Tag: ACE 360

All the AMT 360º posts

Five people showing off Solid Wood Cutting Boards in the Ace Workshop.

Bringing People Together in our Tiny Shop

The Ace Shop.
Renovated Ace Shop with brand new tabletop, dust collection, layout, and tool storage.

Every day we strive to create great experiences for everyone who walks through our doors- no matter where they are on their maker journey. Our inclusion-forward approach informs everything we do including how we design our spaces to welcome users across the skill spectrum. This is one of the many ways we take action to implement our mission in everything we do.

Relative to its small size, our shop houses an impressive collection of tools, workstations, and resources which presents unique challenges when it comes to usability and access for makers with diverse skill sets and experience levels. Finding sustainable solutions to address these challenges and create a great shop in which everyone can try new things, learn, grow, and share knowledge requires:

  1. Approaching problems from an explicitly inclusion-forward perspective
  2. Enthusiastically embracing change, innovation, and curiosity
  3. Pro-actively experimenting with solutions
  4. Seeking input, asking questions, and learning together as a community
  5. Engaging in responsive problem solving as community needs evolve

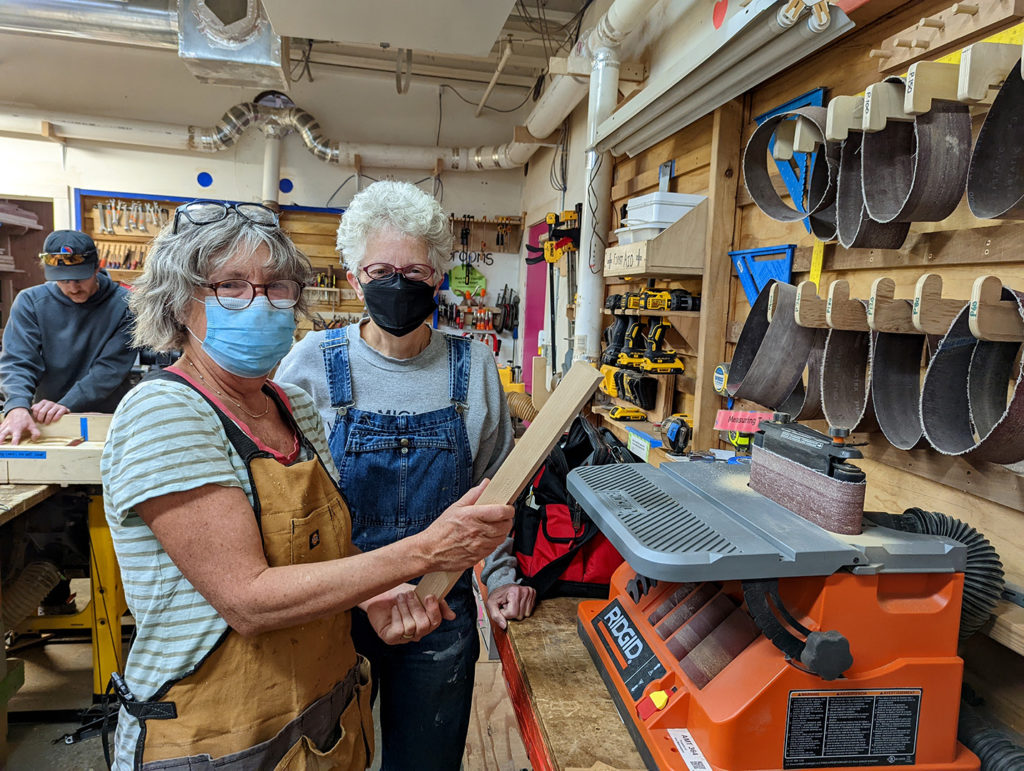
While some of the recent changes are more noticeable like new table tops and work surfaces others are more subtle like adding a side stop to our spindle sander to prevent creep during use. Each adjustment and/or repair big or small was made intentionally in response to community needs, observed patterns of use/breakdown, and bolstered by input from users of all skill levels.

Scaled map of proposed shop layout.
To scale plan for shop renovations made by the community at the 6/29/22 Ace Town Hall.

Optimizing Tool Use Space and Small Tool Storage

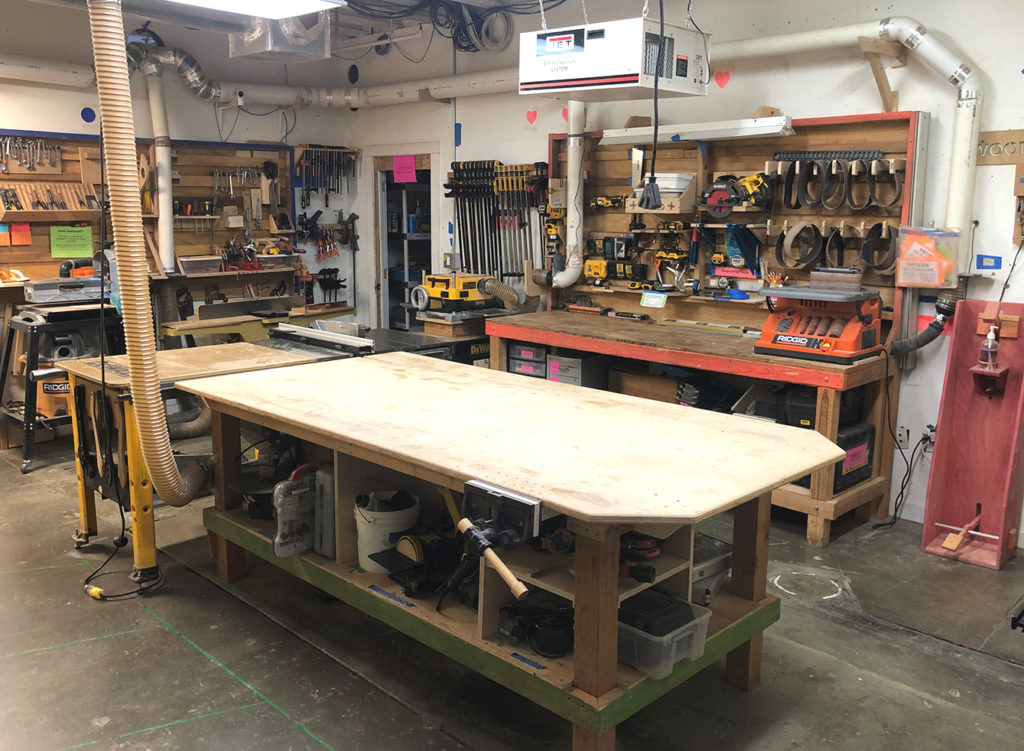
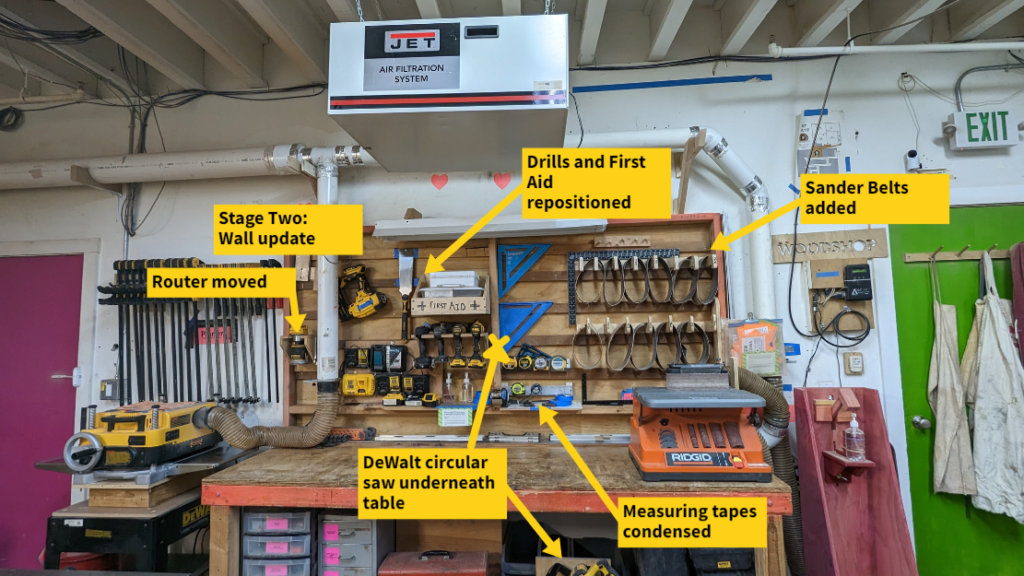
While our collective imagination is infinite, our space is limited… This reality was omnipresent during our recent project, the Great Tool Swap.

When it comes to using our shop we constantly negotiate overlapping “tool-use” spaces. In other words, where you stand to use tools like our table saw, drum sander, jointer, and planer blocks access to others and prevents concurrent use.

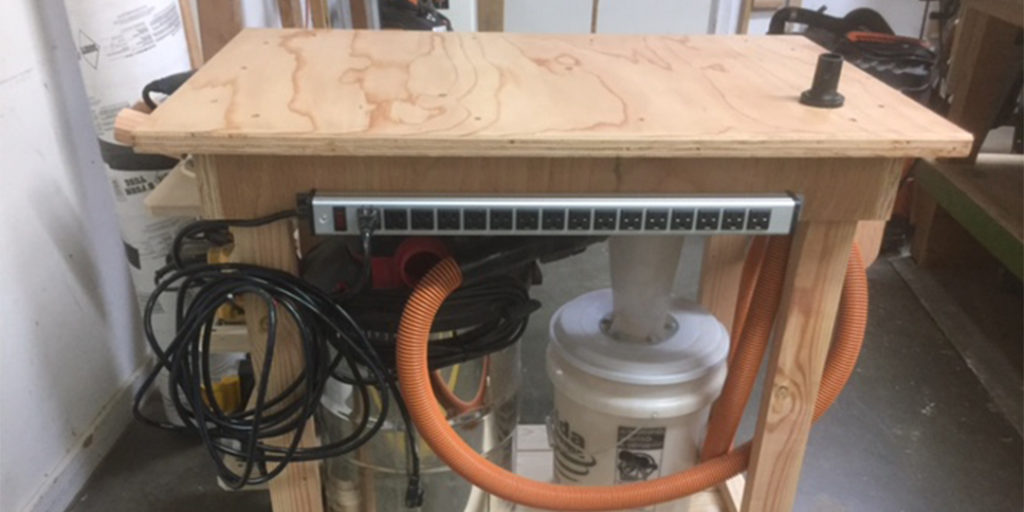
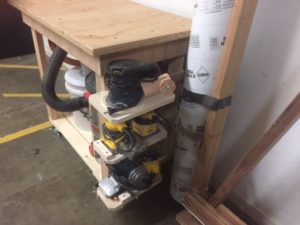
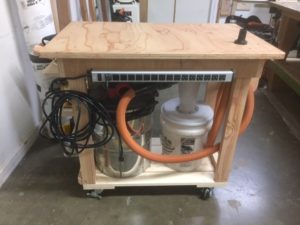
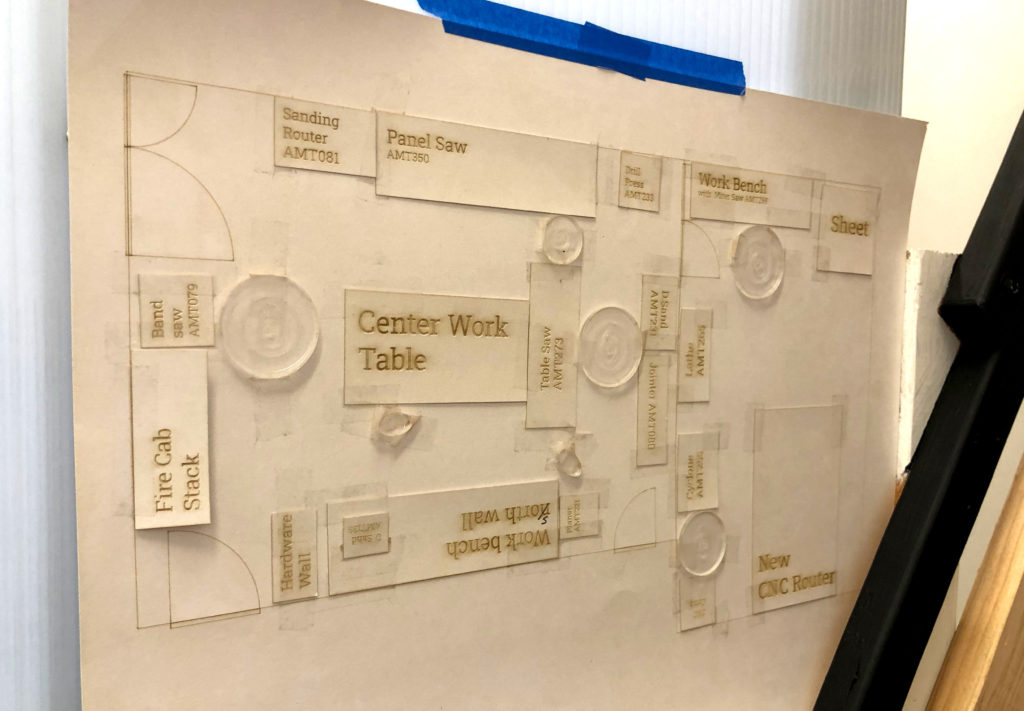
In order to maximize our tool-use space and maintain reasonable workflow we carefully examined how folks were using the shop, identified chokepoints, gathered feedback from the community, and ultimately decided to re-arrange our dust collection set-up and swap the locations of our drill press and bandsaw.

Scaled map of proposed shop layout.
Changes to dust collection set up.

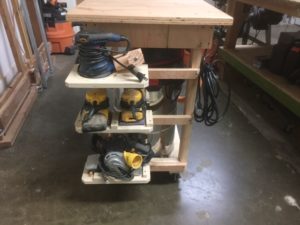
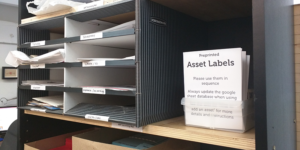
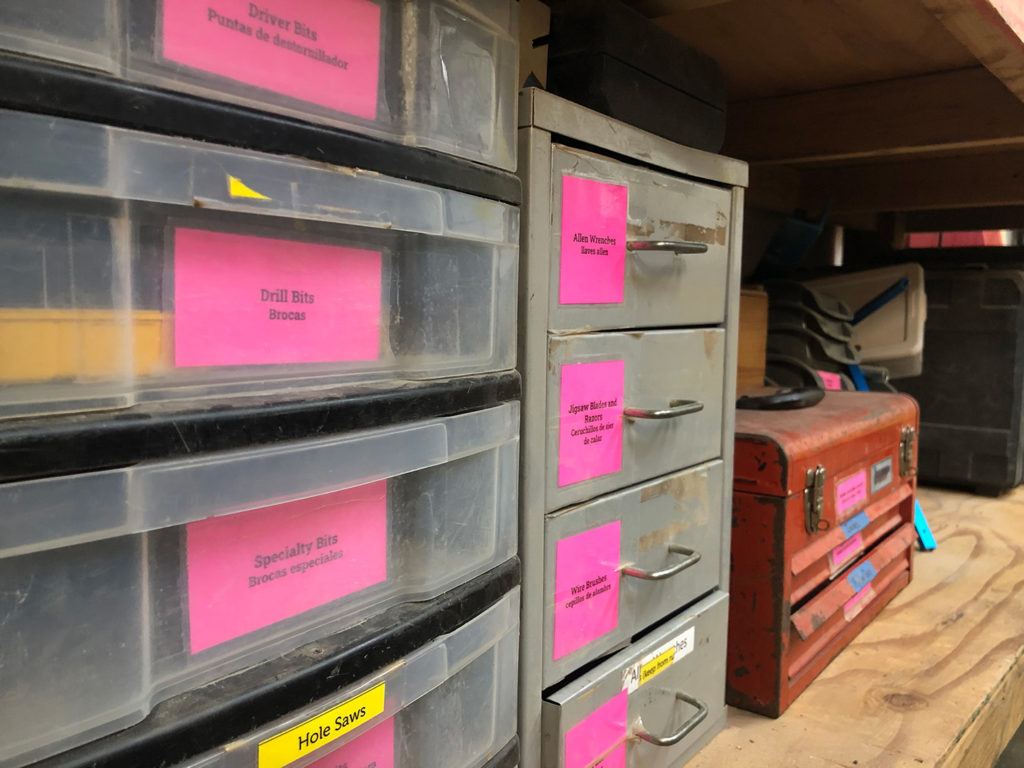
Beyond overlapping tool use spaces we also have limited storage for smaller tools and supplies like drill bits, saw blades, clamps, and gauges. Overly dense storage makes it hard for folks (especially beginners) to locate what they need and/or discover new tools.  It’s also difficult to label dense storage effectively and for our community to keep it organized. By re-arranging vertical storage in the shop and finding new homes for small tools we were able to create a more user friendly visual system for tool storage.

Annotated image of changes to small tool storage.
Changes to small tool storage.

Embracing Entropy as an Invitation for Change

Permanent systems are a myth. Just because something has “always” been one way, does not mean it needs to stay that way.

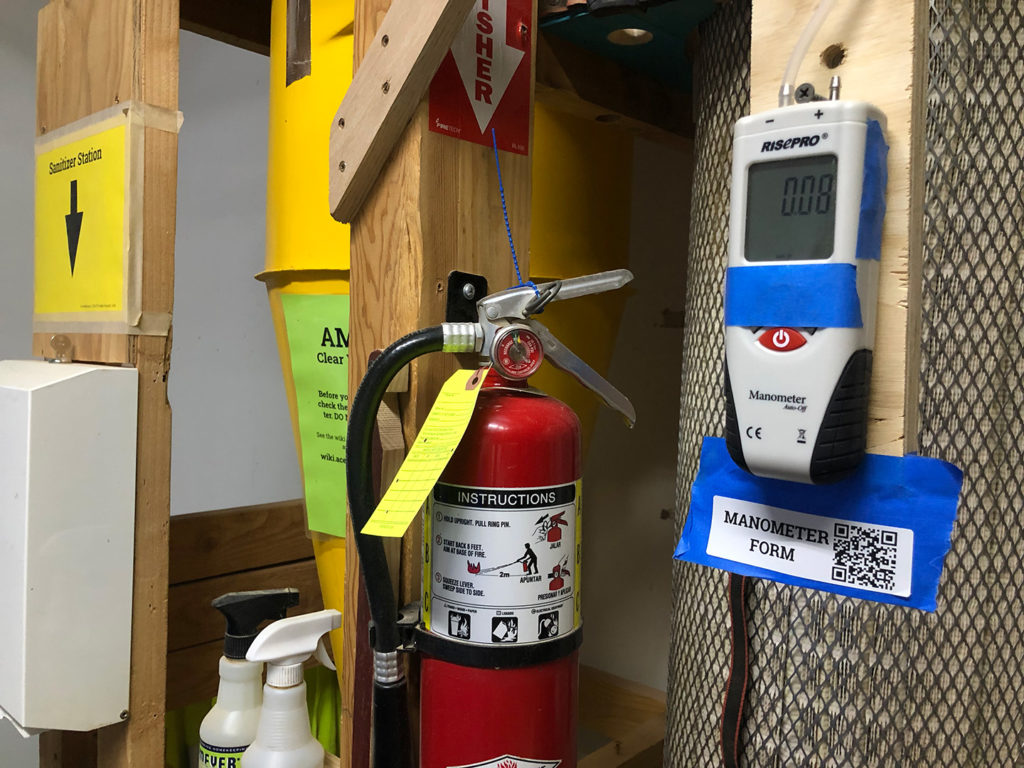
Sometimes systems work in theory but not in practice, become less functional over time because needs for change, or fail to fully resolve underlying issues. Instead of seeking permanent solutions, we look for sustainable ones. For example, when looking holistically at the shop we realized we were stuck in a cycle of reactive Air Quality Management resulting in unpredictable and frustrating shop closures.

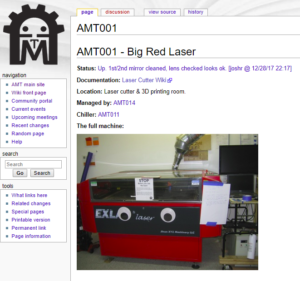
We wanted to move toward a more sustainable, predictable, and proactive system so we installed a new manometer, a meter that measures air pressure differences, to measure the draw of shop ventilation. We also added a convenient QR code that allows shop users to easily update our air quality logs. This small change has improved our ability to track filter life and stay ahead of maintenance.

Manometer with QR code next to a cyclone dust collector.
New manometer with a QR code to update air quality logs is attached to our Cyclone Dust Collector.

The Power of User Input

Expertise is valuable but it’s not the whole story when it comes to designing a shared workshop for the Ace Members we serve. Systems that might work for advanced users can discourage new users and/or put up barriers to access. Experienced users may notice issues that new users may not, but resolving those issues requires input and participation from beginners to be effective.

Relying on a narrow “expert is best” framework is also counter-productive to inclusive shop design because it can reproduce the systems of privilege and power that have limited who is normalized in technical spaces. Instead, we include the perspectives of new users as “expert” especially when it comes to navigating the workshop as a beginner.

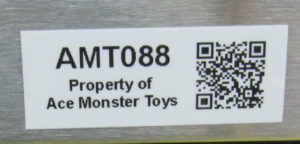
For example, we learned specifically from new users that they were struggling to identify and find what they needed in the shop making starting out feel intimidating and overwhelming. To better welcome them we added more labels to our tools. We also created two Shop Basics and Tool Overview classes to better demystify shop etiquette and help new folks get oriented.

Pink labels on storage containers.
Items clearly labeled in both English and Spanish stored under a workbench in the Ace Shop.
Two folks posing with a piece of wood next to a sander.
Folks enjoying their time in the Ace Shop.

And the Beat Goes On

Our community is always changing and our spaces need to keep pace with those changes in order to best serve everyone. Through our inclusion-forward approach to design, we ensure that the changes we make are more effective for everyone who walks through our shop doors.

Teacher with 3 students holding sculpted wood candle holder projects.
Students showing off their Sculpted Wood Candle Holders after class.
Students making serving trays in the Ace Shop.
Students making serving trays at a Dykes with Drills Workshop at Ace.
cela s

Cela Smith: Board Chairperson

Introduction

Cela Smith is the board chairperson at Ace Makerspace. Given the current state of rebuilding that Ace is going through, I thought it would be useful to learn from an executive what’s going on, while also finding out more about another member of Ace. I’m Carter Jenkins, and I had the opportunity to talk with Cela about what she does and how she does it.

History with Ace

Most board members at Ace end up in their position by volunteering their way up the ranks. They start as being regular members, then over time eventually make the shift to becoming a leader in the place they love. Cela’s story, however, was a bit different.

Cela found Ace through Board Match, a networking service that allows non-profit organizations to meet highly skilled professionals in the hopes of recruiting them to a board position. In one building, more than 100 non-profit organizations had gathered to recruit new members. Cela eventually found herself at the booth for Ace, something she had never heard of. However, she quickly learned that Ace was a place that could offer a lot to her. As someone who was interested in education, science/technology, animals, and nature-conservation type stuff, Ace offered a great window into science and education. This prompted Cela to take a tour of the physical space and after that, she was hooked. 2 years later, and Cela is still here doing what she loves.

Upcoming Things at Ace

Despite the recent COVID surge, the officers and the board have some big plans in the works. First, public events are coming back, like those hosted at the Oakland Public Library and Oakland First Fridays. The events, while being a good way to get the word out about Ace, are also incredibly fun for both the participants and the members arranging them so Cela is very excited to have those back. The other is the project-based learning system (I touched on this in another article, you can read about that here). Ace already classes on how to use tools and things like that, but with this new system, you’ll be actually building complicated things that you could take home with you and actually use/look at.

Three people standing together under a gazebo
From left to right: Cela, Miriam Levenson, and Rachel/Crafty

A Few Words from Cela

I asked Cela about what advice she would give to future board members, and what she said was so well thought out that I decided to put it right here, word for word.

“It’s important to be open-minded and flexible. When you’re trying to help out a non-profit, you want to help to guide things in a certain way. Of course, it’s never going to be 100% what you expect, you need to be ready to adapt to the needs of the organization instead of pushing your own agenda onto the org. Having respect for other people is also very important. It’s essential to remember we’re all just people, so even if there are differences of opinion we still need to respect each other.”

To wrap up, Cela loves being in the maker space itself. Walking around, she can get a lot of cool ideas for projects. Even if she doesn’t end up doing them, it’s great to see creativity in action. With a love of the spaces’ values and its ability to be for a broader community for more than just makers, Cela is grateful for the opportunity to be at Ace. I’m Carter Jenkins and thank you for reading.

Interested in joining the Ace Makerspace Board? Contact “[email protected]

Introduction Ace Booking v1

Ace Booking is the custom open-source software we developed to support us operating in a COVID safe way. This software supports:

  • Occupancy limits in each room
  • Members booking the time they need
  • Occupancy Tracking in case of exposures
  • Remote staffing

We couldn’t ethically consider re-opening without it.

What’s New

There are many upgrades and changes to how the software looks and works.

  • You can now book in 15 min. increments! You no longer have to book by the hour
  • The user interface is very different, now choose your start and end time and the system can tell you about availability
  • The user interface now has a calendar view. If your desired booking isn’t available you can check and see the next closest availability.
  • The late check-in window changed to accommodate the new 15 min. windows.
    • You can check-in 5 min. before your booking (if space is available)
    • You are considered late at the 5 min. after your booking mark and will start to get notifications.
    • You are considered as ghosting at the 15 min. mark after your booking, if you haven’t checked in, and your reservation will be canceled and the space made available for others. (you can always do a new reservation.
    • You will get a notification via email and slack reminding you to check out starting 5 min. before your expected check out times.
  • New remote staffing controls include
    • The ability to book spaces for maintenance without having to make personal bookings.
    • The ability to cancel user reservations for maintenance blocks
    • The ability to remote checkout people who didn’t check out
    • The ability to make bookings for members on maintenance crews
    • Reports on use trends

What to do if things break for users

While the team did our best to anticipate how folks could use or break this software there may still be a glitch or two. And we know our members are some darn creative users. If our members have trouble or the system doesn’t’ behave as anticipated they report the issue on slack and include photos if at all possible. Report on #general or #amt-software

Made at AMT-June 2019

NOMCOM Fob All The Things dashboard | AMT Software • Bodie/Crafty
Hand Built Speaker | Workshop • David
Recycling Game | Workshop/Laser • Bernard M.
Solid wood credenza | Workshop | Raj J.
Tiny electronic brass jewelry | Electronics | Ray A.
RFID Mint Dispensing Box | Laser+Electronics | Crafty
Wood Signage | CNC Router | James L.
Fabric Kraken stuffed with 720 LEDs | Textiles + Electronics | Crafty

Adventures on the Axis of X and Y

The following is the story of one dedicated AMT members adventures in caring for our beloved hacked CNC Router.

When I previously measured the steps on the x-axis, I found a big step difference between the forward and the backward motion. I decided to remove the x-axis to see if there were any mechanical reason which might affect this. At the same time, I removed the z-axis to see if there might be a mechanical reason for the occasional dropping of the z-axis.

z-axis

I removed both z-axes from the CNC and checked the Porter-Cable axis for wear. In addition, I checked to see if there was any slippage between shafts and timing gears, as well as between the shaft and the coupler. (This was a suggestion from @drshiny.) To me, the z-axis looks in a good condition. I identified two issues, one was the timing belt and the other was that the guide wheels were not running tightly on the Guide rails.

The teeth of the timing gear were clogged with debris which looked like it had come from the timing belt. The only picture I have was taken after cleaning, but before doing that, I found a surprising amount of black stuff which was compacted into the grooves. I swapped the belt with the one from the Perske spindle which I assume has not done the same amount of work.

The groove in the bottom of the guide wheels was filled with compacted debris which caused the wheels to not run tightly on the guide rails. The point of the rail sits within the groove of the guide roller. If there is debris within the groove, the guide sits only on the upper face of the guide wheels as shown on the left-hand picture as opposed to the right-hand one(you may need to enlarge the picture to see it).


I used WD40 to softened the debris, and then used the edge of a chisel to scrape the stuff away. It was necessary to repeat this process several times for each wheel.

x-axis

After removing both of the z-axes and the timing belt on the x-axis, I discovered that the x carriage was running only against the back two guide rollers(or wheels), with daylight showing between the front guide roller and guide rails. As before I cleaned and scraped the guide rollers and after tightening the two adjustable back rollers, I tested the smoothness of the carriage by pushing the x-axis forward and backward by hand along the path. At this point, the carriage was running smoothly. When I tested the number of steps forward and backward, I found there was no longer such a big discrepancy, which was the reason I decided to remove the z-and the x-axis in the first place.

y-axis

We know the rack and pinion on the left-hand side has much higher wear than on the right-hand side. I think this is due to the two carriages on the y-axis not running parallel. There are 2 types of guide wheels, fixed and eccentric which means they are adjustable. 2 fixed wheels go on one side and the other 2 go on the other side. I wonder if one of the wheels has been swapped around. That would lead to the carriage being at an angle once tightened. Steve looked at this and also said that the pinion runs at the bottom of the rack and needed to be lifted. It is possible that once the guide wheel has been cleaned and adjusted, it may be enough to lift the rack higher without having to resort to further shimming. This work has not been done yet.

Custom built Sanding Station for the AMT Shop

Exciting news as a slightly late X-Mas present to the shop I have built us a dedicated sanding station with dust extraction!

This project did not cost a single dime and built entirely from things found in the space. The dust collection is thanks to @TechCurious who hooked us up with a donated Shopvac and mini cyclone not too long ago.

It’s on locking casters so can roll around but be stable when you need it to be. The new station has a large power strip on the back for both the shop vac and the various sanders! There are hooks to hold cables and hoses and the main hose comes straight out through the table top. There are dedicated shelves for the sanders on one side and I have made an adaptor for one of the sanders to attach easily to the hose (I will be working on the other sanders soon). Simply insert the hose and tighten down the screw to hold it in place.

Other than the adaptors I would like to get some storage for sandpaper on this cart and hopefully, it will be a nice little addition to the shop.

Just one thing to be aware of I have give the table top a good coat of wax to minimize glue adhesion but please try not to get glue paint etc on the surface, having a flat area to sand on makes things a lot easier so let’s try and keep it that way!

Also, it is built to be level with the bench and the table saw so can be used as additional support, Infeed table etc.

See you around the shop soon!

Colm M.
AMT Workshop Steward


Big empty room

AMT Expansion 2018

This month AMT turns 8 years old and we are growing! We have rented an additional 1200sqft suite in the building. We have a Work Party Weekend planned June 1-3 to upgrade and reconfigure all of AMT. All the key areas at AMT are getting an upgrade :

CoWorking and Classroom are moving in to the new suite. Rad wifi, chill space away from the big machines, and core office amenities are planned for CoWorking. The new Classroom will be reconfigurable and have double the capacity.

Textiles is moving upstairs into the light. The room will now be a clean fabrication hub with Electronics and 3D Printing both expanding into the space made available. Photo printing may or may not stay upstairs — plans are still forming up.

Metal working, bike parking, and new storage including the old lockers will be moving into the old classroom. But before they move in the room is getting a face lift by returning to the cement floors and the walls will get a new coat of paint.

The CNC room and workshop will then be reconfigured to take advantage of the space Metal vacated. We aren’t sure what that is going to look like beyond more workspace and possibly affordable storage for larger short term projects.

Town Hall Meeting May 17th • 7:30PM • Plan the New Space

What expansion means to membership

The other thing that happened in May is after 8 years our rent finally went up. It is still affordable enough that we get to expand. Expansion also means increasing membership volume to cover the new rents and to take advantage of all the upgrades. We are looking to add another 30 members by winter.  Our total capacity before we hit the cap will be 200 members. We feel that offering more classes and the best bargain in co-working will allow us to do this. Please help get the word out!

The New Suite in the Raw

Big empty room

Asset Tagging at AMT

Ace Monster Toys has a lot of stuff. We like to keep our stuff organized, so we tag our stuff with labels like this:

How to Look up an Asset

To look up an asset by number or name, you can check the asset list


The assets are listed in number order, and clicking on the Asset Tag (ex. AMT001 for the Big Red Laser) will bring you to the wiki page for that asset. If the asset has been documented correctly, the wiki page will tell you the specifications and dependencies of that asset.


How to Add an Asset Tag

Preprinted asset tags are available on the supplies rack. Please follow the instructions and use them in sequence. You can check which label was used last in the asset list.

You then need to fill out the spreadsheet with the new asset tag under the item number column, give the asset a unique name, give the location of the asset, the URL for the asset’s wiki page (you can copy the URL for the one above and change the tag name), and the value of the asset. Wait, the asset doesn’t have a wiki page so we need to fix this: click on the URL that you put into the spreadsheet, and you will be prompted to create the wiki page (if you are logged in!).

The Wiki page needs to contain the following information:

  • Status: tool integration (Use this code snippet but use the new asset number: {{#amtasset:AMT001}} )
  • Name: Common name of the tool
  • Make/Model: The make and model of the tool from the manufacturer
  • Documentation: (link to documentation, this can be an online manual or on our wiki, whether this page or another is your choice.)
  • Location: (where in the space does it live)
  • Pictures! 
  • Category: (Add relavant category tags for the item you are adding… IT for it stuff, workshop for tools there, etc.)

The Wiki page will become active when the status is set through the Slack channel. To do this, you must send a direct message to @toybot in the format “!asset{asset number}{status}.” For example, if the Big Red Laser is on fire, then you can send a direct message to @toybot saying:

!asset amt001 On Fire!

Messaging toybot can update the status of existing assets (as shown above) as well as setting the status for a new asset.

Happy Tagging!

AMT Badges

Show folks who step up a little love with a button badge!

Have you spotted these badges in our space yet? We’re excited to introduce a new badge program in which members can acknowledge and celebrate community engagement. AMT Badges are little tokens of appreciation that member can give each other. We do so much for each other and the community… give a badge to a member when you see them stepping up!

Guidelines

To get badges: You must be gifted the badge by somebody else.

To give badges: When you see something worthy, choose your badge give it to the person and ping an officer so we can post a digital badge to the recipients AMT profile. Also if you want give a badge anonymously an officer can be your messenger.

Badges are located on the media table upstairs.

Don’t see the badge you need?

Have a great idea for a badge? You can email officers to get a new badge created OR make your own custom badges on any of the Thursday Night General Meetings when we crack out the button maker.

Badges may sometime in the future make you eligible for special classes (sash making!!)