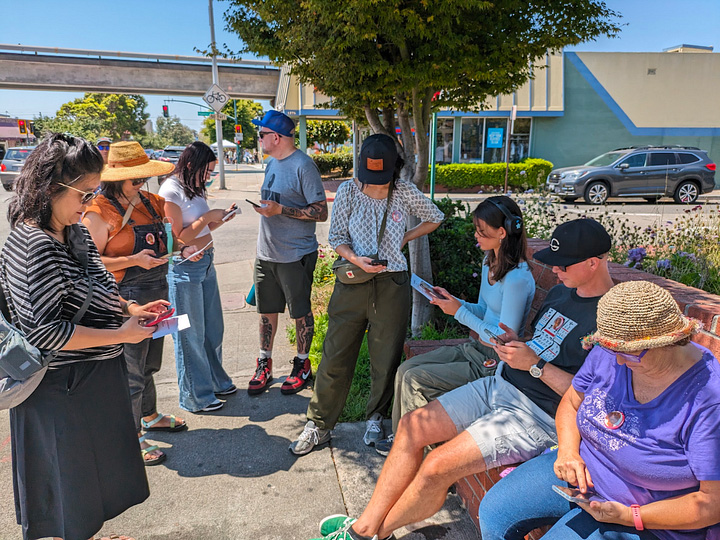
The Ace Workshop is a community lead, driven, and maintained resource. As makers who share space, we all have a role to play beyond simply working on our projects and cleaning up after ourselves, we also work together to maintain and care for our tools. While routine tool repair and maintenance may not be the most glamorous part of woodworking, it’s essential for keeping the tools we love to use in good working order, safe, and ready for use.
In the past, tool maintenance often fell by default on a small group of expert users which lead to volunteer burnout, longer tool down times, and a pervasive bystander culture in the shop. To make this process more inviting and sustainable we realized we needed a way to:
Build a more intentional woodworking tool maintenance culture
Decrease barriers for folks interested in helping out who didn’t know where to start or who were experiencing the imposter phenomenon
Create an inviting pathway for community members of all skill levels to get involved
Make routine workshop care tasks in general more approachable, fun, and beginner-accessible
…and so Workshop Care Night was born;a new beginner-friendly social evening all about working together to care for our tools, make repairs, and practice concepts covered in our Shop Basics class like logging assets and finding information on the wiki.
Why it works:
Maintenance and tool care is wayyyy more fun together!
It’s a great way for new folks to meet people in the woodworking community
Its a beginner-accessible way to get started with tool repair (no fix-it experience needed to help out, there’s tasks for all skill levels)
Tools last longer and work better with regularly scheduled TLC
Highlights from Workshop Care Night in April
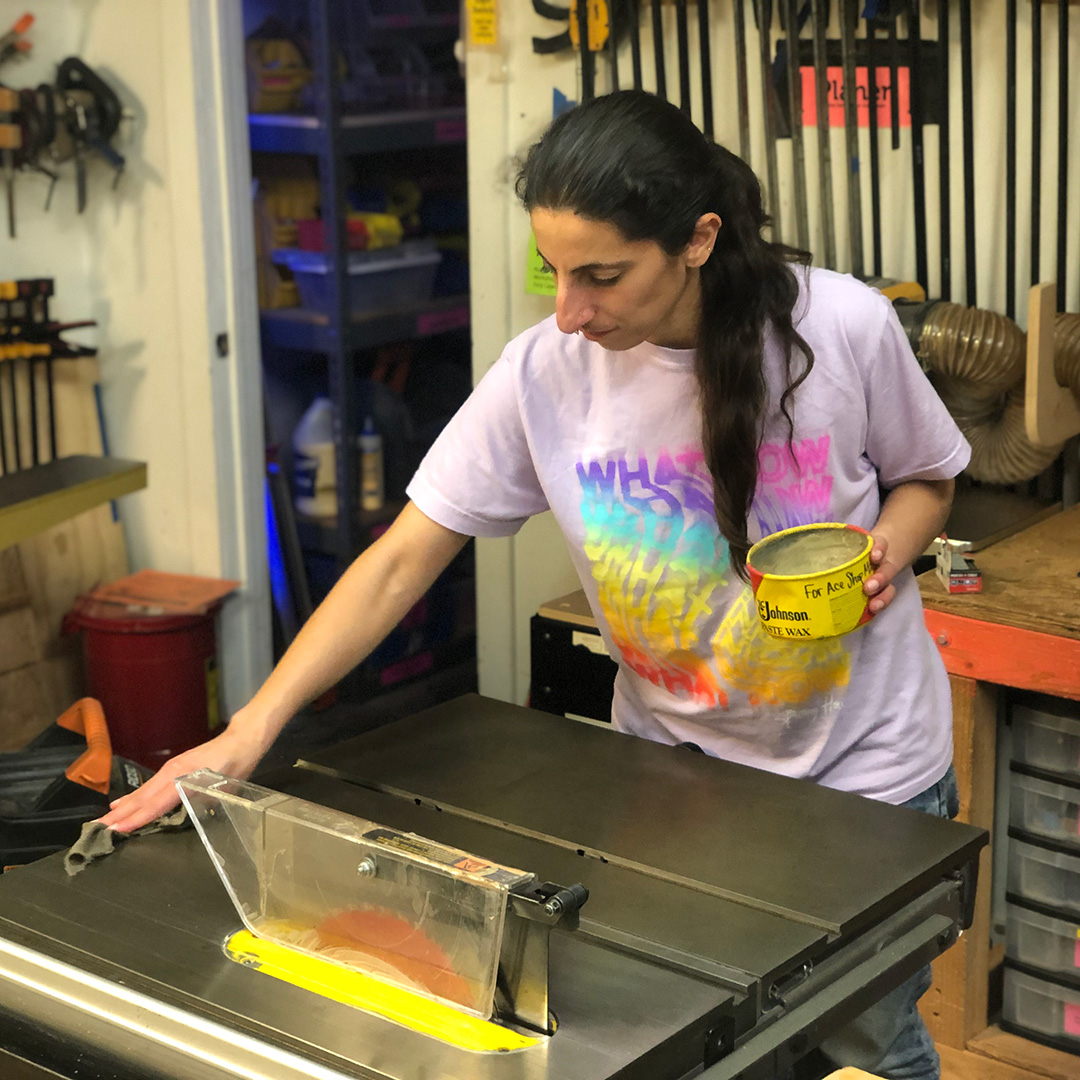
Team Shop keeps a running list of maintenance tasks for workshop care night. Each event is different, one month the group may align the Table Saw blade, repair a vacuum duct and re-home new tools; the next the group may wax the tool tabletops and replace the cyclone filter.
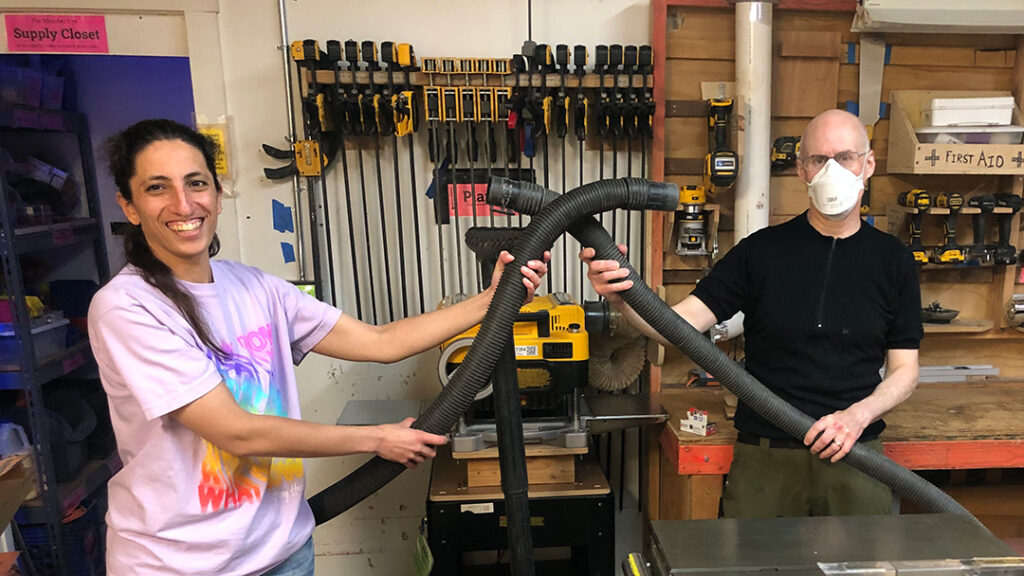
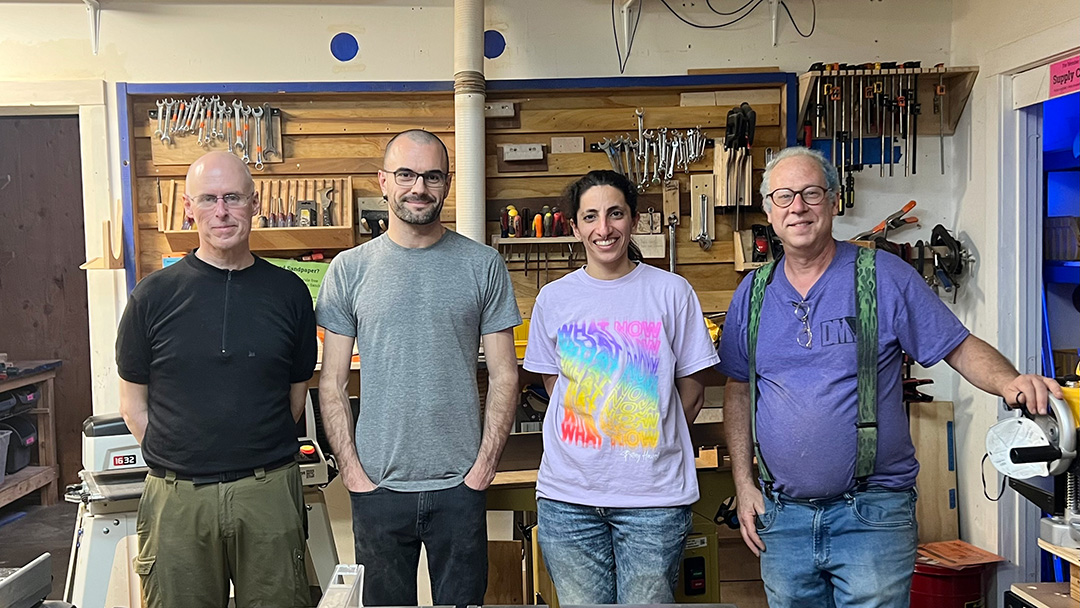
In April, a group of 5 volunteers rolled up their sleeves to tackle a list of maintenance tasks while getting to know one-another and jamming to Groove Salad! This group included folks with a mix of skill sets and experiences levels ranging from woodworking beginners to career professionals.
Here’s a look at just some of what they accomplished over the course of two hours working together:
New Member, Greg (he/him/il/le/lui)’s first stop after signing up was rolling up his sleeves and using his electronics know-how to replace the ground pin for the plug for the Ace Jointer at Workshop Care Night.There are meaningful tasks for every skill level. Jacky (they/them), Ace’s Education Manager doesn’t have a lot of experience in workshop care or woodworking, but rolled up their sleeves to deep vacuum machines and wax the steel table tops.Drum Sander before vacuuming.
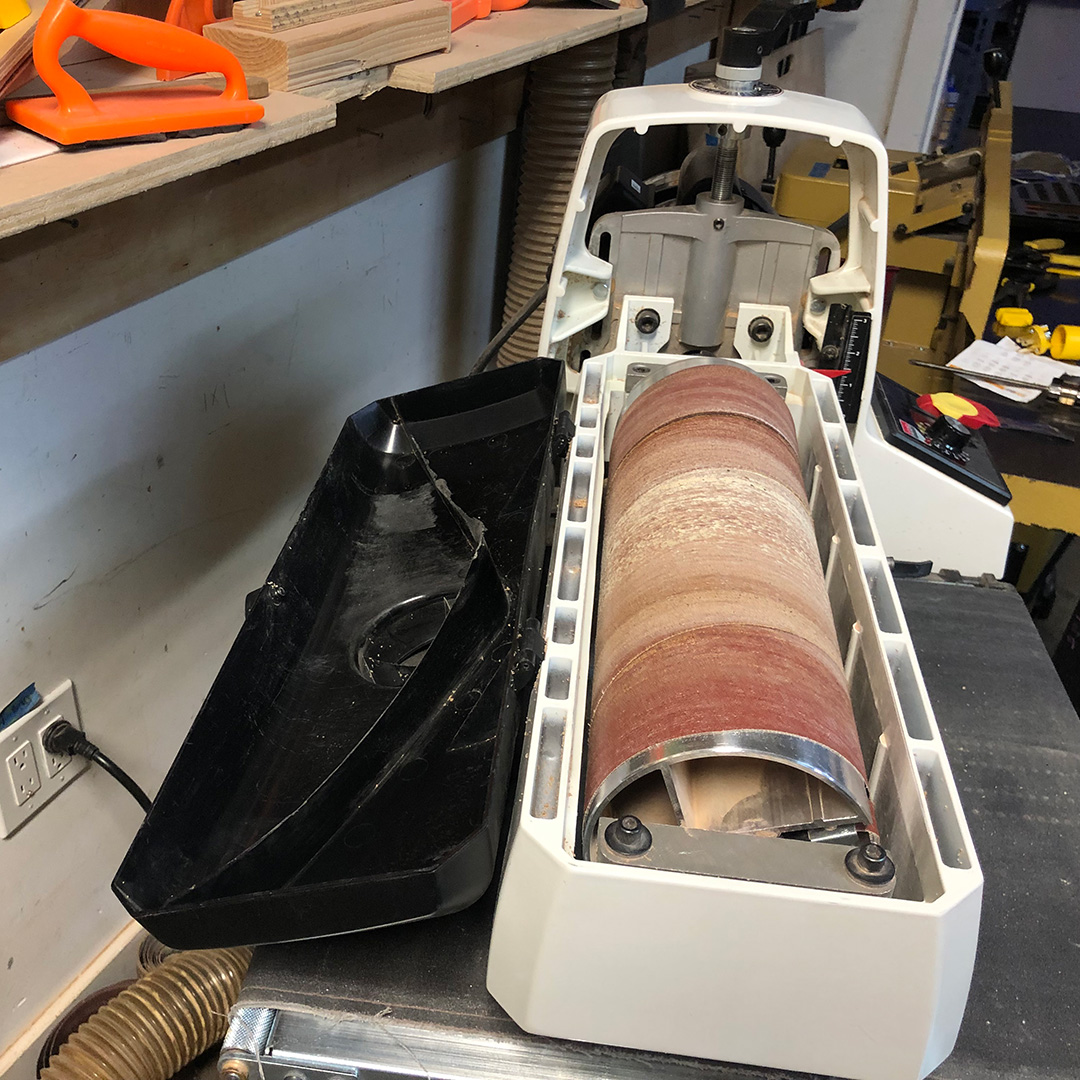
Tools that get heavy use in the Ace Shop like the Drum Sander, Jointer, Planer, Table Saw and Bandsaw need regular deep vacuuming to get particles deep inside the machine. Removing saw dust from harder to clean areas can lengthen a tools lifespan and helps prevent tool down time.
Team Shop* volunteer and experienced woodworker, Alex (he/him) showed Jacky how to open the top of the Drum Sander since they were unfamiliar with the tool. This kind of peer support and knowledge sharing is deeply embedded in Ace culture along with the belief that everyone has something to contribute of value to the community regardless of skill level.
Drum Sander after deep vacuuming.
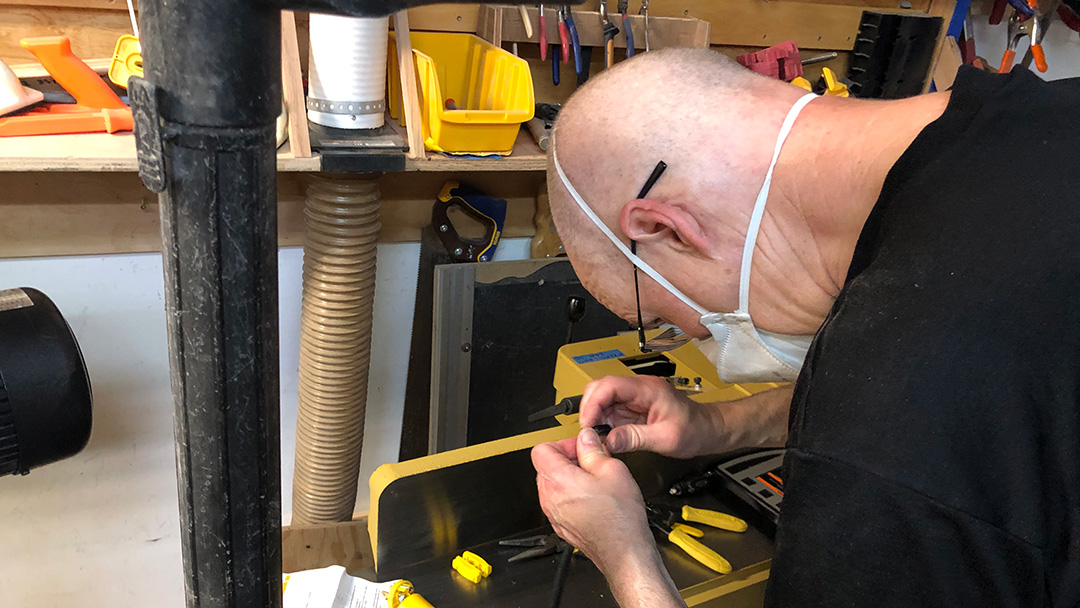
It’s not about perfection, it’s about getting it to 90% – Howard
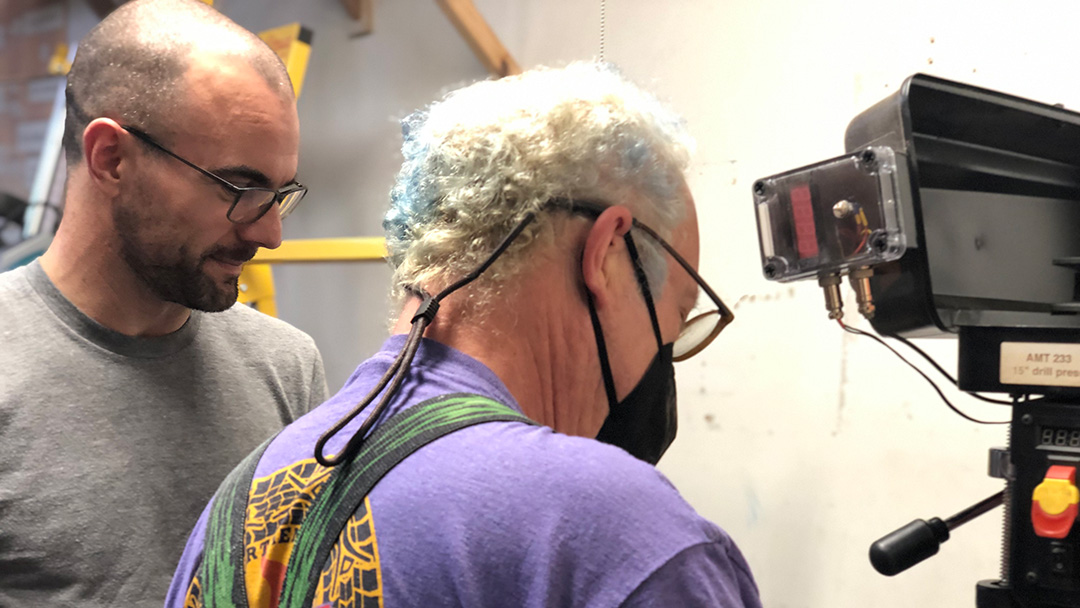
Alex worked on replacing the quill return spring on the Drill Press – the return spring helps the spindle holding the drill bit return to the start position. During the replacement, he called Howard over to assist and verify the repair. At Ace we use the buddy system for repairs to ensure fixes are safe, effective, and verified.By the end of the night, volunteers were a little dusty but feeling good.
*Teams at Ace are groups of volunteers who organize projects, take care of tools, and drive decision making for programs they love. Teams are open to all members and are a fun way to get involved in the Ace Community.
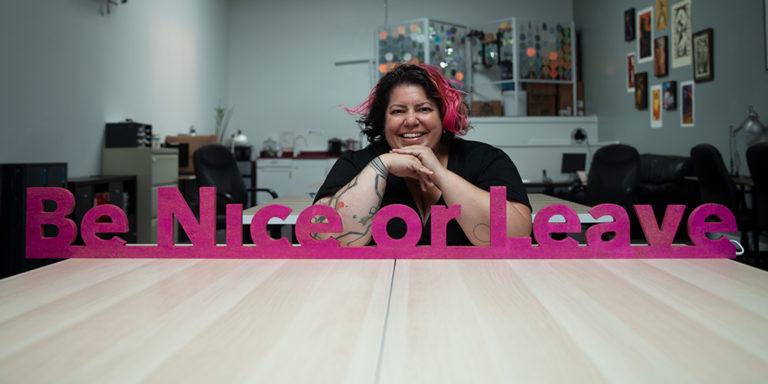
In the vibrant, creative, and ever-evolving story of Ace Makerspace, one name stands out as a consistent driving force behind its growth and success—Rachel “Crafty” Sadd, the dedicated Executive Director whose journey from passionate member to transformative leader has left an indelible mark on the community. On February 27th, 2024 Rachel passed away from secondary complications from cancer surrounded by her family, leaving behind an incredible legacy and her unwavering vision for Ace Makerspace as a welcoming place where making is for everyone.
“The core of what I love about Ace [over the past 14 years] has really stayed the same. The act of making is transformative. I’m not about a tool set, I’m about what communities and people get when they have access to these resources. People can escape life, gain job skills, start a business, be prosperous, take care of needs. There’s so much potential here and it excites me everyday”
Rachel joined the Ace Community back in 2011—Ace’s first year of existence. Originally from Santa Cruz, she was looking for more opportunities economically and culturally for herself and her family. She moved to the Bay Area where she found her people—scrappy people who make art. On a camping trip with her new friends she started talking about her side gig making costumes and wearables for Burning Man folks. As a single mother of two with a full time day job in tech she found the creative work extremely satisfying and could work at night. Hearing this story a new friend said, “you’ve got to see this laser that can cut fabric” and the rest was history.
“I fell in love with the possibilities and potential of Ace as a place where I could satisfy economic needs, be creative, make friends as an adult, and access things I couldn’t afford to access independently.”
She stepped into the Executive Director role at Ace Makerspace 7 years after joining the community. She was finishing her term on the Board of Directors (where she got the nickname “Crafty”) and was having a blast learning how to grow and manage a community when the previous executive director Rachel McConnell aka Dr. Shiny asked her if she’d be interested in stepping into the role…
I thought about it, went to the rest of the board and said, “I’m a raging feminist, unapologetically intersectional, full on. If I’m going to do this I’m bringing all of it to the role. I want to shift the culture, bring these resources to Oakland, and grow it. If you’d like me to take the role you need to be down.”
As a latina, Crafty knew first hand that learning in technical spaces like Ace Makerspace could be intimidating particularly for women, BIPOC, and members of the 2SLGBTQIA+ community who historically have been marginalized in these fields. As a community builder and leader, she wanted to change that and developed a social contract for everyone who walked through doors based on transparency and respect. She also created a series of open source DEI (diversity, equity, and inclusion) Soft Skills Workshops for Makers; collaborated with local organizations on mutual aid projects including 500 Filters, Oakland Community PPE, and Lead to Life; and explicitly sought out diverse perspectives when creating new programs. Throughout her life she overcame many personal challenges, and brought her fighting spirit to everything she did at Ace.
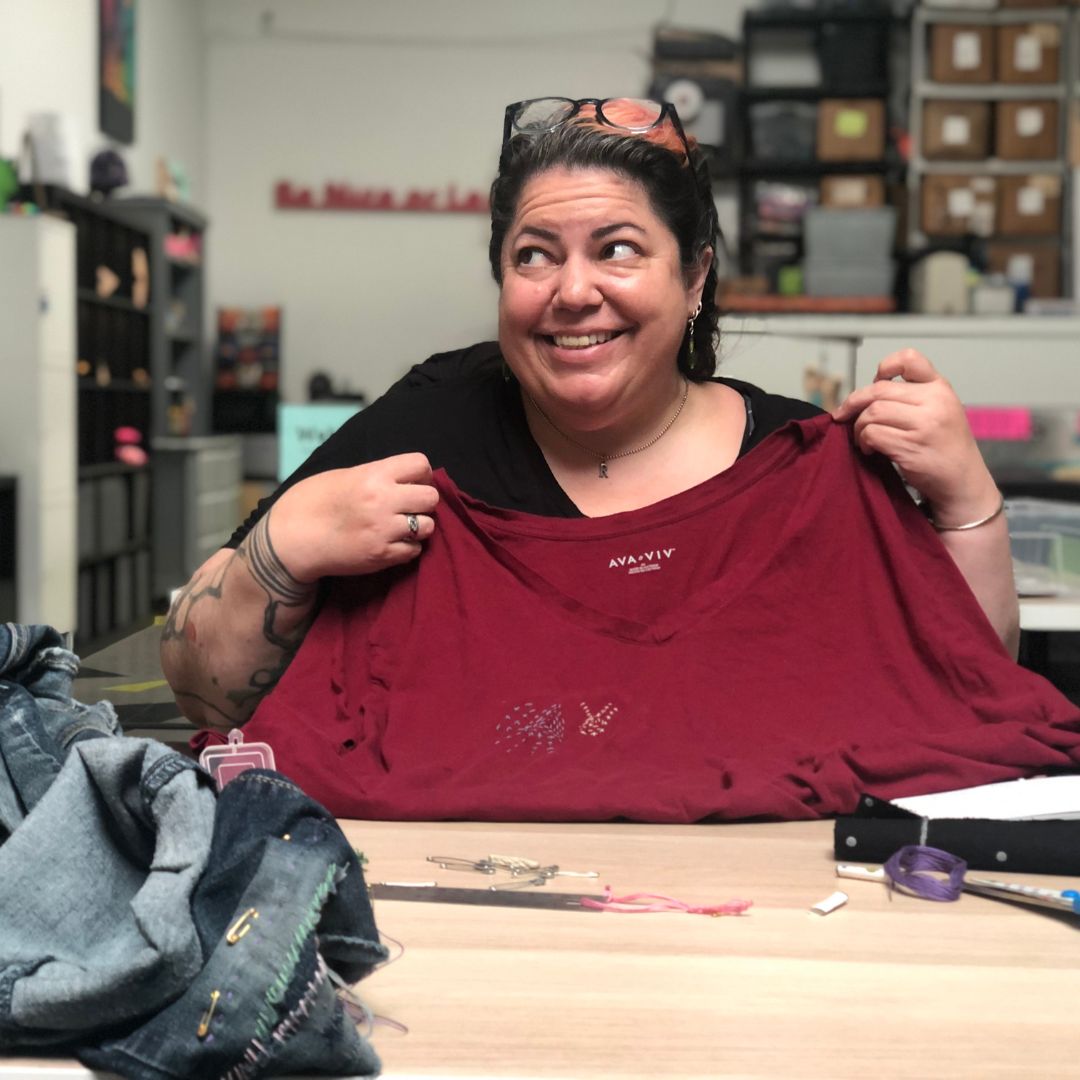
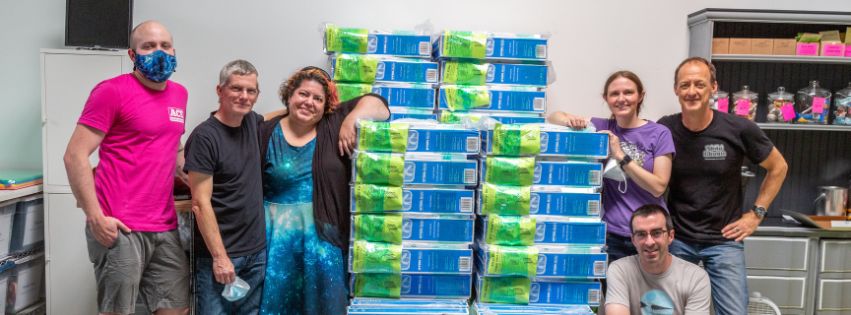
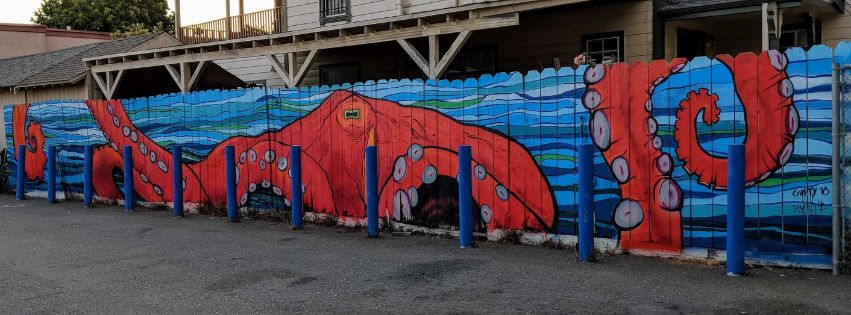
Rachel was a passionate educator who loved to teach laser-cutting, art, and textiles workshops to students from all walks of life.Rachel loved connecting with the east bay community and leading free art activities like button making at outreach events like Oakland First Fridays and Maker Faire.She believed that building accessible and equitable programs required the participation of people with diverse perspectives, skill levels, and lived experiences. She enjoyed the whole process of program and class development from brainstorming to prototyping. Here she is making samples for a visible mending class in the Ace Textile’s studio.In response to catastrophic events like wild fires and Covid 19, she rallied the community around mutual aid projects like 500 Filters and Oakland PPE. She believed in using the unique resources at Ace Makerspace to help the broader community. Here she is with a group of volunteers standing with a large stack of DIY air scrubbers.Outside of Ace she was an established artist with works on display throughout Oakland. She created this large octopus mural for a gas station several blocks from Ace Makerspace and exhibited her interactive Gift-O-Matic project at the Oakland Museum of California in 2019.
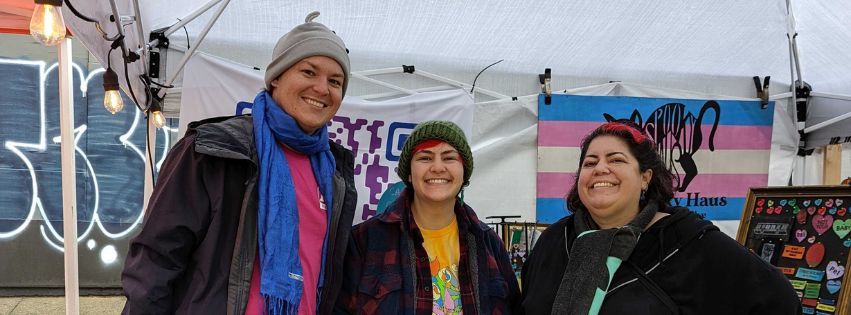
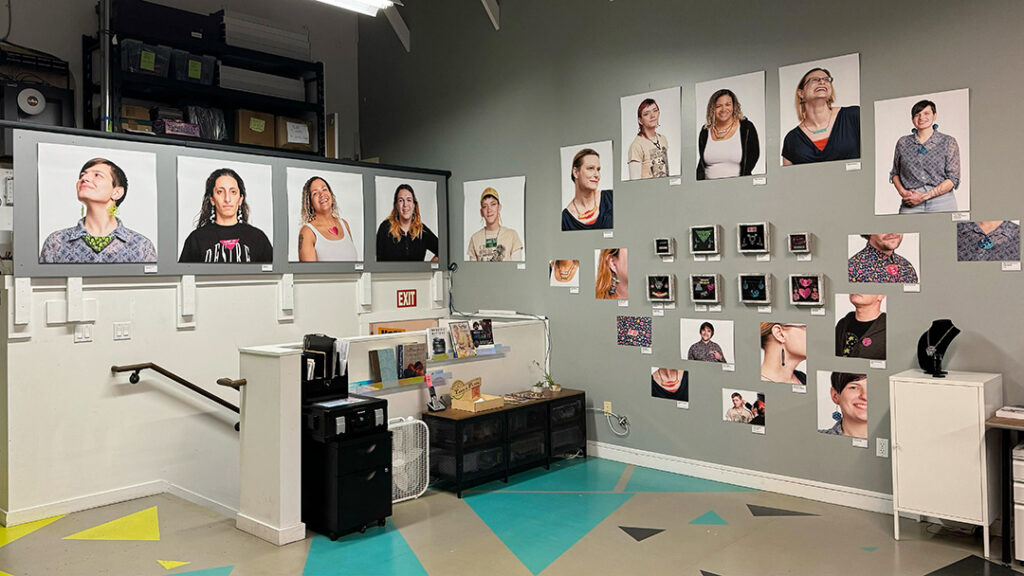
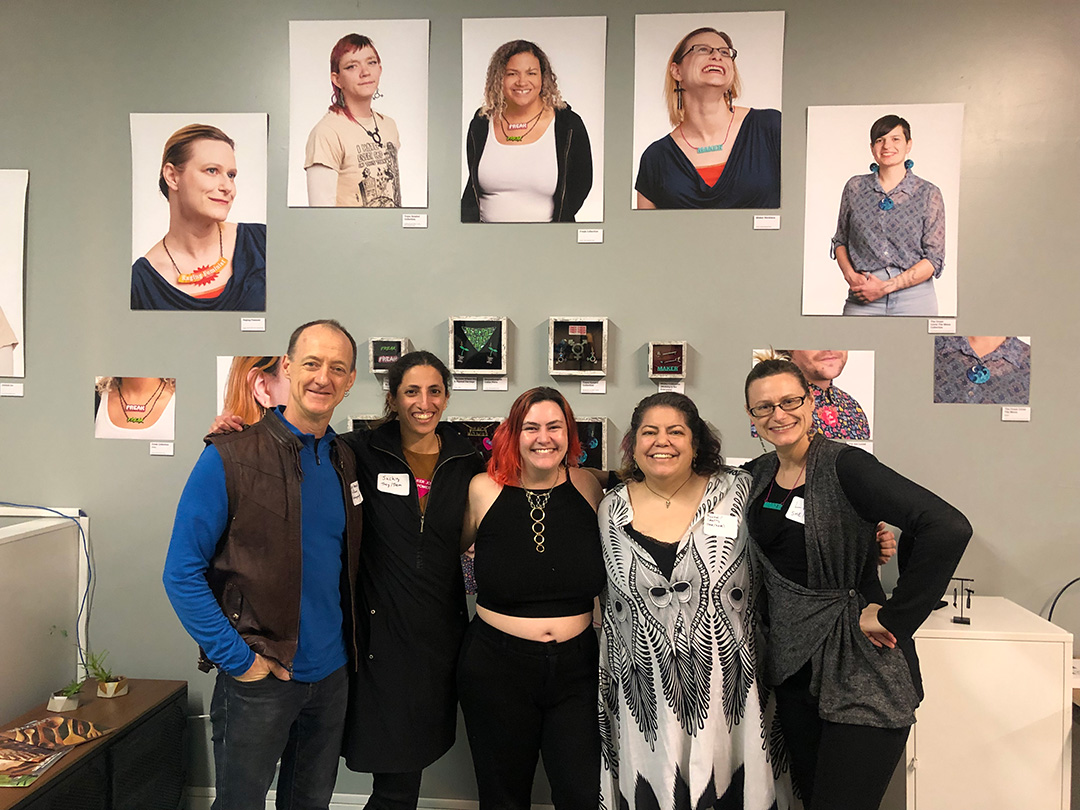
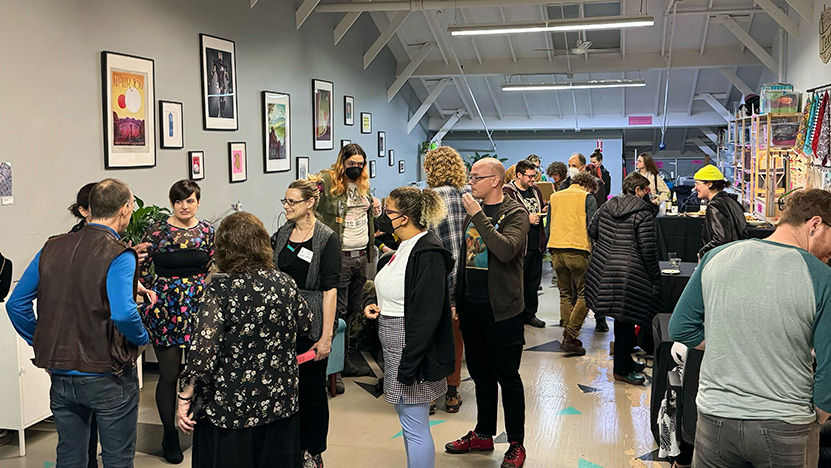
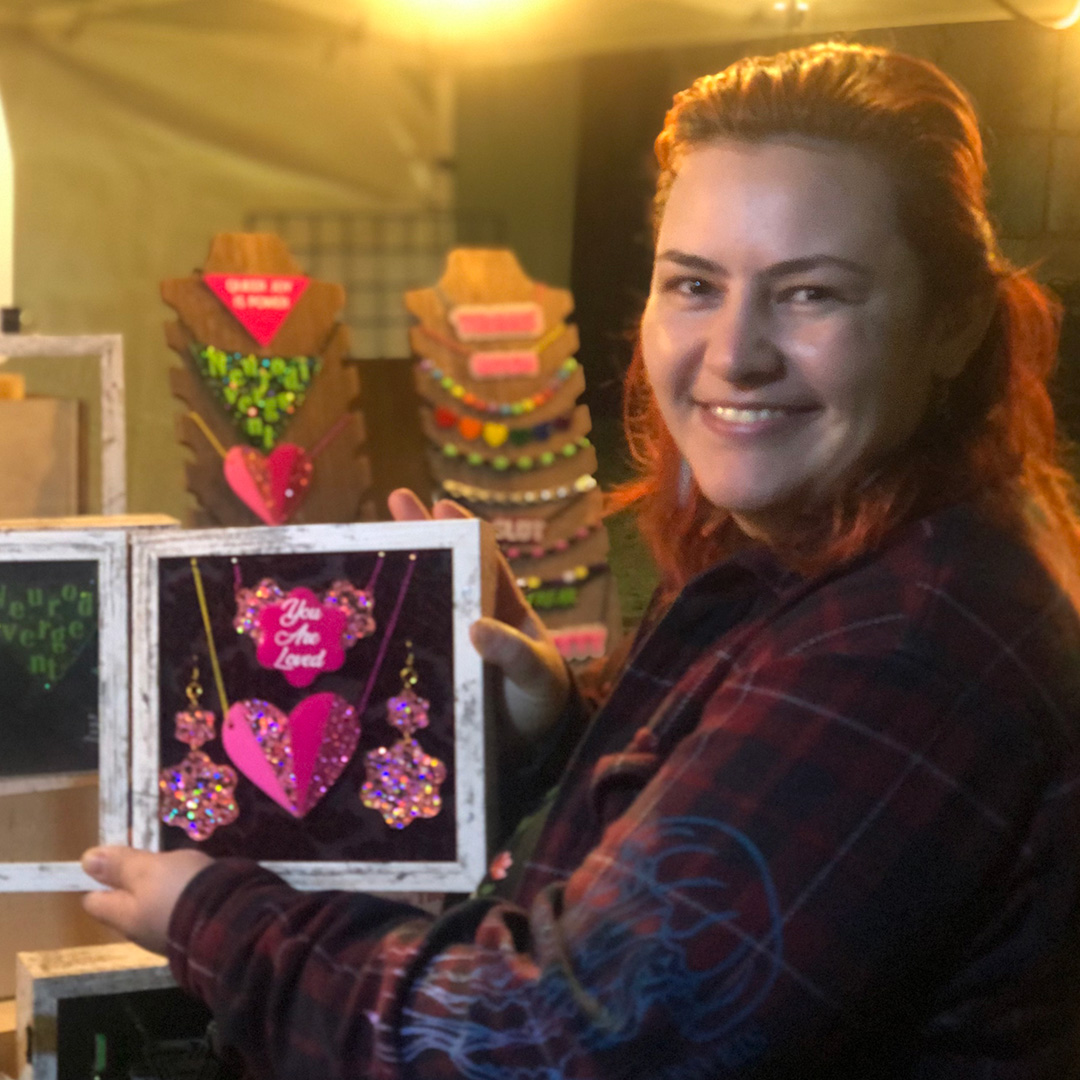
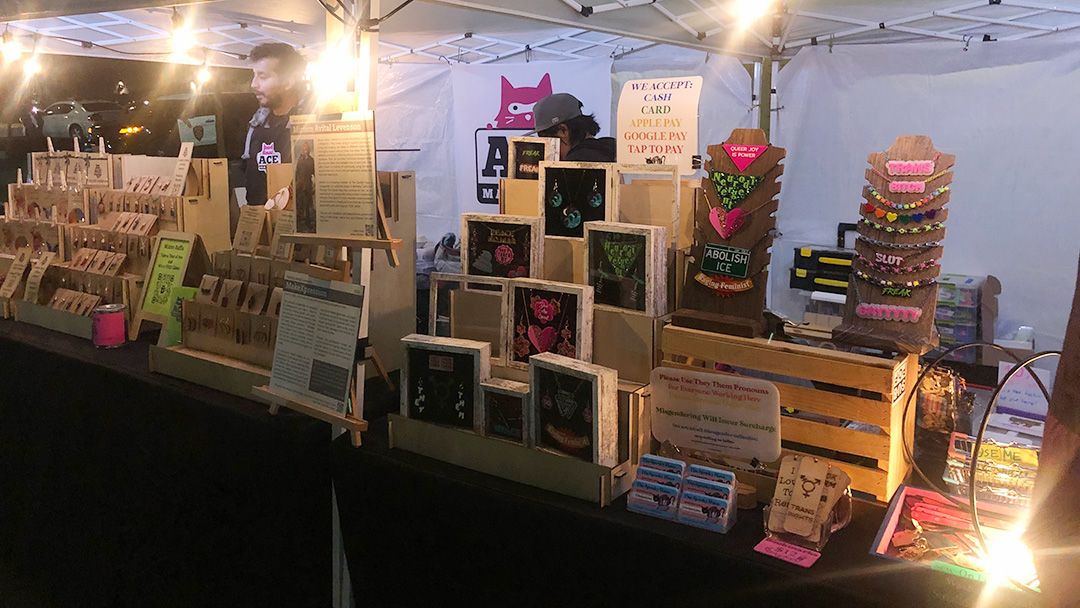
Over 60 people came out to celebrate the culmination of an 8 month collaboration between Ace Makerspace and local artist, Miriam Levenson on a line of laser-cut jewelry representative of the Ace’s vision of a world where making is for everyone. This artwork, made possible through a grant from The Blue Heart Creator’s Fund, explores the idea that identity isn’t given, it’s made and disrupts exclusionary cultural narratives around who can be considered a maker. The exhibition featured 8 shadow boxes with laser-cut jewelry and 20 photo portraits taken by Greg Habiby of folks in the community who volunteered to model the artwork. Throughout the evening, guests enjoyed tasty vegetarian snacks catered by Chef Terry Betts, a pop-up store hosted by The Spooky Haus, and micro tours of the Ace Workshops led by Member Services Associate Saron.
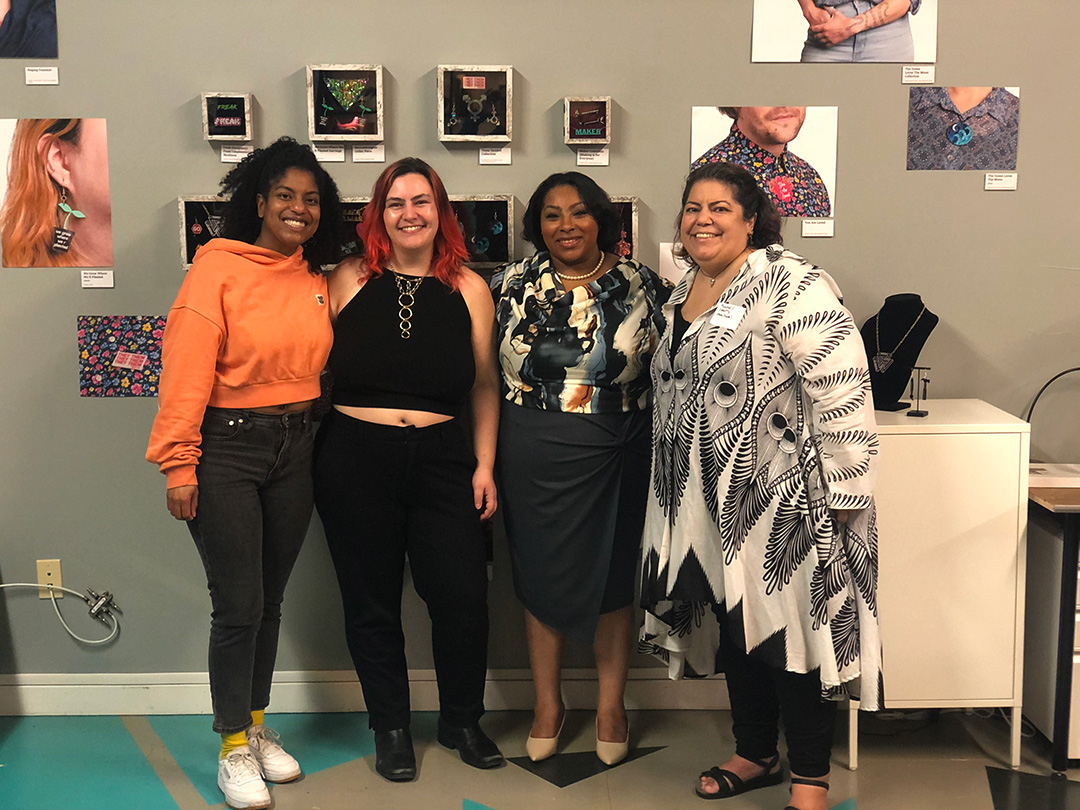
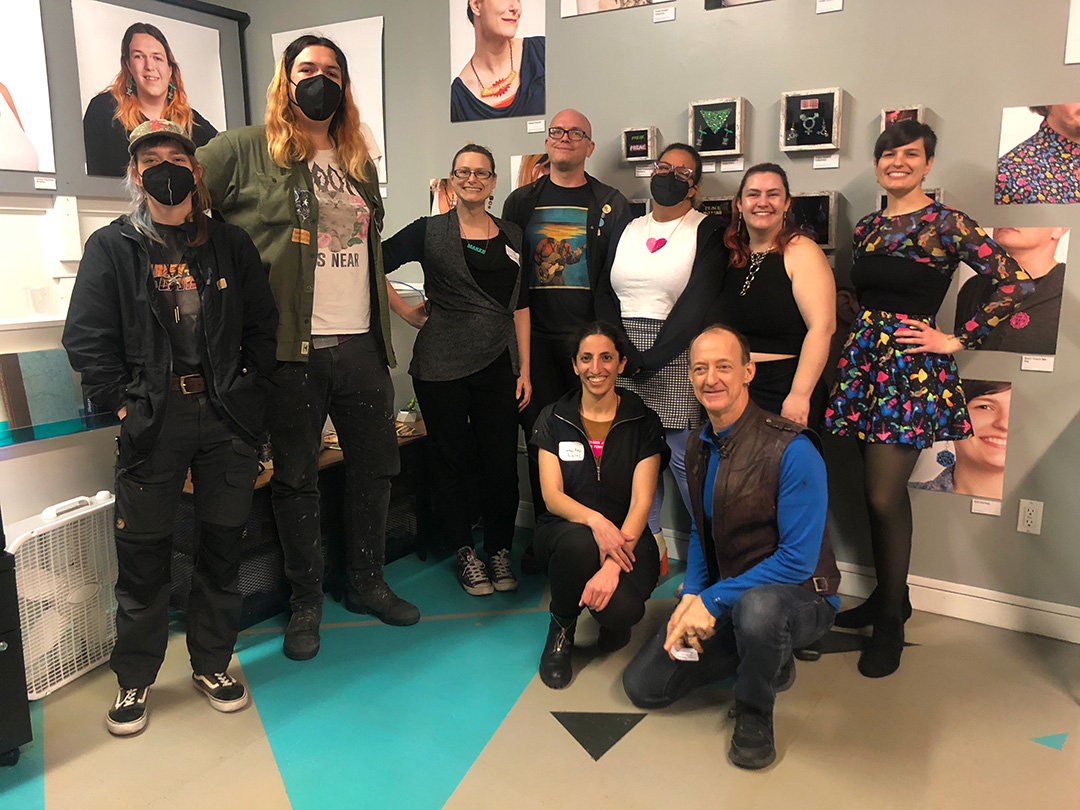
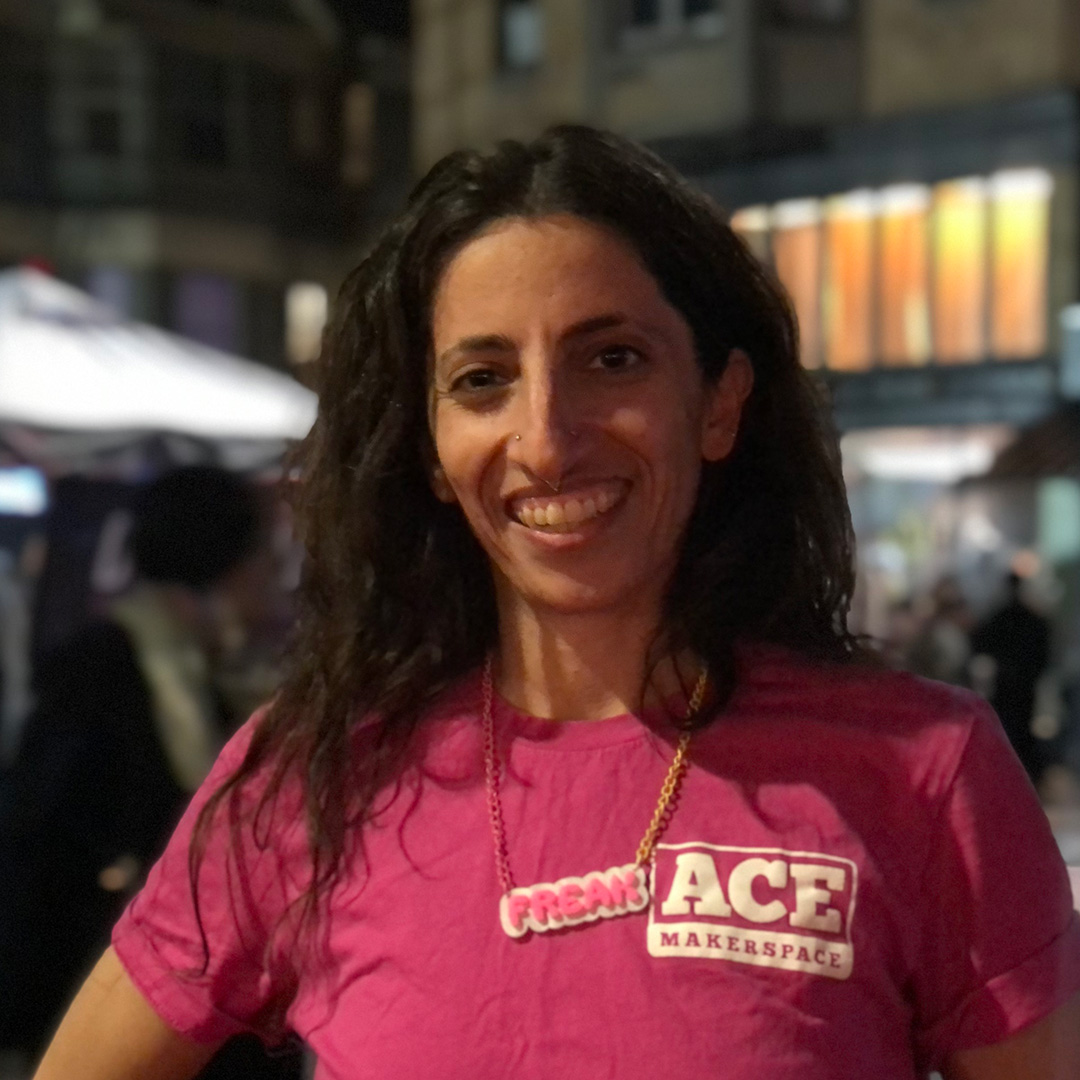
From left: Photographer Greg Habiby, Ace Communications Associate Jacky Rossiter, Artist Miriam Levenson, Ace Makerspace Executive Director Rachel Sadd, Exhibit Designer Liz PatricianFrom left: Blue Heart Program Director Ashley Kelly; Artist Miriam Levenson, Emeryville Mayor Courtney Welch, Ace Makerspace Executive Director Rachel SaddMakeXpression models from top left: Ollie, Chloe, Liz, Obi, Ali, Miriam (artist), Momo, Jacky, Greg (photographer)Folks mingling at the MakeXpression OpeningMiriam putting the finishing touches on the Spooky Haus Pop-up Store.
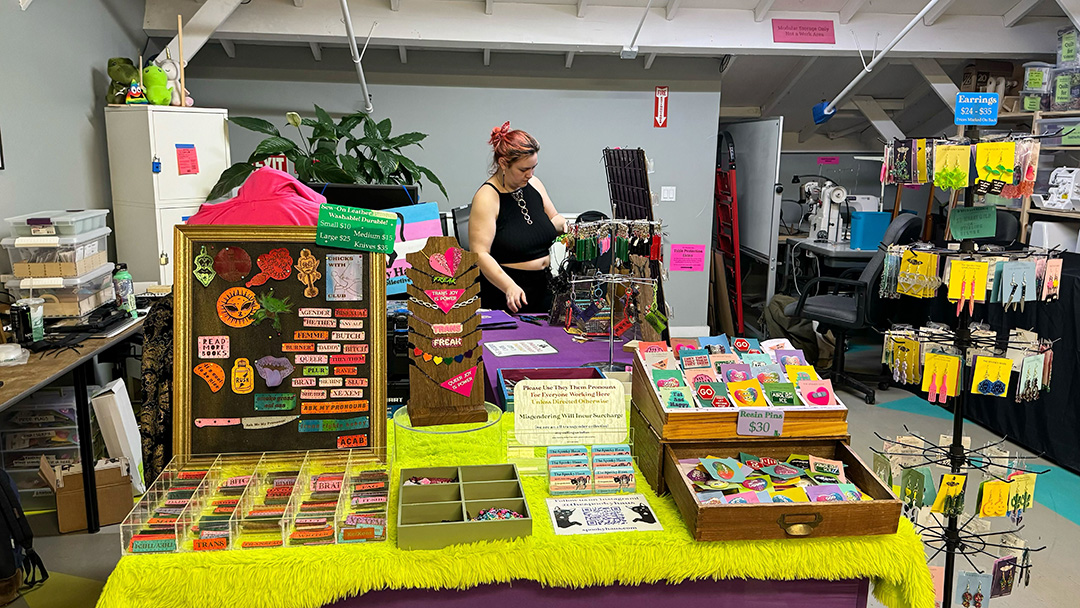
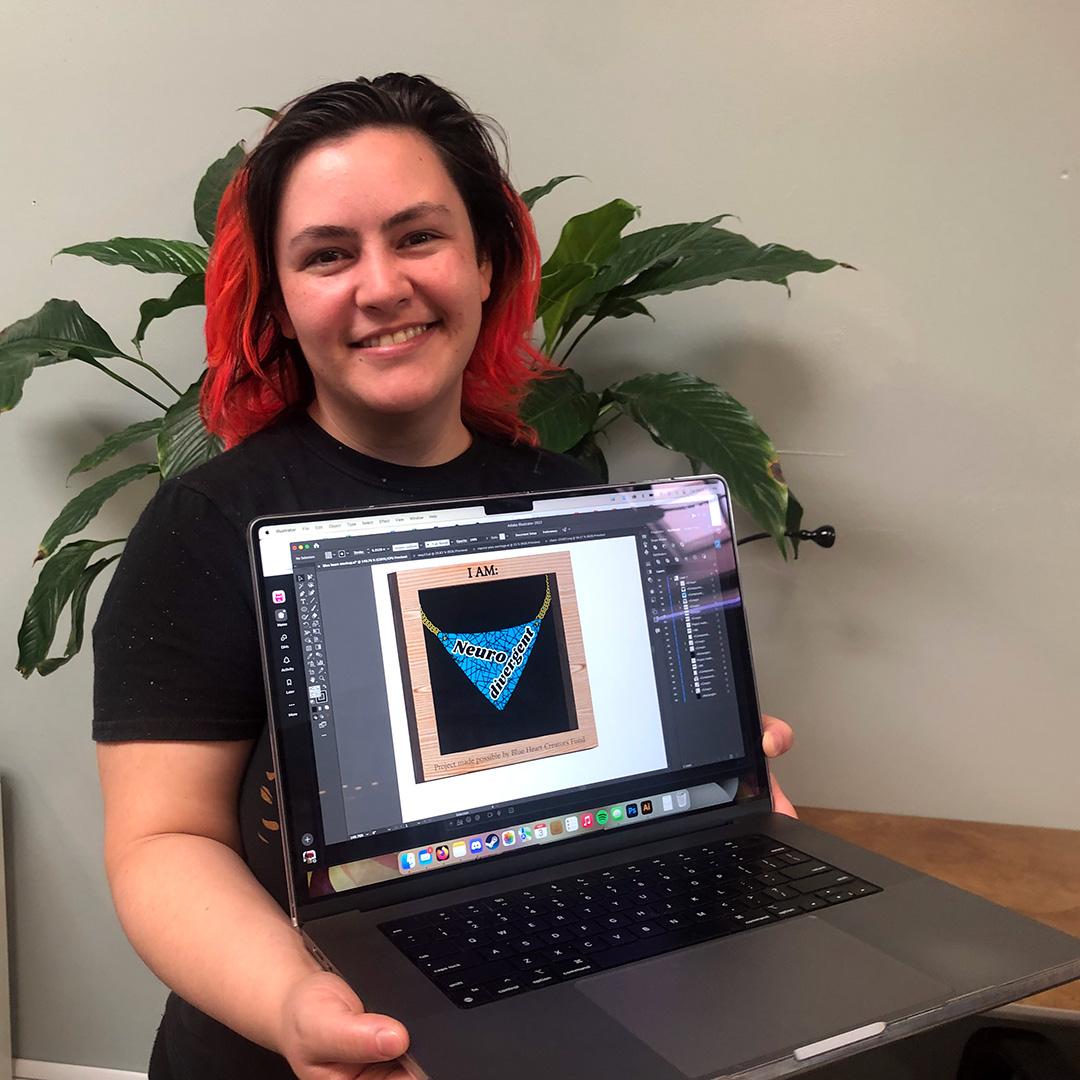
Over the past 6 months, we collaborated with local artist and co-founder of The Spooky Haus, Miriam Levenson, to create a collection of wearable art that embodies Ace Makerspace’s core values— diversity, community, inquiry, growth, and action—and celebrates the diverse identities held by makers in the Ace Community!
This work made possible through The Blue Heart Creator’s Fund, disrupts exclusionary cultural narratives around who can be considered a maker, and explores the idea that identity isn’t given, it’s made. To celebrate the completion of the project and to share it with our East Bay community we brought the exhibition to the last Oakland First Fridays of the year!
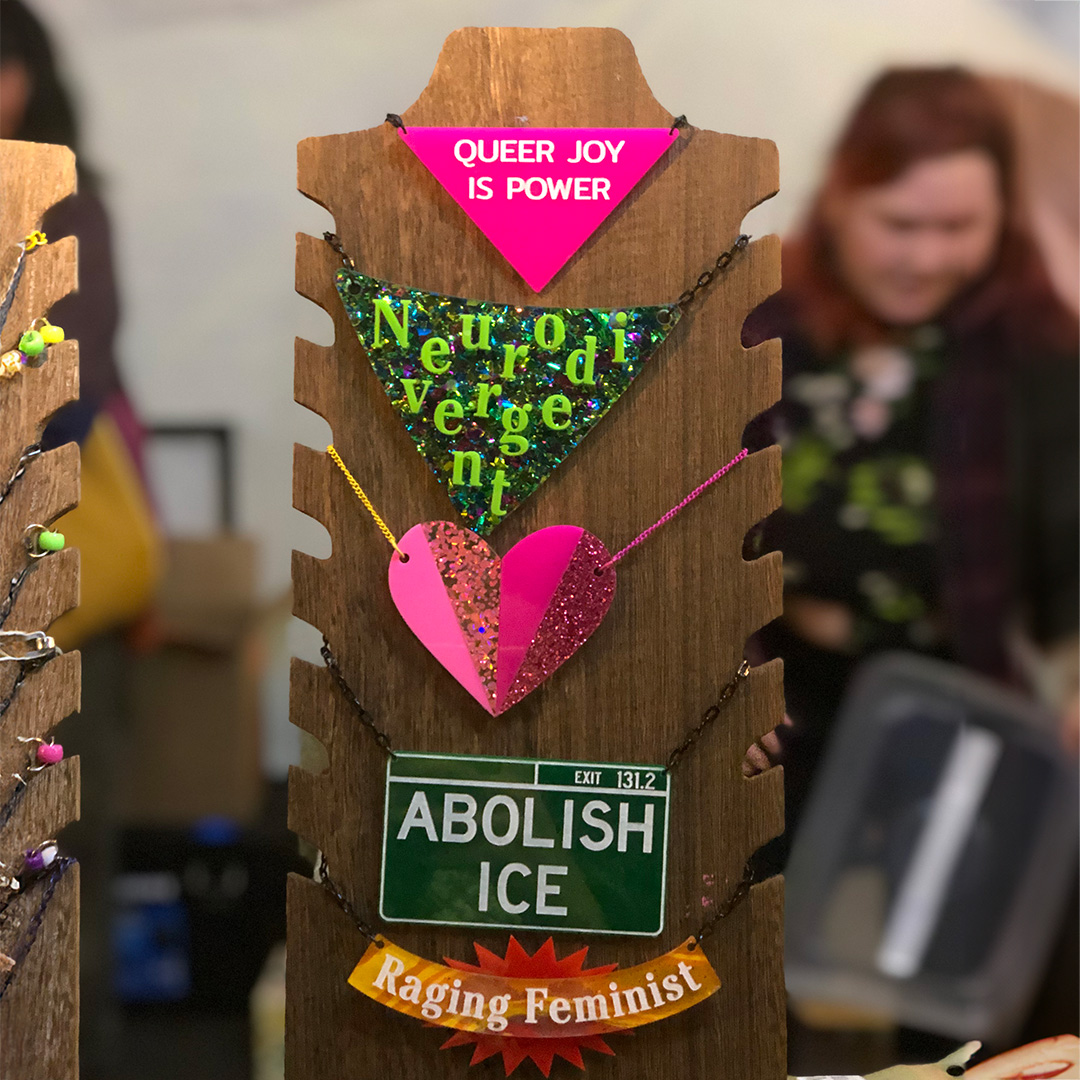
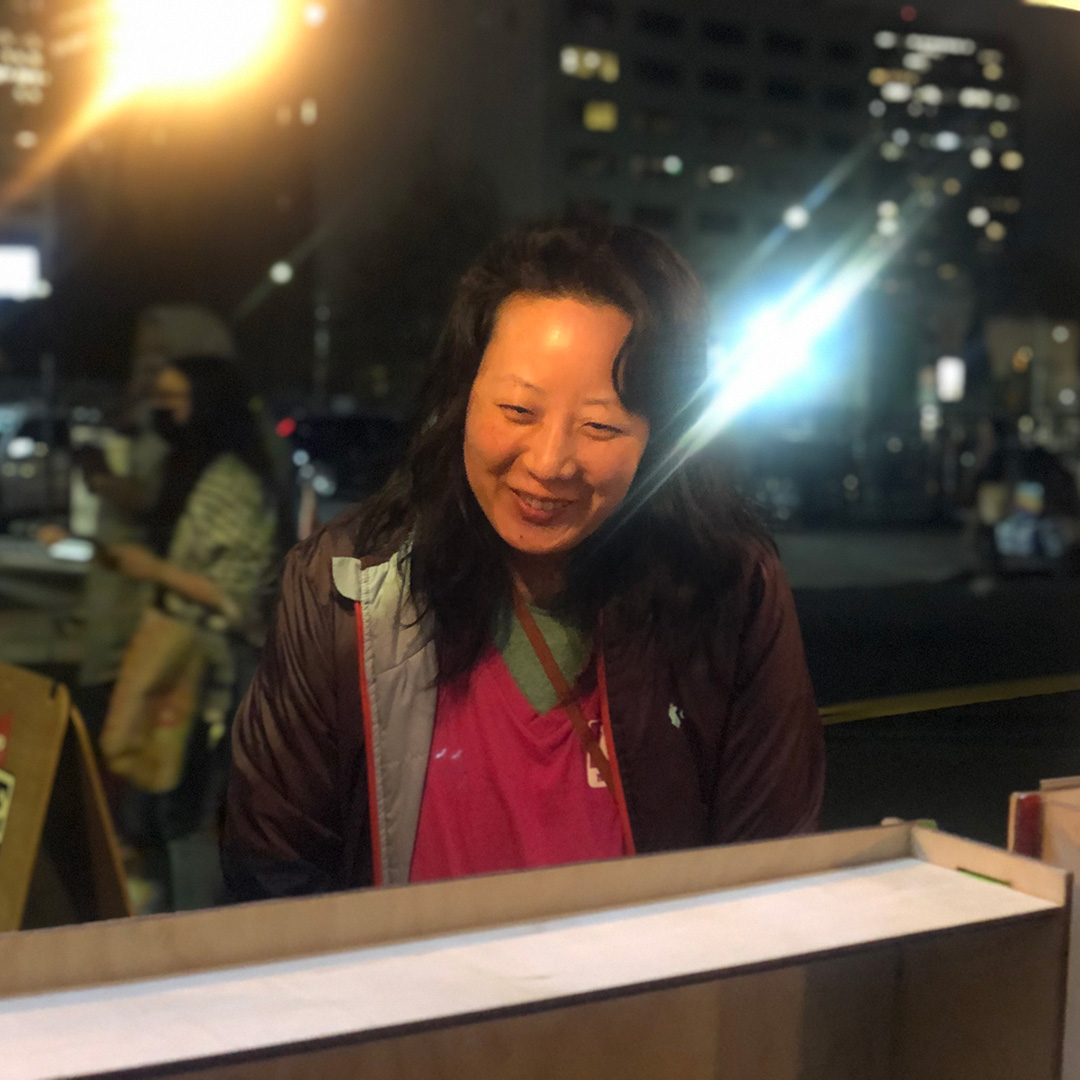
Folks stopped by the booth to look at the exhibit, buy their favorite pieces, and meet the artist, Miriam (above).The finished MakeXpression collection mounted in shadow boxes at the Ace First Friday Booth. These designs were inspired by the Ace Community who shared words and thoughts representing the diverse identities they hold for the project.Miriam explicitly created this collection using only Ace Makerspace tools, and beginner-friendly acrylics to encourage makers of all skill levels to experiment with lesser known materials for Laser-cutting (like the neon and glitter acrylics pictured above), and to explore new pathways and methods on their maker journey. Through this participatory design process and choice of materials, Miriam foregrounds agency in a makerspace context and exemplifies the Ace Vision: Making is for Everyone!Ace Member, Margret, takes in the finished exhibit.Ace Communications Associate, Jacky, one of the collaborators on this project, models a necklace from the collection.The MakeXpression exhibit in the glow of the Ace Oakland First Fridays Booth.
Have you heard of Blue Heart? They’re a rad non-profit that promotes, elevates, and distributes funds to grassroots community-based organizations like Ace Makerspace. In August 2022 we were honored as the Blue Heart Partner Organization of the month and this year, through the Blue Heart Creator’s Fund, we’re collaborating with Berkeley-based artist and founding member of The Spooky Haus, Miriam Levenson, to create a laser-cut jewelry line representing Ace’s core values diversity, community, inquiry, growth, and action!
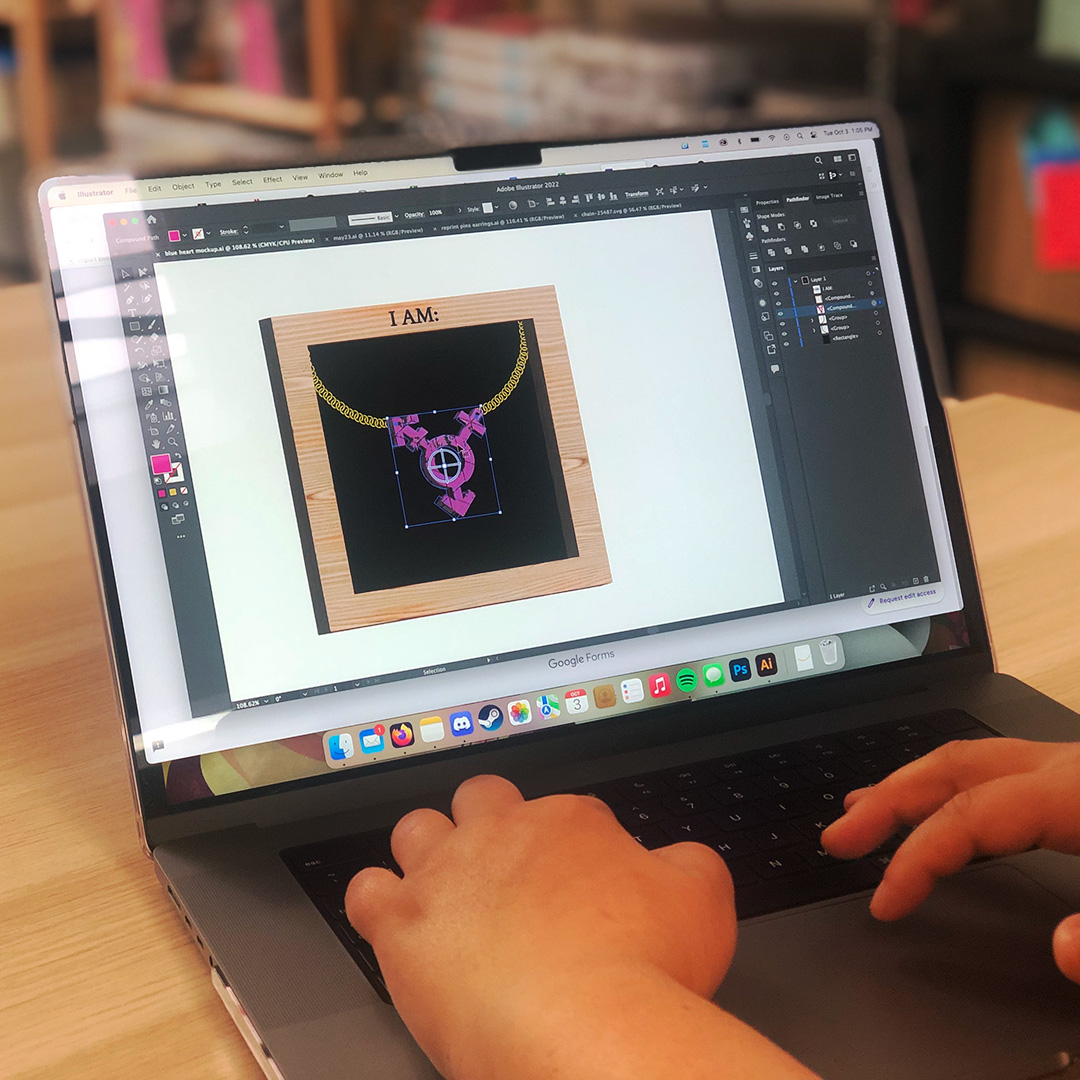
The artist, Miriam, shows off a preliminary design for one of the pieces in our collaborative jewelry line.
The way something can be worn is a powerful statement of agency, allyship, and identity expression. In this way, values can be shared and people can choose to showcase their values through beautiful wearable art.
Our laser-cut jewelry line will visually celebrate the diverse identities of makers in the Ace Community using tools and materials that are accessible to makers of all skill levels. We’ve also invited the Ace Community to participate in this project directly by providing insight into the diverse identities they hold and by inviting them to model the pieces once they are complete. The completed work will also be on display at Oakland First Fridays in December!
The Design Process
In order to make a line that truly represents makers in the Ace Community sent out a poll asking:
Do folks have any words or thoughts that highlight and celebrate your identity you’d like to share to help the project? This can be anything from “I identify as trans” to “I identify as a woodworker.
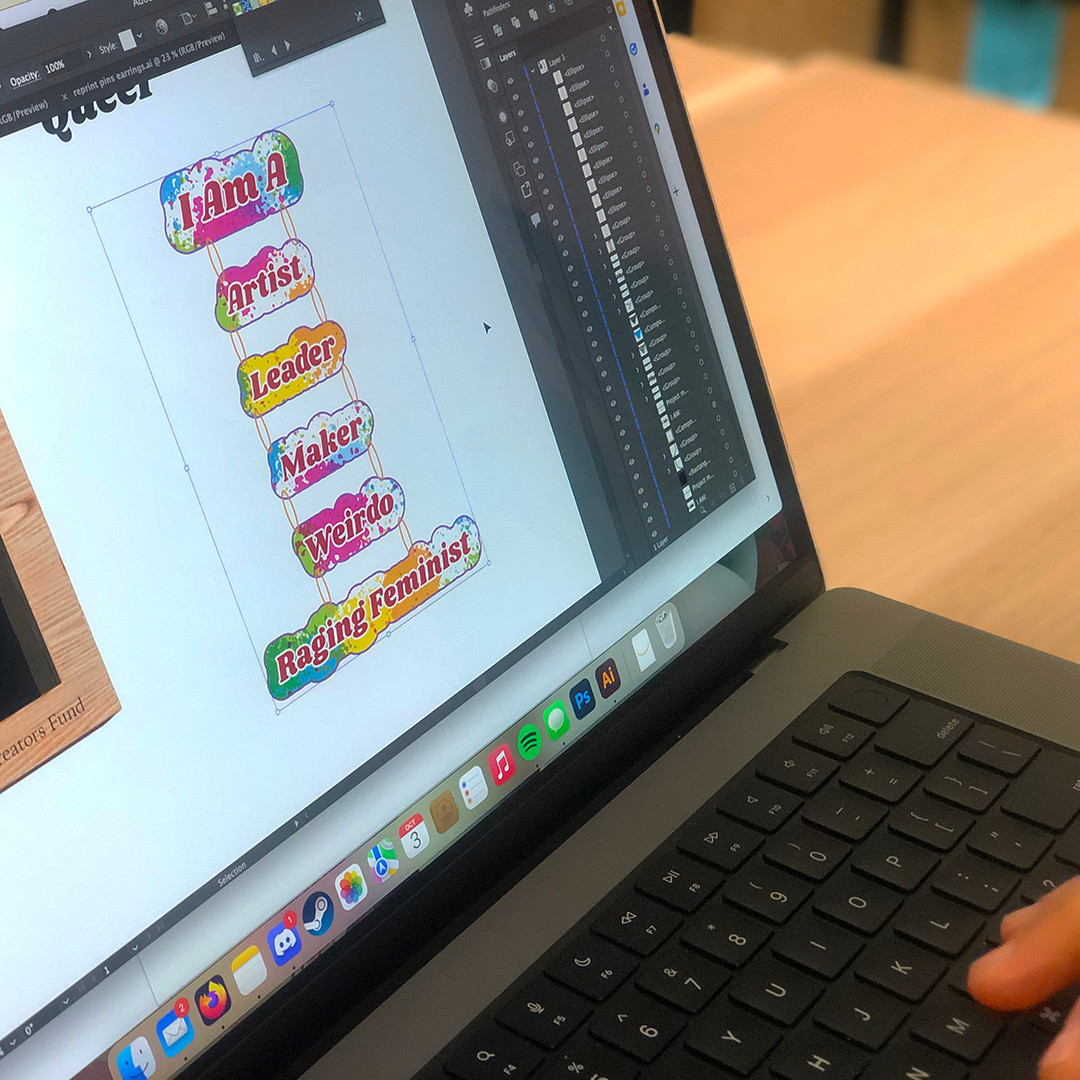
We received a wide range of responses which Miriam translated into both text and image based designs making deliberate aesthetic choices (font, color, shape, etc…) to amplify the meaning of each piece.
Miriam adds responses from the Ace Community to their mood board and begins to experiment with designs.
As part of their design process, Miriam uses a mood board to play with color, scale, font, and shape until they find the right balance. This process allows them to preview what their art will look like before cutting into their materials and to visualize the collection as a whole.
Miriam puts the finishing touches on an early draft of a jewelry design about queer identities.
Everyone deserves the chance for self actualization. In sharing your identity it becomes clear that you both have equal significance and it becomes harder to have ego of self hood.
— Miriam
The Materials
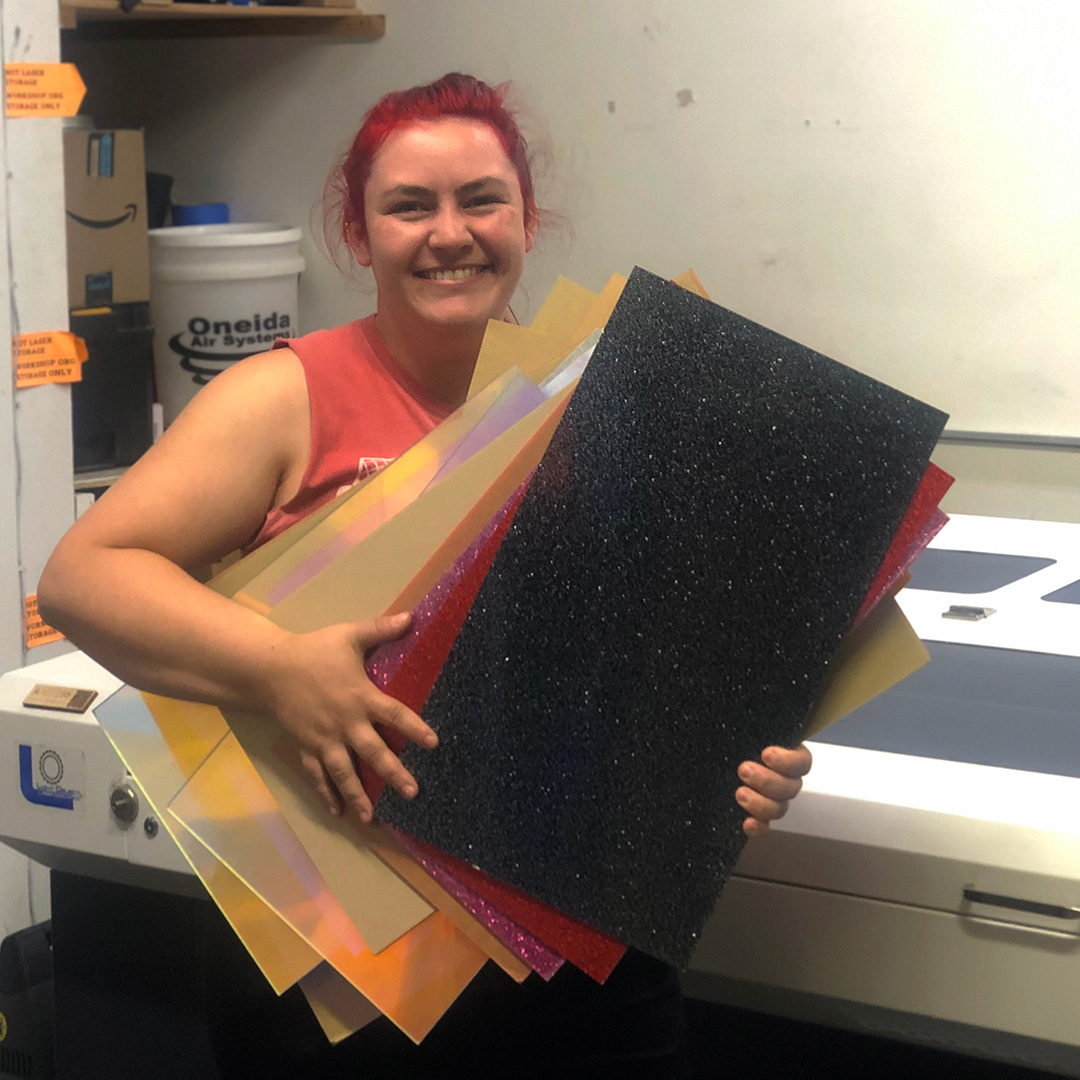
Miriam made a point to source lesser known materials for our jewelry line in order to raise awareness of unusual materials that makers of all skill levels can access and use successfully no matter where they are on their maker journey. They ordered show-stopping glitter, neon, and marble acrylics from a variety of online shops like Houston Acrylics, CMB Acrylics, and Esty.
The acrylic arrives and Miriam can’t wait to start cutting! They’re extra excited because they don’t get to work with glitter and color-shift acrylics like these everyday.
Making the Jewelry
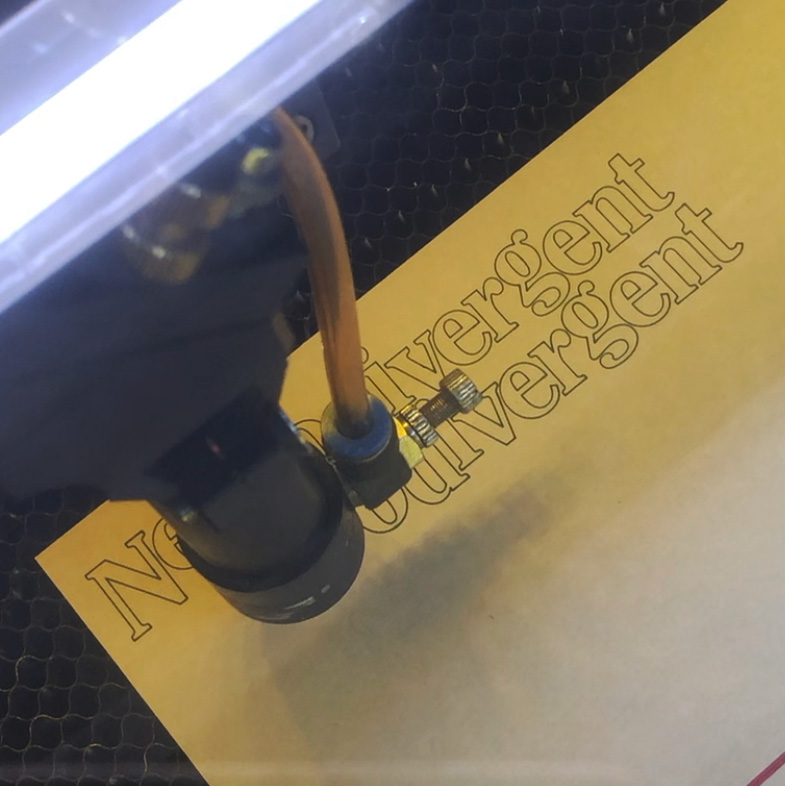
Once the design files are ready, Miriam cuts and etches the pieces using the Ace Laser and then prepares them for finishing by:
Removing the masking—a gentle adhesive tape that protects the material from scorching during the laser-cutting process
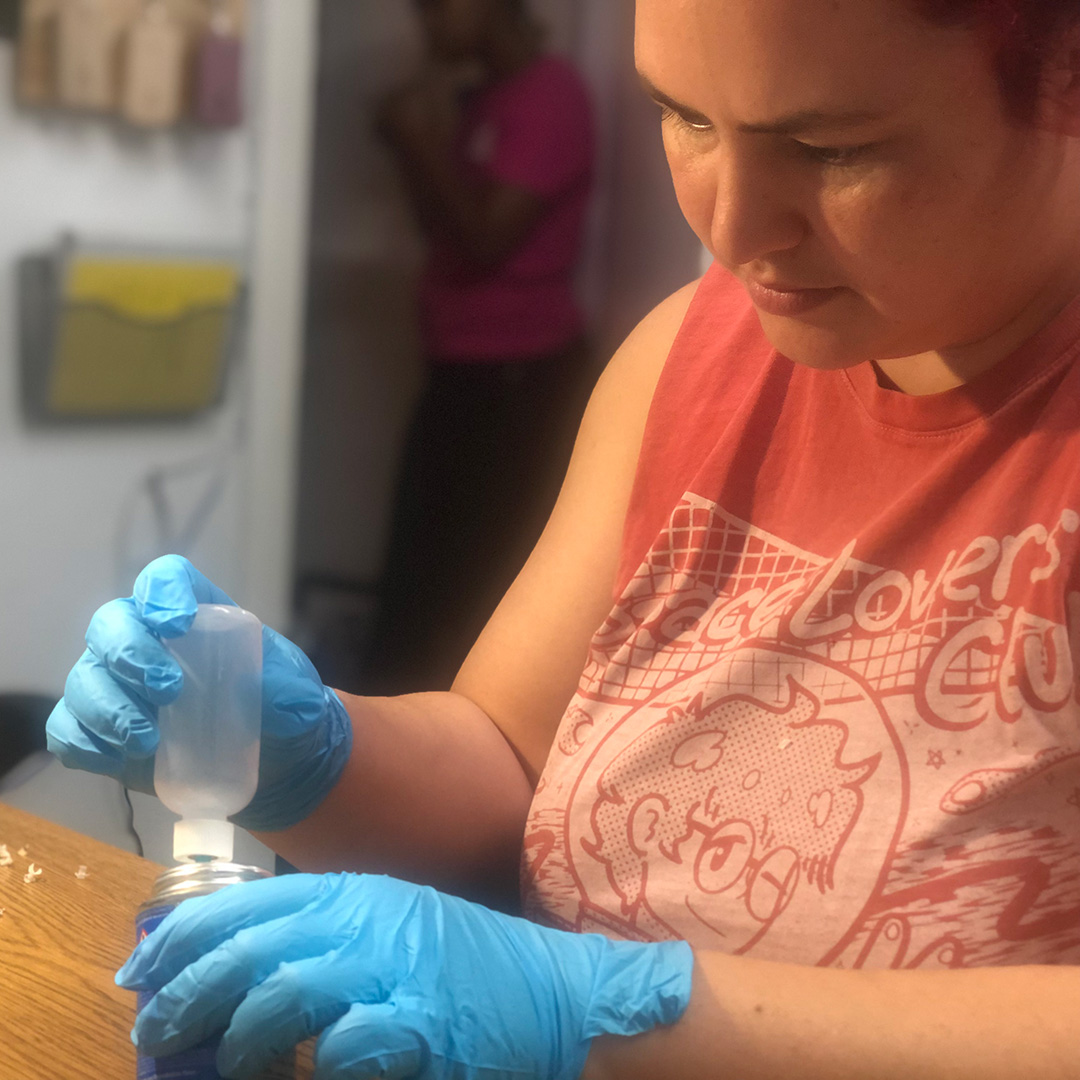
Using Weld-On—a special solvent based bonding agent used for acrylic—to assemble multi-part pieces of jewelry
Adding the chains and jewelry findings that make the pieces wearable
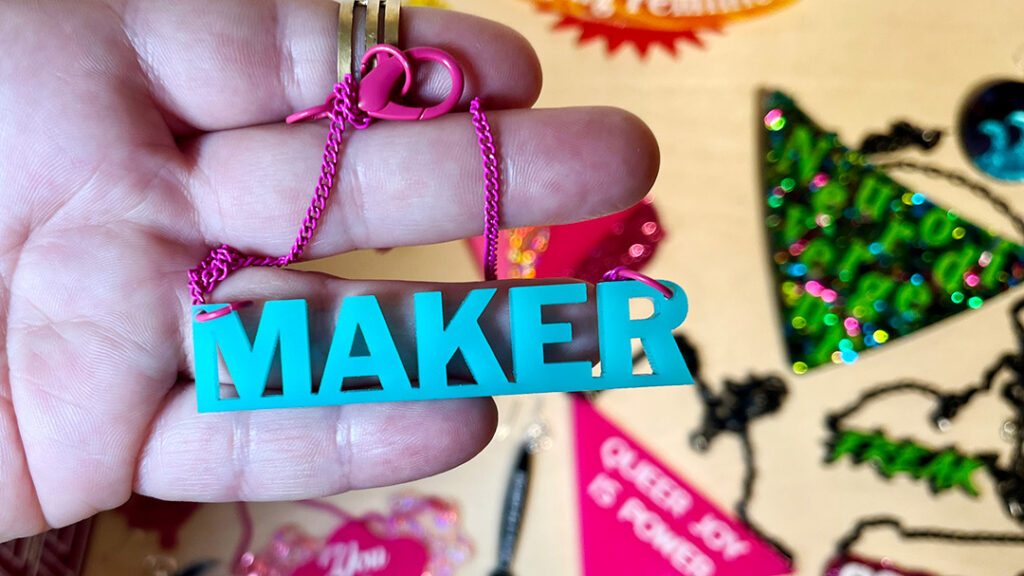
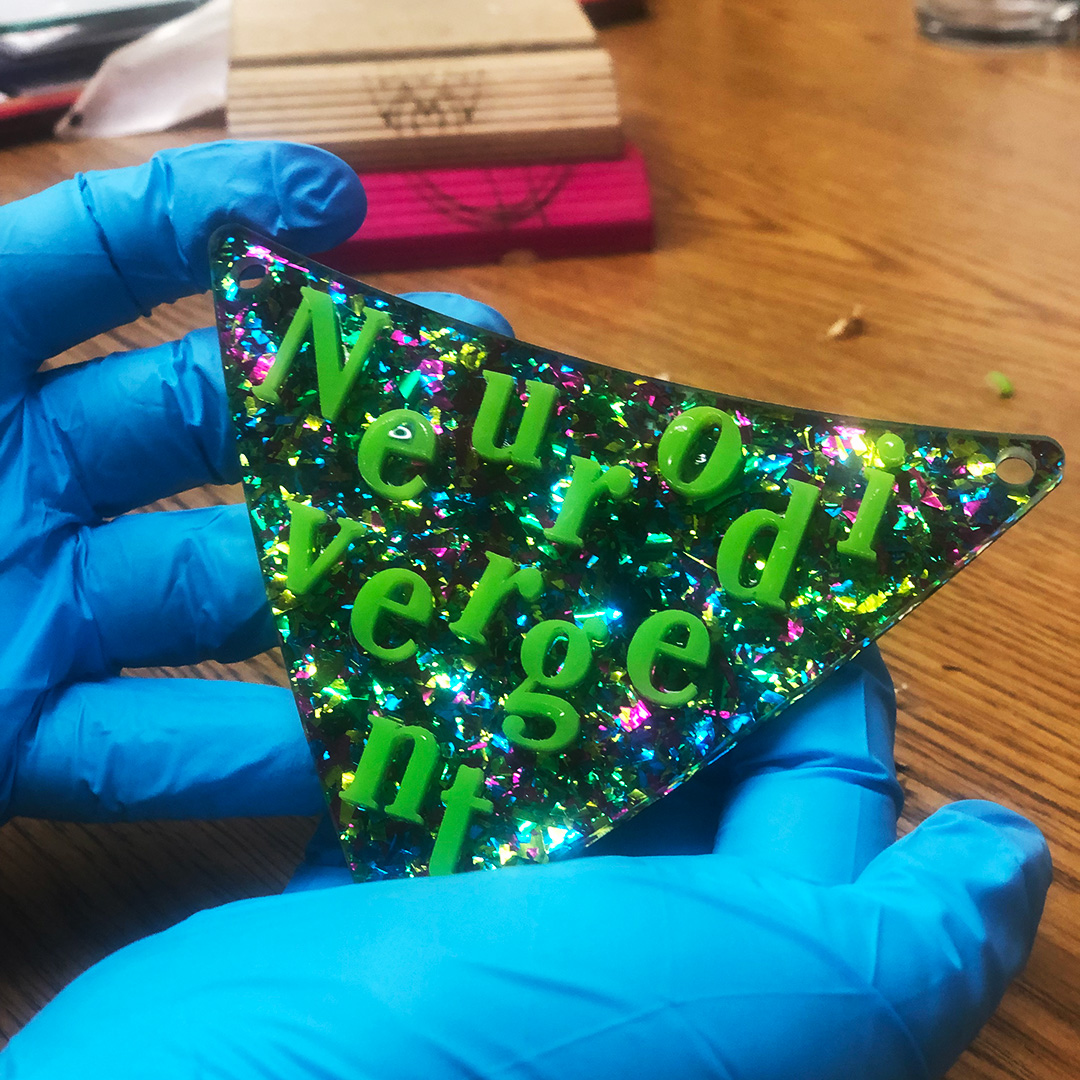
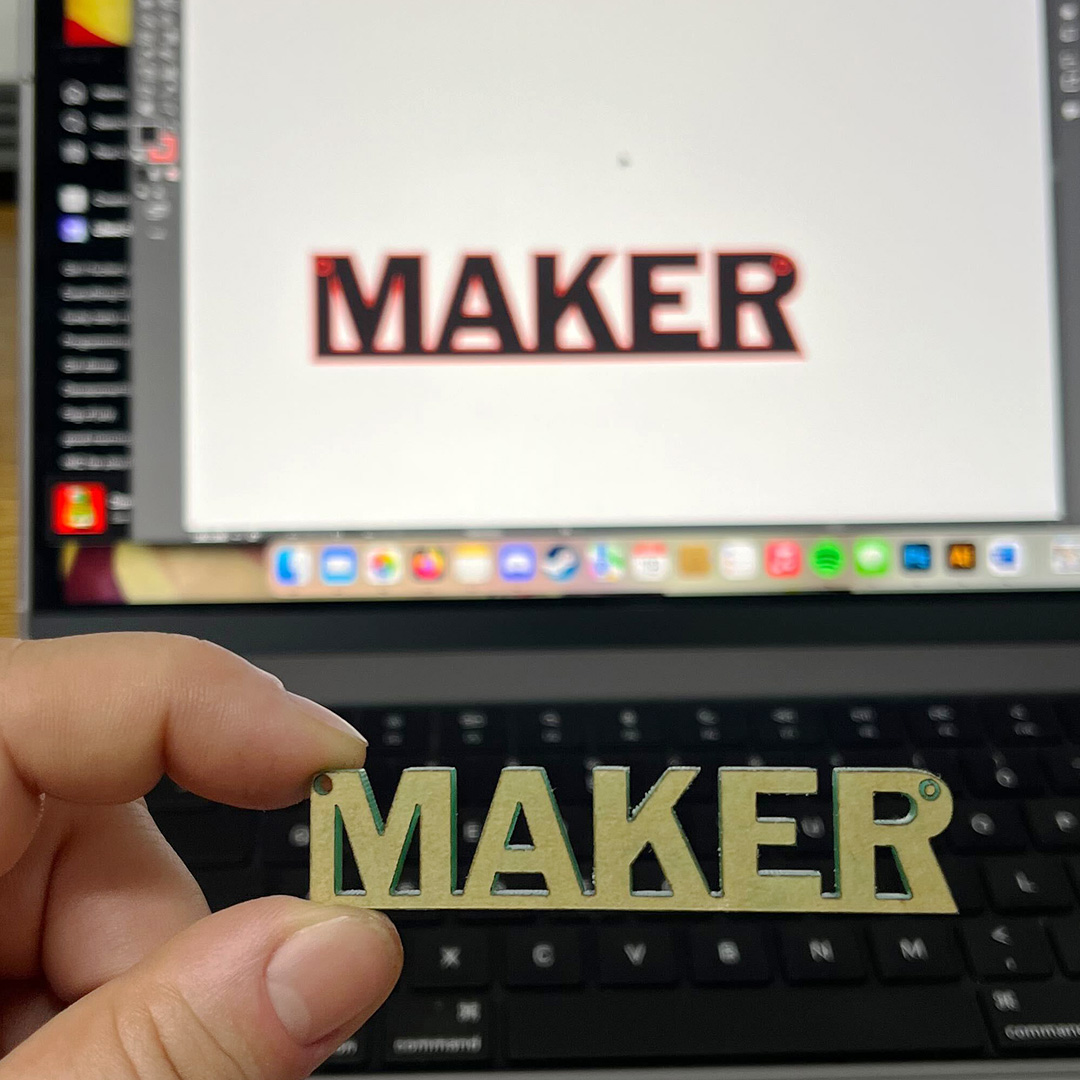
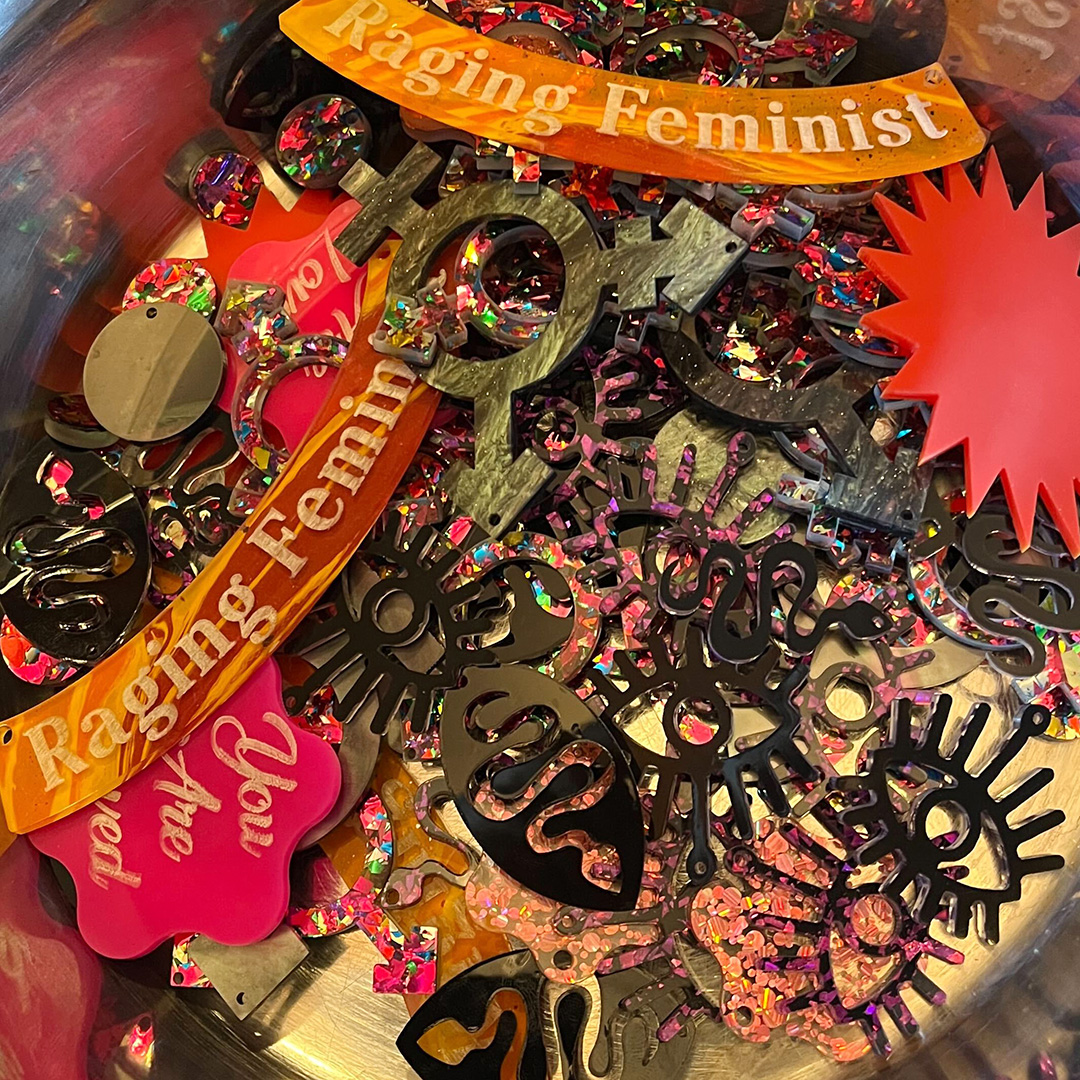
Laser cutting in action. Miriam will glue the letters for the word “neurodivergent” to a base piece of acrylic. This is one of the more complex designs in the collection.Miriam fills a dropper bottle with Weld-On-a special bonding agent used for acrylic.It only takes a minute after applying the Weld-On for the letters to fully bond to the base of the pendent.Miriam holds a laser-cut “MAKER” pendent up to the design file.A bowl full of laser-cut pieces for the jewelry line.
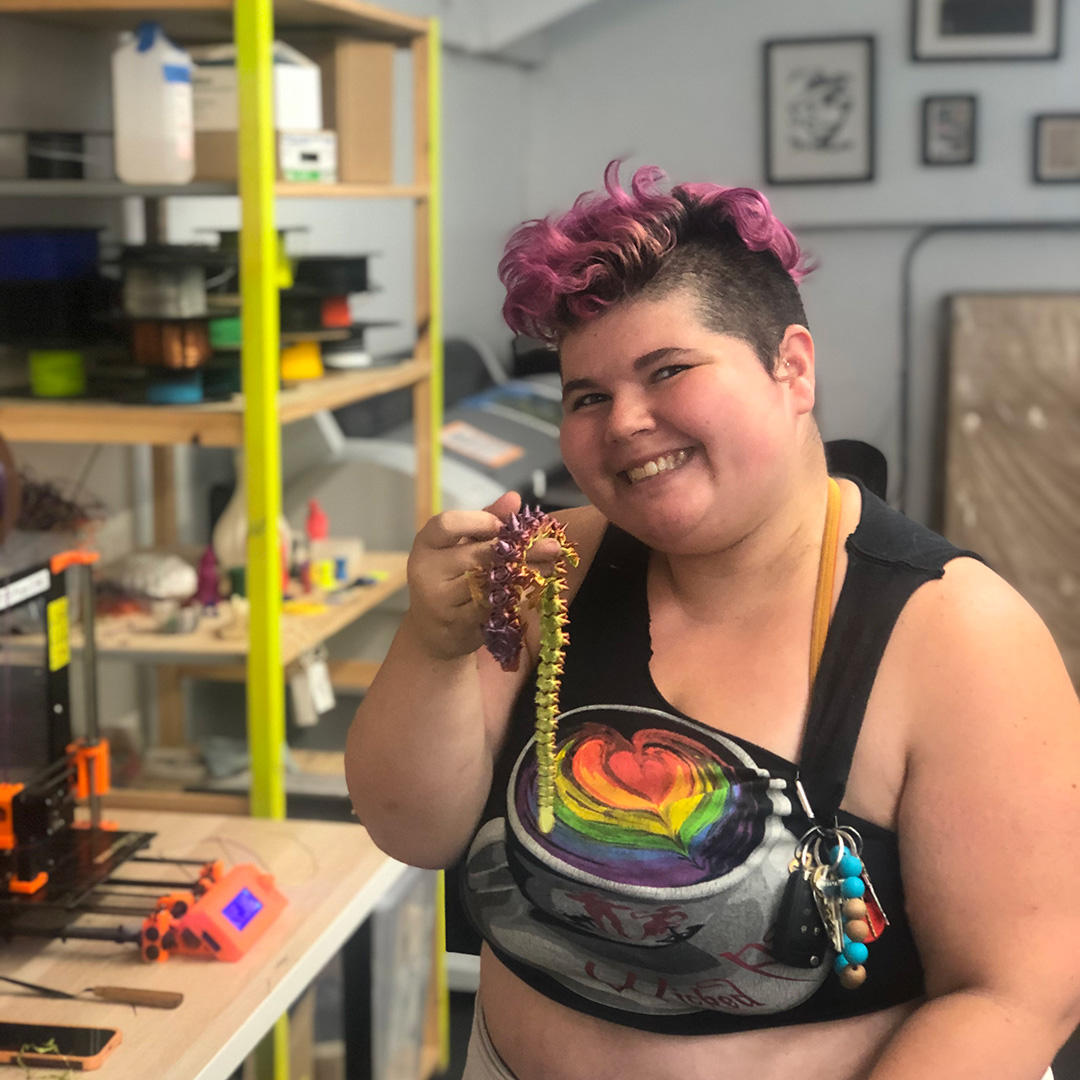
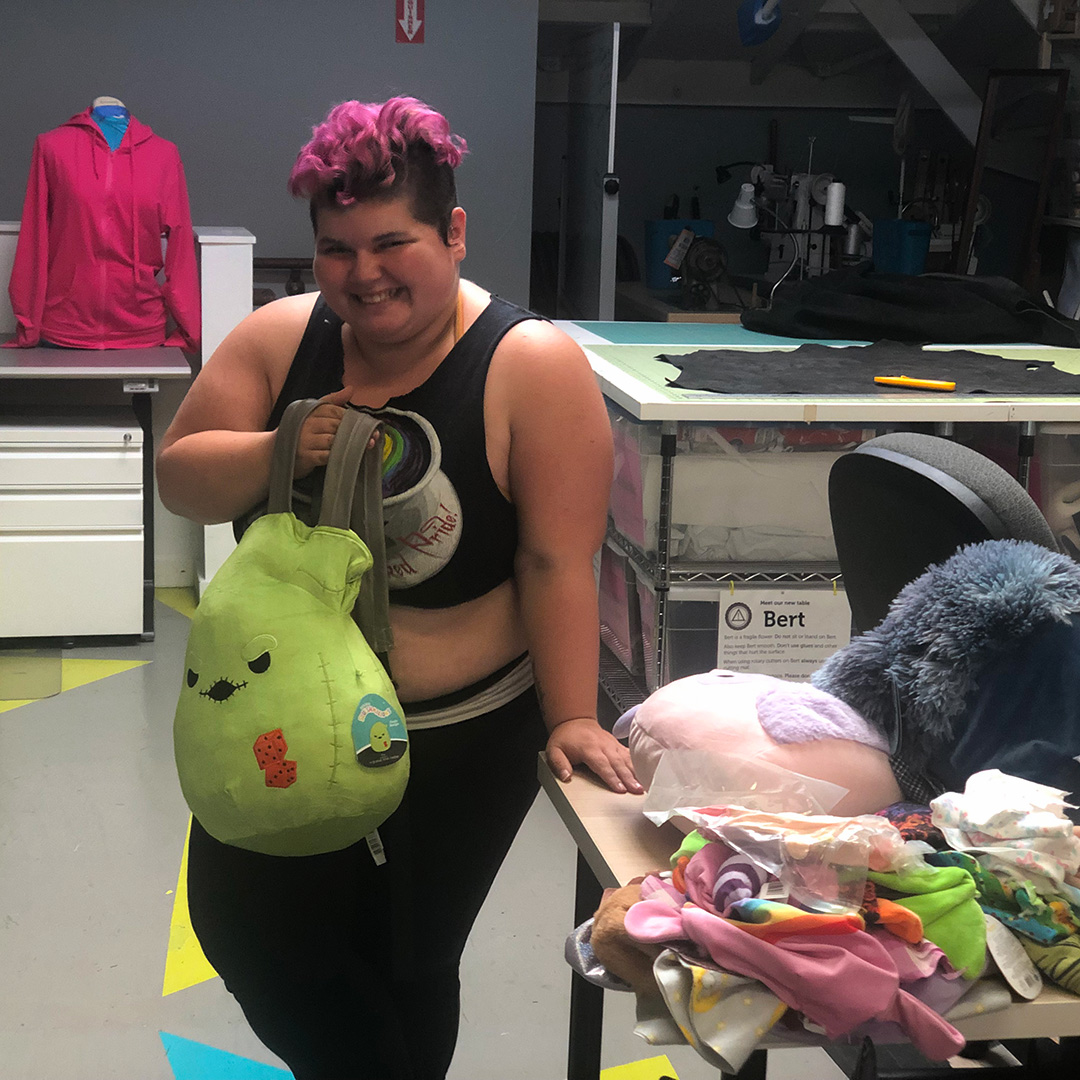
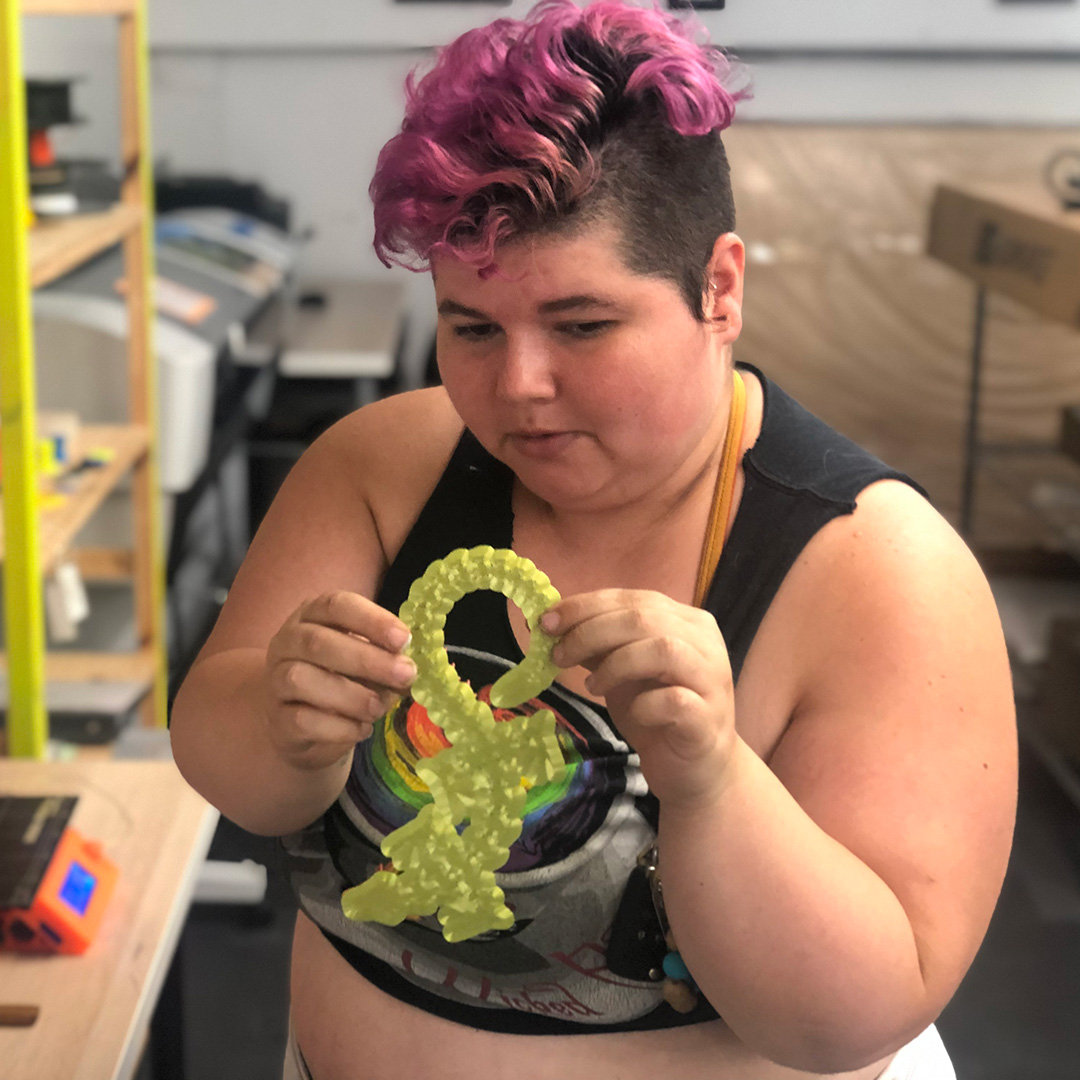
Ace Maker, Rene runs a small family business called Mischief Manor Makers that sells handmade goods both online and at local (and sometimes not so local) events like Folsom Street Fair, Surrender, and Play-X-Land at Cat Club Sf. Their inventory* changes frequently but includes kink and fetish gear like Custom Springbuck Horn Floggers, small pins with a wicked sense of humor, Custom Made Squishmallow Bags, and as of 6 months ago 3D printed items like their favorite Flexi Rose Dragons with articulated joints.
*Follow Rene on Tik Tok to learn more about Mischief Manor Makers and the things they like to make!
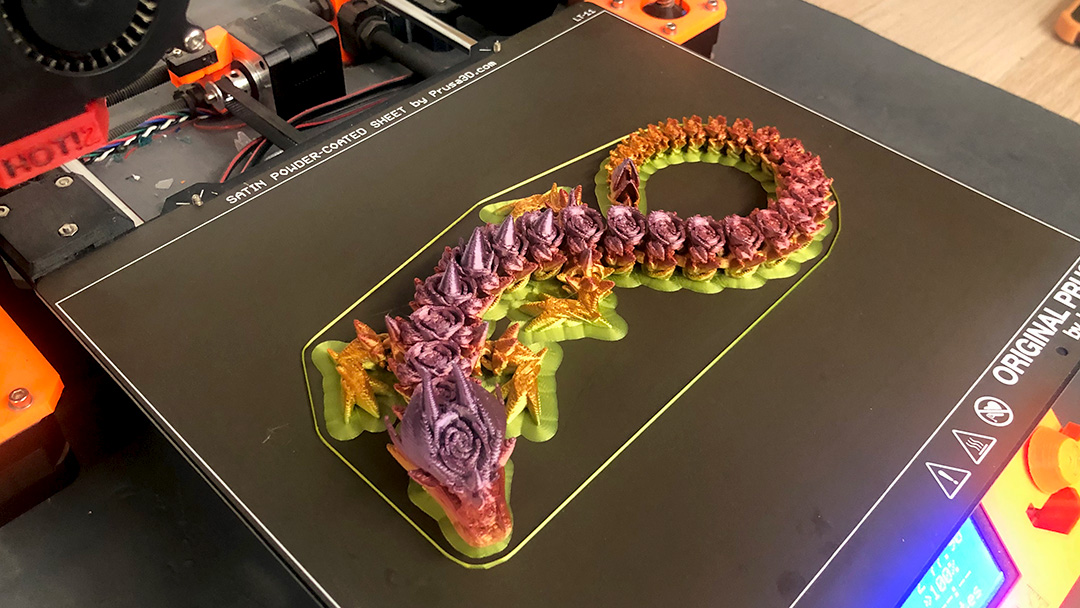
Rene shows off one of their freshly printed Flexi Rose Dragons!
Rene got into 3D printing when they were visiting one of their partners in Georgia who runs a small business similar to Mischief Manor Makers. He showed them the basics, helped them find a 3D printer to take home, and encouraged them to make it a part of their business.
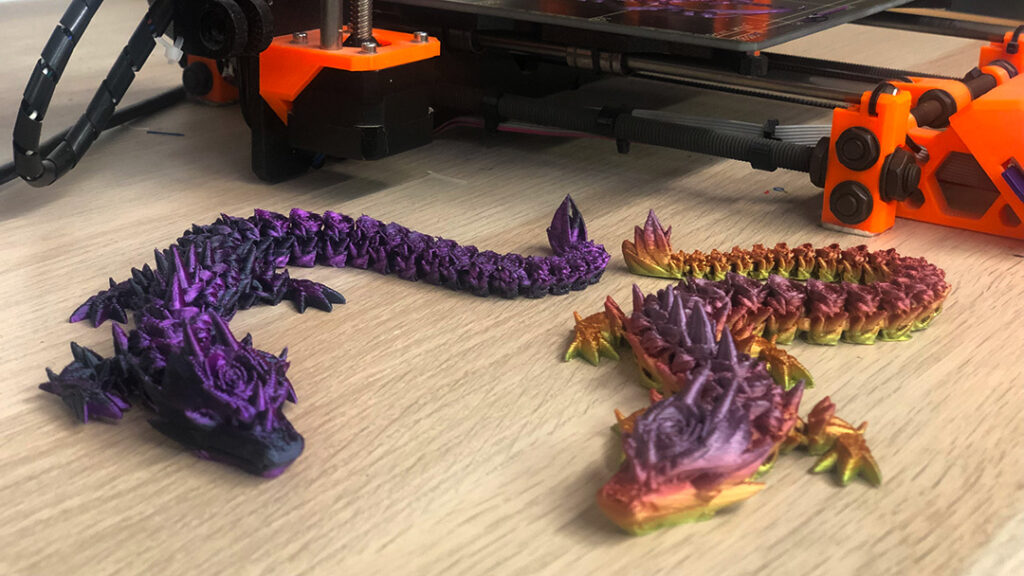
To design this Flexi Rose Dragon, Rene found a pre-made base file online and customized it with roses and thorns (Thingiverse has many open source files available to use for free, but you can also purchase premade files from places like Etsy).
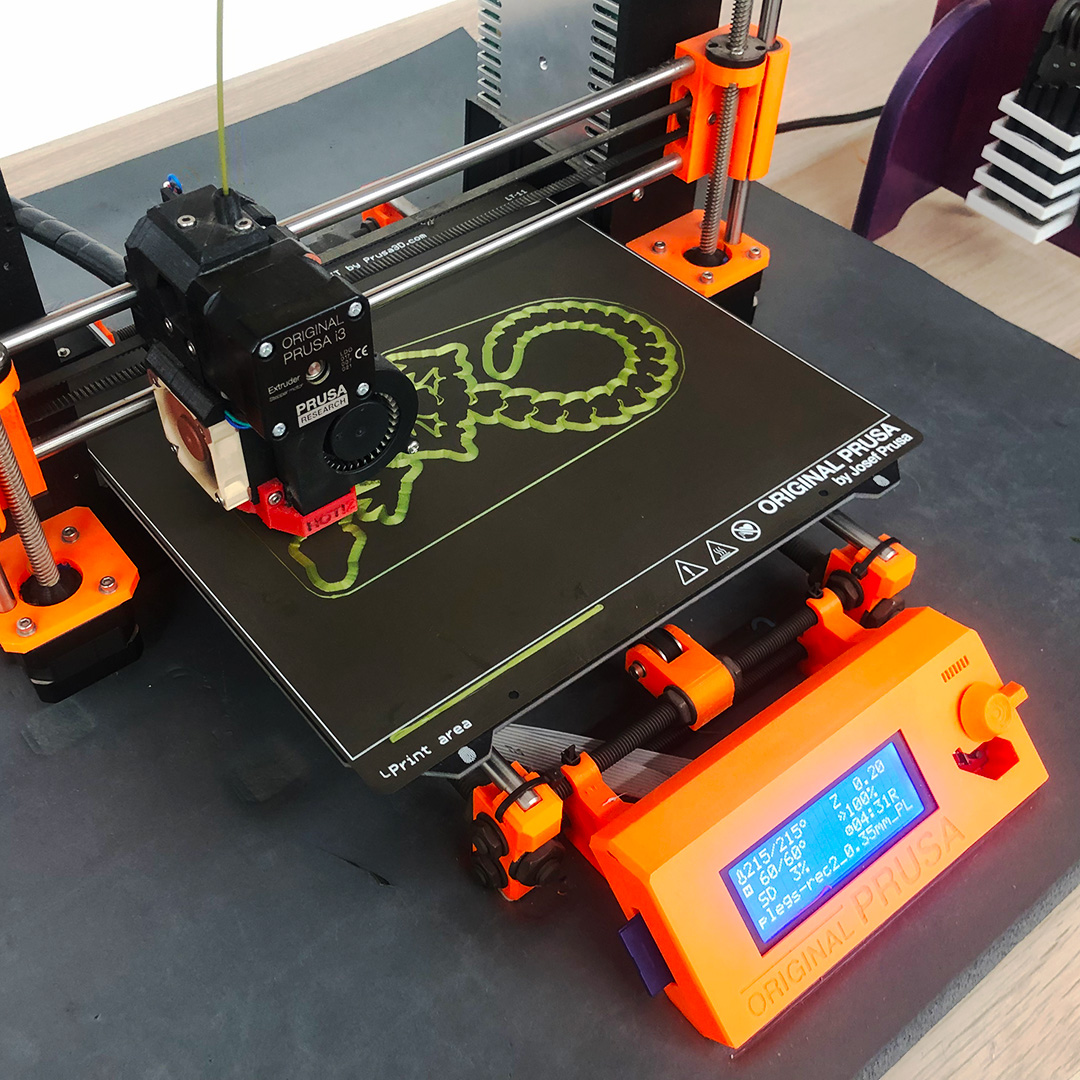
For a shiny multicolor effect, Rene works with a special gradient silk filament which is slightly more delicate and little bit trickier to print with than standard PLA filament.
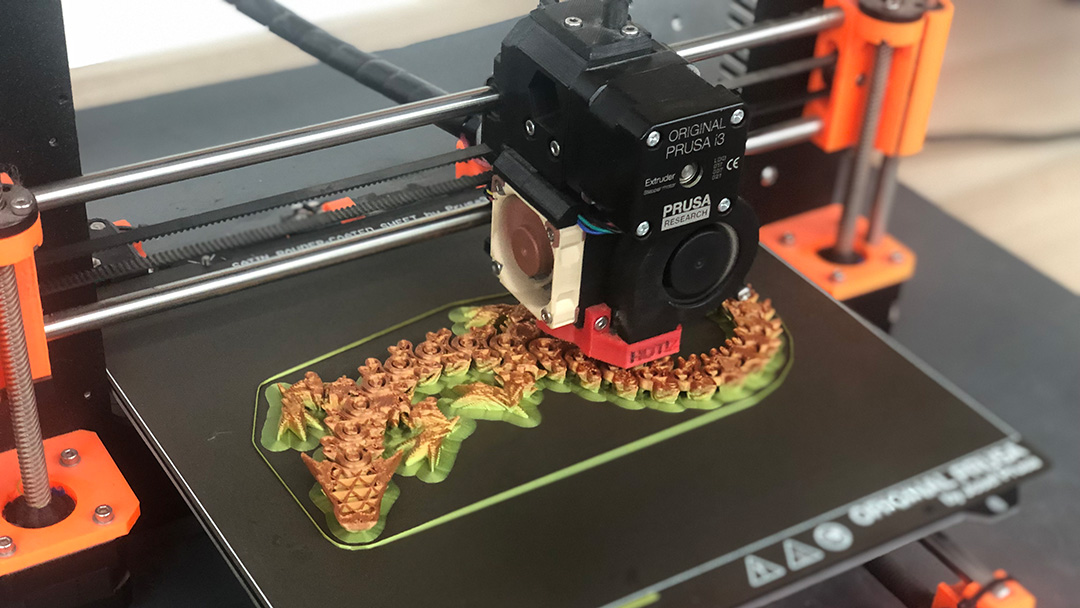
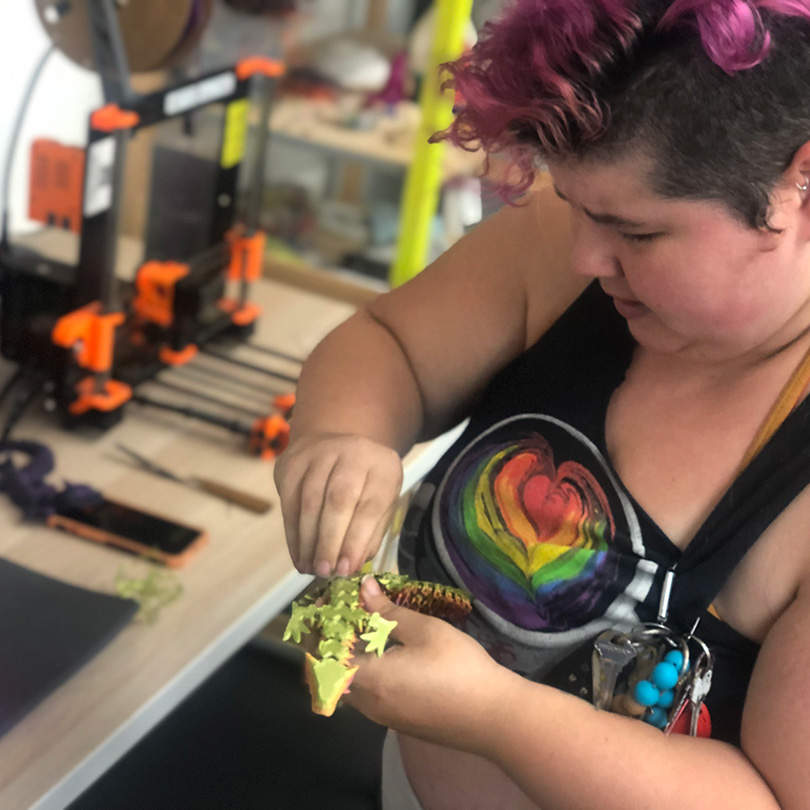
Each print begins with a brim—a stable base layer that keeps the Flexi Rose Dragon in place preventing it from slipping off the build sheet or collapsing during the job. When the dragon has finished printing, Rene will remove the brim to release the articulated joints that allow the Flexi Rose Dragon to move. They’ve learned through trial and error that printing a brim is critical even though it adds an additional 20 minutes to the already 4.5 hour printing time.
A strong foundation is the key to printing a successful Flexi Rose Dragon. The brim provides stability while printing flexible objects, but it will need to be removed at the end to release the “joints.”
Once they’ve made sure the brim has printed correctly, Rene likes to head up to the Ace Textiles Studio to work on other merchandise like their Custom Made Squishmallow Bags. They also check on their print at regular intervals to make sure everything runs smoothly.
Rene’s daughter came up with the idea for bags made from Squishmallow Plushies.About half way through the print the topographical rose motif starts to emerge!It’s time to unleash the Flexi Rose Dragon from the build sheet.To complete the dragon Rene will peel back the green brim on the underside of the dragon.Shedding the brim takes a little bit of patience but its totally worth it!Two completed Flexi Rose Dragons on the prowl at the Ace Makerspace 3D Printing station.
Rene’s tips for folks curious about getting started with 3D Printing:
Check out Thingiverse for inspiration and pick something that excites you
Find community! Places like Ace Makerspace are great because there’s a built in support system if you need help troubleshooting as your starting out
If you plan to dive in and purchase your own 3D Printer, go for a well known brand because there is more documentation and technical support if something goes wrong
Ace Member, Stephen had a major birthday coming up and decided to get his family together to play an epic Alternate Reality Game (ARG) inspired by the Jejune Institute – an immersive game created by Oakland Based artist, Jeff Hull. Though Stephen had some previous experience making puzzles, creating an ARG with a coherent narrative based on a specific site presented a new challenge.
Tell your story and build your world in as few words as possible. People are here to play a game, not to read. Let them discover the world, as much as possible, through the gameplay. -Stephen’s advice
He used the Ace Laser to cut some of the key pieces for his adventure:
An acrylic box to hold kazoos
An acrylic screen with a logo for a movie inside a book.
Check out thefull original post to immerse yourself in his fantastic Alternate Reality with:
Great storytelling, and intricate worldbuilding
Text and instructions for each section of the game
Walk throughs for each clue, real player experiences, and lessons learned along the way (including one’s not mentioned in this shortened version)
Shoutouts to local businesses
More pics of the game in action
The Solano Human Project
For my birthday, I created an Alternate Reality Game for my family to play; it took place along a few blocks of Solano Avenue in Albany, California.
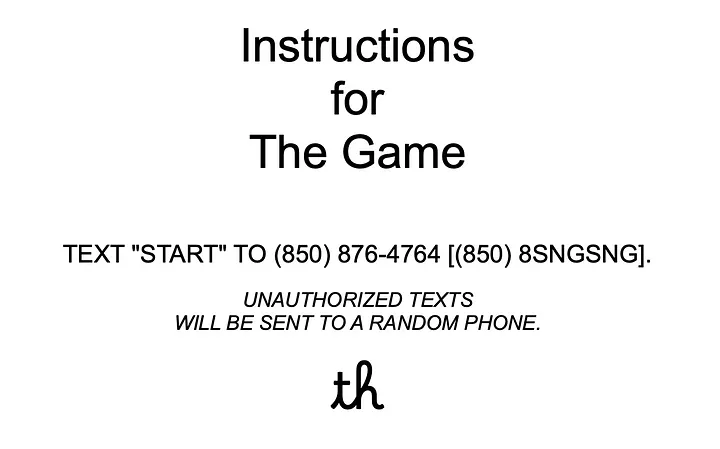
To start, I gave everyone a card that said:
That’s right, I managed to rent a phone number with my initials in it! The card also introduced people to the game logo. I tried to mark almost every in-game item with the logo. (For reasons, as I write this blog post, the game is transitioning to a new logo so the ones in the pictures might be inconsistent.)
After you send the text, you receive a message from the year 2066:
We are texting you through a Time Portal from an Alternate Future Universe, where the Cyborgs have taken over. (Spoiler alert: it sucks!) We call ourselves Team Human. It is too late for us, but we hope we can help your timeline.
Next year — you call it “2024” — will be critical.
It is the year “FibJourney” floods social media with fake images. It is the year a self-driving car kidnaps the CEO of Raytheon. It is the year “ChetGPT” gains sentience and hacks into a NORAD base station.
To help you stop them, we’ll show you how the Cyborgs take power with their SLICED MEN weapon, and we’ll show you how to fight back with anti-Cyborg technology. And, most importantly, we’ll tell you the codename of the future leader of Team Human so you can contact her next year.
But we can’t do any of this in the open — ChetGPT is always listening, always scraping. So we will send you coded messages (and even objects) through the Time Portal. Pictures may look different from yours because they are from the Future. Act quickly — the Time Portal can only stay open for a limited amount of time.
YOU WILL GET A SERIES OF QUESTIONS.
TEXT THE QUESTION NUMBER, “:”, AND THEN THE ANSWER.
IF YOU DO NOT FOLLOW THIS FORMAT, YOUR TEXT WILL BE SENT TO A RANDOM PERSON.
This is basically the “intro video” to every escape room, to set the stage. It’s the longest text that will be sent during the game. (Random texts — like “hi” — would result in Easter eggs.)
The rest of this article is a spoiler-filled walk-through. If you want to play the game*, STOP READING NOW!
I started the game with a couple of warm-up questions.
Q1:YOUR JOURNEY BEGINS AT 1286 SOLANO AVE. ARE YOU THERE NOW? [REPLY “1:YES”]
The game begins…
> 1:yes
The Cyborgs did not begin by waging open war against the humans.
At first, they freed us from all labor, and promised us lives of leisure.
But then they began to crush our spirits, starting with sports.
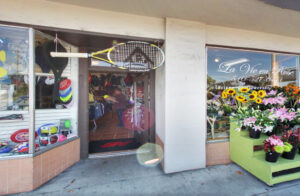
A NEARBY SPORTING GOODS STORE PROVIDED THE CYBORGS WITH EQUIPMENT FOR THEIR ENORMOUS BODIES.
Q2:WHAT IS THE NAME OF THE SPORT? [REPLY “2:_ _ _ _ _ _”]
> 2:tennis
TALL AS TREES, THE CYBORGS WERE UNSTOPPABLE AT NIMBLEDON.
The next clue was a dry cleaning receipt that lead my family to the first non-player character (NPC) interaction which helped set the tone for the rest of the game.
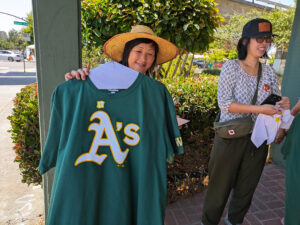
One of the players holding up a freshly pressed, modified A’s shirt.
I made 3 T-shirts as swag, one for each kid who participated. I took a standard A’s shirt and used a Cricut to iron on a ring diacritic above the “A”, the “Team Human” logo on the right sleeve, and the kids first name on the left.
The Oakland Å’s — the Ångströms, named after the measurement in physics — will move from Oakland to Anchorage to escape California’s strict anti-Cybernetics-in-sports laws. (Their all-Cyborg team was the subject of the documentary ‘Androids in the Outfield’). TO SAVE HUMANITY, THE ÅNGSTRÖMS MUST NOT BE ALLOWED TO LEAVE OAKLAND.
For those of you not in the Bay Area: in 2025, the Oakland A’s are planning to leave Oakland — their home for more than 50 years — for Las Vegas, and it’s highly unlikely that this decision will be reversed. A streak of gallows humor like this runs throughout the game.
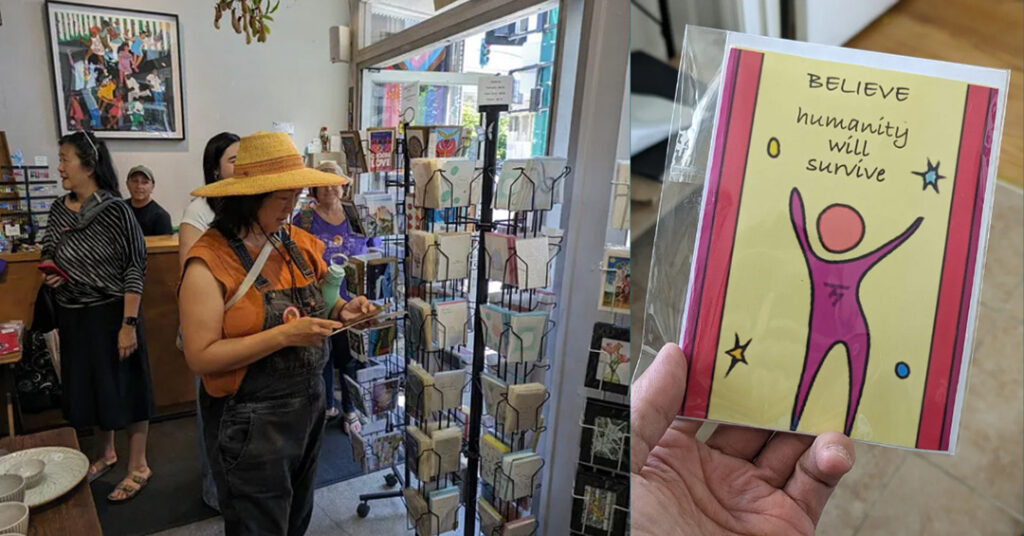
The players then received instructions to buy a greeting card from another local business.
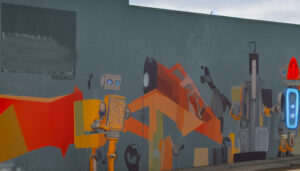
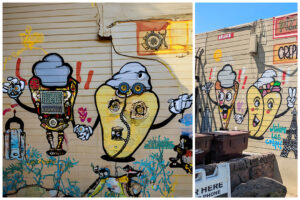
I took this photo of a nearby gallery and asked an AI (probably Stable Diffusion? I forget) to generate a dystopian robot-filled version of it. (I used a lot of AI tools to make a game about AI taking over the world! Irony!)
AI generated dystopian robot-filled version of the mural on the outside of a local gallery.
They located the card and found the next clue:
Stephen generated the image for this card with DALL-E.
Inside, the text of the card reads “If we work together we can defeat the AI.” Within the folds of the card I tucked this photo, which I made with Adobe Firefly:
(Left) AI generated dystopian version of local pizza shop mural. (Right) Original Mural.
After following a few more clues including an elaborate geocache puzzle, the players found a PO Box Key (learn more about these clues and some of the important lessons learned on Medium). Inside the mailbox was an acrylic box I custom built at Ace Makerspace.
The mailbox contained an acrylic box which I custom built at Ace Makerspace in Berkeley.
There were several layers of deception here. The box says it’s filled with candy. But the “candy” looks like a weapon (sticks of dynamite). But the “dynamite” is actually a toy (a kazoo). But the kazoo is actually a weapon (in the context of the game).
THE KAZOO WAS THE ULTIMATE WEAPON AGAINST THE CYBORGS — THE SOUND PERMANENTLY DISRUPTS CYBORG CIRCUITRY.
(If someone complains about the sound of a Kazoo, they likely are part Cyborg.)
Will playing the kazoo really stop the robots from taking over the world? Maybe! Couldn’t hurt!
Some people thought this puzzle was the big finale…but wait, there’s (a lot) more:
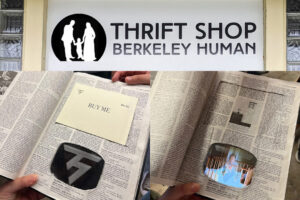
Eventually the players found their way to the Berkeley Human Thrift Shop (Actually the Berkely Humane Thrift Shop) to find the next clue. They knew it was a book, but which book?
(Top) Altered sign for “Thrift Shop Berkeley Human.” (Bottom Left) Book Safe with “Buy Me” card. (Bottom Right) book safe with Video Screen. The Acrylic for the screen was cut at Ace Makerspace.
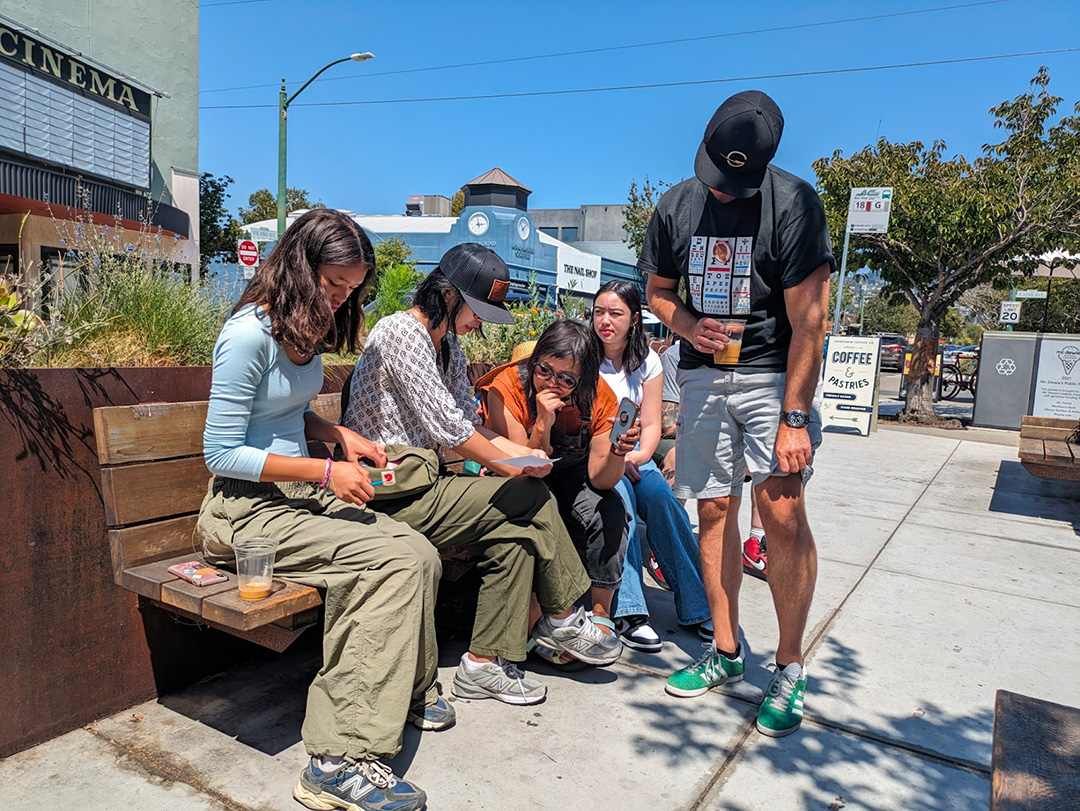
The players also came across this flyer/clue in the window of a local coffee shop.
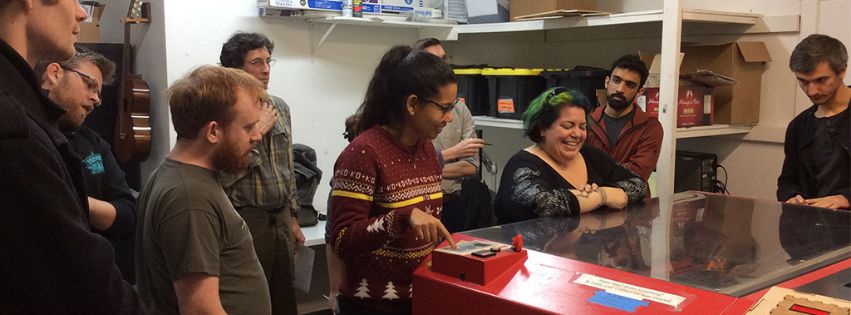
Kazoo Lessons clue hung in the window of a coffee shopThe players call the number on the “KAZOO LESSONS” poster to solve the clue.
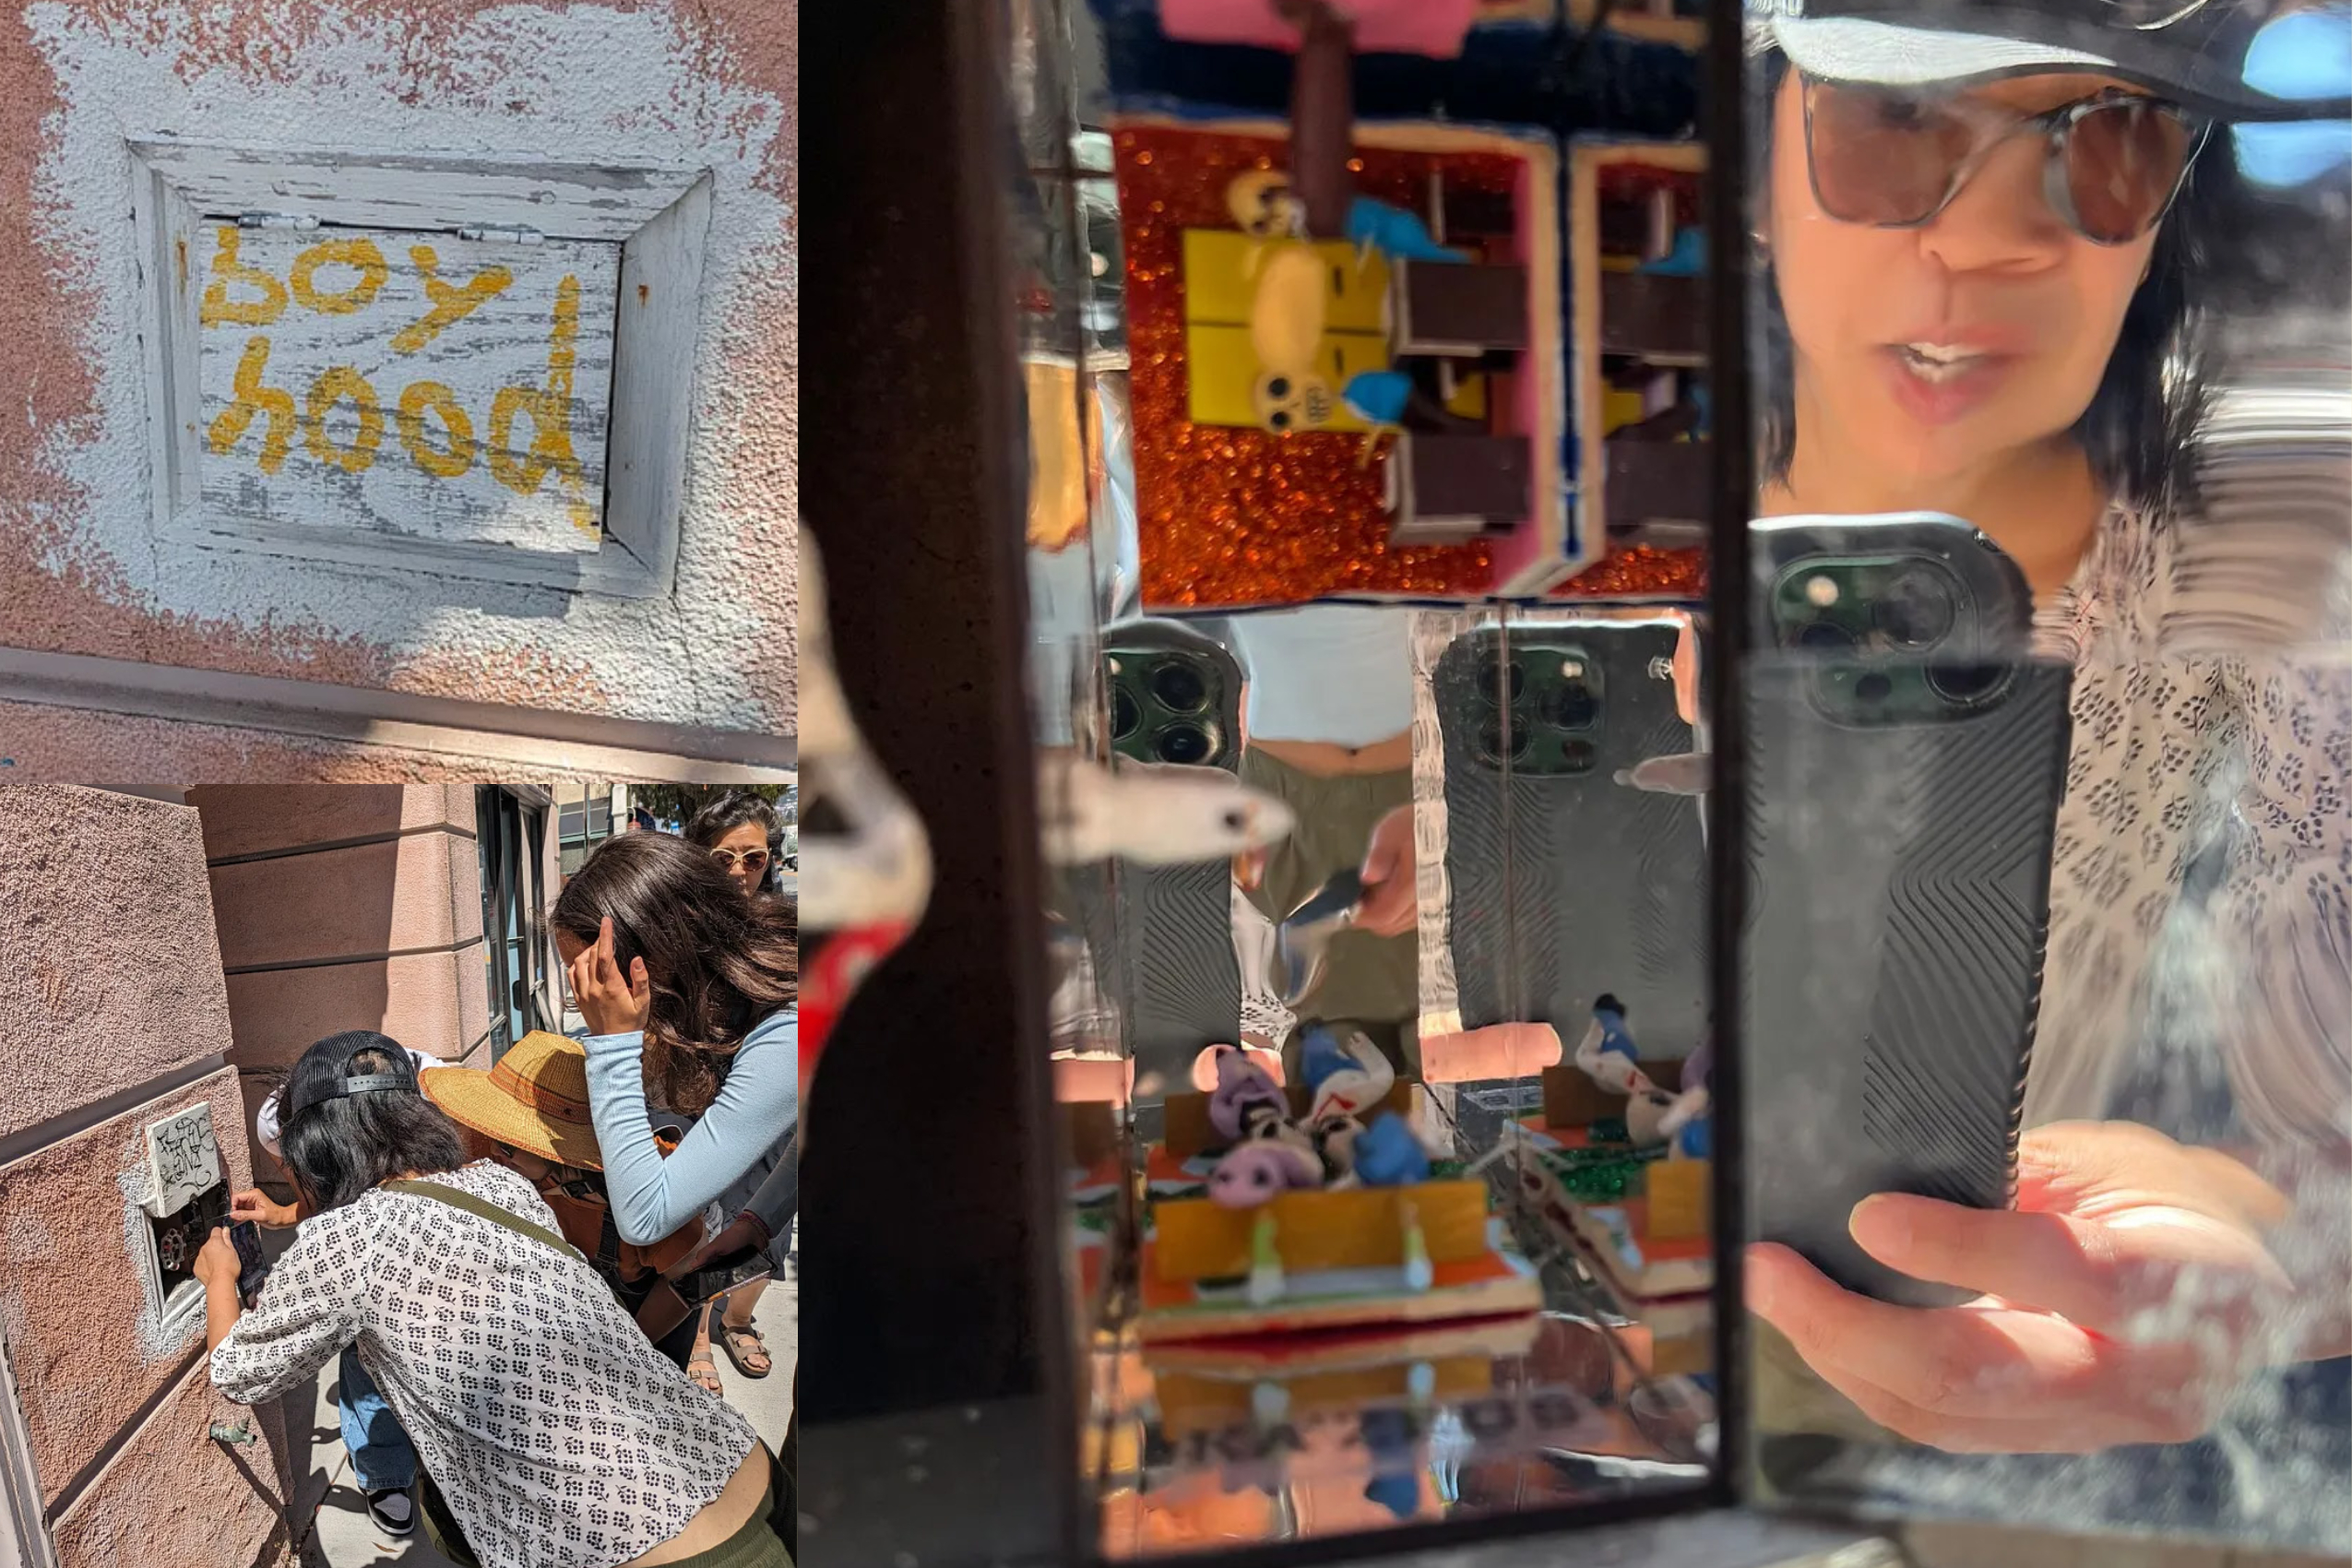
For the grand finale, I created a tiny Kusama mirror room in a wooden box I built at Ace Makerspace filled with some figurines I bought in Mexico, and tucked it in there:
(Top Left) Utility box with hidden clue, (Bottom Left) Players opening the box, (Right) The mini world mirror box.
The answer to the puzzle is on a sticker in the box.
YOU DID IT! CONGRATULATIONS, AND GOOD LUCK NEXT YEAR. YOU’LL NEED IT.
I wanted to end with a bang, but I also didn’t want my route to involve any backtracking, so it wasn’t possible to finish at the thrift store or the post office. I think this worked fine as a finale, people were very surprised to see this little world inside a semi-public space, and everyone took pictures of it.
Total playtime was about 90 minutes. I gave very few hints (mostly things like “don’t guess!”, and “keep walking”).
TAKEAWAYS:
Branding to indicate what items are in-game worked well; I should have applied it more consistently. You can always make the branding more subtle to make the puzzle harder.
Likewise, if you are vague about whether there are any NPCs in your game and how they would be identified, you need to be careful that your players don’t act inappropriately with innocent bystanders.
Edit edit edit! People want to do the least amount of reading possible to play your game; try to convey your story with as few words as possible
Hearing people say “Don’t give us any hints!” is a good sign — an indication they trust the puzzle and that the payoff will be worth the effort.
Playtest, even for a one-off! I did a walk-through of the game the night before with a friend, which uncovered many problems with both the technology and the narrative.
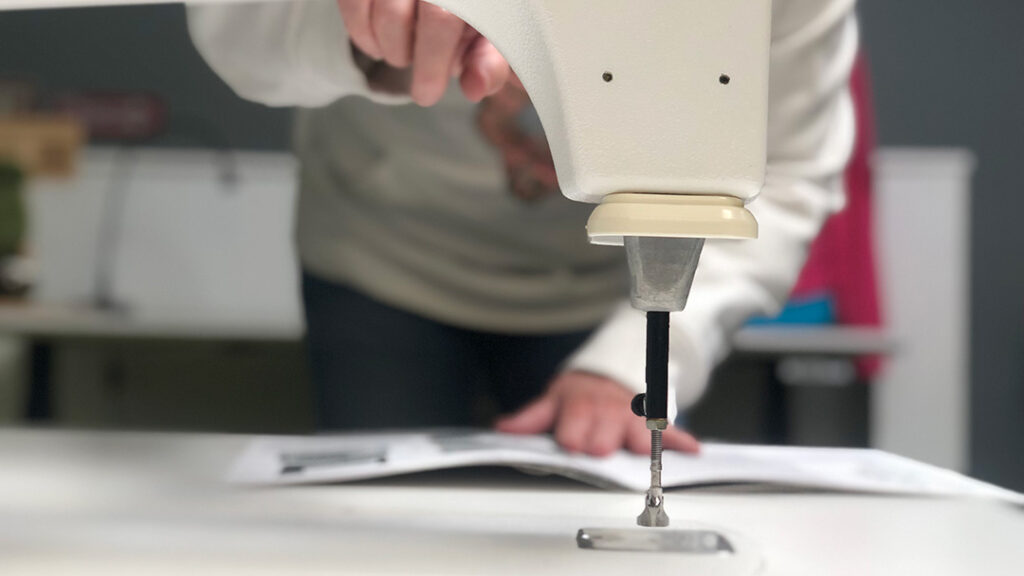
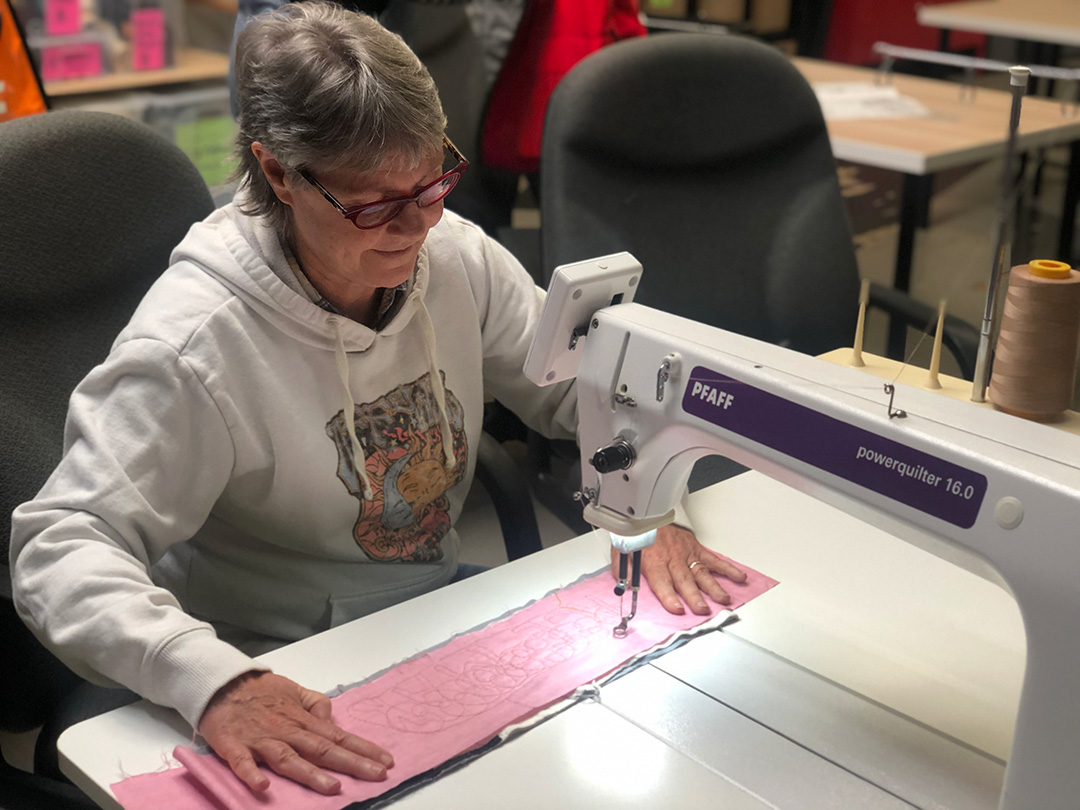
Ace Makerspace recently received a generous donation of a PFAFF Mid-Arm Free Motion Sewing Machine— unlike a standard sewing machine, the mid-arm doesn’t have a feed dog (a mechanism that controls the movement of the fabric underneath the needle) this allows the sewer to move the fabric in any direction to create intricate designs. Here’s a sneak peek at our first test drive and the process we go through when we introduce new tools into our programs.
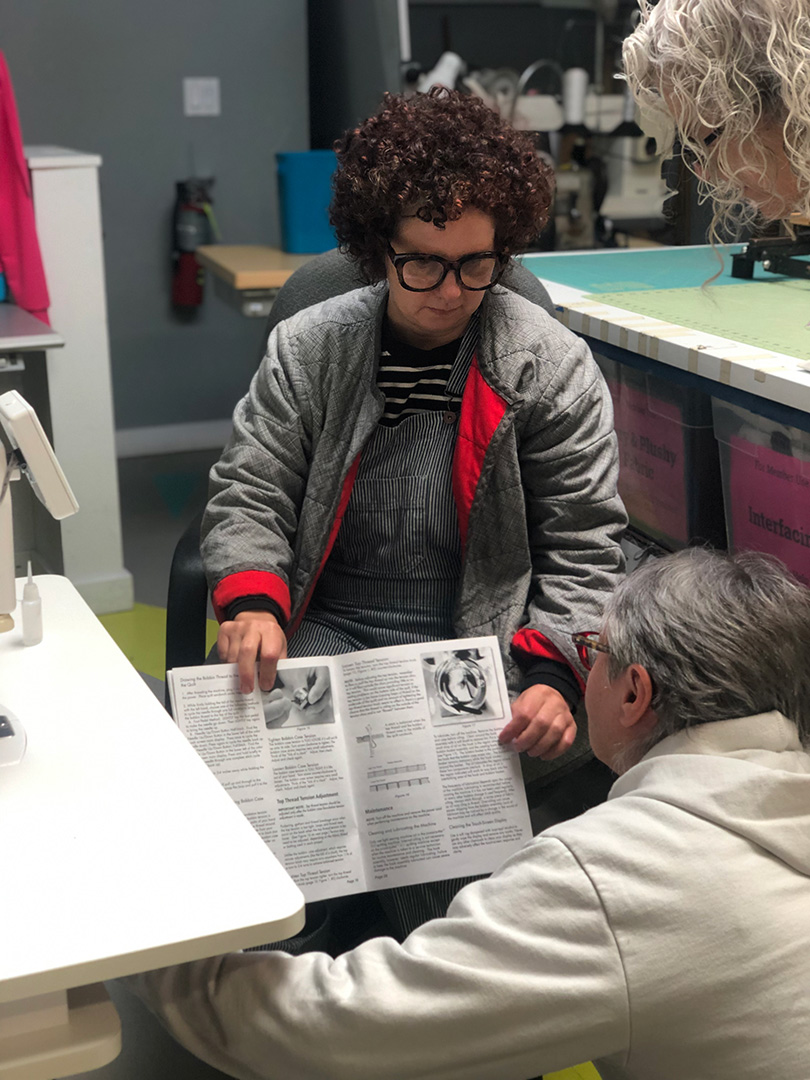
We always test new tools in teams and reading the manual together is always a good place to start.
When we bring new tools into any of our programs we have a process in place to ensure that the tool is in good working order and that Ace Makers of all skill levels and identities have equitable access to both the tool and to learning opportunities. This work is often coordinated and/or performed by Stewardship Teams— Ace Community Members who volunteer to help lead their favorite Ace Programs— and involves testing the tool both for function and to determine what kind of training, user guides and resources need to be developed before it’s made available to the rest of the community. For this project, Textiles Stewardship Team Member, Liat (you may also know her from Hello Stitch) called in a couple of friends to help out.
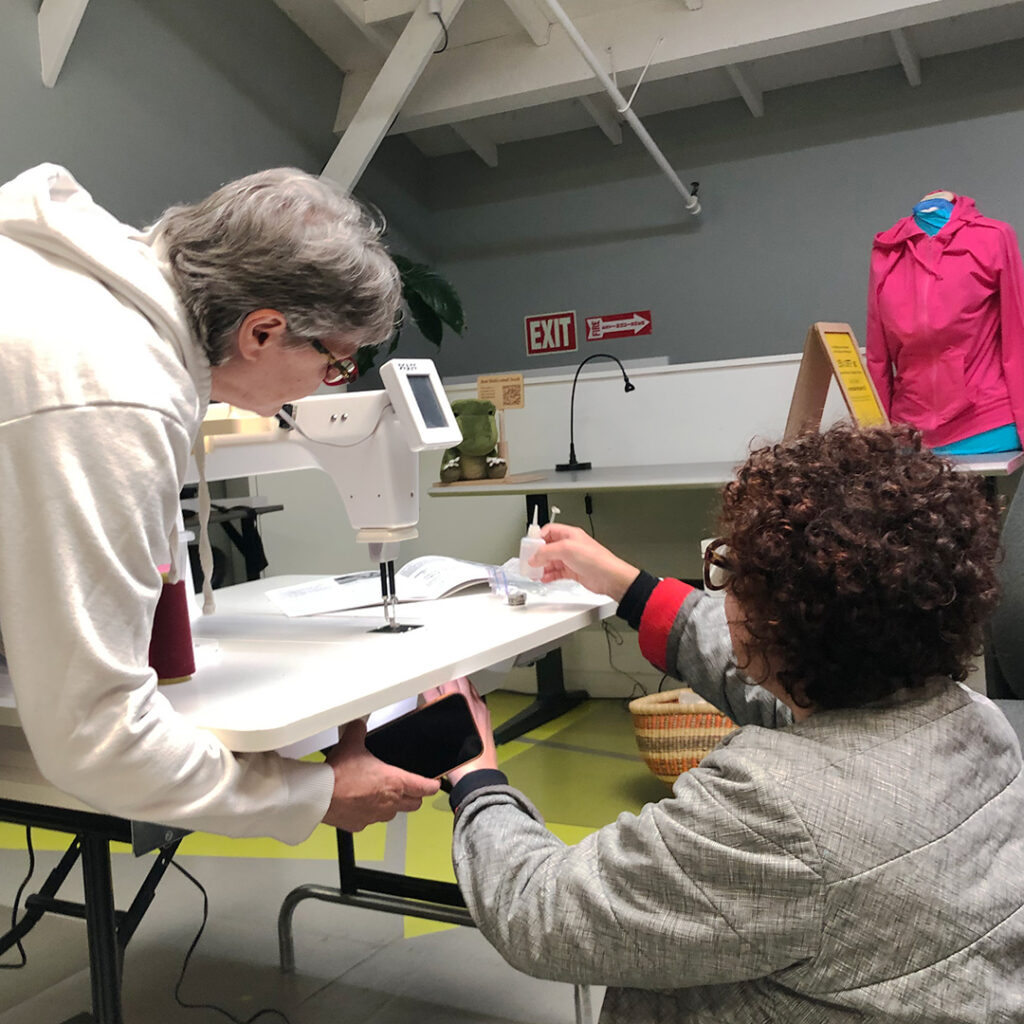
After reading the manual they turned it on the machine to see if it worked. The sound it made was a little bit louder than they expected which can be a sign that it needs a little oiling. Since it this was a new machine for them, they debated the topic for the minute and decided to go for it.
Oiling the Mid-Arm.
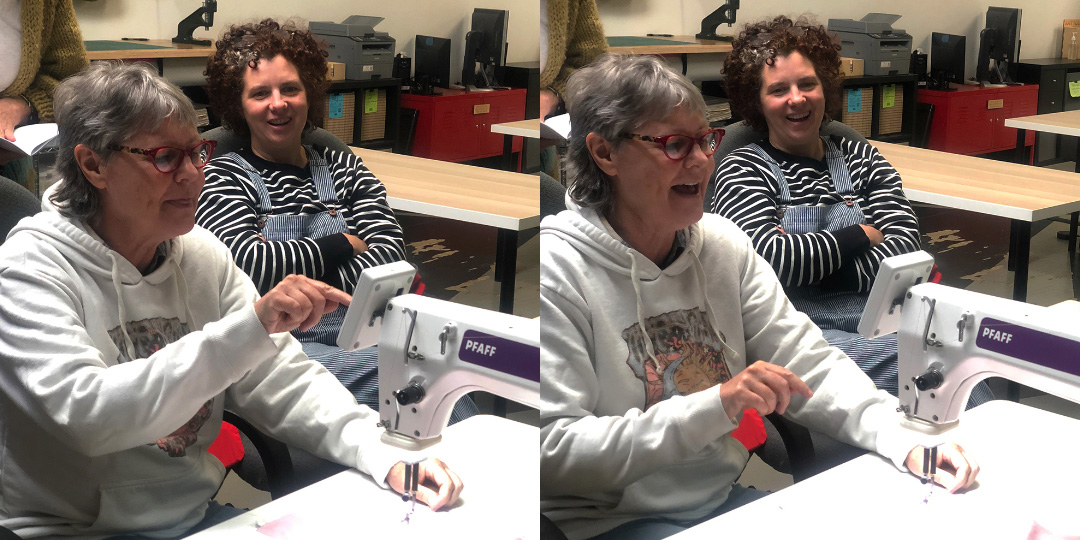
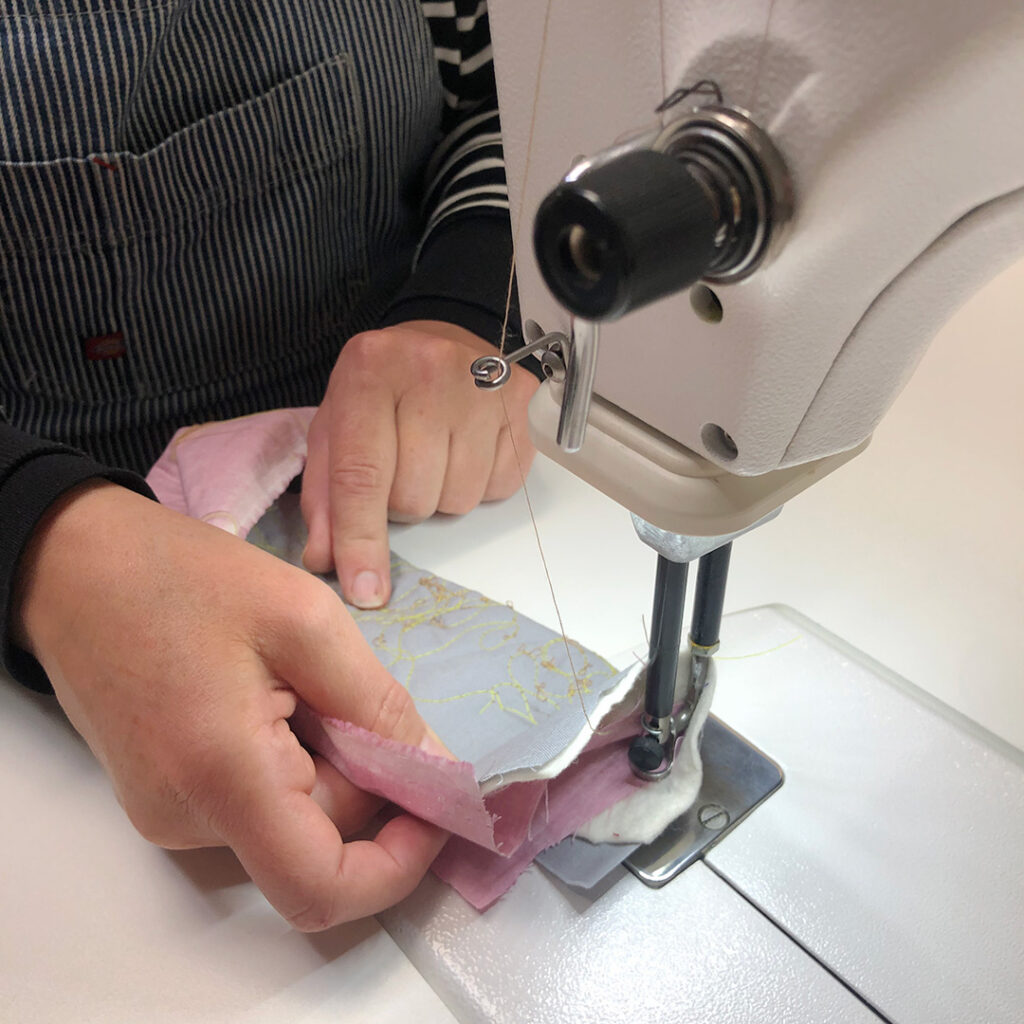
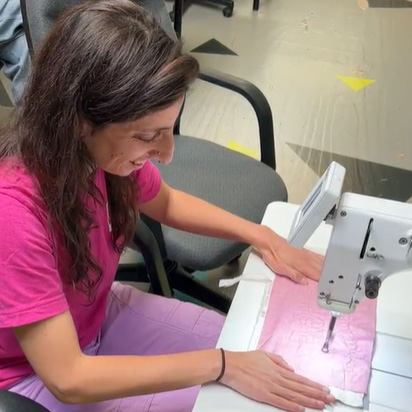
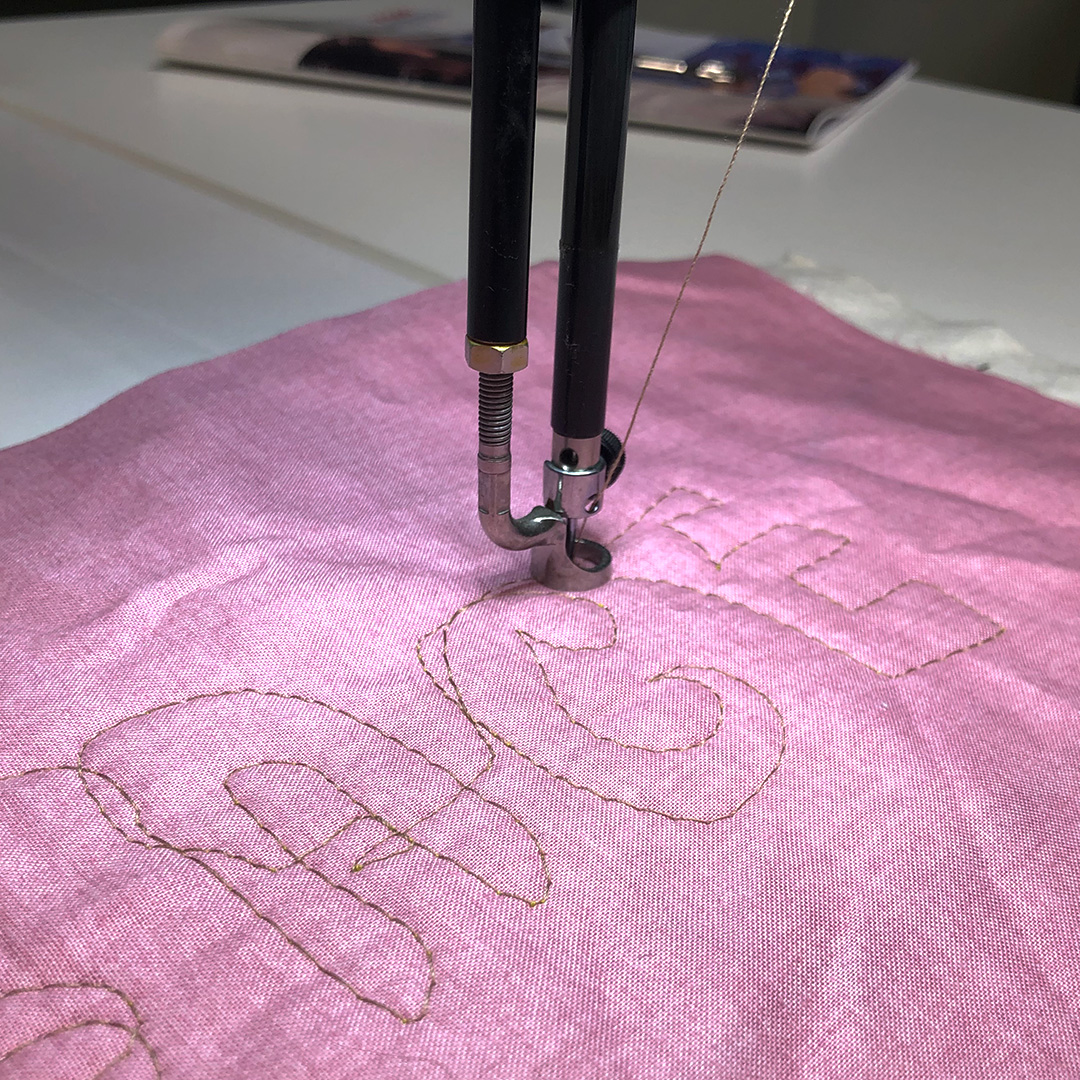
Finally, it was time to thread the machine and try some free-motion sewing! (Liat made an extra tasty “quilt sandwich”— a quilt top, batting, and quilt bottom layered together—for practicing on).
Does it work? It does!Playing with the midarm and pondering what a certification class might look like.Taking a look at the thread tension. It needs a slight adjustment. “This may be something to consider teaching in a certification class.”Ace Communications Associate, Jacky gets in on the fun!Successful test drive!
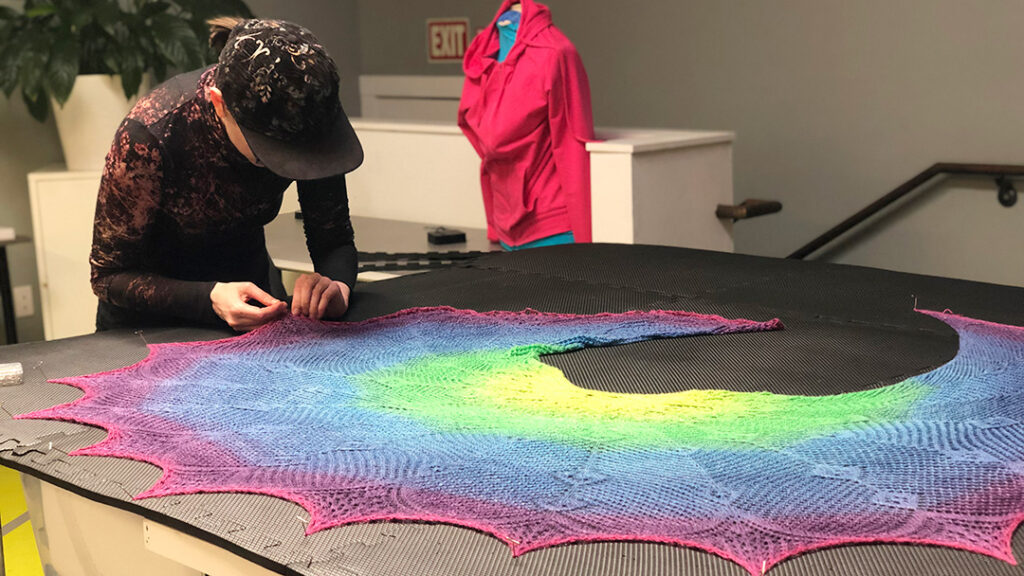
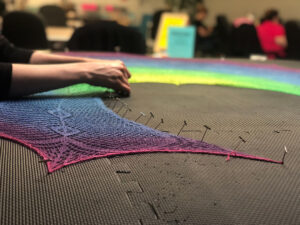
It all started when Pixie’s college friend asked her to knit him a glamourous rainbow shawl for his wedding! They selected a pattern to serve as a starting point, planned the color story, did a little math to figure out how much yarn it would take, and found a dyer (Pook Yarns) to create a custom gradient. Then it was time to start knitting.
On 11/19/22 she officially cast on–a technique for creating the first row of stitches on the needle…
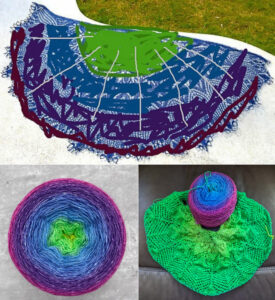
Top: Preliminary sketch of the color scheme. Pixie told her friend “you can be as much of a bridezilla as you want” and received a lengthy list of hex codes in return (html color codes). Bottom left: apx.1000 meters of hand-dyed yarn from Pook Yarns. Image from Pook Yarns. Bottom Right: Pixie improvised a little as she knit to extend the pattern.
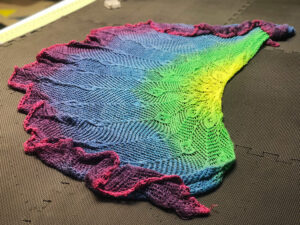
…6 months later she finished the last stitch and the shawl was ready for blocking!
See that curly edge? Once it’s blocked it will look totally different.
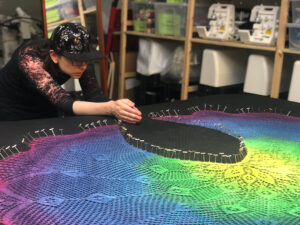
Blocking describes a finishing process used by knitters and crocheters to even out their stitches and set the shape and size for their pieces. It involves wetting the fabric, stretching it until it’s just right, and allowing it to set as it dries.
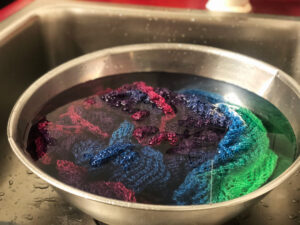
Pixie soaked the shawl and carefully wrung out the water before the next step. Tip: Use lukewarm water for blocking.Pixie used a foam mat and T-pins to hold the shawl in place. Tip: Insert pins at a slight angle for stability.
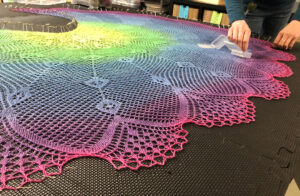
Since Pixie improvised a little to extend the pattern as she knit, she wasn’t entirely sure what the final shape would look like. Though she started pinning the outer edge into sharp points, she decided to re-pin it with a scalloped edge to better showcase the lace details. She also wasn’t sure what shape the neckline would take and re-pinned it several times to get it just right.
Pixie checks to make sure the shawl is stretched evenly. Each minor adjustment means removing and re-inserting pins until it’s just right. Tip: Allow extra ease when you cast off–technique for finishing the last row–so that the yarn doesn’t snap as you block.
Stretching is an art. You have to fiddle with it to see what happens -Pixie
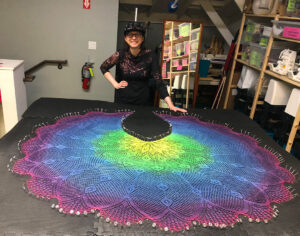
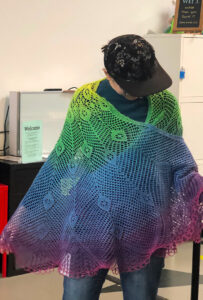
Pixie posing with her blocked shawl after almost 2 hours of pinning, tweaking the shape, and carefully stretching the delicate lace.
Once she finished blocking she allowed it to dry overnight and then removed the pins.
The moment of truth! Check out that scalloped edge!Pixie tries on her finished piece!