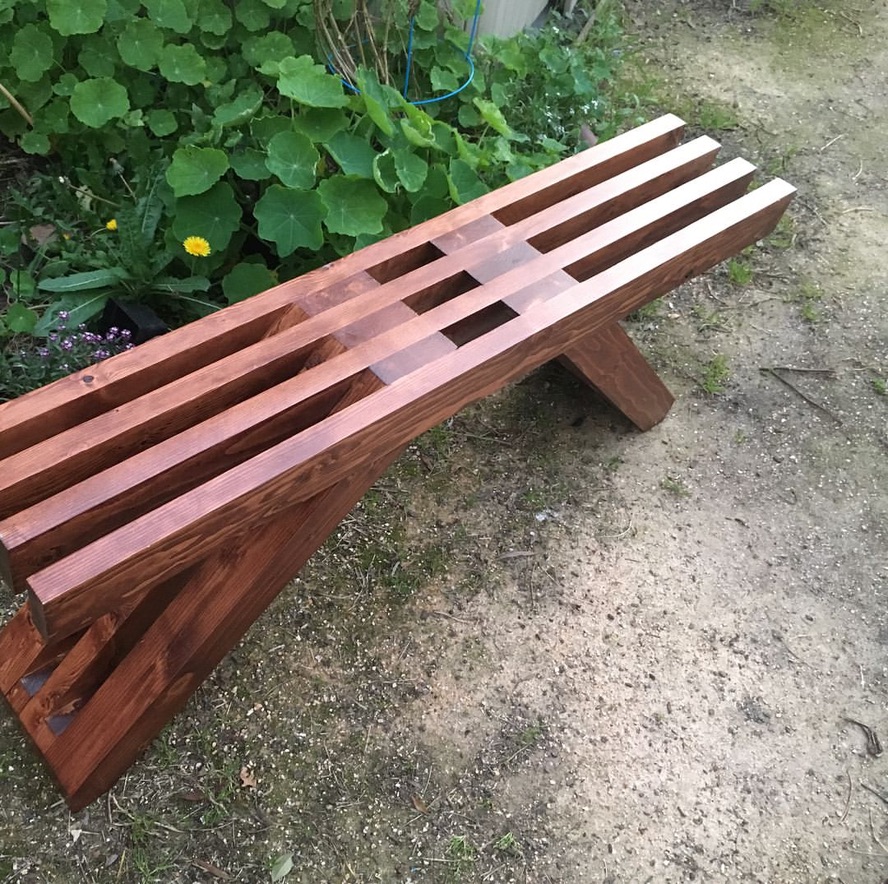
The Ace Workshop is a community lead, driven, and maintained resource. As makers who share space, we all have a role to play beyond simply working on our projects and cleaning up after ourselves, we also work together to maintain and care for our tools. While routine tool repair and maintenance may not be the most glamorous part of woodworking, it’s essential for keeping the tools we love to use in good working order, safe, and ready for use.
In the past, tool maintenance often fell by default on a small group of expert users which lead to volunteer burnout, longer tool down times, and a pervasive bystander culture in the shop. To make this process more inviting and sustainable we realized we needed a way to:
Build a more intentional woodworking tool maintenance culture
Decrease barriers for folks interested in helping out who didn’t know where to start or who were experiencing the imposter phenomenon
Create an inviting pathway for community members of all skill levels to get involved
Make routine workshop care tasks in general more approachable, fun, and beginner-accessible
…and so Workshop Care Night was born;a new beginner-friendly social evening all about working together to care for our tools, make repairs, and practice concepts covered in our Shop Basics class like logging assets and finding information on the wiki.
Why it works:
Maintenance and tool care is wayyyy more fun together!
It’s a great way for new folks to meet people in the woodworking community
Its a beginner-accessible way to get started with tool repair (no fix-it experience needed to help out, there’s tasks for all skill levels)
Tools last longer and work better with regularly scheduled TLC
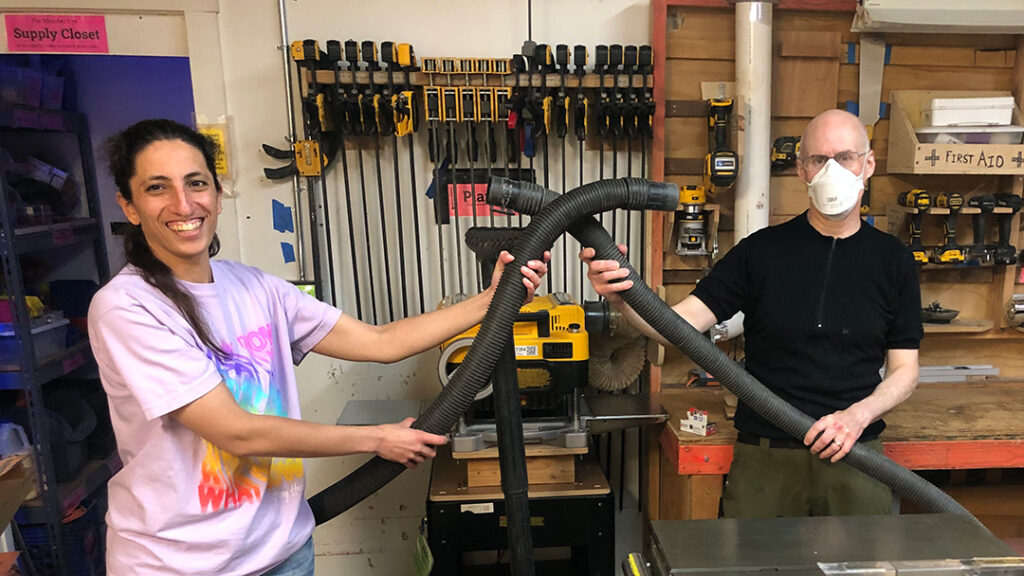
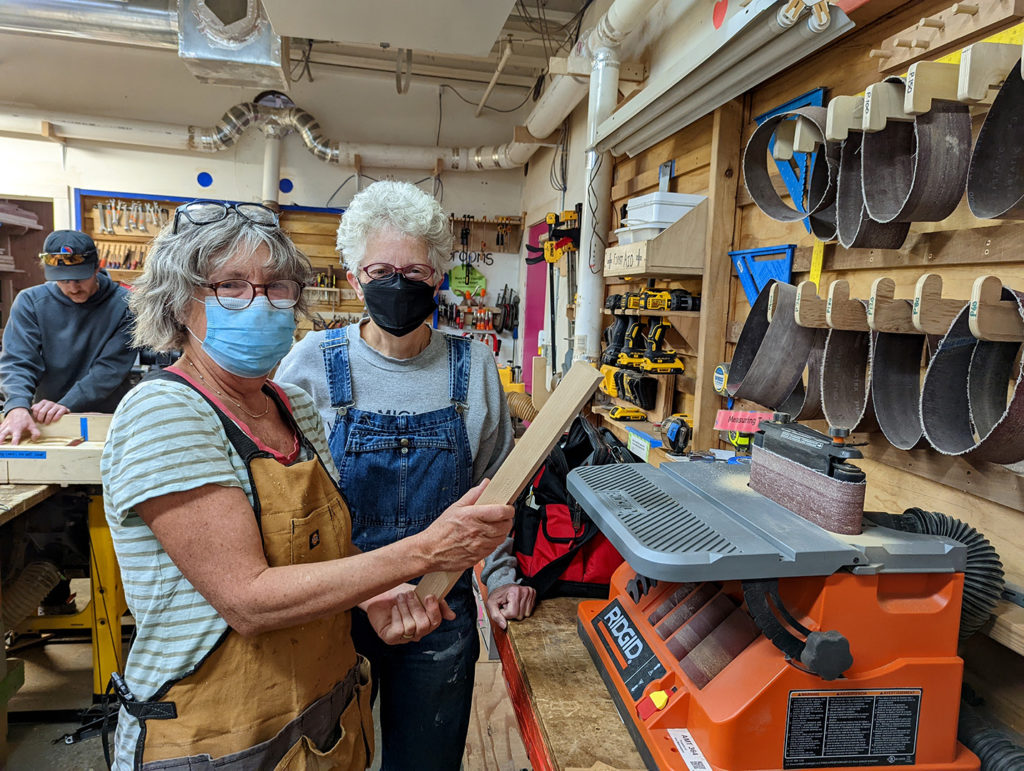
Highlights from Workshop Care Night in April
Team Shop keeps a running list of maintenance tasks for workshop care night. Each event is different, one month the group may align the Table Saw blade, repair a vacuum duct and re-home new tools; the next the group may wax the tool tabletops and replace the cyclone filter.
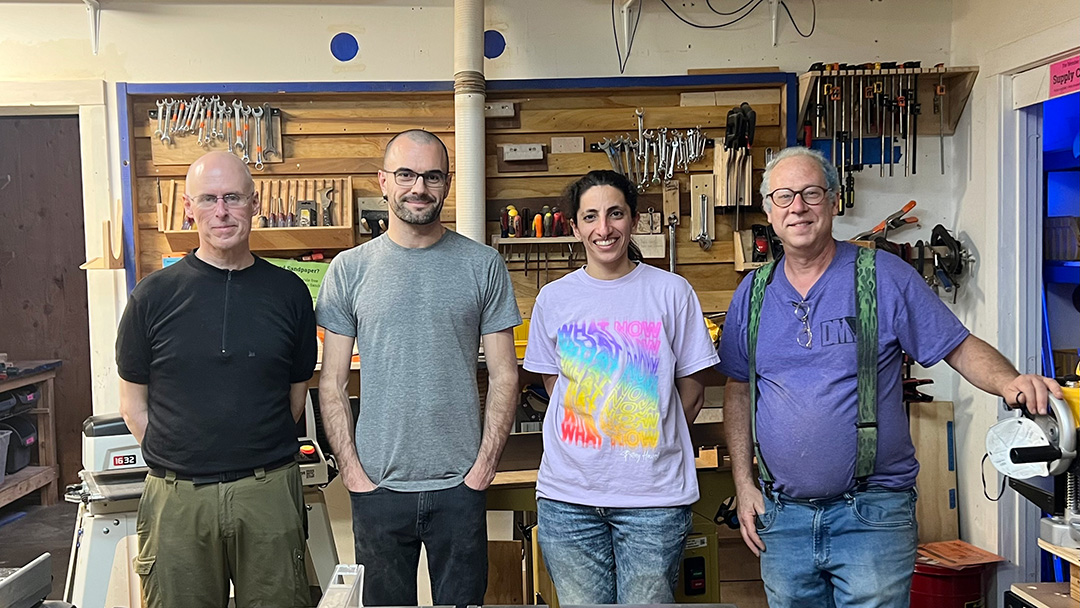
In April, a group of 5 volunteers rolled up their sleeves to tackle a list of maintenance tasks while getting to know one-another and jamming to Groove Salad! This group included folks with a mix of skill sets and experiences levels ranging from woodworking beginners to career professionals.
Here’s a look at just some of what they accomplished over the course of two hours working together:
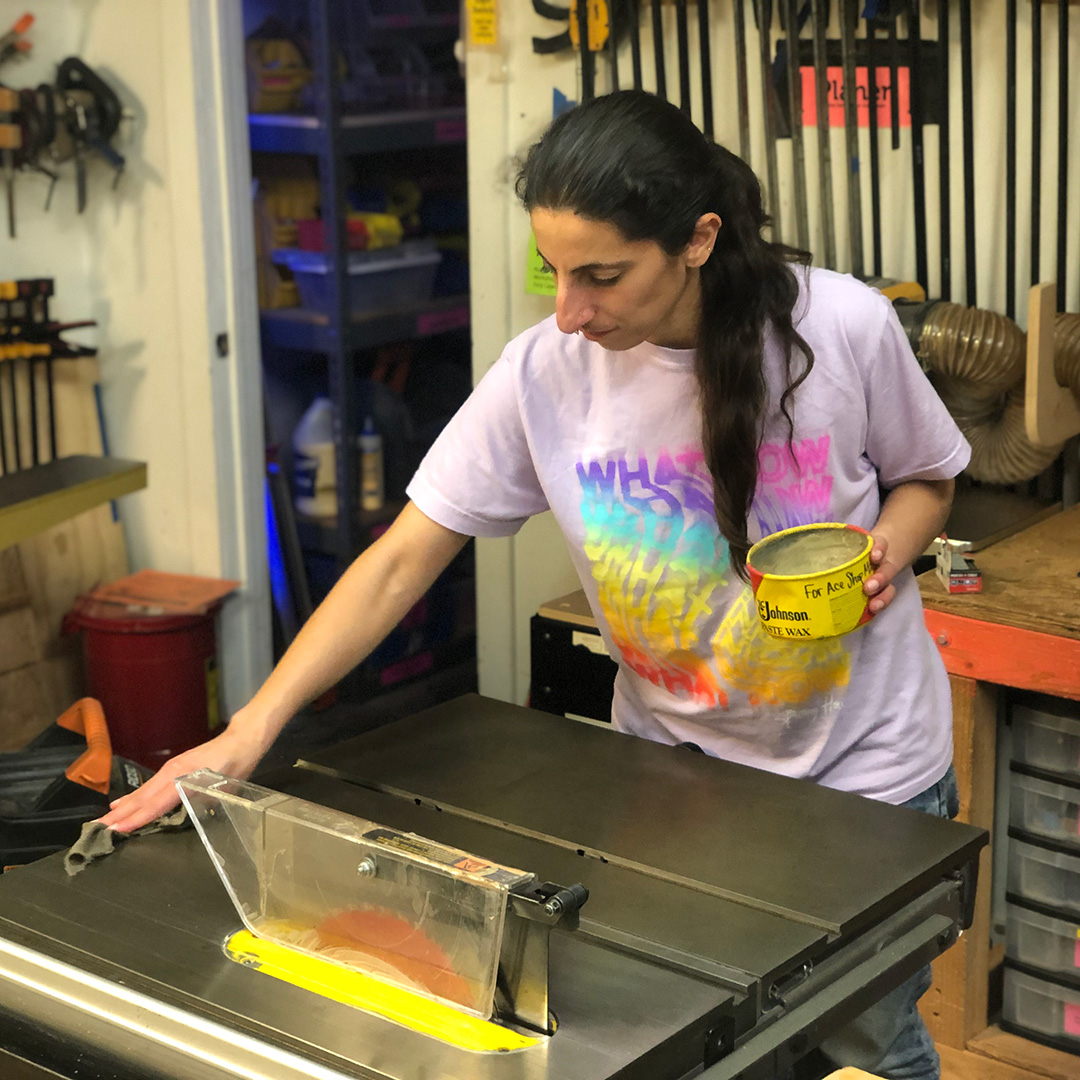
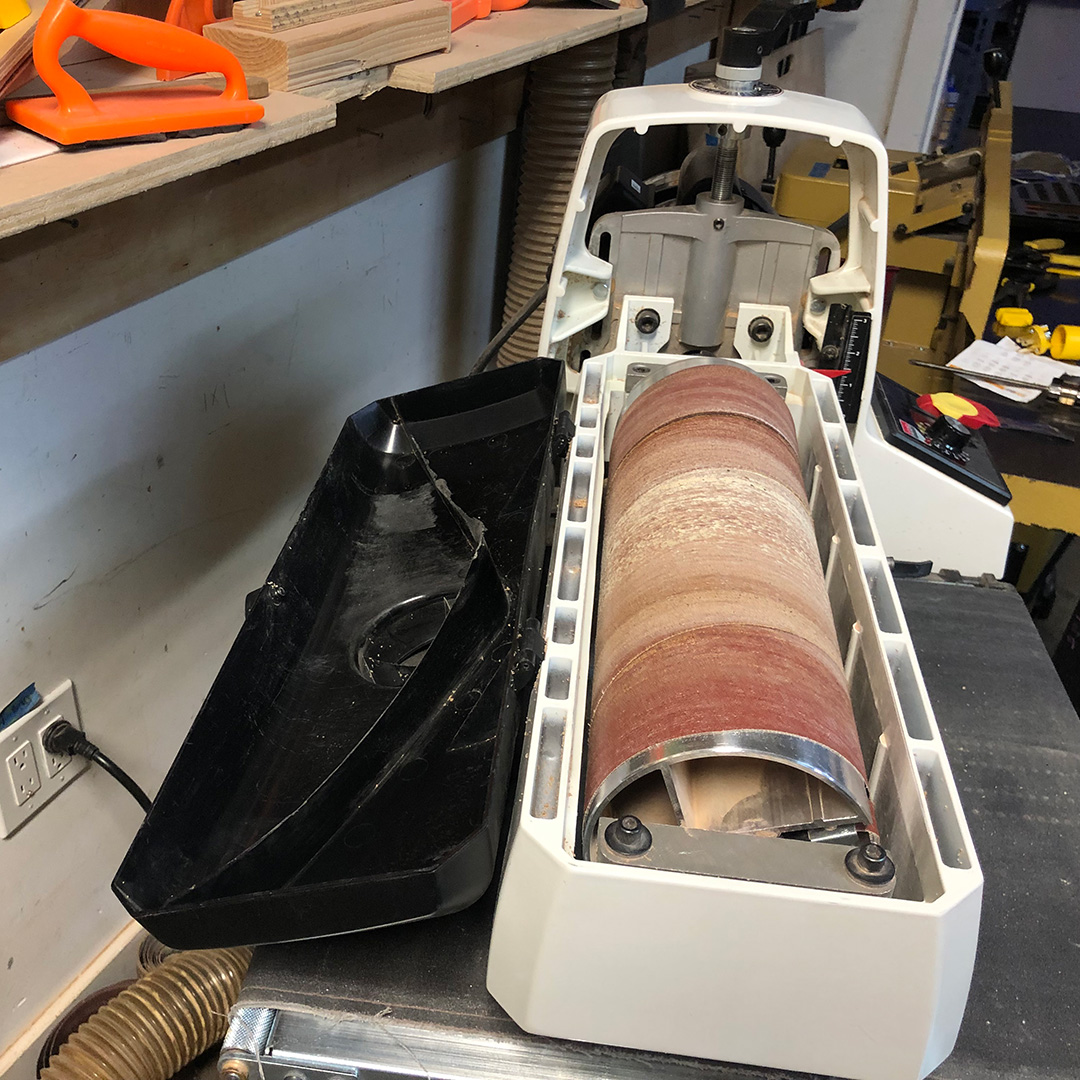
New Member, Greg (he/him/il/le/lui)’s first stop after signing up was rolling up his sleeves and using his electronics know-how to replace the ground pin for the plug for the Ace Jointer at Workshop Care Night.There are meaningful tasks for every skill level. Jacky (they/them), Ace’s Education Manager doesn’t have a lot of experience in workshop care or woodworking, but rolled up their sleeves to deep vacuum machines and wax the steel table tops.Drum Sander before vacuuming.
Tools that get heavy use in the Ace Shop like the Drum Sander, Jointer, Planer, Table Saw and Bandsaw need regular deep vacuuming to get particles deep inside the machine. Removing saw dust from harder to clean areas can lengthen a tools lifespan and helps prevent tool down time.
Team Shop* volunteer and experienced woodworker, Alex (he/him) showed Jacky how to open the top of the Drum Sander since they were unfamiliar with the tool. This kind of peer support and knowledge sharing is deeply embedded in Ace culture along with the belief that everyone has something to contribute of value to the community regardless of skill level.
Drum Sander after deep vacuuming.
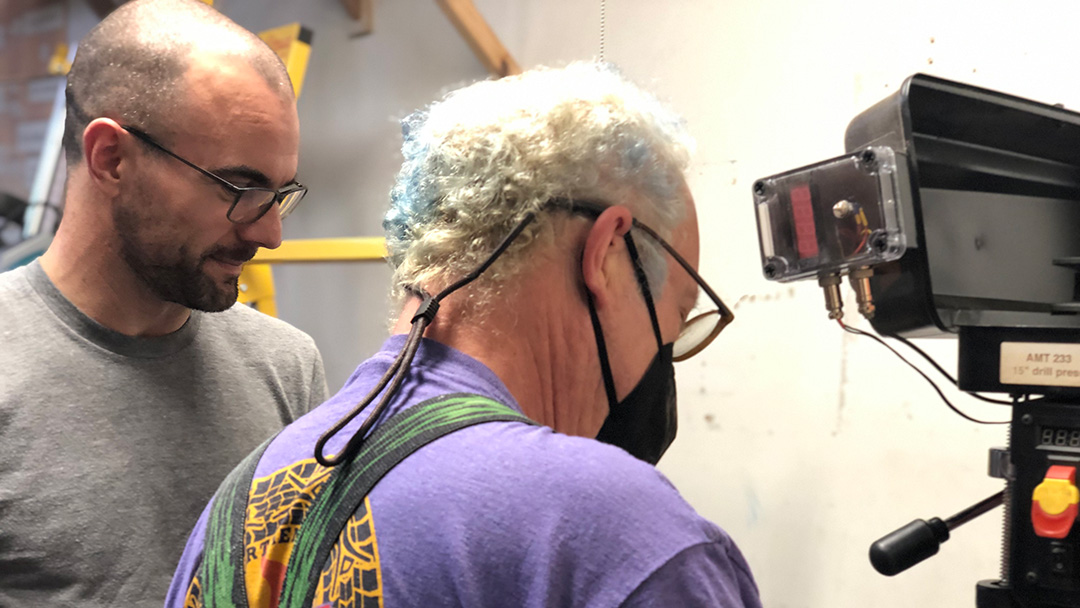
It’s not about perfection, it’s about getting it to 90% – Howard
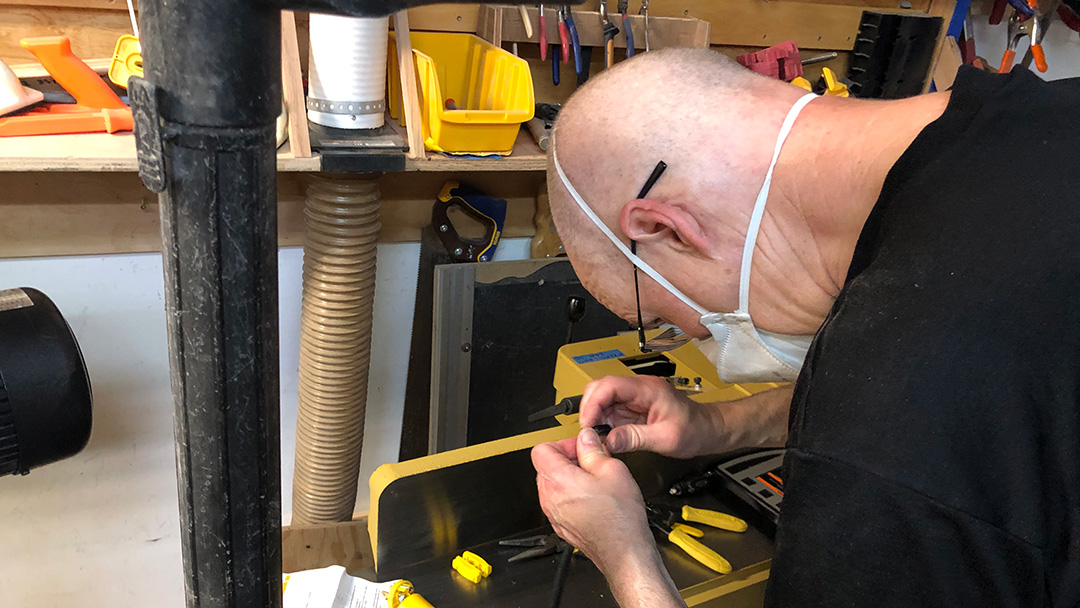
Alex worked on replacing the quill return spring on the Drill Press – the return spring helps the spindle holding the drill bit return to the start position. During the replacement, he called Howard over to assist and verify the repair. At Ace we use the buddy system for repairs to ensure fixes are safe, effective, and verified.By the end of the night, volunteers were a little dusty but feeling good.
*Teams at Ace are groups of volunteers who organize projects, take care of tools, and drive decision making for programs they love. Teams are open to all members and are a fun way to get involved in the Ace Community.
This summer, I had the opportunity to design and build one of the stages for a small annual festival. I’d just returned from a 3-week bike tour through Portugal and Southern Spain, where I’d seen an abundance of amazing historical buildings, from cathedrals to ancient fortresses.
Inspired by the amazingly elaborate details and layers of cultural influence in the architecture I’d seen, I wanted to create an intricate laser-cut plywood design that incorporated LED strips for nighttime stage lighting, but that still looked visually interesting during the daytime performances. It also had to be built ahead of time and easily assembled on-site.
Architectural detail on the Catedral de Sevilla; one of my main reference photos for design elements to use in the stage design.
I originally planned to use Rhino with Grasshopper for creating the design. Grasshopper provides a node-based way of scripting parametric models, and I’ve seen people make some incredible computational designs using it in combination with Rhino. Although I’d really like to learn how to use these programs, and they would have been a good fit for this project, due to time constraints, I stuck to the skills I already have from my background as a mechanical engineer. This meant using OnShape, an online Computer Aided Design (CAD) modeling program like SolidWorks or Autodesk Inventor.
To those unfamiliar with CAD tools that use parametric modeling, it works a bit differently than tools like Illustrator or Paint where you create the design directly. With parametric modeling, you define a series of geometric constraints, dimensions and formulas that define the shapes you’re trying to create.
Parametric models work a little bit like complex equations or a software code, in that it takes time to set them up, but once you do you can go back and adjust the inputs to get near-instant updates without having to recreate or manually tweak the design.
With parametric modeling, as when writing software, it’s good to follow the principle of, “DRY – Don’t Repeat Yourself.”
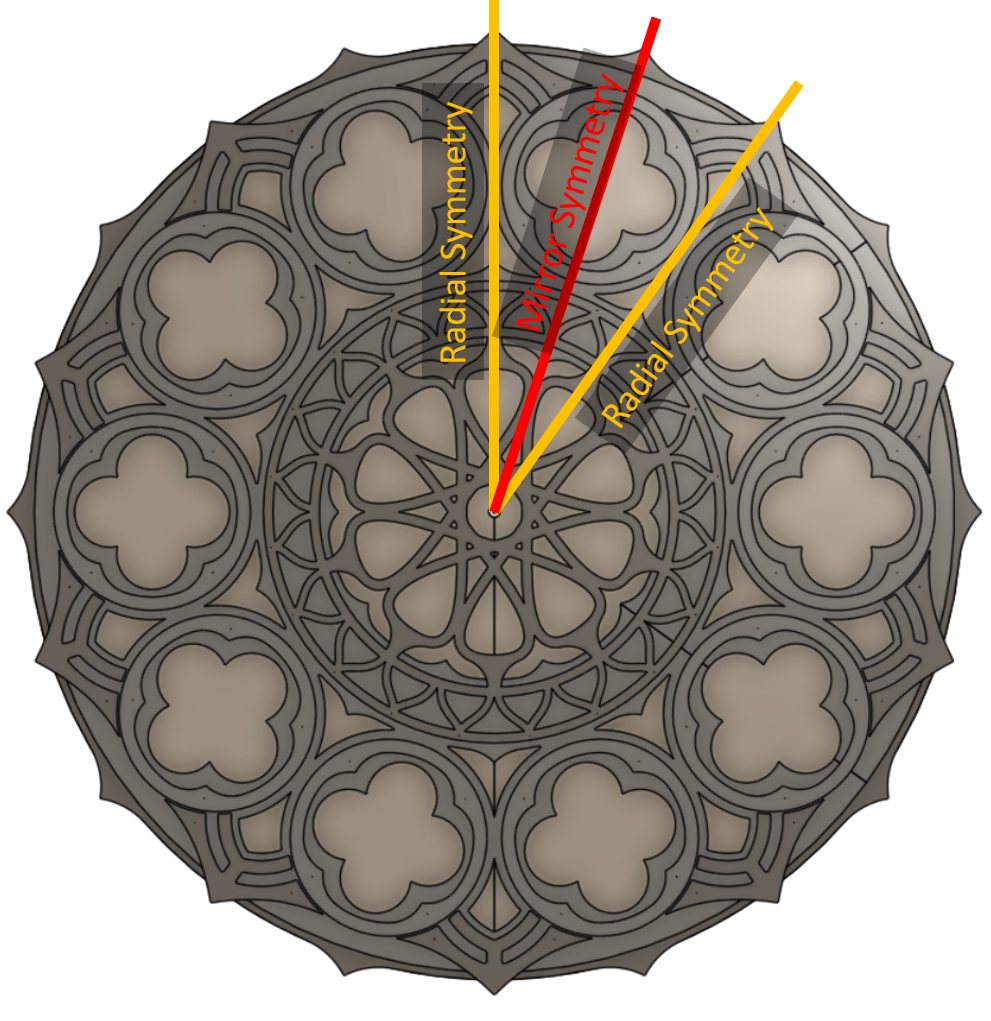
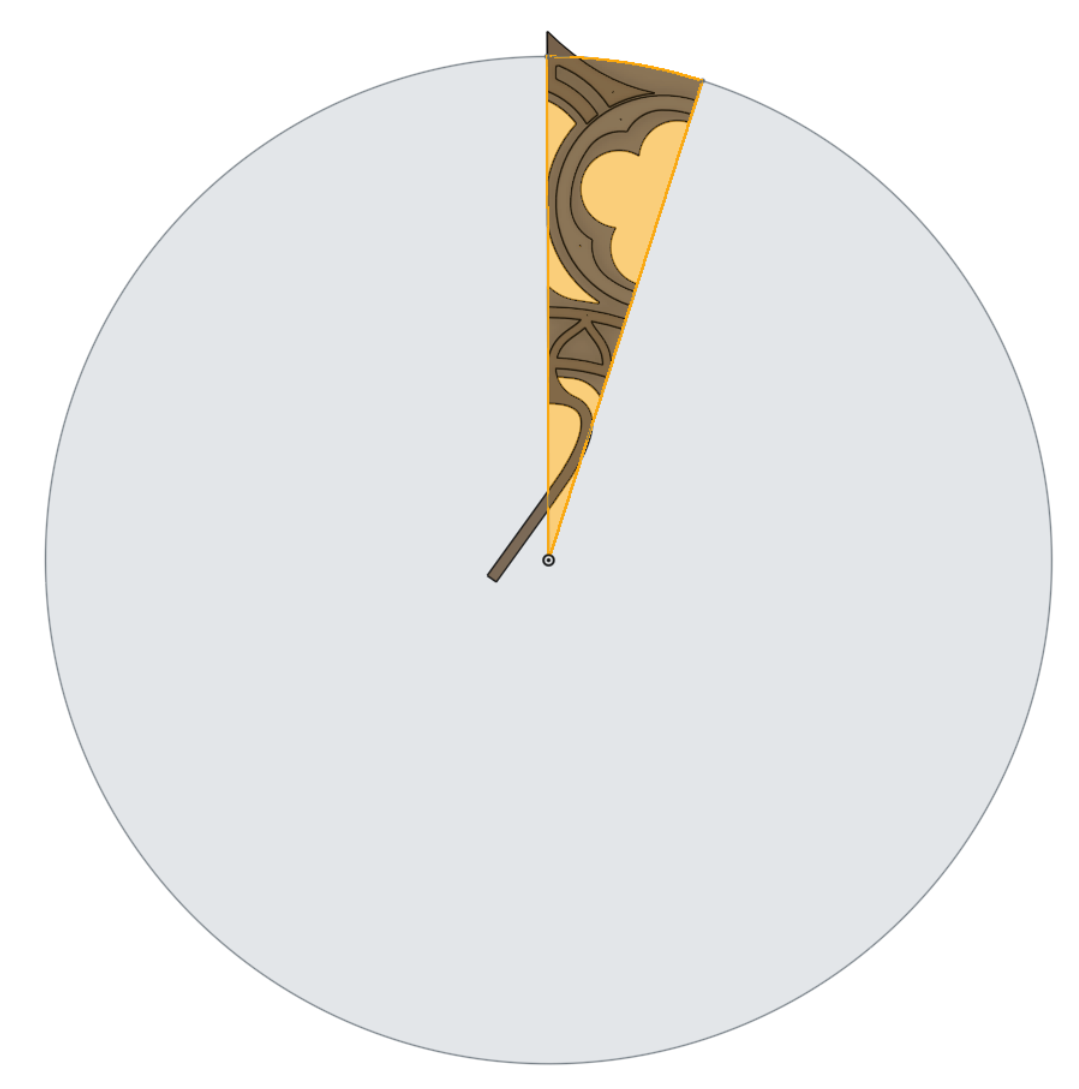
For the rose window element design, the first step was to look for any symmetries. In this case, it meant identifying the smallest “unit cell” that could be replicated to create the full design through mirroring, copying and patterning it. Fortunately every CAD tool has built-in commands to mirror and to rotationally pattern a part. These built-in commands make it easy to create the full piece from a smaller, simpler “unit cell,” while being able to update the original and see how it would look when patterned.
Radial and symmetry axes of the rose window design.Rose window unit cell.
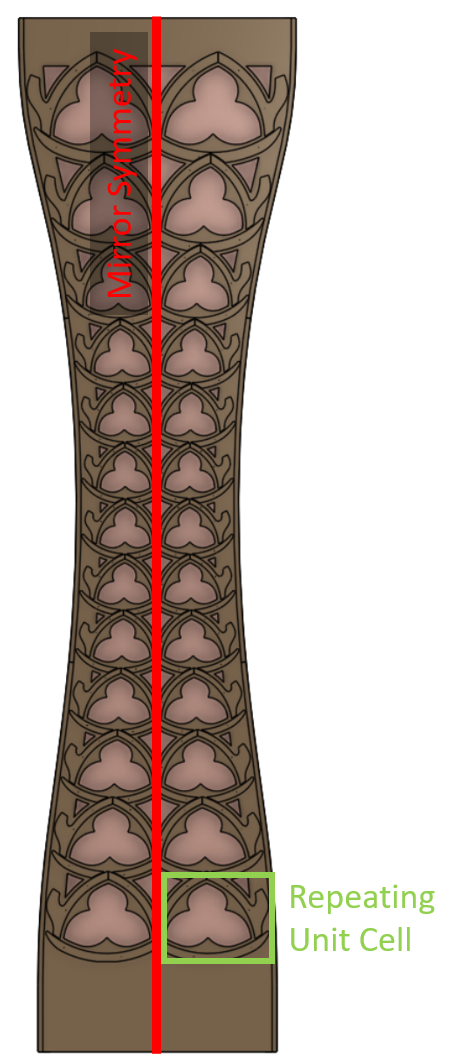
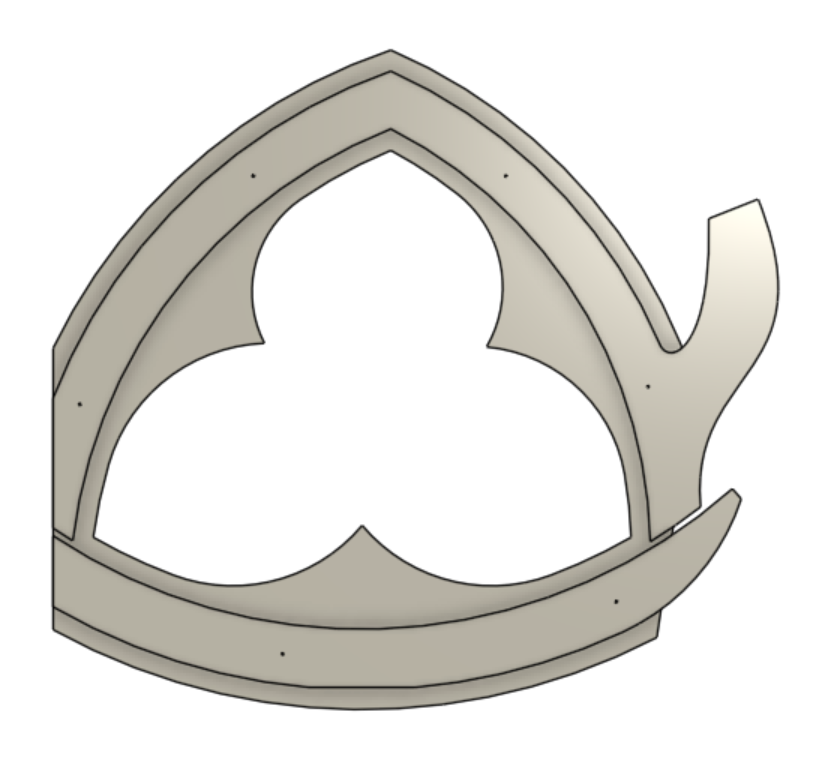
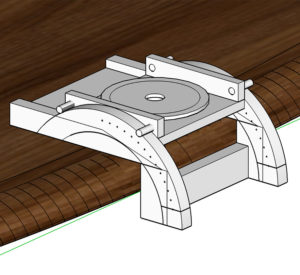
Creating a model for the pillars was more difficult. I wanted to be able to pattern a design along a gentle curve while having it adapt to the width between the curve and the centerline. There’s no built-in CAD command to pattern a part while changing the inputs that define the part (well, there is kind of but not in a way I was able to make work for this design). Instead, I set up a part for the pillar unit cell with different “configurations” where each configuration had the height and width of the bounding shape matching those measured along the curve. This was still a somewhat manual process because, if I changed the shape of the curve, I had to update the width and height of each part configuration to get it to match. That being said, with the curve fixed, I was able to change a single design and have all the instances of the unit cell update—my desired result. It’s worth noting that OnShape actually has its own scripting language, FeatureScript, which I could have used to write a custom command for the result I had hoped to achieve, but didn’t have the time. I plan to explore this approach more in the future.
Identifying symmetry and unit cell pattern in the pillar design.Configurable “unit cell” for the pillar.
All this modeling was to make the files required for the laser cutter, which reads 2D line drawings.
Someone who is proficient at a vector art tool like Illustrator likely could have created the same final design in 1/10th the time it took me to set up this complicated parametric CAD model. That being said, I had fun modeling it this way and I got more familiar with OnShape along the journey!
Once I was happy with the design (by which I mean out of time to continue tweaking it), I exported everything and headed to the laser cutter.
Laser cutting mostly went smoothly, although it took two passes to get all the way through the 1/4″ birch plywood. The main issue for the bigger parts was just getting the plywood to lay flat enough to keep the laser in-focus. I used every magnet in the drawer and could have used even more!
I hit a snag with the high-quality “Exterior Grade” Baltic Birch Plywood I had originally purchased for the project from MacBeath Hardwood. Whatever the manufacturer treated it with to make it exterior grade, prevented the laser from cutting past the first glue layer. After having made this expensive error, I bought the cheaper 4×8′ regular “White Birch” sheets from MacBeath, which they helped me rip into thirds that fit nicely into both the laser-cutter work area and the back of my car. The total cut time was approximately 200 minutes, spread out across several long, late-night sessions. It took far more time to layout and fixture the cuts than actual active cutting time.
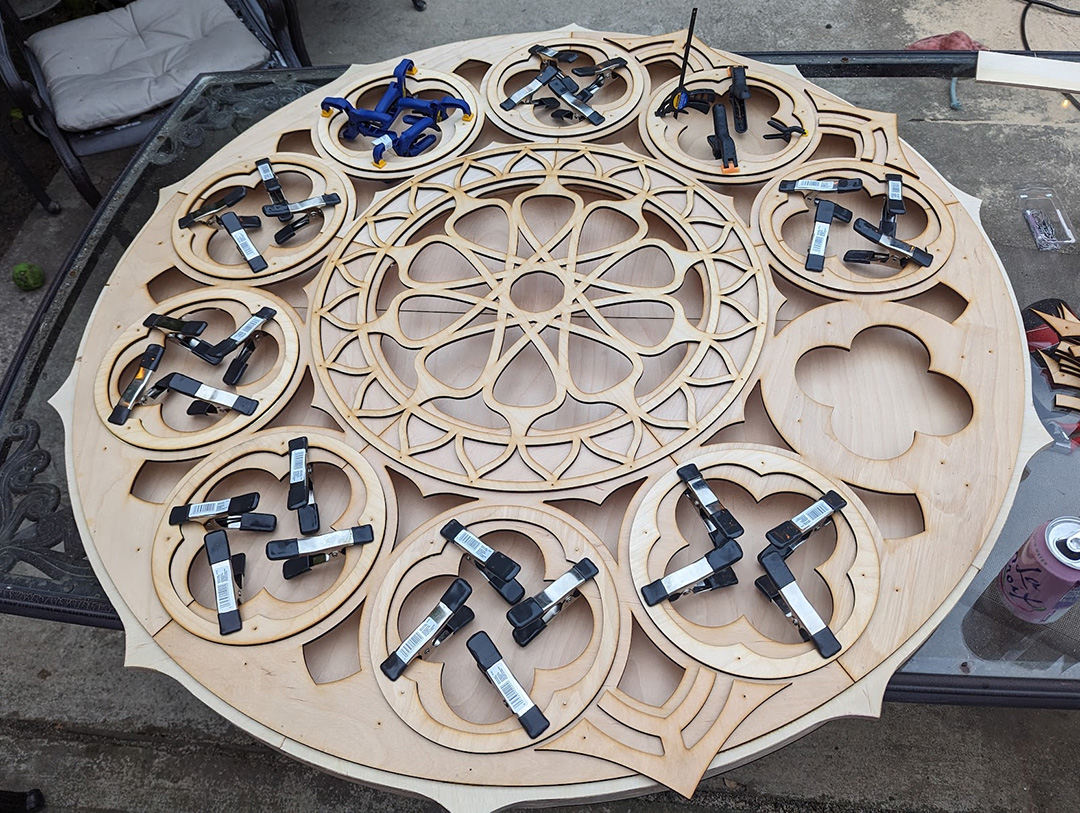
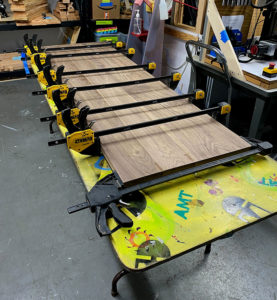
Glue layup of the rose window element; could have used even more clamps.
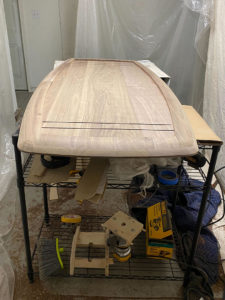
The final assembled pieces have a solid back spaced 1.5″ from the front cutout parts. I cut “rib” parts out of 3/4″ plywood and doubled them up to get the 1.5″ spacing. I then joined the parts with wood glue and a nail gun (the nails are invisible from far away and provided good clamping force while the wood glue dried). This resulted in surprisingly light and stiff parts.
I created the detail on the front of the panels by gluing on smaller parts. This layup was challenging due to the sheer quantity of small parts.
For the pillars where the unit cell had many unique configurations, there were literally hundreds of small parts that all had to go in specific locations!
I added pre-fabricated holes to the laser-cut patterns for small brad nails which made it easy to align the small parts during assembly, and keep everything from sliding around during the glue-up. Once the glue was mostly dried I removed the brad nails so they wouldn’t become a permanent part of the assembly. The back panels are removable for installation and maintenance of LED strips glued along the inside face of the ribs. I used a silicone caulk for the LEDs, which works well as long as the ends of each LED strip are securely attached. The silicone caulk is strong enough to keep the strips in place, but easy to peel off if necessary.
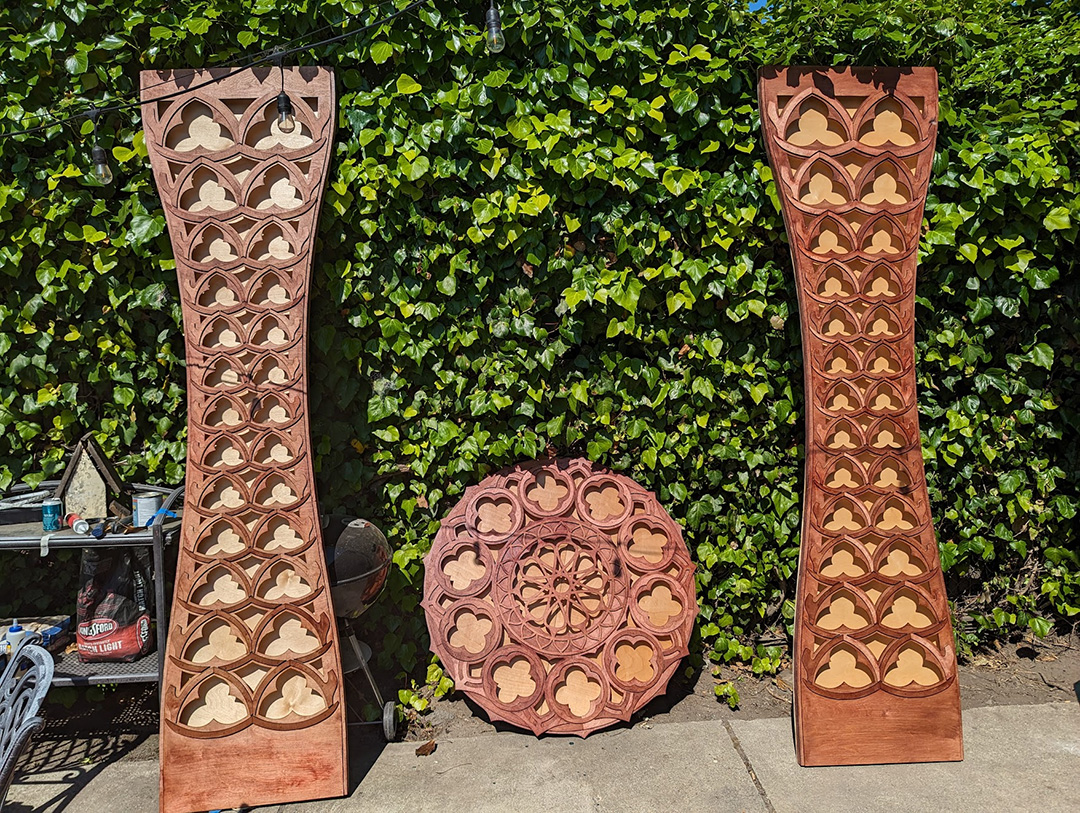
Finished and stained panels.
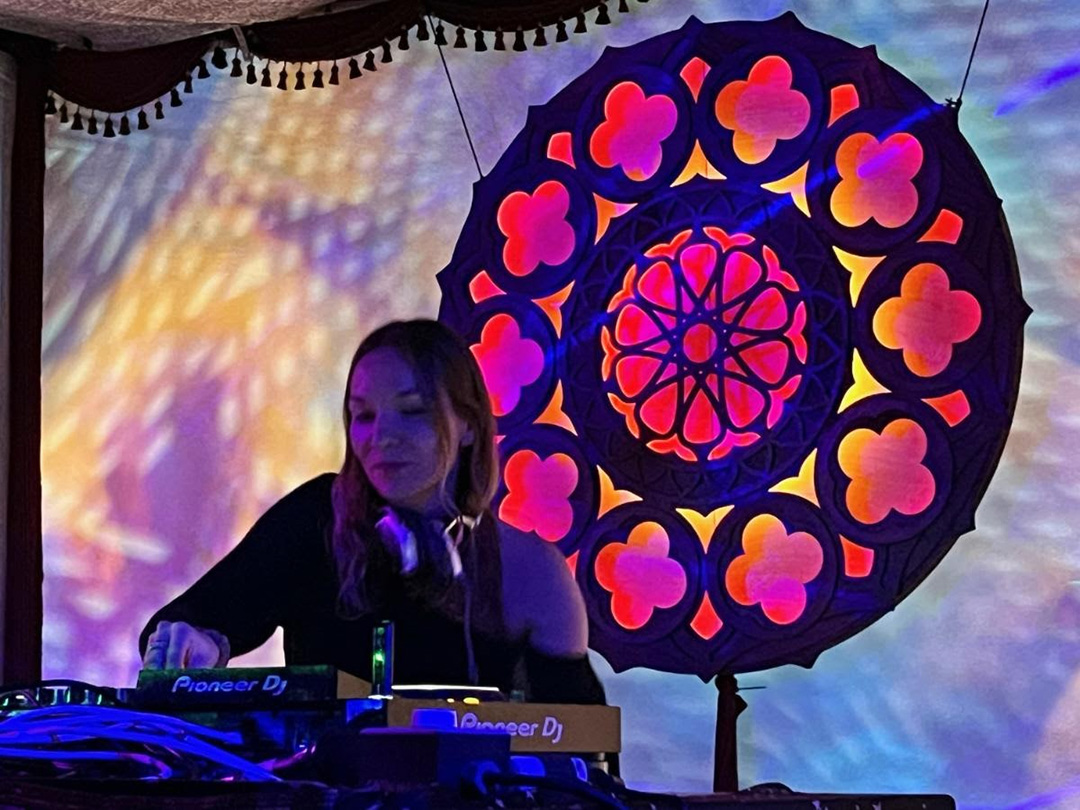
At the festival, the pieces were in the capable hands of Radiant Atmospheres, an event lighting collective practically next door to Ace. They hooked up the LED strips to a DMX decoder, which let them control them from the same system they were using to drive the rest of the stage lighting and effects. They also brought two rear projection units that set up an ever-shifting psychedelic pattern on the stage backdrop. I was really impressed with the work they did; it’s a bit hard to capture in photos but the stage lighting was gorgeous. All-in-all I’m pleased with how this project came out, and excited to take lessons learned and continue to play with the laser-cutter and other tools at Ace!
Ukrainian artist “Asymmetry” performing with the rose window element behind.
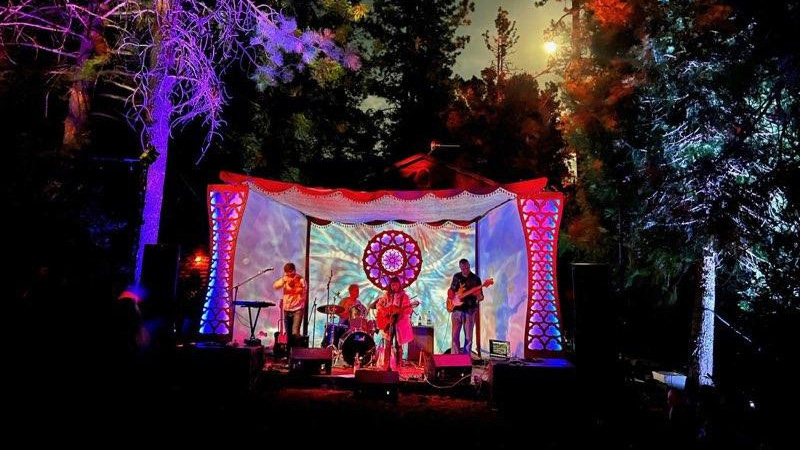
Oh, and the band in the cover image is the enchanting Foxtails Brigade!
What worked:
The alignment holes and brad nails made the glue-up substantially easier; it would have been a real nightmare to get things lined up without them.
In the design I left strategic gaps between parts to create the illusion that some parts were behind others, even though they were on the same layer. This visual trickery seemed to work; I had a few folks tell me they were surprised that it only had two layers.
I loved the effect of the indirect LED lighting on the back panel, especially the regions lit by two different LED strips. It created smooth gradients that I thought were beautiful. The default with LED art is to create more complexity by adding an ever-increasing density of LEDs, but in this case I think less was more. It’s only five unique colors for all three of the panels, but the natural blending on the back panel made it seem more complex than it was. A happy accident of the constraints of the materials/budget I had to work with!
What could be improved:
Creating the design out of hundreds of small parts made assembly incredibly time consuming. Designing for fewer, larger parts with more complexity per part would have cut down on the time it took to assemble everything.
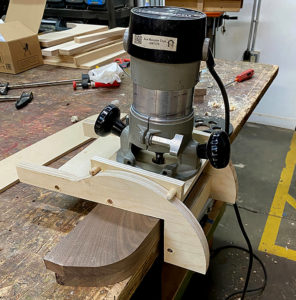
The ribs between the front and back layers were time consuming to make; I “scored” lines onto thick plywood with a light laser pass and then cut them out with a jigsaw at home. This took a long time and was difficult to do accurately, even with the precise guide lines created on the laser cutter. If I were certified on the CNC machine at Ace, that would have been a better way to go. Fortunately, the closest audience members were approximately 15′ away, and most of the mistakes were invisible from that distance.
In hindsight, it would have been interesting to score inset lines from the edges of the parts on the laser-cutter; that would have been an easy way to suggest even more depth & visual interest.
CNC Program planning in progress with Sharps(left) and Rachel (right).
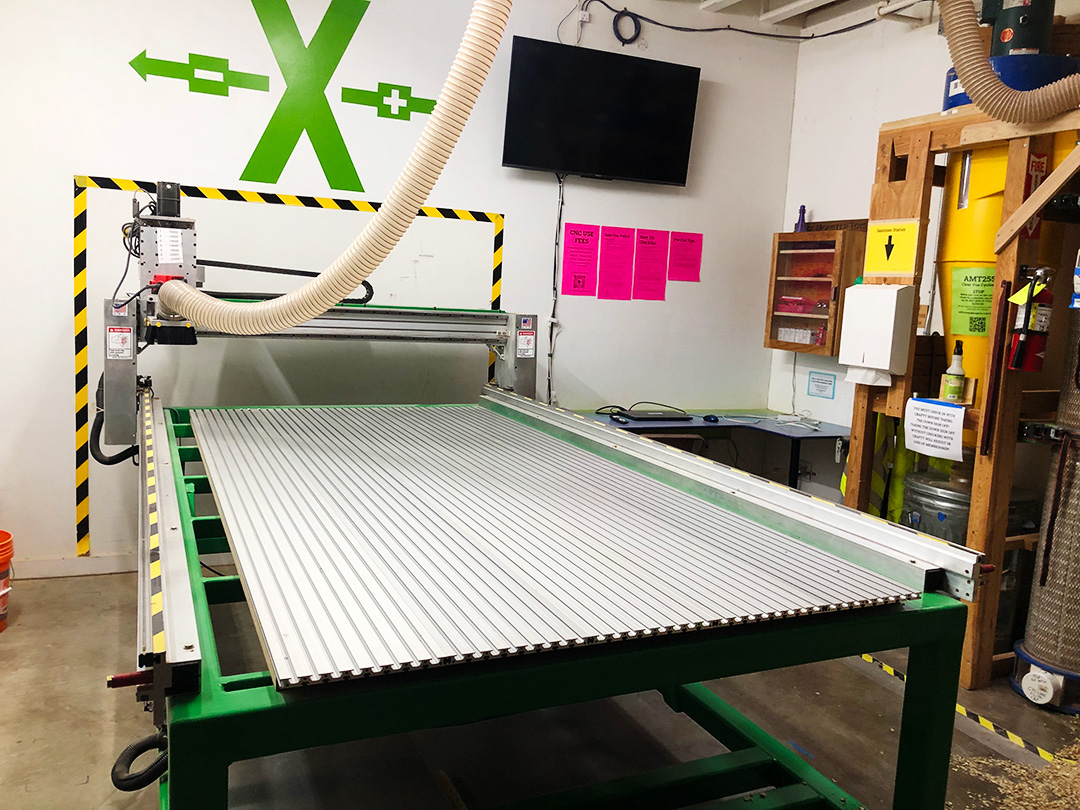
We love building kick-ass programs at Ace Makerspace, and this past year we had a special opportunity to apply our innovative, collaborative approach to program development to a much-needed community resource—our new Full Bed CNC Router. Like many small businesses, we took out an SBA Loan to survive the pandemic but also wanted to put some of the money towards mission-driven growth that would benefit the broader Oakland/East Bay community around us.
Did you know the Ace CNC router was the only public access router in the east bay not on a college campus? The community needs a more robust resource for people to use, run their small businesses, and gain job skills. It needs to be accessible for beginners and easier to maintain.
–Rachel Sadd, ED
We’d been thinking about investing in a new Full Bed CNC Router for our program since 2019, and after a few false starts over the years, we finally gained enough traction to bring our dream to life. Providing an approachable point of entry for folks of all skill levels to learn modern fabrication skills in the East Bay drove our subsequent program development process.
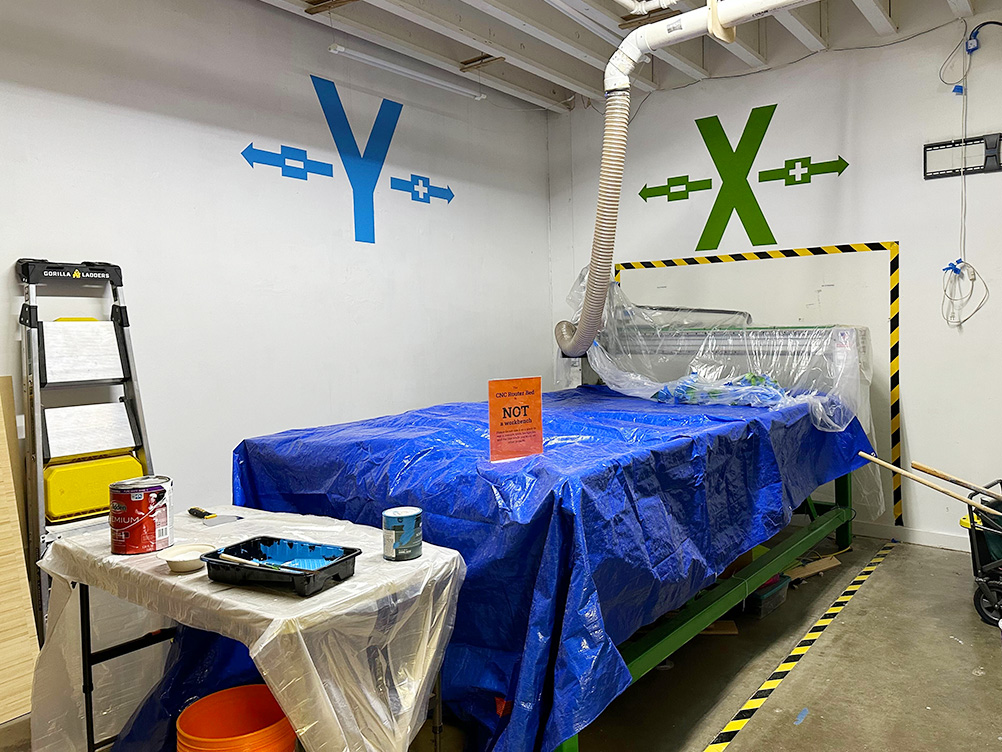
Our new full bed CNC router, X axis mural, and workstation.
The new program we imagined would be:
Beginner-friendly
Affordable
Self-guided
Highly accessible
And would serve:
Folks interested in learning job skills
Small businesses
Folks making repairs
Hobbyists
Current and graduated students looking to continue their education and practice their skills
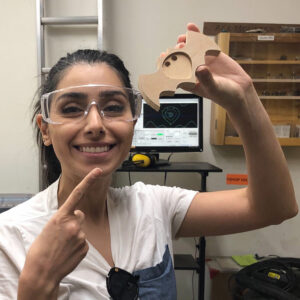
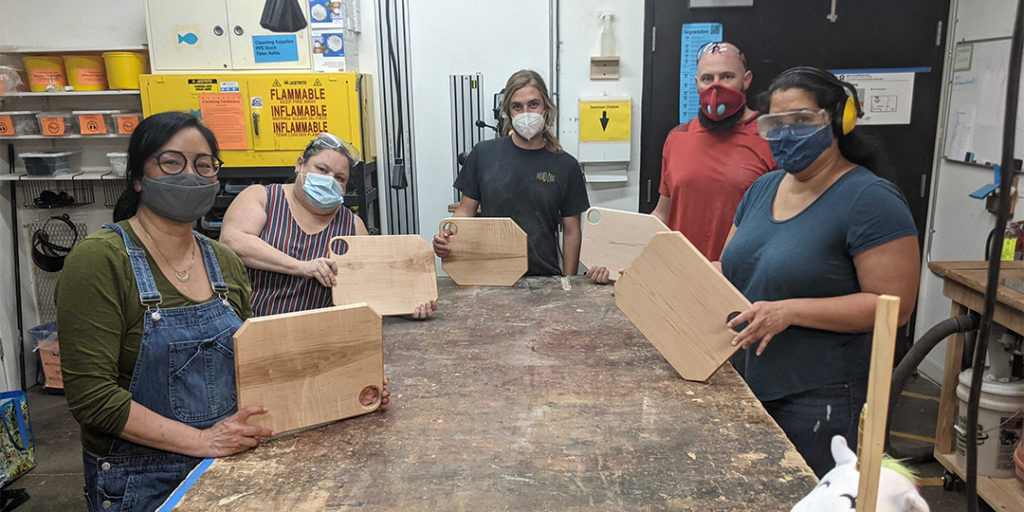
Student showing off their first CNC Project after class.
The Early Adopters
In order to build our dream CNC Program we put out a call for volunteers to join the Program Development team as Early Adopters.
We are seeking women, non-binary and BIPOC folks to join the CNC Early Adopter team. Ace firmly believes that a variety of lived experiences are needed to grow truly inclusive programs. And we are at a magic moment with the CNC Router Program as we re-design the program for the new router. You do NOT need to be an expert CNC Router Operator. The perspective of new users is also very valuable to program development.”
–Early Adopter Recruitment Post
For a truly accessible program we needed a group with diverse perspectives, skill levels, and lived experiences. We ended up recruiting:
Sylvia- A novice CNC operator with a technical background, who played an instrumental role in curriculum and knowledge check development
Bob- Someone with extensive CNC experience at Ace both as a user and an instructor
Frank- An advanced tool user with no previous CNC experience and an old school approach to documentation
Dave- Someone with CNC experience in both Ace and outside contexts
Sharps- A former tool manager for a shared shop with extensive CNC experience outside of Ace
Liz- Ops manager in charge of the executing the environmental design for the physical space and limited CNC experience
Rob- A technical contractor who helped build out the space and design the X and Y axis murals
Rachel- Executive director of Ace Makerspace
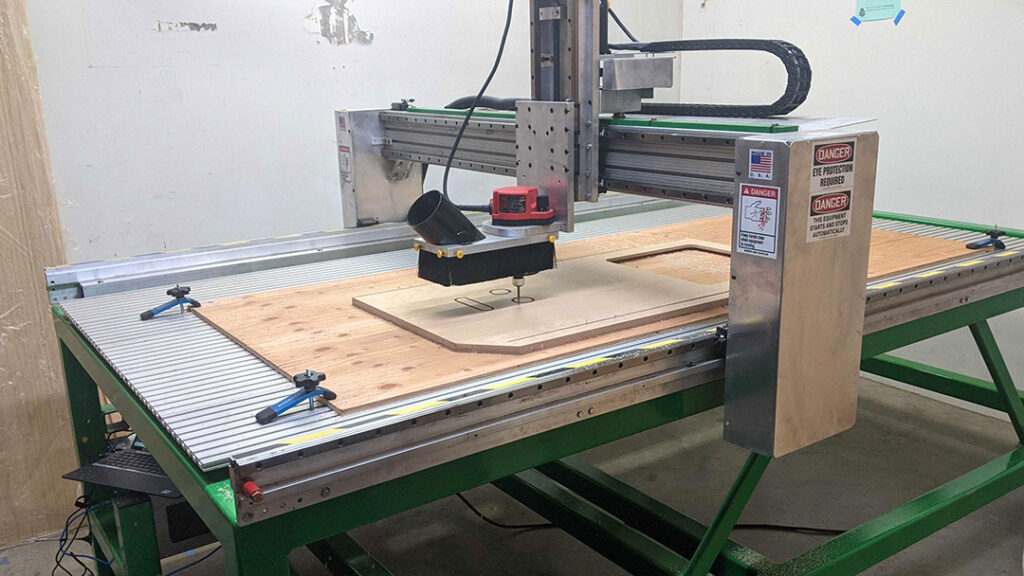
Taking the new CNC Router for a test drive shortly after delivery. Part of developing a new program involves testing the machine in a variety of ways and troubleshooting issues.Checking the X and Y axes for precision after troubleshooting an early issue with router bed alignment.
Building a Beginner Friendly Program
Building an approachable CNC program requires bridging the gap between the advanced user approach and a more equitable, beginner-friendly approach.
X and Y Axis Murals for easy reference make our newly designed space approachable for novice CNC Operators.
Sylvia, a novice CNC Operator with extensive technical writing experience, played a major role in developing the curriculum and writing the knowledge check. Ace Communications Associate, Jacky, sat down with Sylvia to learn a little bit about her perspective as a novice CNC operator on the team and what beginners can expect from the new program.
1. What prompted you to join the Early Adopters Team?
I joined because the call was for a BIPOC beginner and that was me.
2. What was your experience as a beginner CNC Operator working on curriculum development?
My first experience with CNC Routing was with the Forest Scientific trainer who came to Ace to work with the Early Adopters. That training session, which lacked visual aids and handouts, wasn’t helpful to me as a beginner, although it did seem to resonate with the more experienced users and did take a hands-on approach.
Writing the curriculum was a highly iterative process, and as a beginner I was still able to contribute at our first team meeting by simply asking questions. Rachel provided background on Ace culture with respect to collaborative class development. Sharps wrote an initial draft outline covering CNC Router concepts. Bob contributed his expertise from years of teaching beginner CNC users. Frank [another New CNC Operator] documented the step-by-step process of operating the CNC router. During team revisions Frank and I identified things that were unclear to us as beginners. For example, the Router has 3 axes: X and Y and Z axis, and one of the training slide examples mentioned ‘2.5 axis.’ A beginner wouldn’t be able to decode that.
3. What is one (or more) thing you really thought about/kept in mind as you were contributing to the writing of the CNC knowledge check?
The more brains that attack this the better. I thought the team effort was key, which included leveraging the Laser Team’s tried and tested Laser Knowledge Check as a starting point. Sharps and I generated an initial draft of questions. Then there was a technical review by Bob and Sharps, an inclusivity review by Rachel, a re-write by Rob to transition questions from a true/false format to a multiple choice format, and a review by Jesse M who provided valuable feedback from a test taker perspective.
Revising the new CNC Knowledge Check as a team.
4. What did you learn through the process?
How important it is to address different kinds of learning styles. Some folks are visual, some folks like a checklist, and some folks need things said aloud, while other folks need to touch the machine for the info to take hold.
5. What can beginners expect from the new program?
“An evolving process that they can contribute to in order to make it even better!”
Pilot Classes Begin
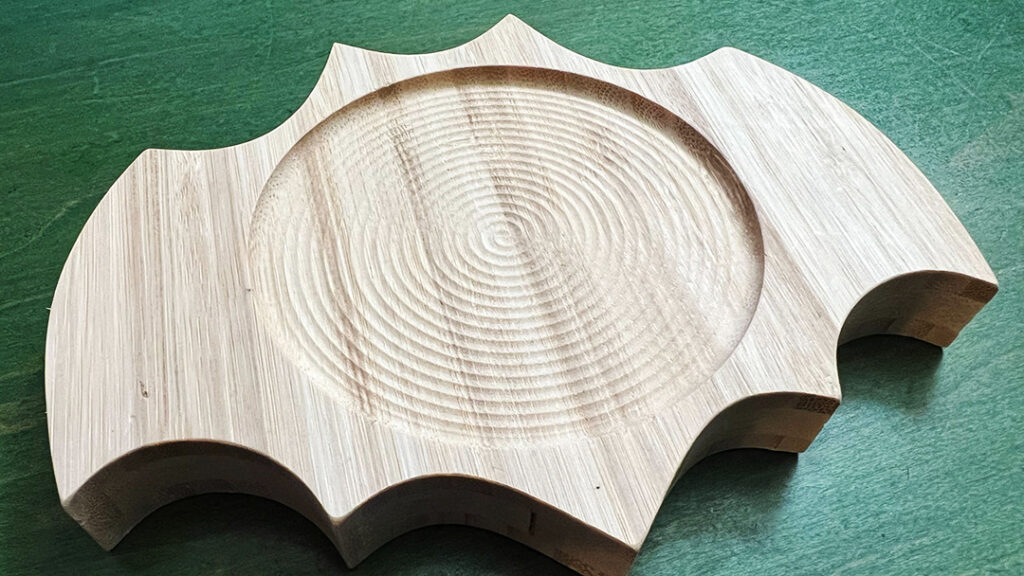
Wooden bat coaster practice project for New CNC Router Basics Workshop.
Ace is looking for 4 beginners for the next CNC Pilot Class! It will likely be mid-month and definitely on a weekend. Reply to this thread if you are interested. Update: Please if you have previous CNC experience do not put yourself on the list.
-Pilot Class Announcement
Finally, after installing the New Router, learning how to use the new machine and experimenting with it, designing the curriculum, handouts, knowledge check, and other user documentation on the Ace Wiki, installing a new desk, painting X and Y Axis murals for easy reference, and designing a beginner friendly “data pack”, it was time to pilot the new CNC Basics and Certification class starting with….beginners!
What’s next for the CNC Router Program?
Our program is evolving and we plan to continue iterating our collaborative approach to design as we fine tune our existing CNC Router offerings, grow our program, and develop more great beginner-friendly learning opportunities for our East Bay community.
Here’s a taste of what to look forward to as we continue developing new learning opportunities for CNC Routing at Ace:
Software Design Classes for CNC Routing
V-Carve Design for CNC Routing (less powerful, but less complicated)
Fusion 360º Design for CNC Routing (more powerful, but more complicated)
CNC Router Advanced Operation and Certification Workshop focused on 3D Routing and handling specialty materials (like plastic) safely
Open Labs with focused topics like “planing contours” and “cutting plastics”
Practice Projects like dice trays, bee-houses, and clocks
In order to create robust and equitable resources, we invite folks interested in being a part of this exciting process to bring their unique perspectives, skills, and talents to the table. We also plan to continue working side by side with our community as we evolve other current and future programs.
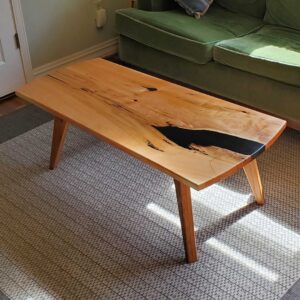
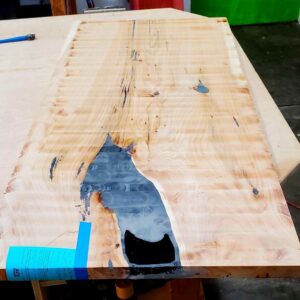
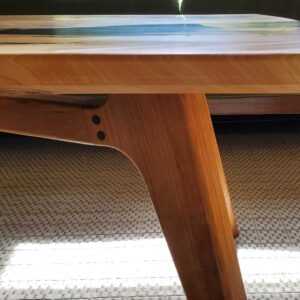
Martin has loads of furniture making experience, but this deep pour resin technique was totally new for him…
Martin’s finished deep pour resin coffee table
The idea for the project came from Martin’s friends who spotted a sleek resin pour table they liked on Four Eyes Furniture. They asked him if he could make them one so he watched a couple videos and decided to give it a go.
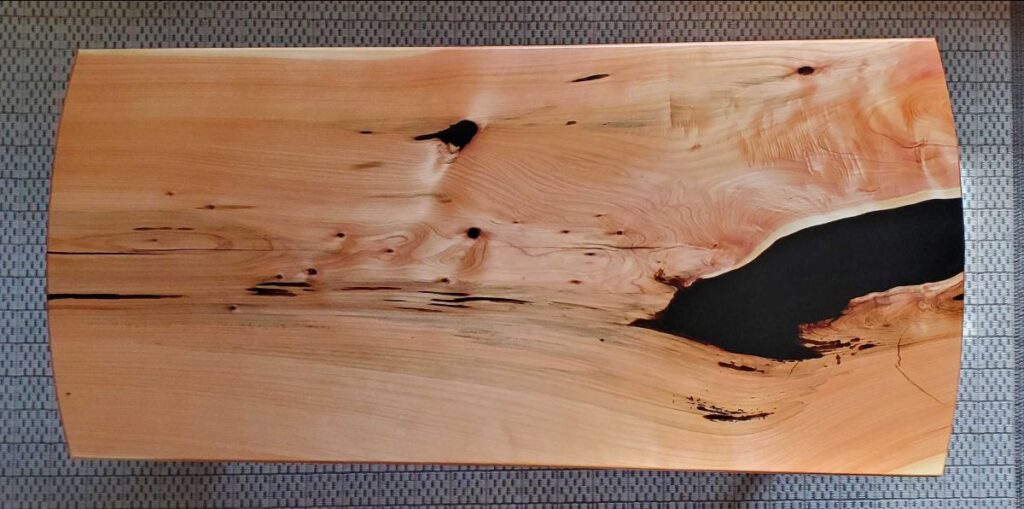
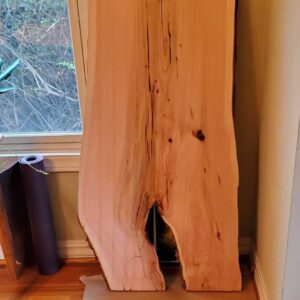
First, he selected a gorgeous slab of kiln dried Monterey Cyprus.
Gorgeous slab of Monterey Cyprus
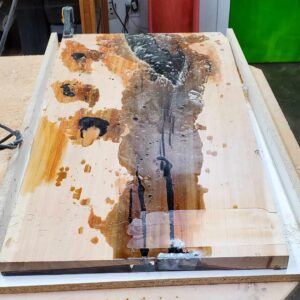
Then he purchased a gallon of Black Epoxy Resin and checked in with the Ace Workshop Community about using Clean Fab for the pour.
Waiting for the first round of epoxy resin to cure.
Martin filled the gaps in two rounds; first the top and then the bottom. Each pour took several days to cure before he hand planed it to remove extra resin from the surface.
Martin’s coffee table after hand planing to remove excess resin.
Martin’s tips and takeaways:
Resin costs $$$
It takes time, patience, and a little planning. Each pour takes several days to cure.
After the resin sets, planing the surface by hand is labor intensive. Be prepared to roll up your sleeves.
Monterey Cyprus Wood dust is particularly irritating so well fitting PPE is a must
He’d do it again, but mostly because he has extra resin…
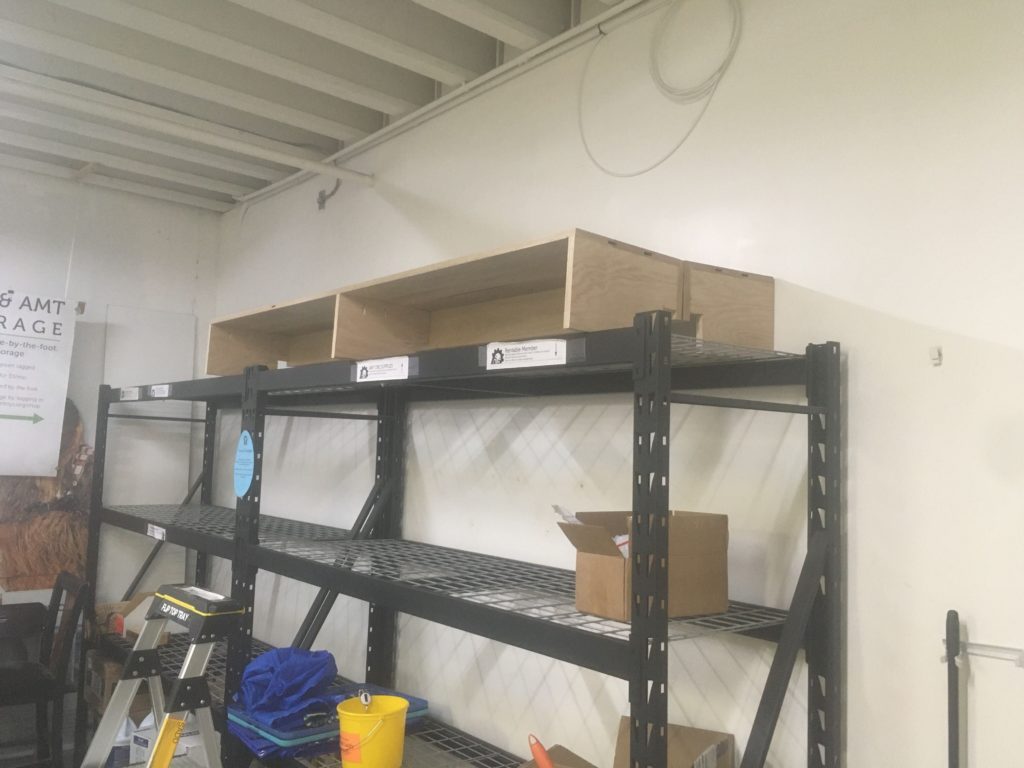
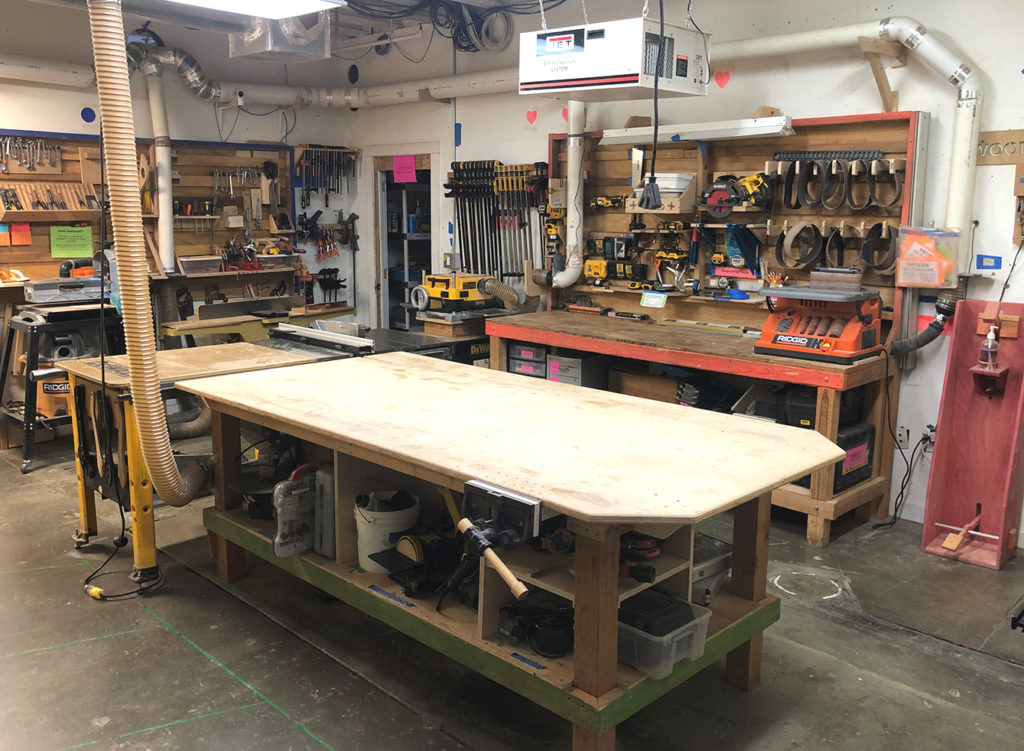
Renovated Ace Shop with brand new tabletop, dust collection, layout, and tool storage.
Every day we strive to create great experiences for everyone who walks through our doors- no matter where they are on their maker journey. Our inclusion-forward approach informs everything we do including how we design our spaces to welcome users across the skill spectrum. This is one of the many ways we take action to implement our mission in everything we do.
Relative to its small size, our shop houses an impressive collection of tools, workstations, and resources which presents unique challenges when it comes to usability and access for makers with diverse skill sets and experience levels. Finding sustainable solutions to address these challenges and create a great shop in which everyone can try new things, learn, grow, and share knowledge requires:
Approaching problems from an explicitly inclusion-forward perspective
Enthusiastically embracing change, innovation, and curiosity
Pro-actively experimenting with solutions
Seeking input, asking questions, and learning together as a community
Engaging in responsive problem solving as community needs evolve
While some of the recent changes are more noticeable like new table tops and work surfaces others are more subtle like adding a side stop to our spindle sander to prevent creep during use. Each adjustment and/or repair big or small was made intentionally in response to community needs, observed patterns of use/breakdown, and bolstered by input from users of all skill levels.
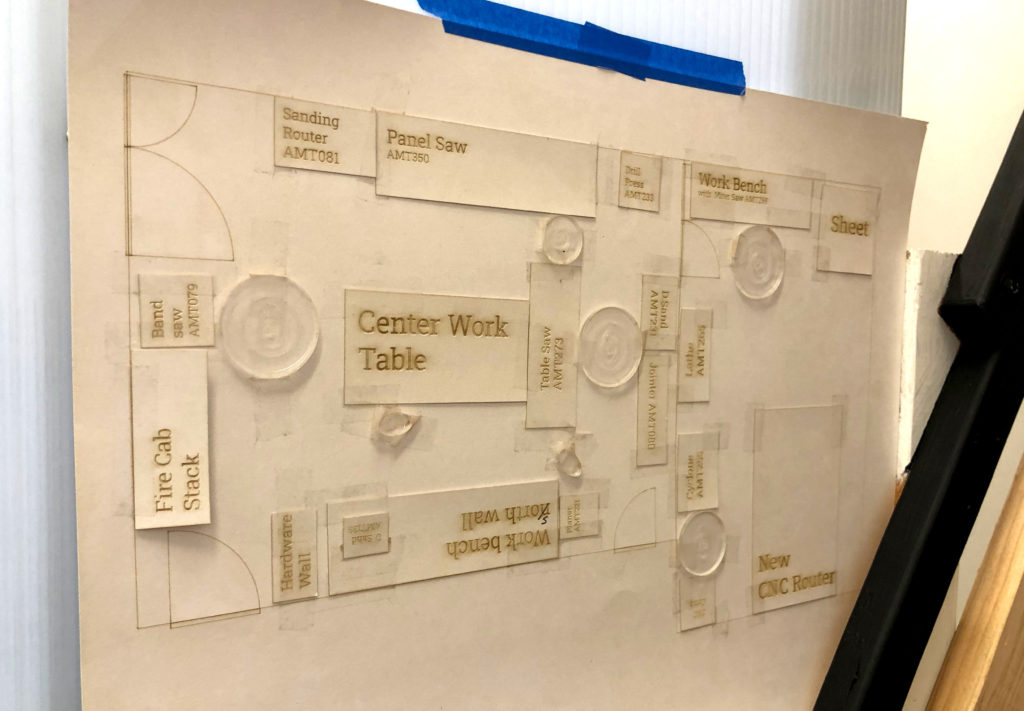
To scale plan for shop renovations made by the community at the 6/29/22 Ace Town Hall.
Optimizing Tool Use Space and Small Tool Storage
While our collective imagination is infinite, our space is limited… This reality was omnipresent during our recent project, the Great Tool Swap.
When it comes to using our shop we constantly negotiate overlapping “tool-use” spaces. In other words, where you stand to use tools like our table saw, drum sander, jointer, and planer blocks access to others and prevents concurrent use.
In order to maximize our tool-use space and maintain reasonable workflow we carefully examined how folks were using the shop, identified chokepoints, gathered feedback from the community, and ultimately decided to re-arrange our dust collection set-up and swap the locations of our drill press and bandsaw.
Changes to dust collection set up.
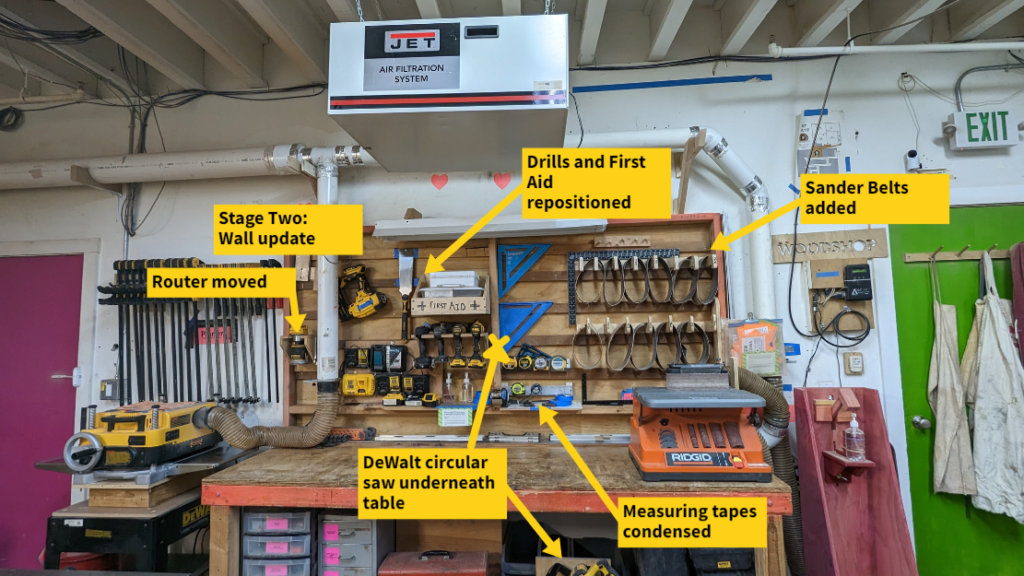
Beyond overlapping tool use spaces we also have limited storage for smaller tools and supplies like drill bits, saw blades, clamps, and gauges. Overly dense storage makes it hard for folks (especially beginners) to locate what they need and/or discover new tools. It’s also difficult to label dense storage effectively and for our community to keep it organized. By re-arranging vertical storage in the shop and finding new homes for small tools we were able to create a more user friendly visual system for tool storage.
Changes to small tool storage.
Embracing Entropy as an Invitation for Change
Permanent systems are a myth. Just because something has “always” been one way, does not mean it needs to stay that way.
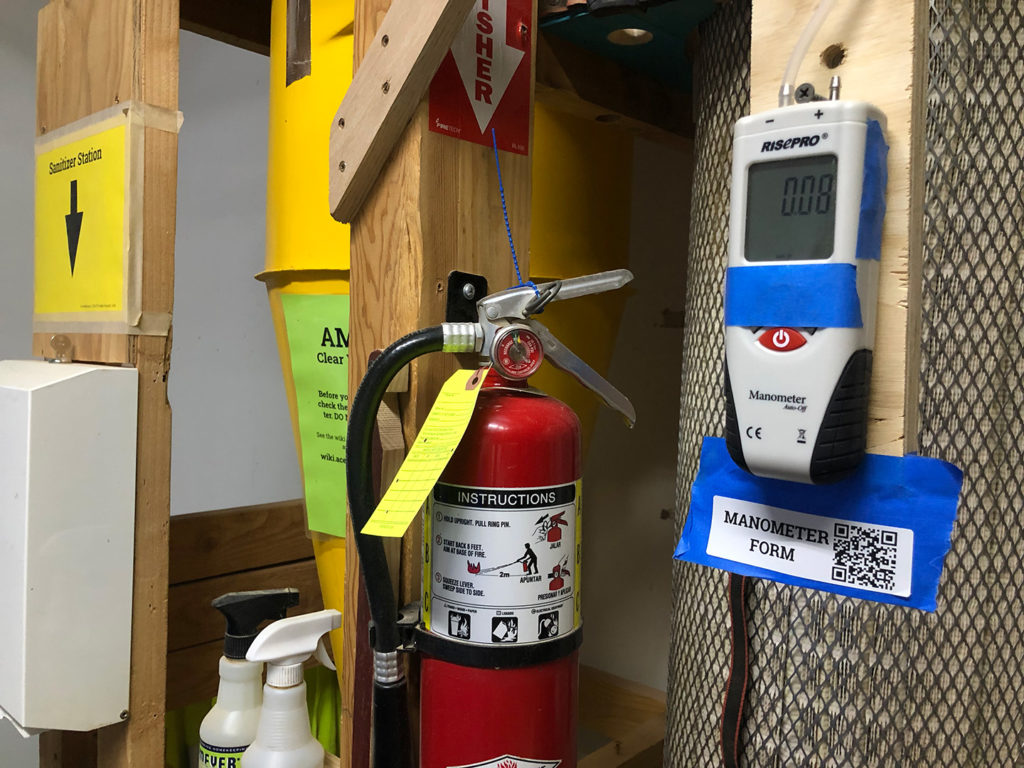
Sometimes systems work in theory but not in practice, become less functional over time because needs for change, or fail to fully resolve underlying issues. Instead of seeking permanent solutions, we look for sustainable ones. For example, when looking holistically at the shop we realized we were stuck in a cycle of reactive Air Quality Management resulting in unpredictable and frustrating shop closures.
We wanted to move toward a more sustainable, predictable, and proactive system so we installed a new manometer, a meter that measures air pressure differences, to measure the draw of shop ventilation. We also added a convenient QR code that allows shop users to easily update our air quality logs. This small change has improved our ability to track filter life and stay ahead of maintenance.
New manometer with a QR code to update air quality logs is attached to our Cyclone Dust Collector.
The Power of User Input
Expertise is valuable but it’s not the whole story when it comes to designing a shared workshop for the Ace Members we serve. Systems that might work for advanced users can discourage new users and/or put up barriers to access. Experienced users may notice issues that new users may not, but resolving those issues requires input and participation from beginners to be effective.
Relying on a narrow “expert is best” framework is also counter-productive to inclusive shop design because it can reproduce the systems of privilege and power that have limited who is normalized in technical spaces. Instead, we include the perspectives of new users as “expert” especially when it comes to navigating the workshop as a beginner.
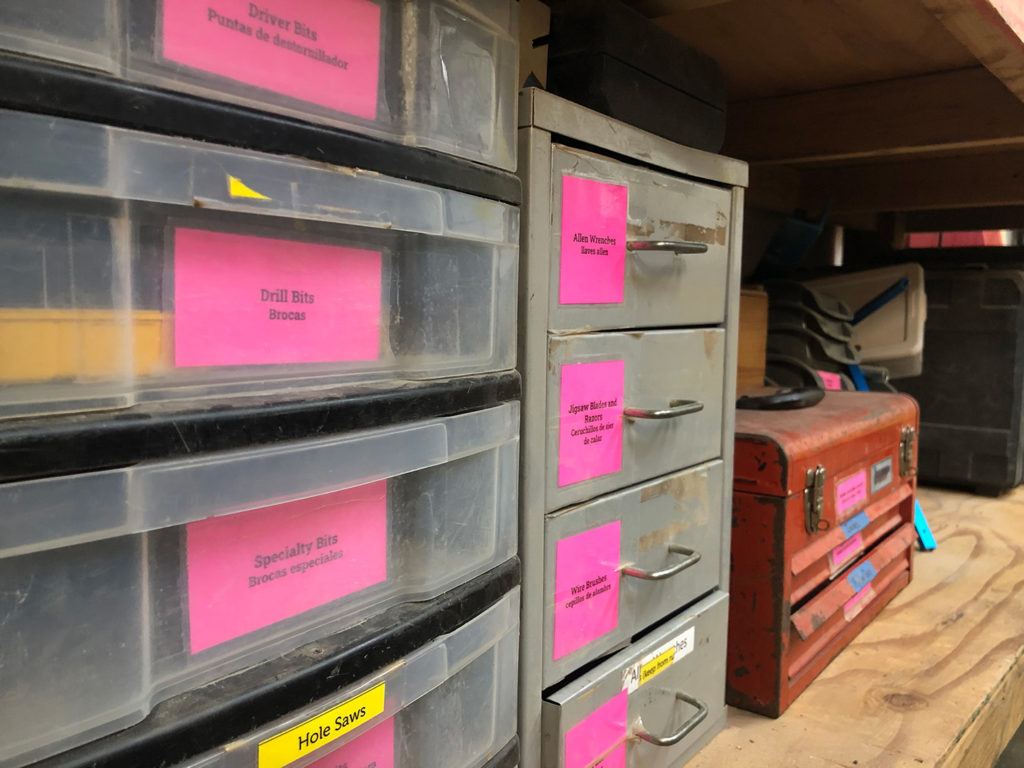
For example, we learned specifically from new users that they were struggling to identify and find what they needed in the shop making starting out feel intimidating and overwhelming. To better welcome them we added more labels to our tools. We also created two Shop Basics and Tool Overview classes to better demystify shop etiquette and help new folks get oriented.
Items clearly labeled in both English and Spanish stored under a workbench in the Ace Shop.Folks enjoying their time in the Ace Shop.
And the Beat Goes On
Our community is always changing and our spaces need to keep pace with those changes in order to best serve everyone. Through our inclusion-forward approach to design, we ensure that the changes we make are more effective for everyone who walks through our shop doors.
Students showing off their Sculpted Wood Candle Holders after class.Students making serving trays at a Dykes with Drills Workshop at Ace.
As usual it was way more work than anticipated, but I’m quite pleased with the final result. I had a to build a ridiculous number of jigs and templates for this thing. –Frank
After 4 months of hard work, Frank, a new member, and carpenter completed an absolutely show-stopping dining table in the workshop and posted images of the final piece on the Ace Community Discussion Board.
Prompted by the Ace Community, Frank also provided insight into his process and the many tools he used to design, sketch, render, and build his dream dynamic, curvy table.
I’ve only been woodworking earnest for about the past year. I dabbled with it in college as well but just a bit. Most of what I know has been from the school of YouTube or from talking with people around Ace, and being a mechanical engineer has helped with some aspects.–Frank
Check out some highlights from his build:
Frank built a “ridiculous” number of custom jigs for shaping the unique curves of his design. See how he takes his idea, renders it, builds it, and tests it below:
Rendered JigTesting the Jig
He also put together a super neat glue-up for the top of the table:
Super neat and tidy glue up
He even converted his living room into a stylish workshop and all that between his 10-month-old’s naps!
Frank’s living room converted into a workshop
The project may have been “way more work” than Frank thought it would be but, wow! Hopefully, he’s sending out dinner invites soon!
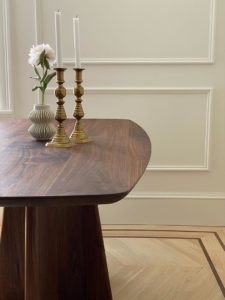
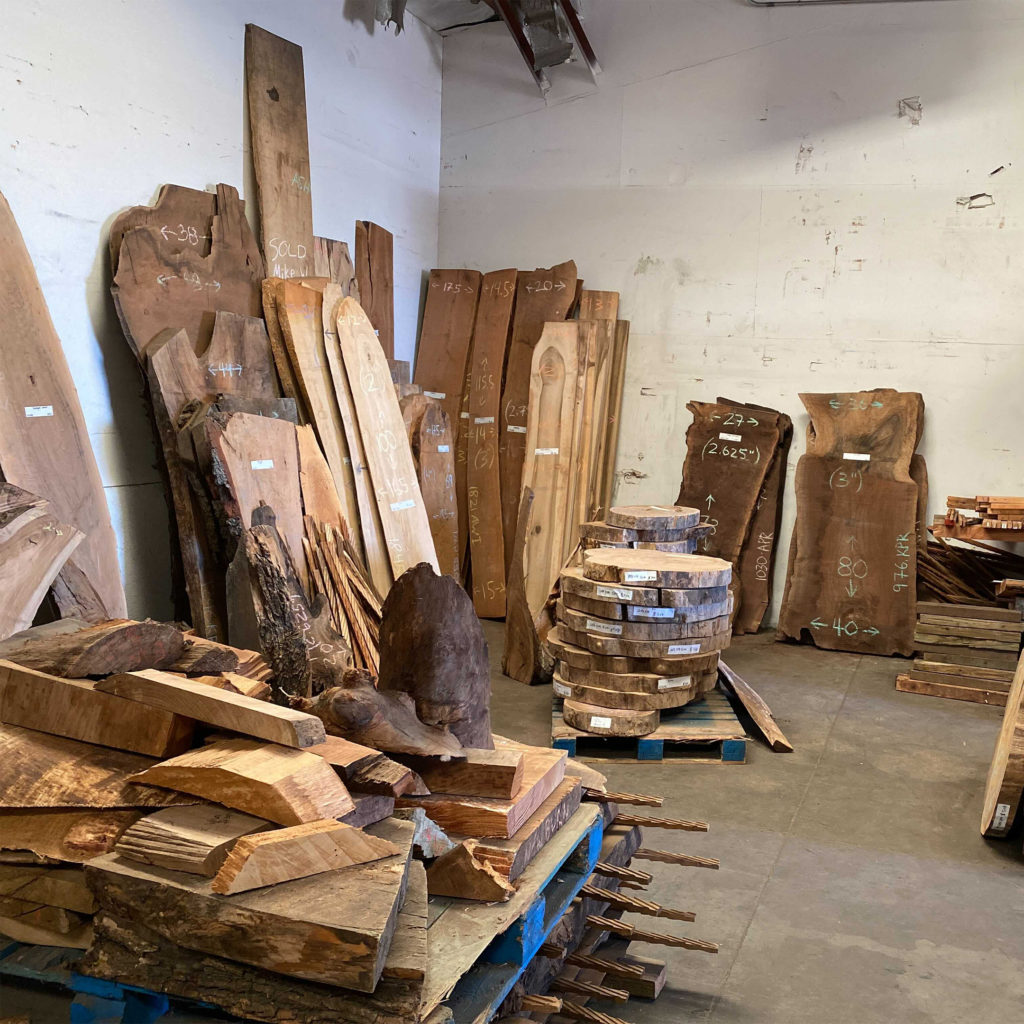
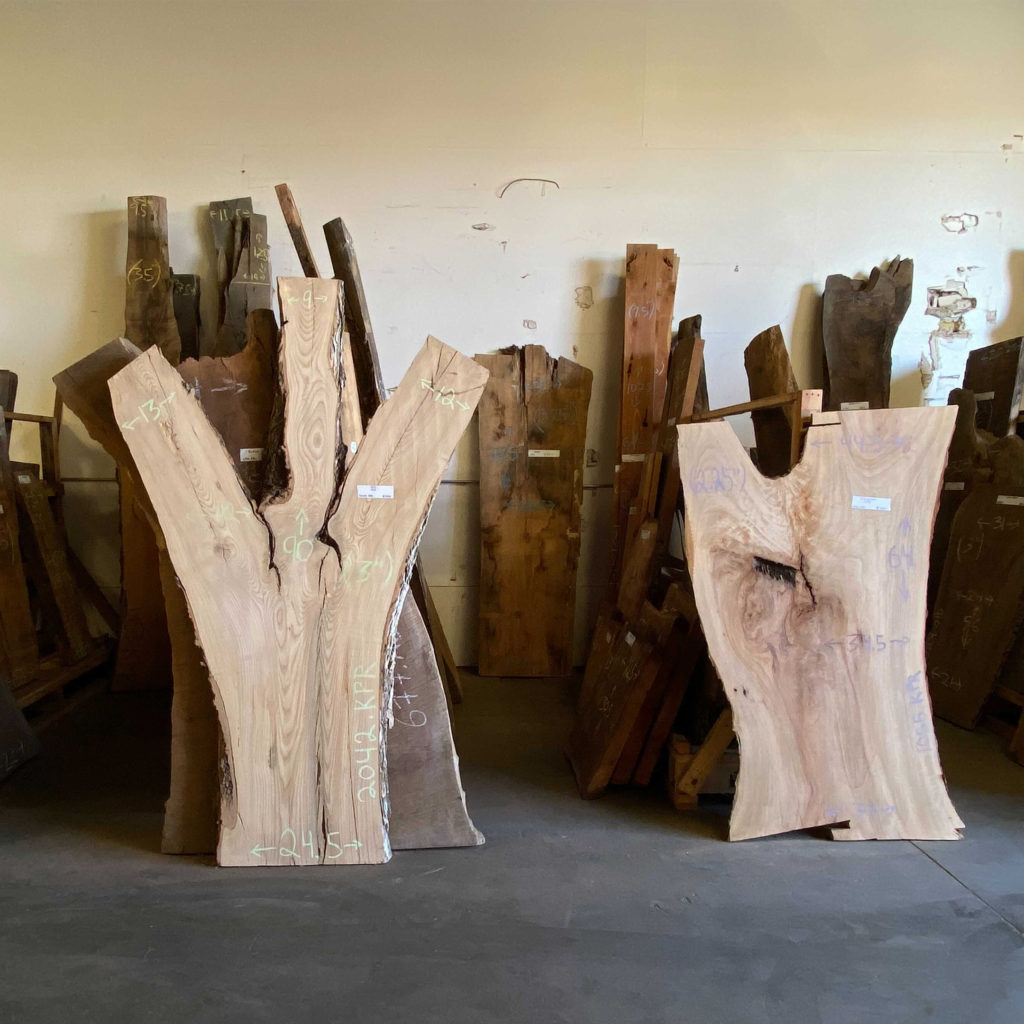
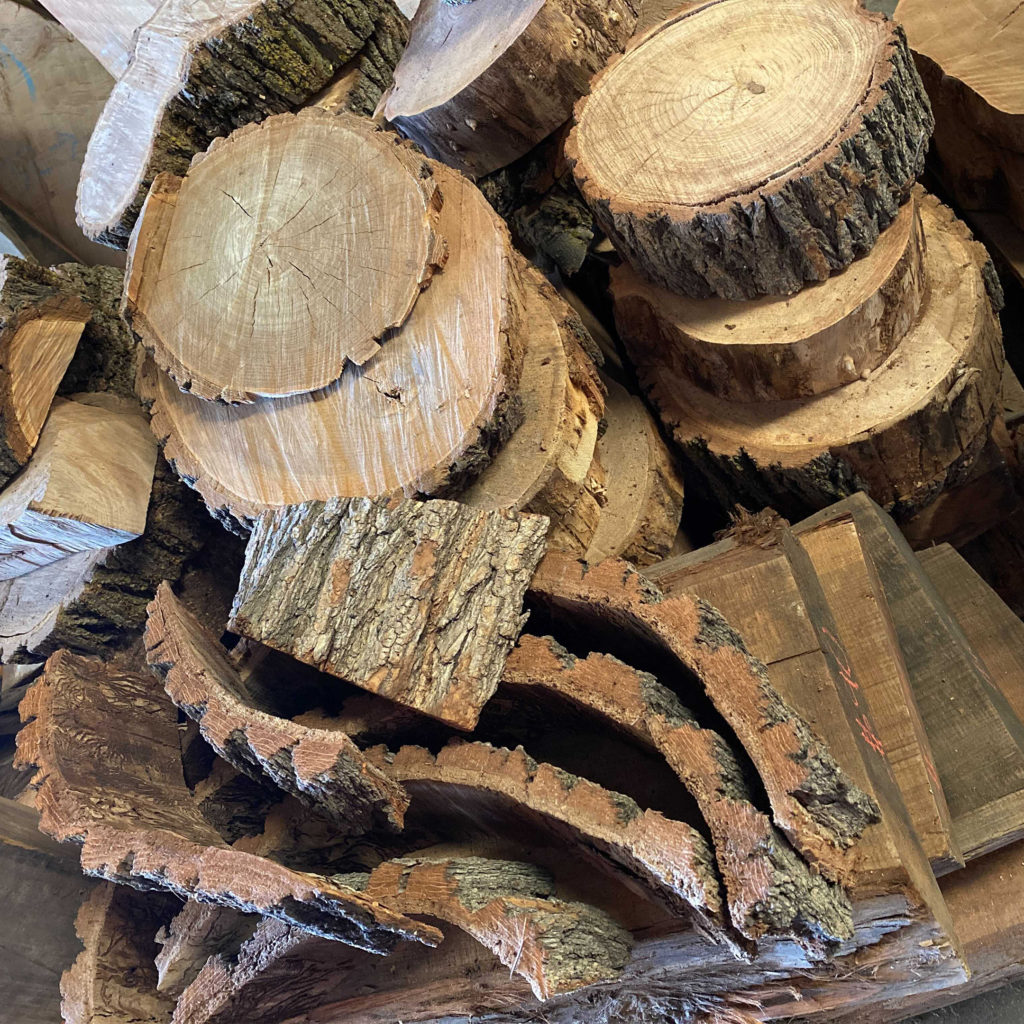
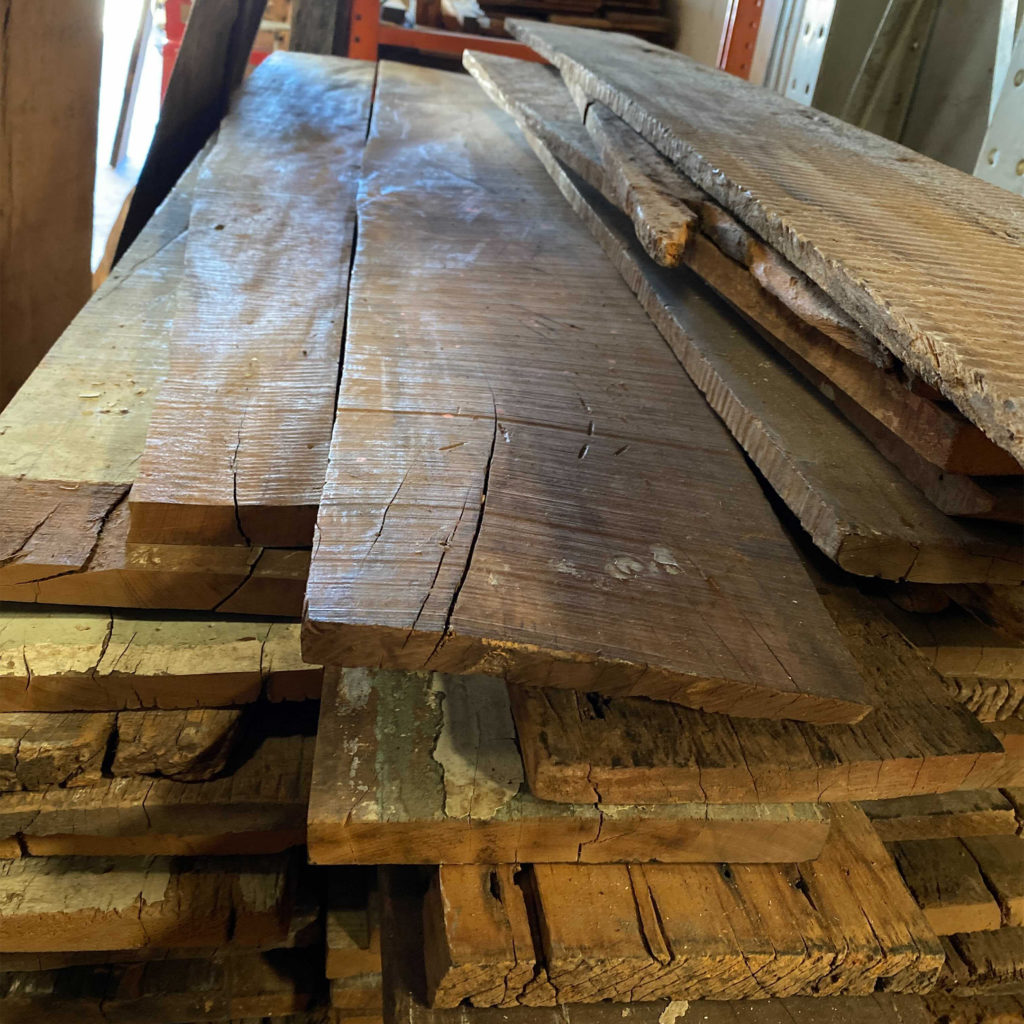
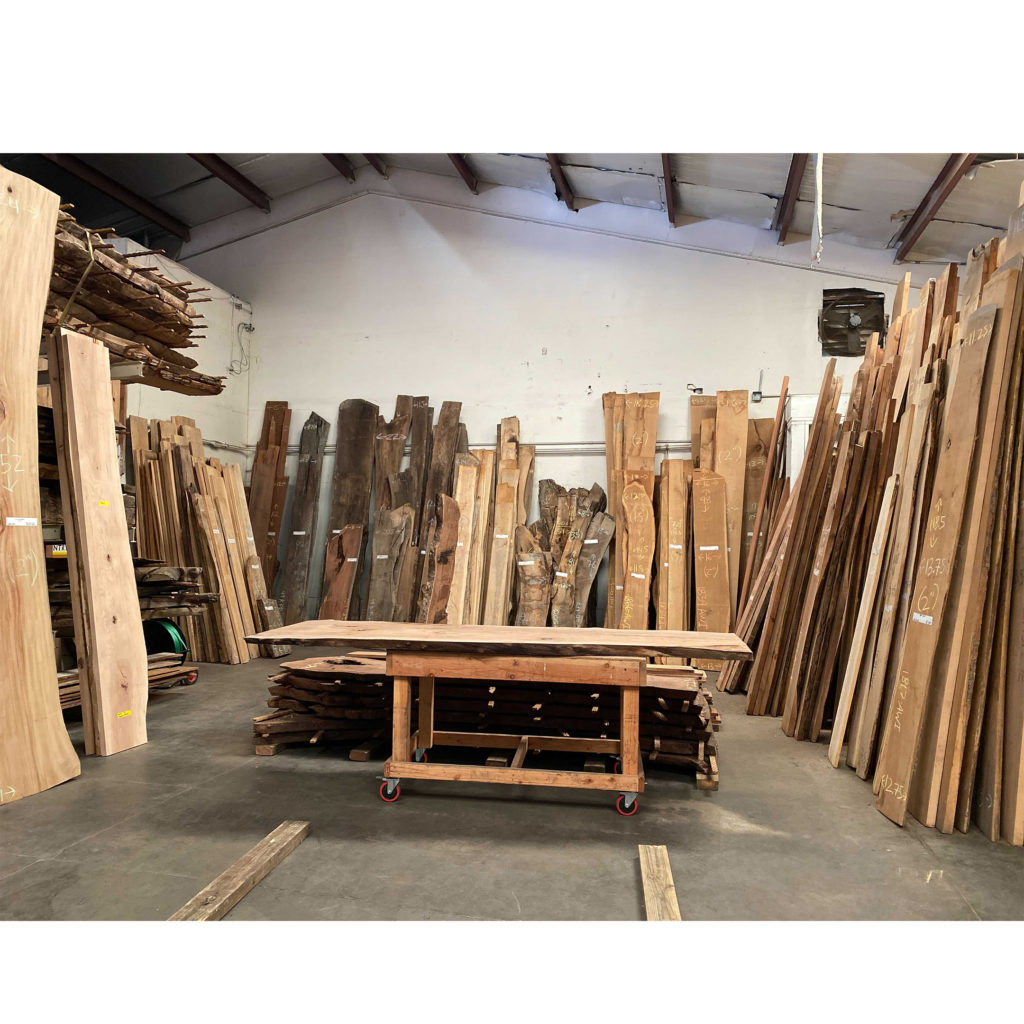
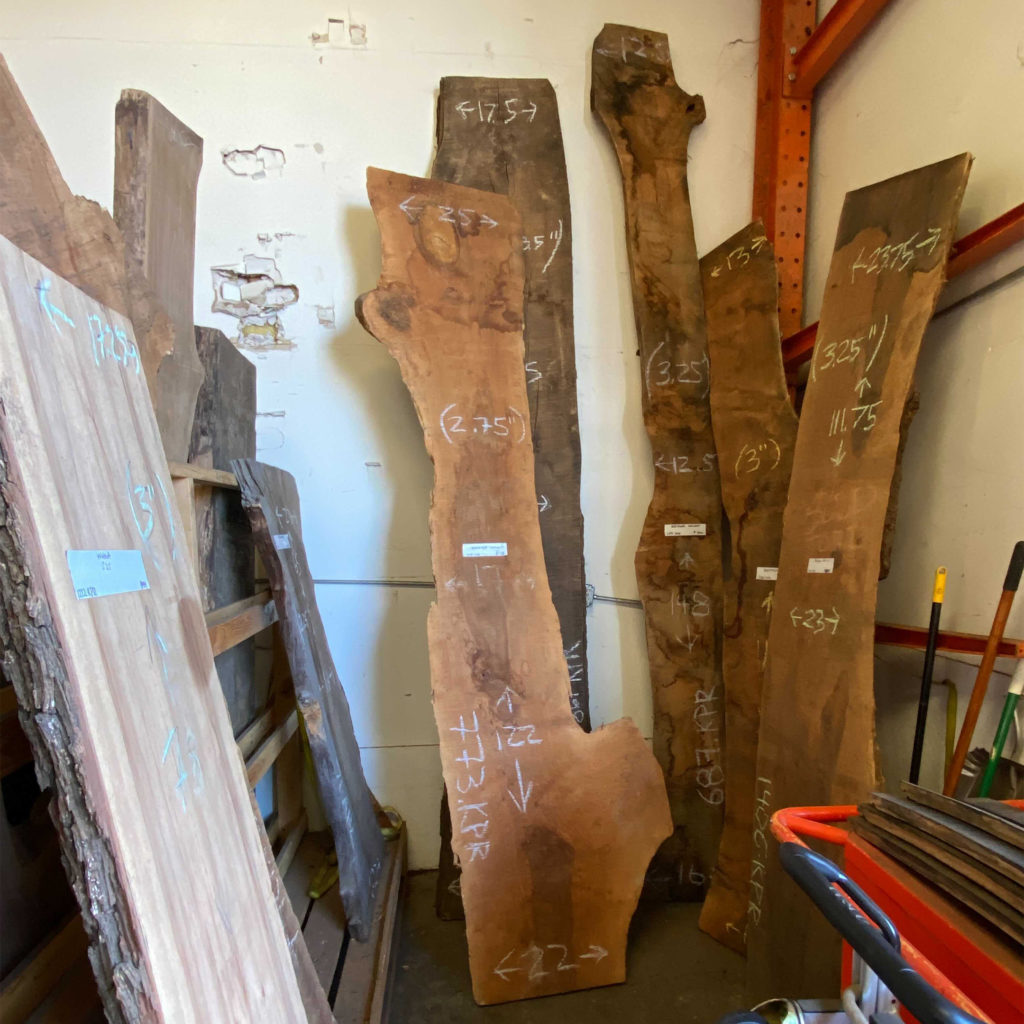
We recently went on a field trip To Peroba Reclaimed out in Richmond. They specialize in reclaimed lumber and live edge slabs ethically harvested. The staff was lovely and helpful. And really patient with us digging through their off-cuts pile. We were on a mission to get affordable wood to use in Ace project-based workshops. Not only did we find affordable products but really pretty options we can feel good about spending community money on. We definitely recommend going out there when you are ready to level up your solid wood projects.
Victor Lane may live in Sacramento, but he is still an active member of the Ace community. At Ace, Victor did a lot of woodworking with joinery, and over the past few years, he’s eventually made his way to becoming an instructor. I’m Carter Jenkins, and I had the pleasure of speaking with Victor to find out more about him.
Victor’s relationship with Ace began in a similar way to a lot of other members: finding an affordable and welcoming maker space. In his search, he found plenty of alternatives, but they were mostly for-profit organizations with narrowly defined communities that did not have a diverse environment. “You go to a lot of ‘maker spaces and it’s white guys my age making robots or 3d printing…” as Victor put it. He found that Ace fostered a group of people that was full of people that you wouldn’t find in those other maker spaces. Ace also had different technologies that you wouldn’t find in other maker spaces, such as fabric arts. He appreciates the fact that these “non-traditional” making practices have dedicated homes at Ace.
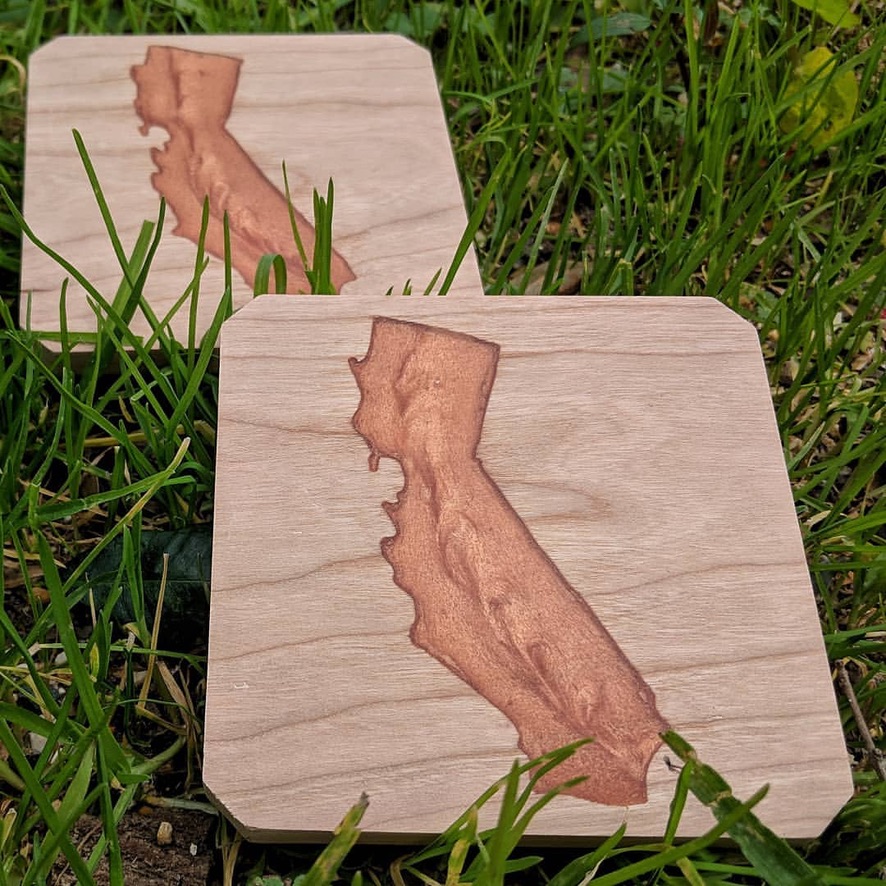
Two custom made coasters designed by Victor
Victor’s New Class at Ace
Victor is hosting an in-person woodworking class for a small group of people at the maker space. It’s a class he has hosted pre-lockdown, but luckily not a lot about the class had to change. Like before, he’s teaching how to make a basic cutting board out of a single piece of wood, teaching how to properly cut and finish the material. The main purpose of the class is not to walk away with a perfect cutting board but to rather learn how to use the tools properly. As Victor said, “If you are not scared of the power tool you are using, you probably shouldn’t be using it.” He believes that gaining a sense of respect is the most important thing that a maker should have for their tools. The class employs the use of the chop saw and table saw, which Victor hopes to make his students comfortable. For the most part, mask protocol isn’t affecting the class. Most of the time, the people in the class were wearing filtered dust masks, so modified masks are being used.
Talking with Victor was a blast, and the Ace community benefits greatly from having a guy like him in it. His charismatic personality and great communication skills make him an excellent teacher and should make for a great workshop experience.
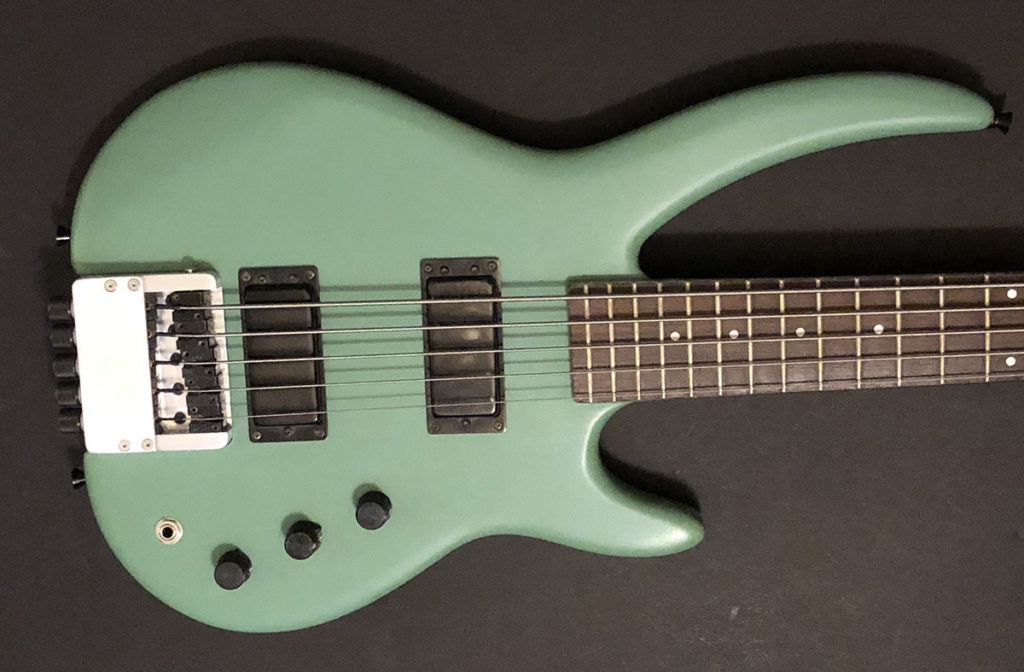
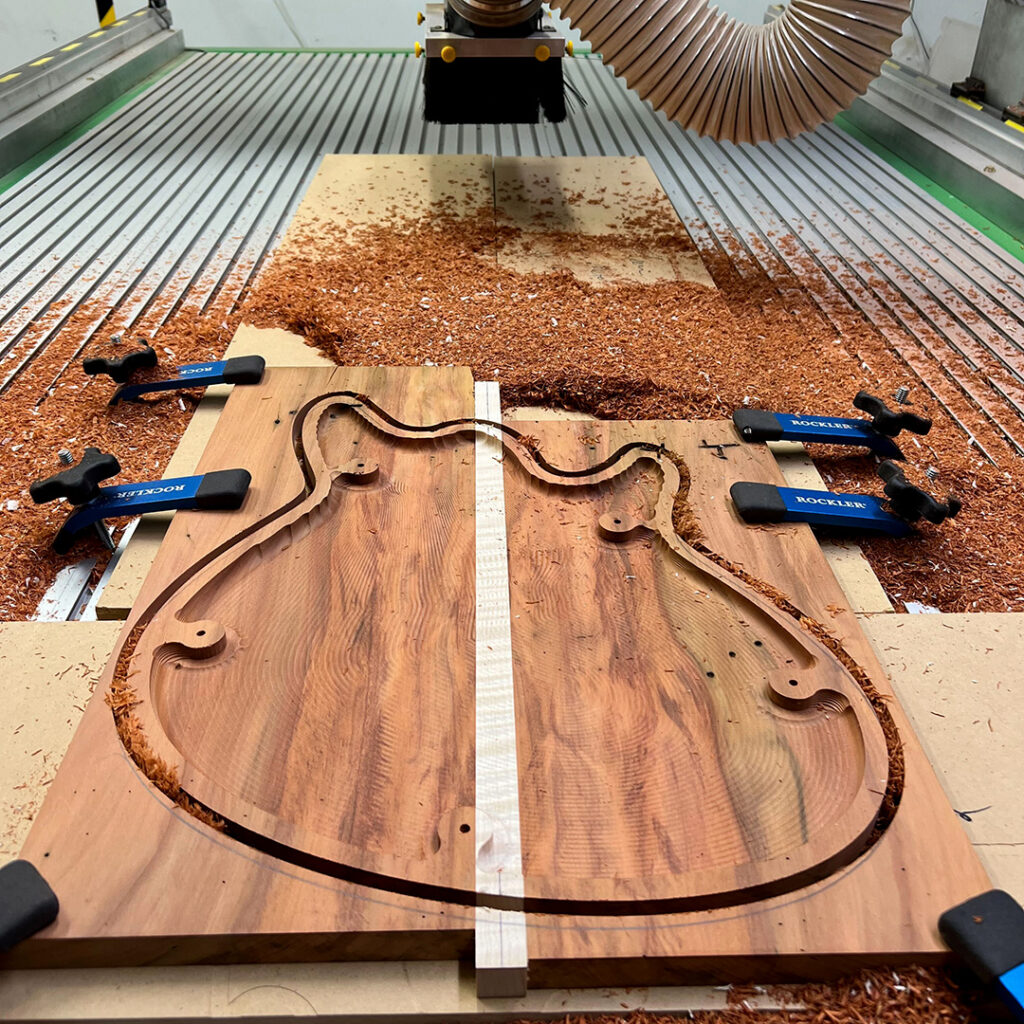
Out of Ace’s list of members, Bob M is definitely one of the more unique people to walk through the workshop doors. Nowadays, Bob is most known for his custom-built guitars and basses, and the reason why this is goes back all the way to his high school days. I’m Carter Jenkins, and I had the chance to speak with Bob about what he does at Ace as well as a little more about how his life has led him to this point.
The Beginning
In high school, Bob originally aimed on becoming a violin craftsman. However, that path didn’t work out and Bob had to explore other areas. For 20 years, Bob held a job as a professional juggler while still exploring his passion for playing guitar. One day in 1989, he paid someone to do some repairs on a bass he had. The job was completely botched, leaving Bob thinking, “I could do so much better than that.” After a little mechanical ingenuity and some tinkering, Bob quickly discovered a new skill.
In the early 90s, Bob opened up a hand-crafted guitar shop to both satisfy his guitar fix and to have a career. Unfortunately, he soon shut down the operation. The money wasn’t the biggest problem, rather Bob “couldn’t stand the sales relationship that the job required.” Wrangling what you love into a money-producing machine isn’t a great feeling, and after only a few years of operation, Bob walked away.
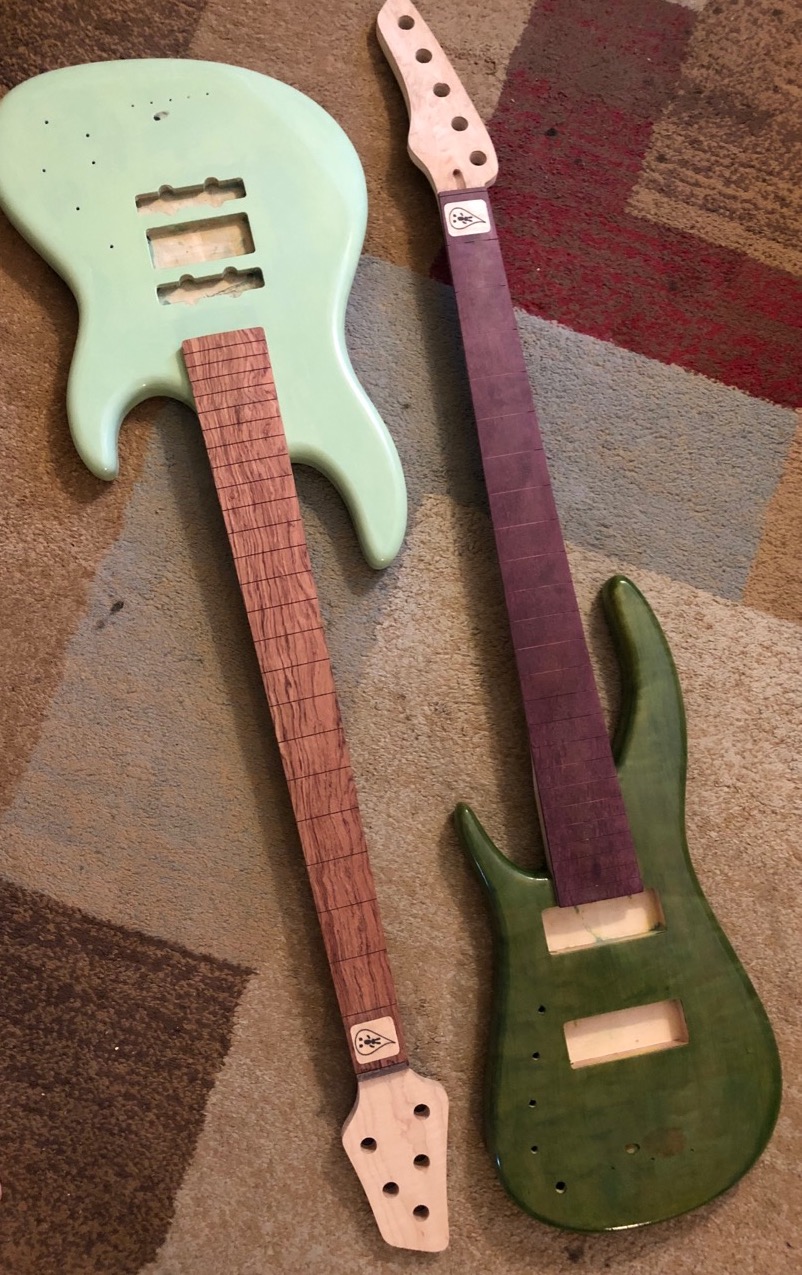
2 partially completed guitars
More Recent Years
In between 1997 and 2017, Bob didn’t do a lot of making or tinkering. However, in 2017, he went to the Ace Building for a Fusion 360 CAD software meeting. During his visit, he took a guided tour around the facility where his attention was caught by the CNC machine and the woodshop. While Ace wasn’t the entire reason he got back into making, seeing the necessary tools that Ace offered with an affordable membership compared to other spaces Bob had looked at was a big part of it. Nowadays, Bob still makes custom guitars, no longer for the money but rather for the affection he has for the craft.
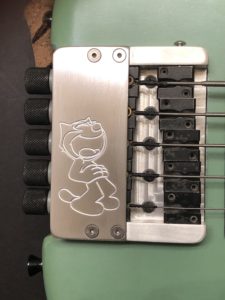
A bridge with a drawing inscribed
Advice for Other makers
Towards the end of our meeting, I asked Bob for any advice he had for makers looking to turn a passion into a business. Bob says that if you have a passion, don’t try to monetize it unless you know you can succeed. Take guitar building for instance. The market for that kind of thing is heavily over-saturated, with new builders investing all their money into a business that will last a few years before shutting down.
Bob got out of the business for a reason, now he spends his days doing what he loves, not doing work. If you have something you want to pursue, he recommends finding a group of people that have a similar interest to you and then finding opportunities to put your skills to work through there. A big enough community will be able to supply you with answers to your questions and will also help you grow as a person.
Mauricio Salmerón has been working on a project recently. What started as a joke request to a friend has now spanned into a multi-month project that is now nearing completion. I got a chance to speak with Mauricio over a weekend and he shed some light on what other workshop members saw as two large pieces of wood glued together.
Mauricio has been an off-and-on member of the Ace Makerspace for a few years now. He used to own a furniture-making shop called “The Furniture Space,” where he did woodworking to create all kinds of custom furniture such as tables and sideboards. After that, Mauricio found Ace to be the best place to continue honing his craft.
A while back, Mauricio was talking with June, a friend of his. The conversation eventually drifted to June’s need for a new bed. After discussing how June’s search hadn’t been successful, Mauricio jokingly offered to build her a bed frame. The two laughed, and the conversation moved on. However, a month or two later June took Mauricio up on his half-serious request.
The bed frame, later in its construction phase
Mauricio worked on the project on and off, but many months later it’s nearly complete. Throughout his build process, Mauricio used many workshop tools to complete the project. The table saw, chop saw, router, drill, and planer to name a few. He estimates “another 10 hours of work and headboard assembly” and the new frame will be ready to send to June. The entire assembly consists of 5 main parts that can be put together to complete the full platform-style bed. June, of course, will have to provide the mattress, but it seems that the bulk of the work has been completed.
Process
Early pieces
Oak boards were surfaced through the joiner and planer, then dimensioned with the table saw
The boards were clamped together and glued to make the large sides of the bed, the tops to the sides with pocket screws
The three main pieces were completed by now, each with its own plywood support frame
Later pieces
The surfaced boards were put together with pocket screws and clamps to create the headboard
The last piece, the middle mattress support, was made with plywood, glue, and pocket screws
Final assembly
The three large oak pieces were attached with latches, the headboard had cleats and bolts to attach to the side pieces, and the middle mattress support piece


 Victor Lane may live in Sacramento, but he is still an active member of the Ace community. At Ace, Victor did a lot of woodworking with joinery, and over the past few years, he’s eventually made his way to becoming an instructor. I’m Carter Jenkins, and I had the pleasure of speaking with Victor to find out more about him.