Tag: Makerspace

Person holding neon green "neurodivergent" pendent.

MakeXpression: Celebrating the Ace Community with Laser Cut Jewelry

Have you heard of Blue Heart? They’re a rad non-profit that promotes, elevates, and distributes funds to grassroots community-based organizations like Ace Makerspace. In August 2022 we were honored as the Blue Heart Partner Organization of the month and this year, through the Blue Heart Creator’s Fund, we’re collaborating with Berkeley-based artist and founding member of The Spooky Haus, Miriam Levenson, to create a laser-cut jewelry line representing Ace’s core values diversity, community, inquiry, growth, and action!

Person holding laptop with jewelry design
The artist, Miriam, shows off a preliminary design for one of the pieces in our collaborative jewelry line.

The way something can be worn is a powerful statement of agency, allyship, and identity expression. In this way, values can be shared and people can choose to showcase their values through beautiful wearable art.

Our laser-cut jewelry line will visually celebrate the diverse identities of makers in the Ace Community using tools and materials that are accessible to makers of all skill levels. We’ve also invited the Ace Community to participate in this project directly by providing insight into the diverse identities they hold and by inviting them to model the pieces once they are complete. The completed work will also be on display at Oakland First Fridays in December!

The Design Process

In order to make a line that truly represents makers in the Ace Community sent out a poll asking:

Do folks have any words or thoughts that highlight and celebrate your identity you’d like to share to help the project? This can be anything from “I identify as trans” to “I identify as a woodworker.

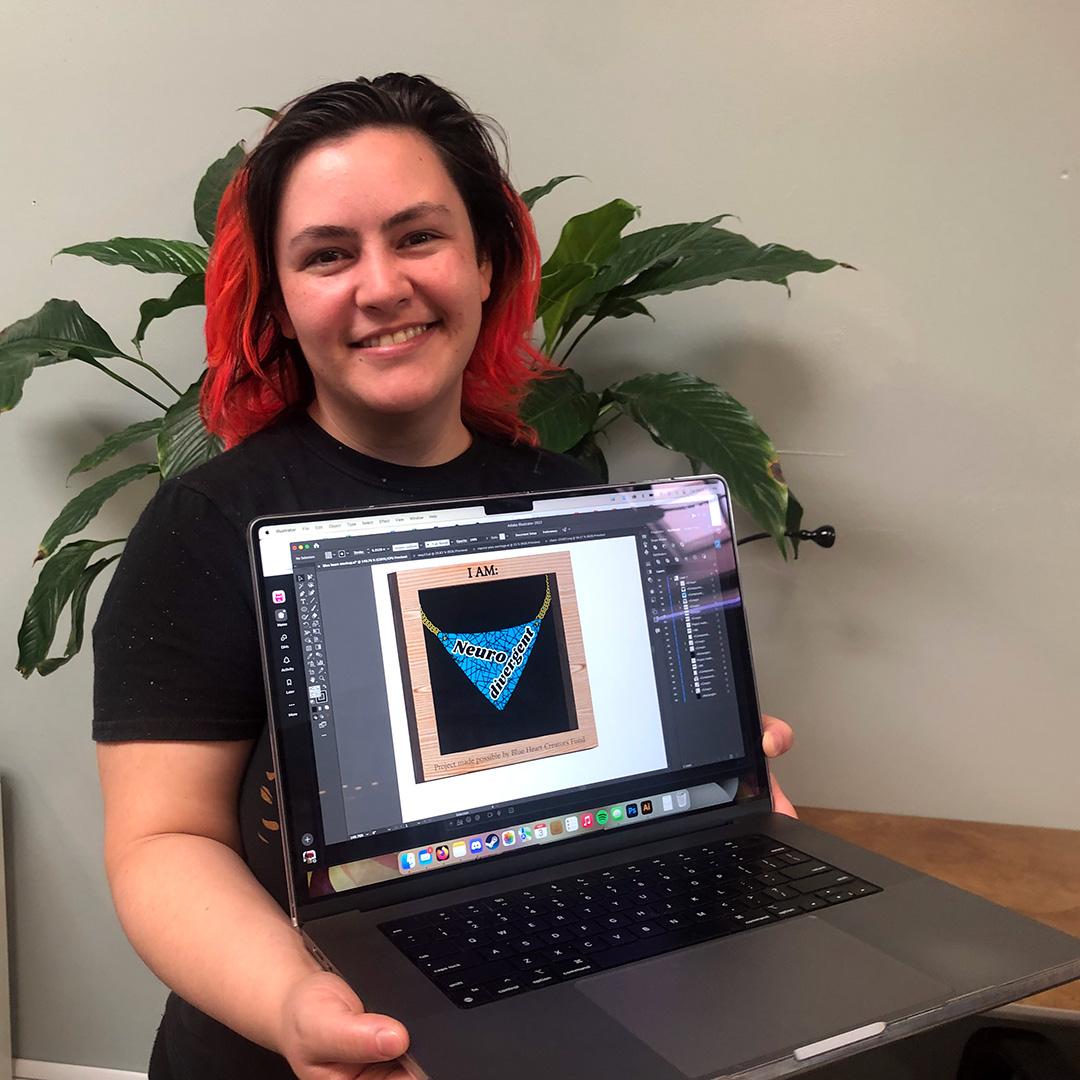
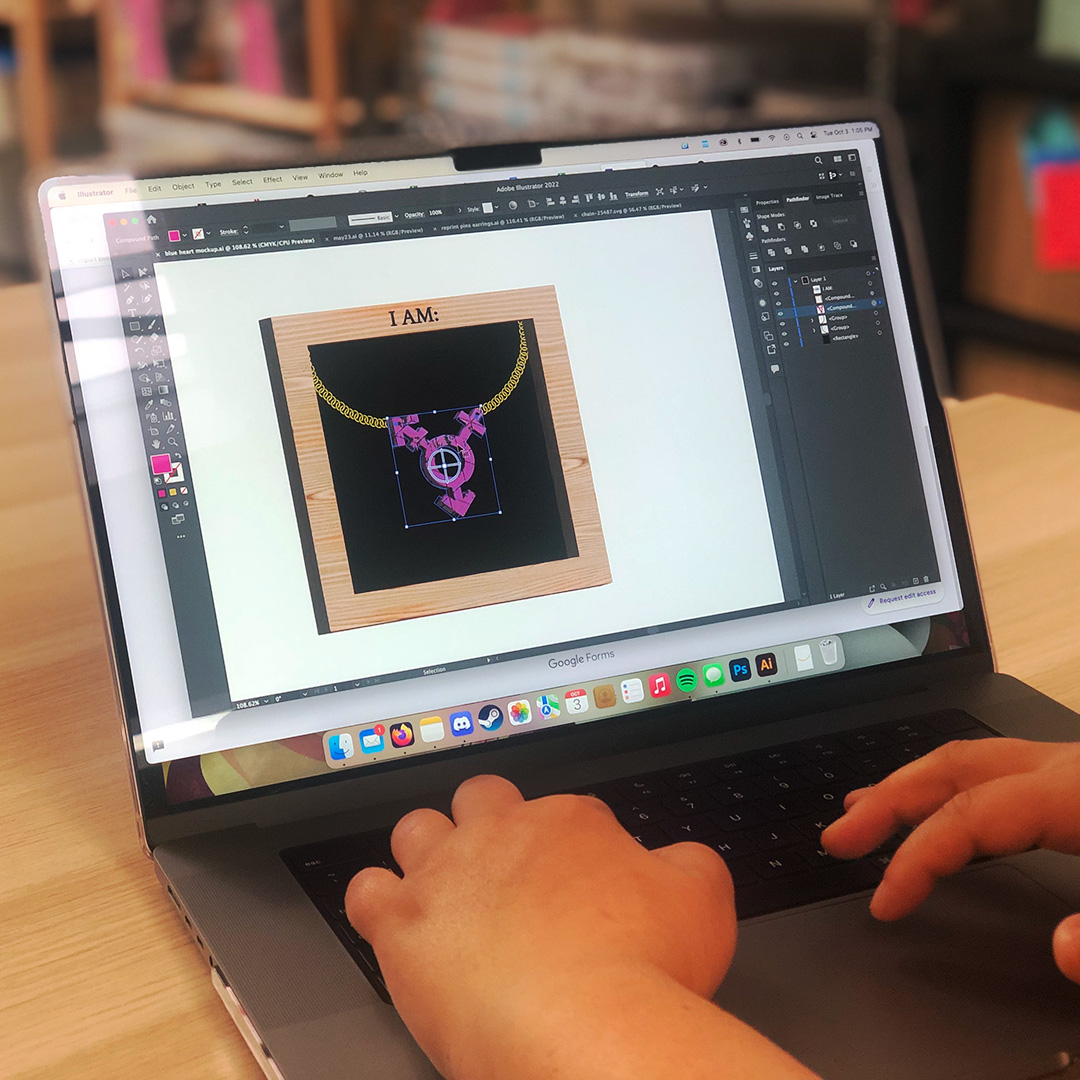
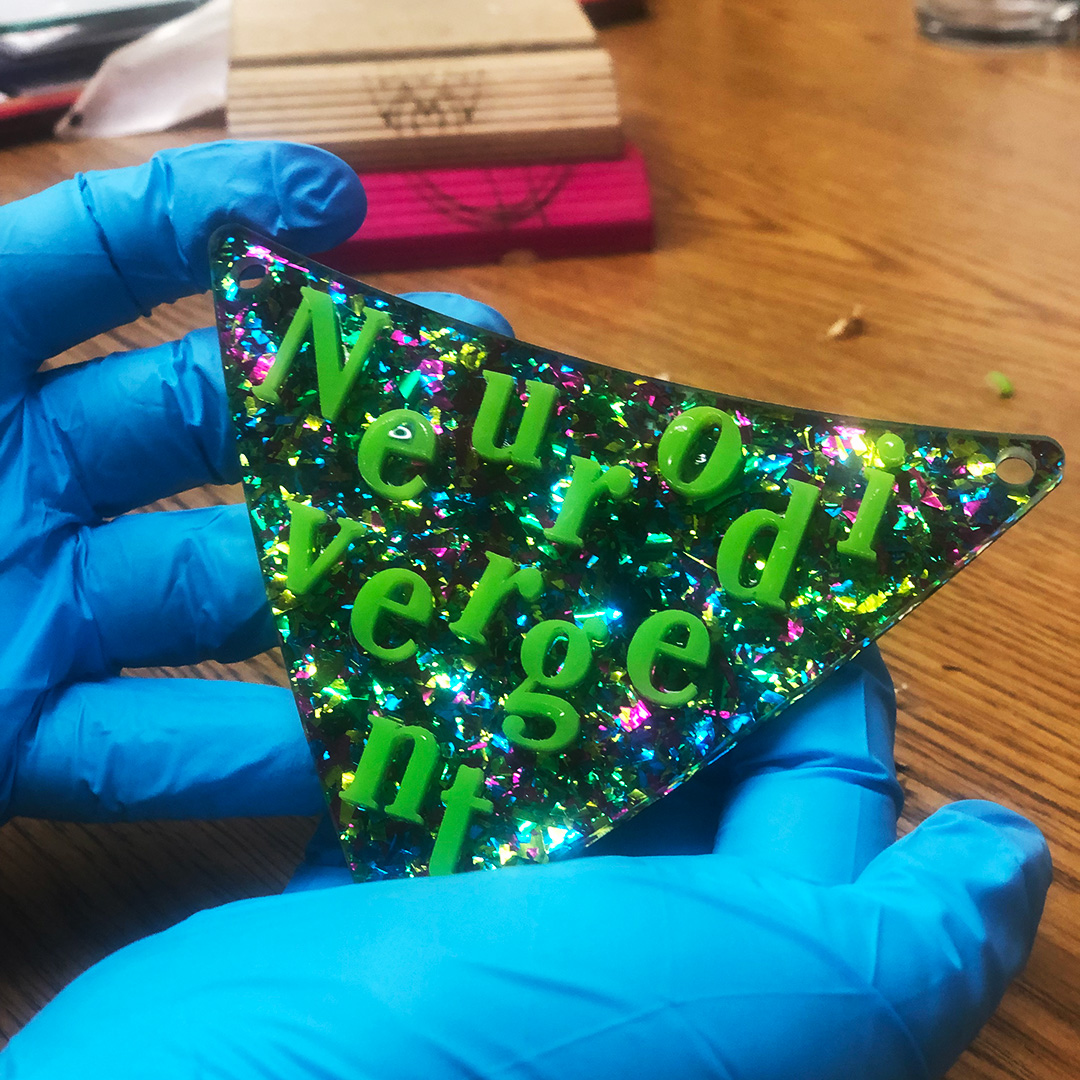
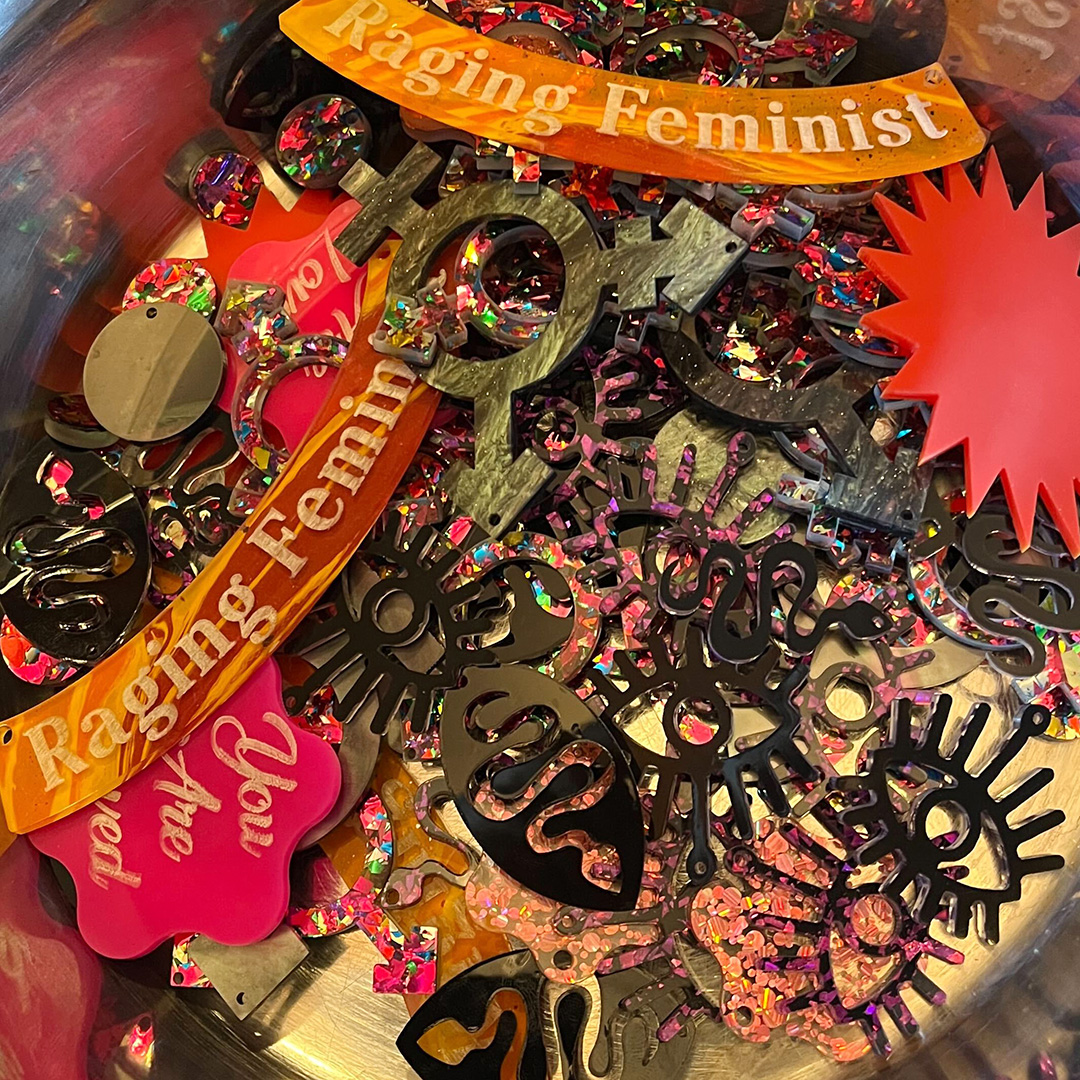
We received a wide range of responses which Miriam translated into both text and image based designs making deliberate aesthetic choices (font, color, shape, etc…) to amplify the meaning of each piece.

Jewelry Design with words "Raging Feminist," "maker," "artist," "leader," "weird."
Miriam adds responses from the Ace Community to their mood board and begins to experiment with designs.

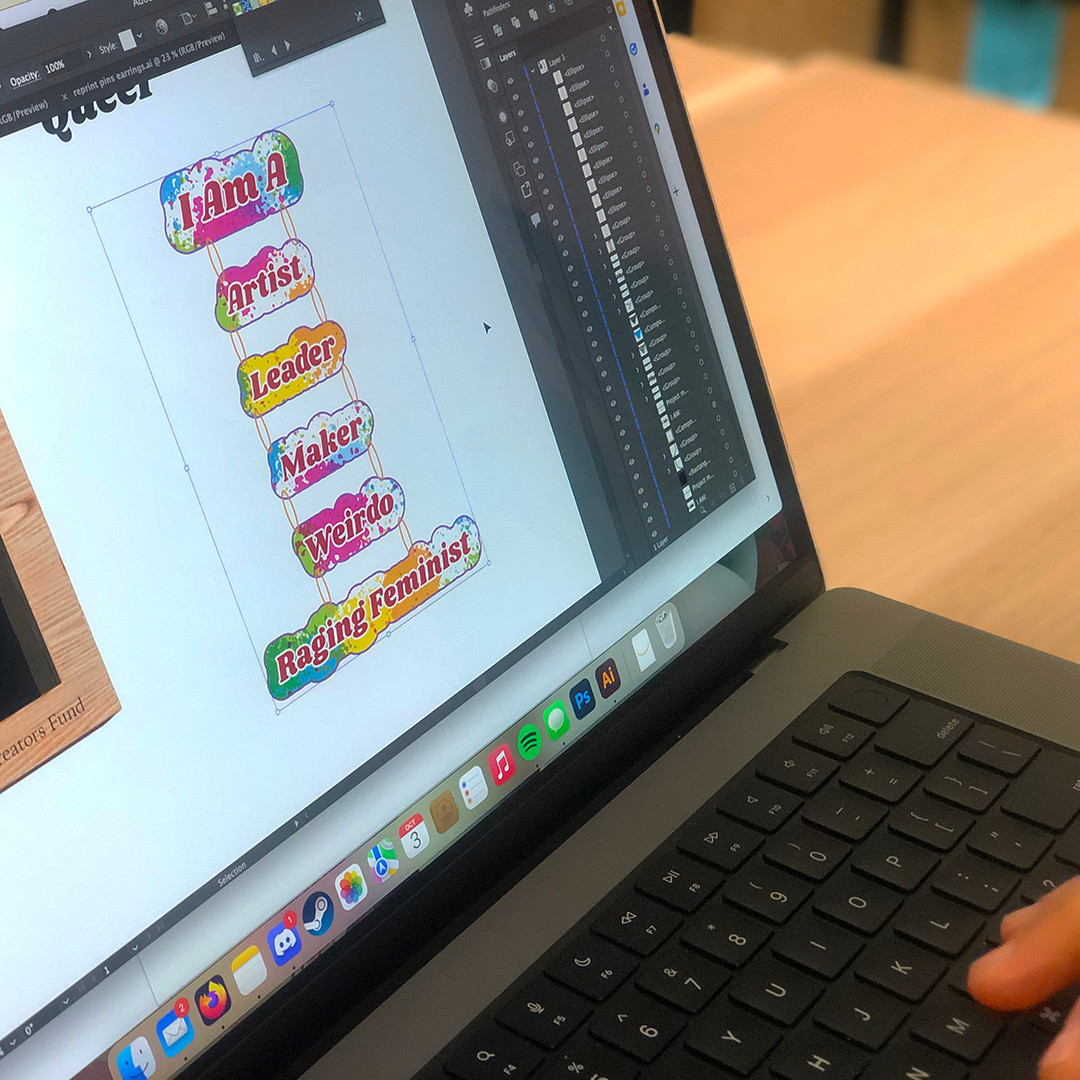
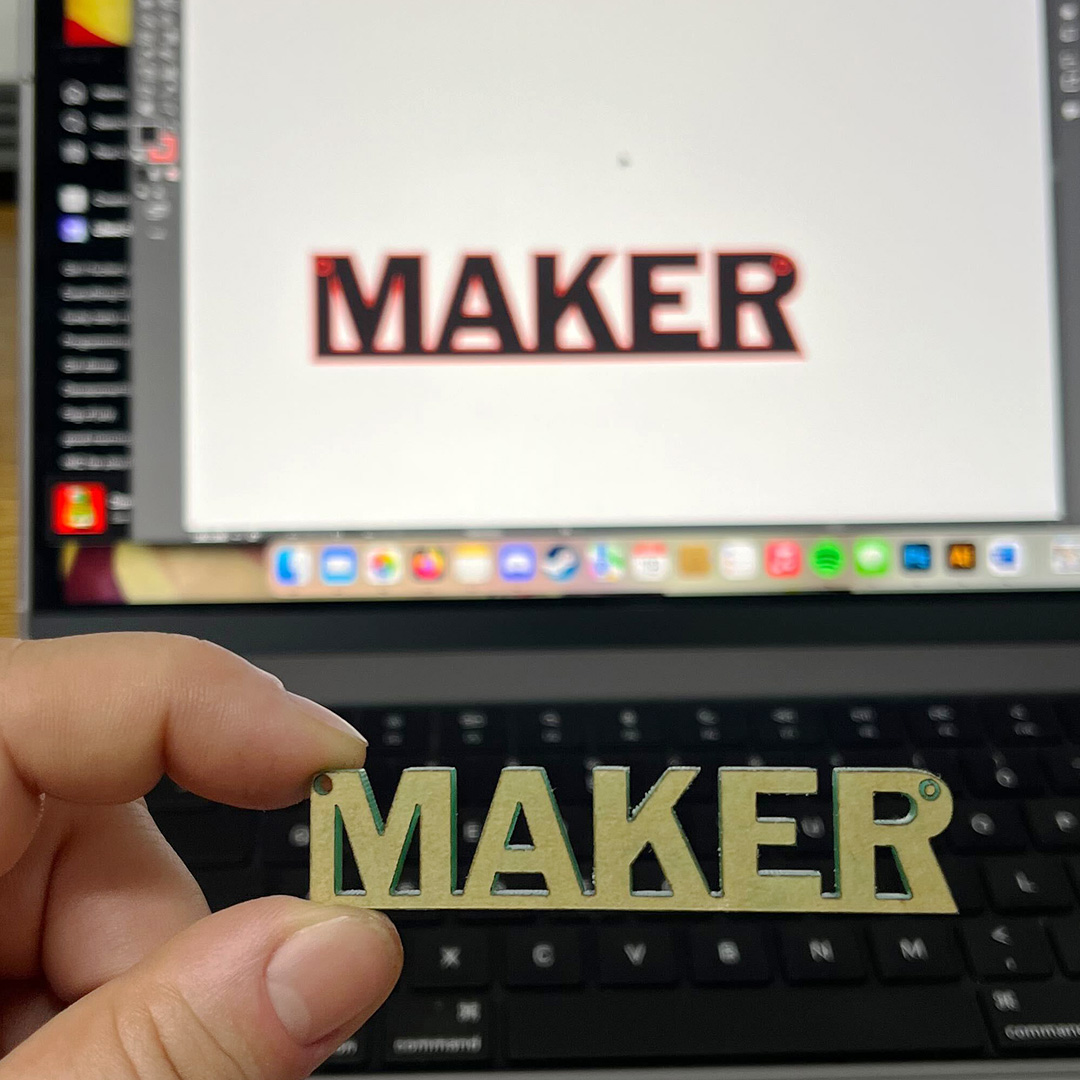
As part of their design process, Miriam uses a mood board to play with color, scale, font, and shape until they find the right balance. This process allows them to preview what their art will look like before cutting into their materials and to visualize the collection as a whole.

Jewelry prototype with symbol representing gender identities.
Miriam puts the finishing touches on an early draft of a jewelry design about queer identities.

Everyone deserves the chance for self actualization. In sharing your identity it becomes clear that you both have equal significance and it becomes harder to have ego of self hood.

— Miriam

The Materials

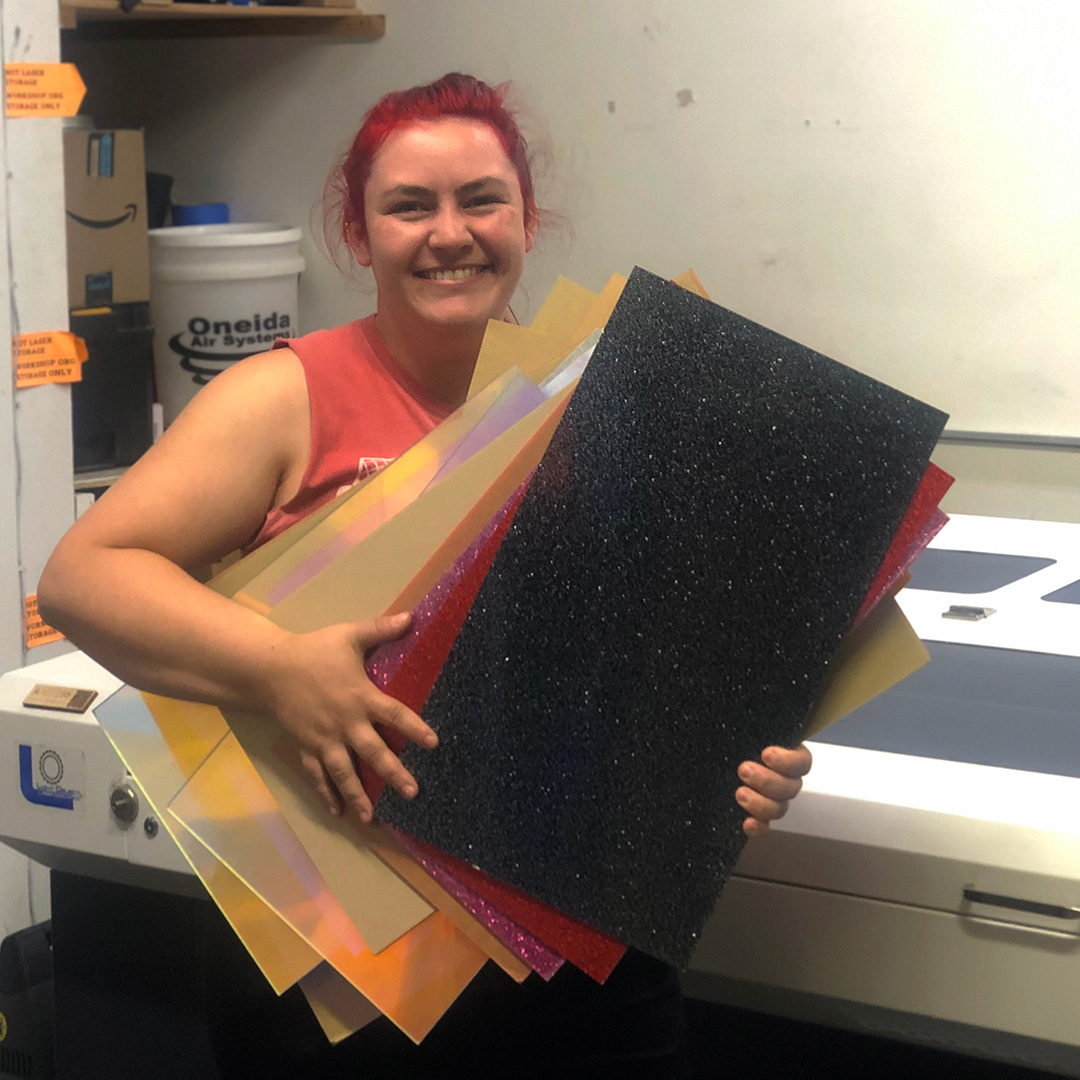
Miriam made a point to source lesser known materials for our jewelry line in order to raise awareness of unusual materials that makers of all skill levels can access and use successfully no matter where they are on their maker journey. They ordered show-stopping glitter, neon, and marble acrylics from a variety of online shops like Houston Acrylics, CMB Acrylics, and Esty.

Person holds up a big stack of acrylic sheets.
The acrylic arrives and Miriam can’t wait to start cutting! They’re extra excited because they don’t get to work with glitter and color-shift acrylics like these everyday.

Making the Jewelry

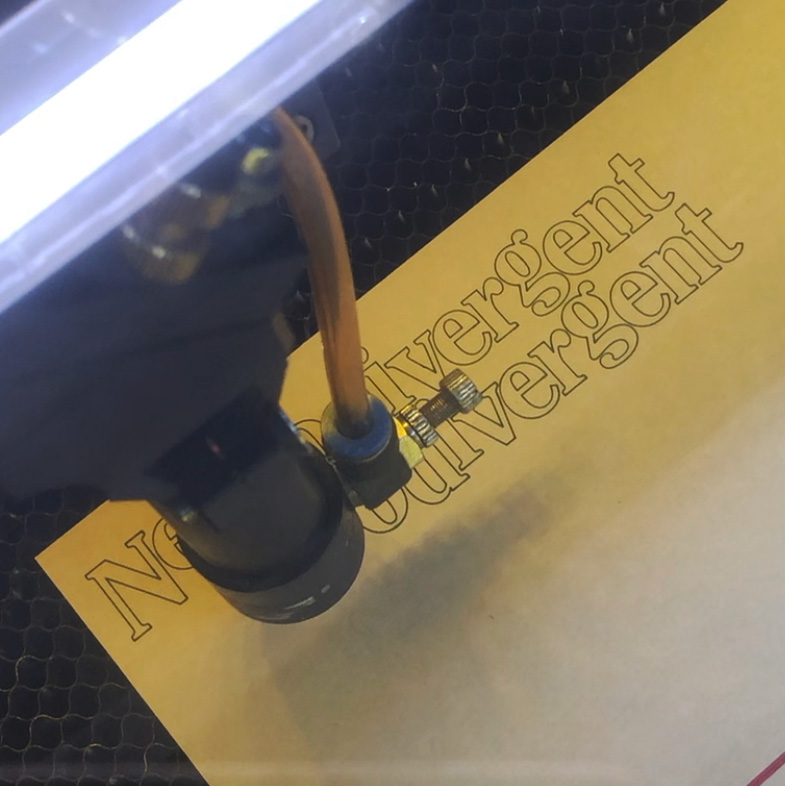
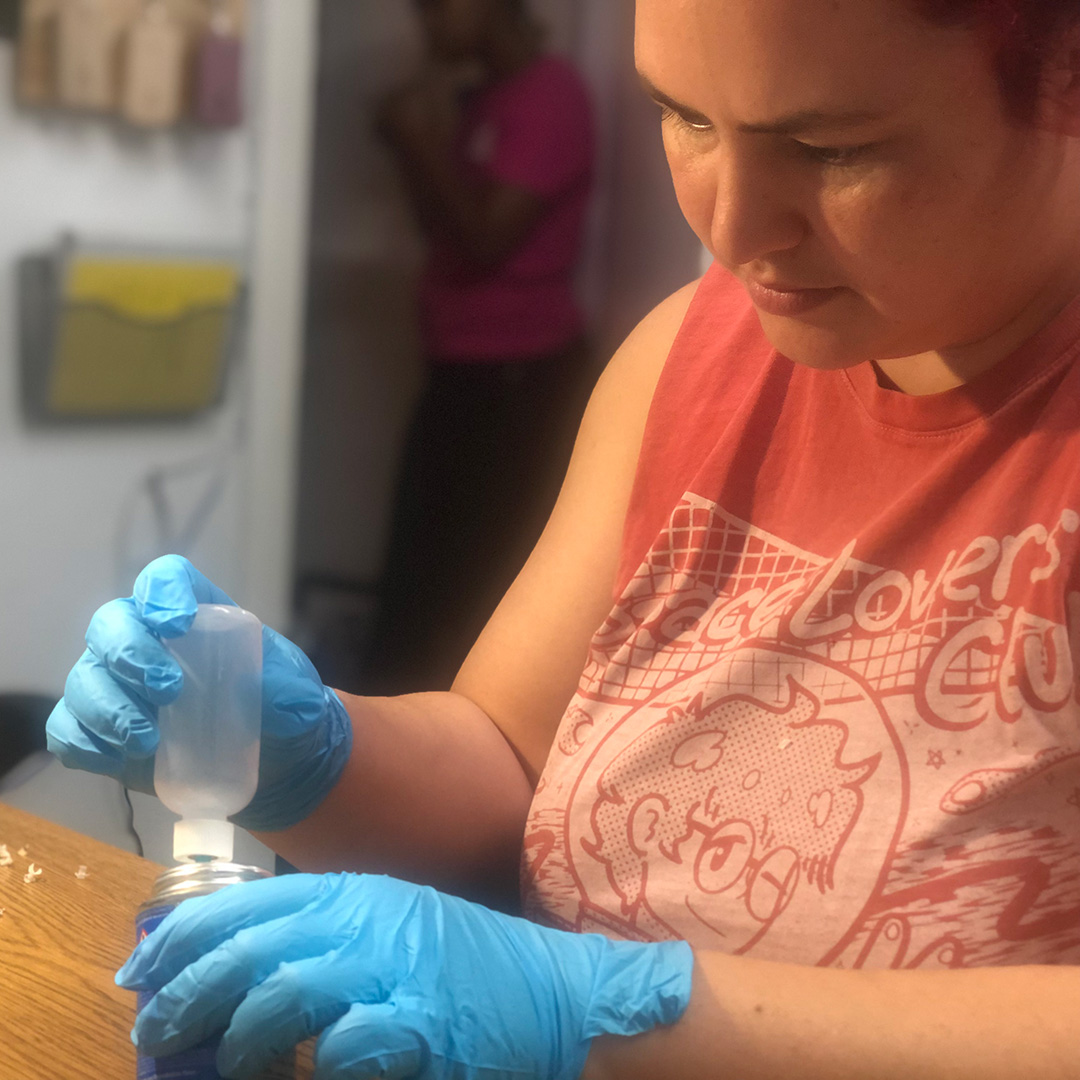
Once the design files are ready, Miriam cuts and etches the pieces using the Ace Laser and then prepares them for finishing by:

  • Removing the masking—a gentle adhesive tape that protects the material from scorching during the laser-cutting process
  • Using Weld-On—a special solvent based bonding agent used for acrylic—to assemble multi-part pieces of jewelry
  • Adding the chains and jewelry findings that make the pieces wearable
Laser-cutting the word "NEURODIVERGENT"
Laser cutting in action. Miriam will glue the letters for the word “neurodivergent” to a base piece of acrylic. This is one of the more complex designs in the collection.
Person filling dropper bottle
Miriam fills a dropper bottle with Weld-On-a special bonding agent used for acrylic.
Gloved hands holding neon green "neurodivergent" pendent.
It only takes a minute after applying the Weld-On for the letters to fully bond to the base of the pendent.
Laser-cut "MAKER" and design file.
Miriam holds a laser-cut “MAKER” pendent up to the design file.
Bowl of laser-cut jewelry
A bowl full of laser-cut pieces for the jewelry line.

Stay tuned for Part Two!

Purple and rainbow 3D printed dragons on table

3D Printing Flexi Rose Dragons with Rene from Mischief Manor Makers

Ace Maker, Rene runs a small family business called Mischief Manor Makers that sells handmade goods both online and at local (and sometimes not so local) events like Folsom Street Fair, Surrender, and Play-X-Land at Cat Club Sf. Their inventory* changes frequently but includes kink and fetish gear like Custom Springbuck Horn Floggers, small pins with a wicked sense of humor, Custom Made Squishmallow Bags, and as of 6 months ago 3D printed items like their favorite Flexi Rose Dragons with articulated joints.

*Follow Rene on Tik Tok to learn more about Mischief Manor Makers and the things they like to make!

Person holds up 3D printed dragon.
Rene shows off one of their freshly printed Flexi Rose Dragons!

Rene got into 3D printing when they were visiting one of their partners in Georgia who runs a small business similar to Mischief Manor Makers. He showed them the basics, helped them find a 3D printer to take home, and encouraged them to make it a part of their business.

To design this Flexi Rose Dragon, Rene found a pre-made base file online and customized it with roses and thorns (Thingiverse has many open source files available to use for free, but you can also purchase premade files from places like Etsy).

For a shiny multicolor effect, Rene works with a special gradient silk filament which is slightly more delicate and little bit trickier to print with than standard PLA filament.

Each print begins with a brim—a stable base layer that keeps the Flexi Rose Dragon in place preventing it from slipping off the build sheet or collapsing during the job. When the dragon has finished printing, Rene will remove the brim to release the articulated joints that allow the Flexi Rose Dragon to move. They’ve learned through trial and error that printing a brim is critical even though it adds an additional 20 minutes to the already 4.5 hour printing time.

Dragon base layer on 3D Printer build sheet.
A strong foundation is the key to printing a successful Flexi Rose Dragon. The brim provides stability while printing flexible objects, but it will need to be removed at the end to release the “joints.”

Once they’ve made sure the brim has printed correctly, Rene likes to head up to the Ace Textiles Studio to work on other merchandise like their Custom Made Squishmallow Bags. They also check on their print at regular intervals to make sure everything runs smoothly.

Person with pink hair holding green Squishmallow backpack
Rene’s daughter came up with the idea for bags made from Squishmallow Plushies.
3D dragon in progress.
About half way through the print the topographical rose motif starts to emerge!
Multicolor 3D printed dragon.
It’s time to unleash the Flexi Rose Dragon from the build sheet.
Person holds up 3D printed dragon with attached brim.
To complete the dragon Rene will peel back the green brim on the underside of the dragon.
Person removing brim from 3D printed dragon.
Shedding the brim takes a little bit of patience but its totally worth it!
Purple and rainbow 3D printed dragons on table
Two completed Flexi Rose Dragons on the prowl at the Ace Makerspace 3D Printing station.

Rene’s tips for folks curious about getting started with 3D Printing: 

  • Check out Thingiverse for inspiration and pick something that excites you
  • Find community! Places like Ace Makerspace are great because there’s a built in support system if you need help troubleshooting as your starting out
  • If you plan to dive in and purchase your own 3D Printer, go for a well known brand because there is more documentation and technical support if something goes wrong

AMT’s Adventures at Maker Faire 2018

The Art Printing Photobooth aka The Edgy Printacular

At the Bay Area Maker Faire 2018, a team of Ace Monster Toys members created a photobooth where participants could take selfies which were then transformed into line art versions and printed, all initiated by pressing one ‘too-big-to-believe’ red button.

Back in March, AMT folks began prepping for Maker Faire 2018, and had an idea: what if you made a machine that could take a selfie and then generate a line art version of the said selfie, that could then be printed out for participants like you and me?! Thus, the Art Printing Photobooth was born! This project was based on the Edgy Cam project by Ray Alderman. AMT created a special slack channel just for Bay Area Maker Faire 2018 #maker-faire-2018. Then members set about figuring out how exactly to make this art-generating-automaton and Rachel (Crafty) campaigned for having a ‘too-big-to-believe’ push button. They would need many maker skills: CNC routing and file design, woodworking, electronics wiring, and someone to art it all up on the physical piece itself. Bob (Damp Rabbit) quickly volunteered to take on the design and CNC cutting, while Ray (whamodyne) started to chip away at the code that would be used to convert photos to line art.


Then the trouble began. By mid-April, our intrepid troubleshooters were running into all sorts of snags – so much so that the original code needed to be thrown out and rewritten from the ground up! To add additional difficulty (and awesomeness!) the team decided to use a Print on Demand(POD) service to allow participants to have their generated art uploaded and available to be printed on mugs, t-shirts, posters, etc. Soon after, Ray wrote up a new digispark code for the big-red-button to actuate the script and convert and print the line art (code given below) using Python3, opencv library, printer library from https://github.com/python-escpos/python-escpos.


Meanwhile, Crafty Rachel and Bernard were configuring the TV mount that would be the selfie-display of the photobooth and Damp Rabbit was busy CNCing and painting up a storm to create the beautiful finished product – The Edgy Printacular! The EP was a hit and won three blue ribbons at Maker Faire 2018. Another happy ending that speaks to what a few creative makers can do when they put their heads together in a place with all the right equipment, Ace Monster Toys <3

Visting Boulder’s “Building 61” Makerspace

I hope you all had a Happy Thanksgiving!

I’m in Boulder Colorado this week visiting family. On Friday afternoon I took some time out to visit the new Makerspace at the Boulder Public Library. It’s always interesting to see how other maker communities do things. I thought I’d share a few photos.

I barged in with no warning and introduced myself to Adam Watts, one of two library employees in charge of the space. The remainder of the staff are volunteers. Adam seemed happy to meet a kindred spirit and was kind enough to show me around.

There are three main rooms at Building 61; a small office-like room, a main workspace, and a (nascent) wood shop.

bms_map

I took no photos of the little office, but it’s a small room with a few standing-height desks and seems to be devoted to design work.

The main space has a work area in the center surrounded by specialized machines. They have three nice Lulzbot 3D printers.

bms_3d-printers

Next to them lives an Epilog 40 watt laser and its console computer.  Both LulzBot and Epilog are located in Colorado, not far away.  Adam says they like to deal locally when possible  … As do we!

bms_epilog-laser

On the opposite wall lives a new ceramics kiln; not quite operational yet.

bms_kiln

And, next to that, an electronics workstation, complete with a small CNC machine dedicated to circuit-board machining.

bms_electronics

The wood shop features a Table saw, chop saw, drill press, thickness sander, and jointer among other things.  The centerpiece is a brand new CNC router, about the same size as ours.  The wood shop is not quite up and running yet, but Adam says they’re getting close!

bms_shopbot bms_thickness-sander bms_table-saw

bms_chopsaw

The Makerspace is a relatively new offering at the library, made possible by a foundation grant. That explains where all those the shiny machines came from! They don’t have as much space as we do, but they seem to be making pretty effective use of the space they do have. Adam reports high public interest in all the programs offered so far.

Access to the space is free for everyone with a library card. Materials cost extra. Adam explained that he’d love to offer 24/7 access like we do, but that’s just not in the cards. The library requires them to have an employee present when the space is open, which is probably to be expected when dealing with a public entity. The offerings generally seem to be more structured as well: organized classes complemented by ‘drop in’ hours for various functions in the space.

But a lot of issues sounded very familiar: They’re figuring out how to set up the ceramics kiln without setting off the fire extinguishers; they had to cut a new hole in the wall for ventilation; … etc. I’m sure snags like this are common to every hacker space!

While I felt envious of all the spiffy new machines, I also felt proud of the volunteer spirit we foster at AMT. I think the energy we generate with our open-to-the-public classes and innovative programs like BoxBots makes up for a lot of grant money, and enables us to serve our community remarkably well. Of course, I don’t mean to suggest that we’d turn down your money, if you happen to be in a position to help!

Thanks Adam for taking the time, and best of luck with your new Makerspace! Boulder is lucky to have you!