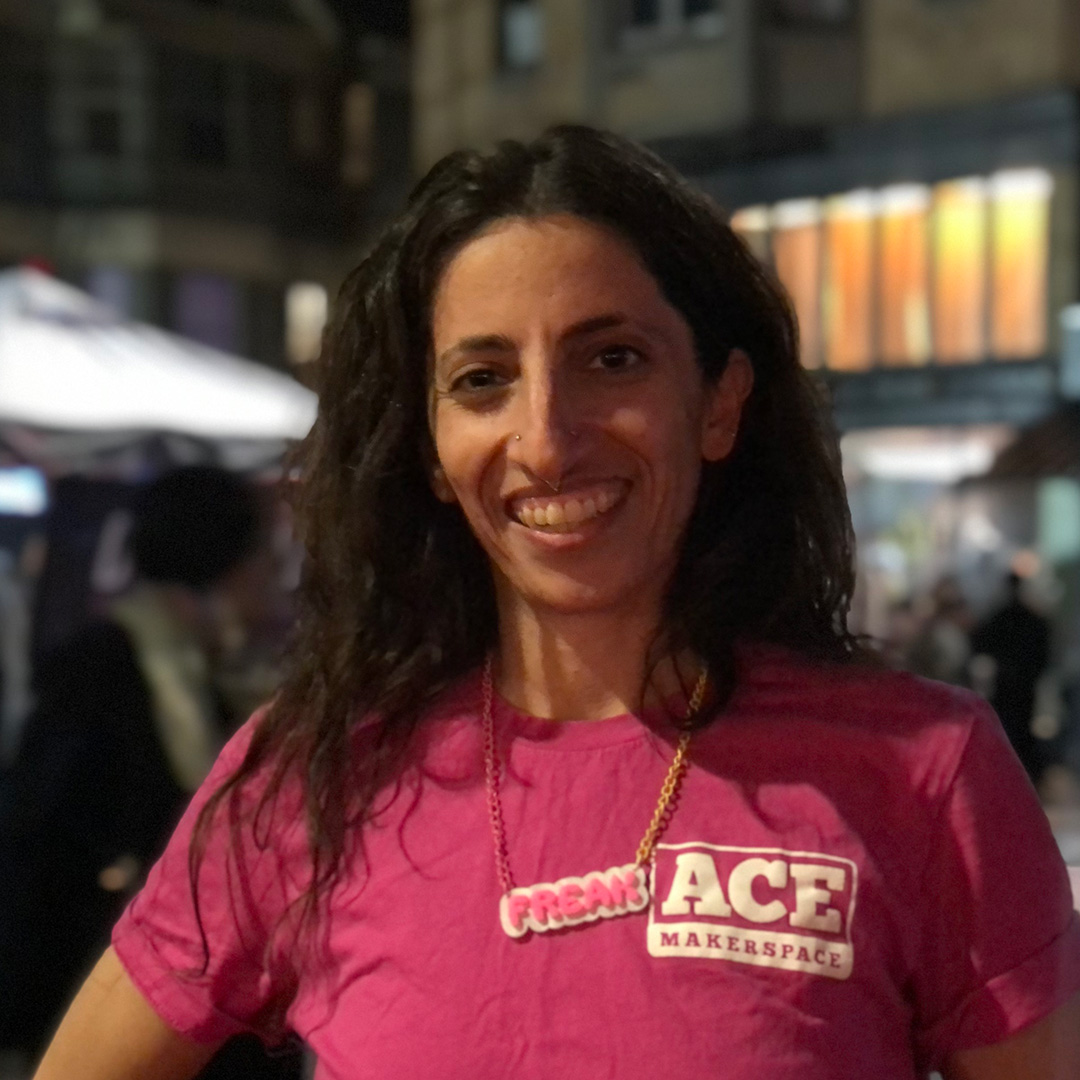
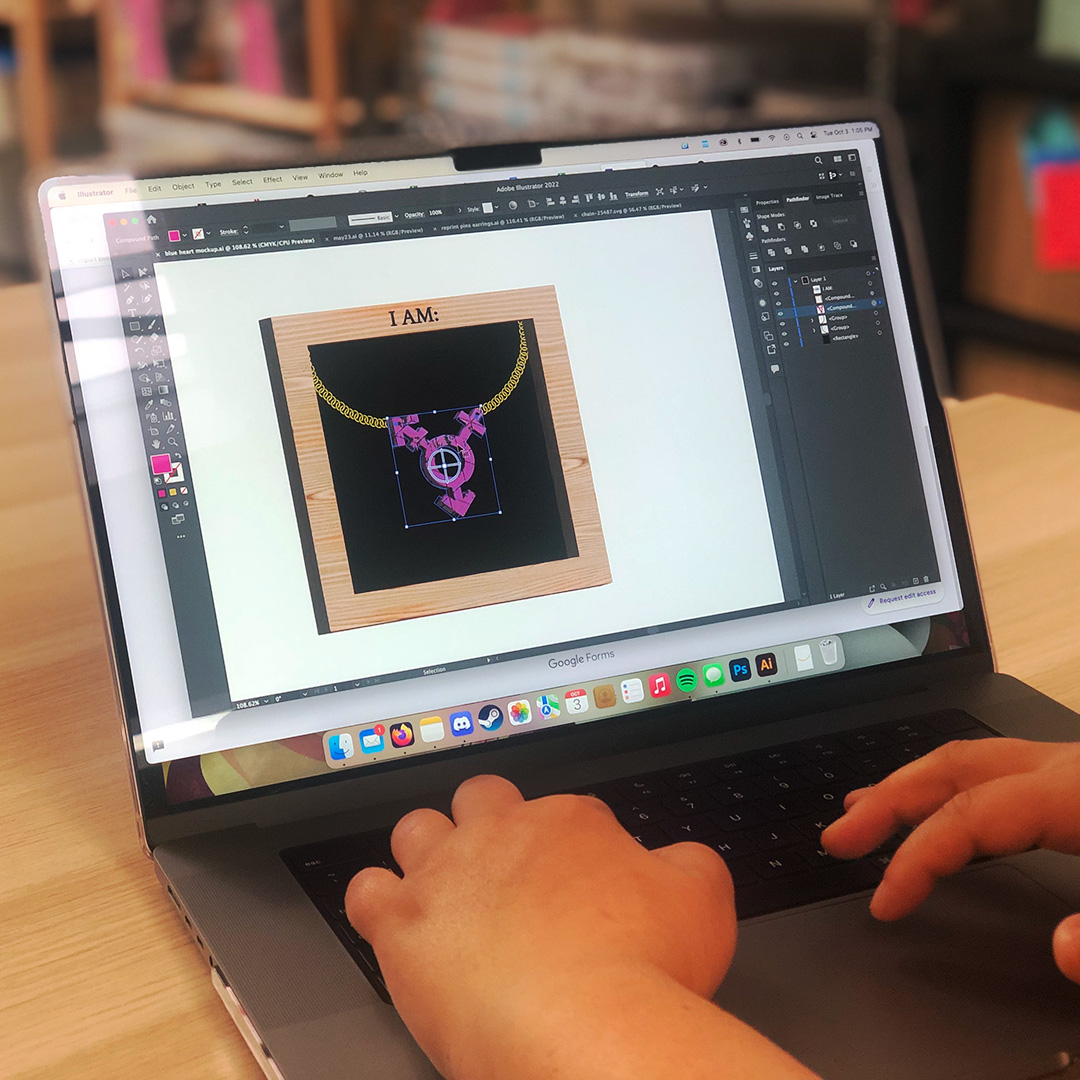
Over the past 6 months, we collaborated with local artist and co-founder of The Spooky Haus, Miriam Levenson, to create a collection of wearable art that embodies Ace Makerspace’s core values— diversity, community, inquiry, growth, and action—and celebrates the diverse identities held by makers in the Ace Community!
This work made possible through The Blue Heart Creator’s Fund, disrupts exclusionary cultural narratives around who can be considered a maker, and explores the idea that identity isn’t given, it’s made. To celebrate the completion of the project and to share it with our East Bay community we brought the exhibition to the last Oakland First Fridays of the year!
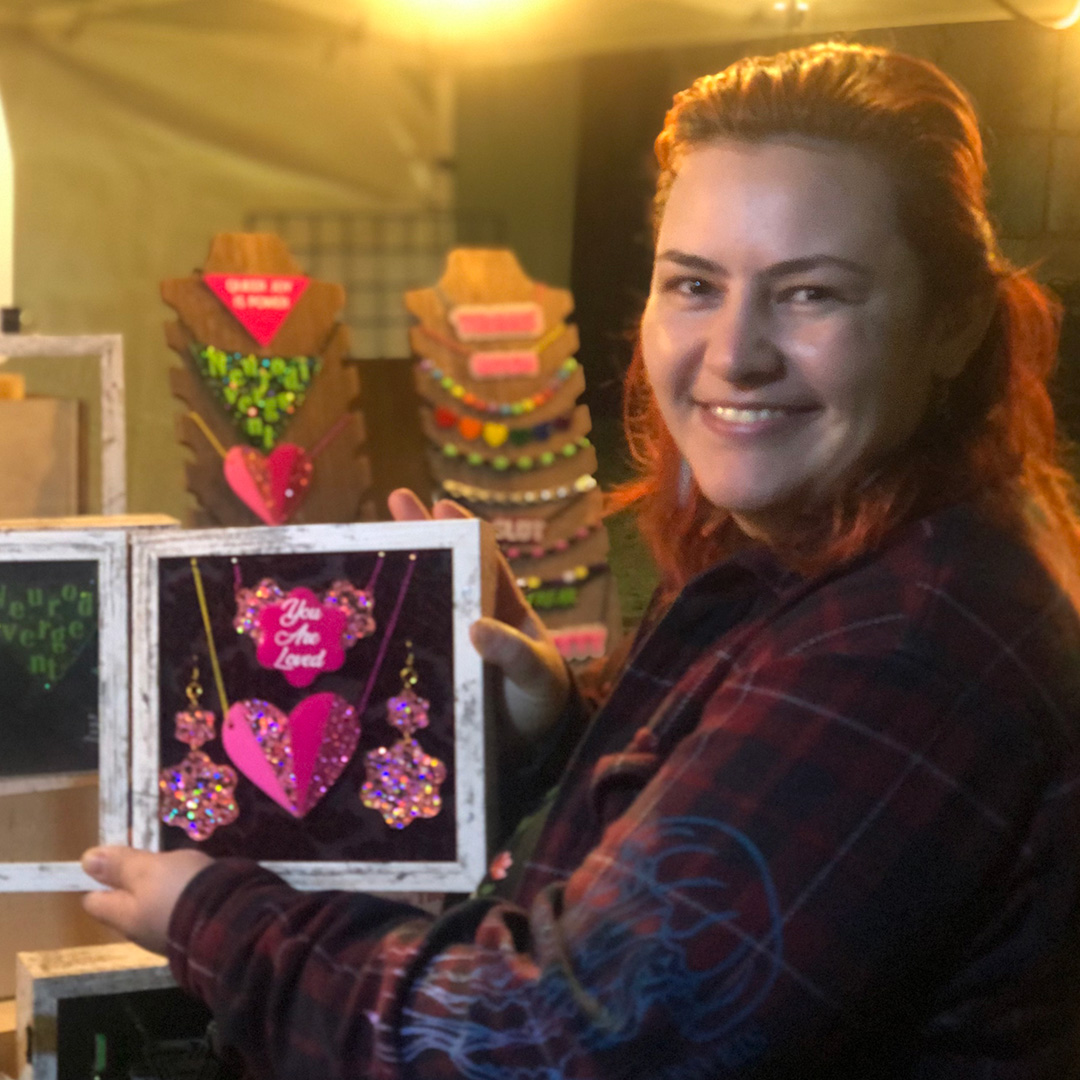
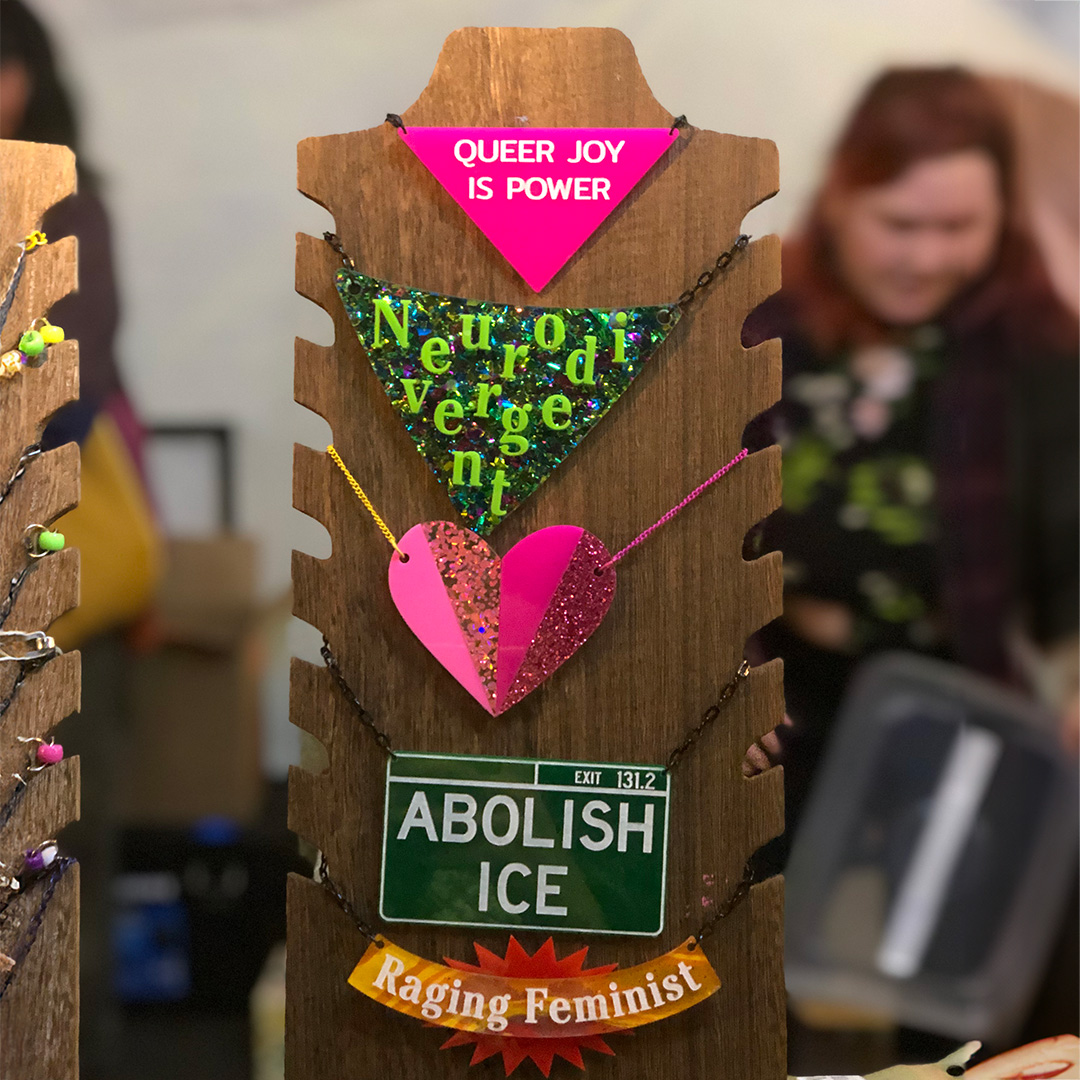
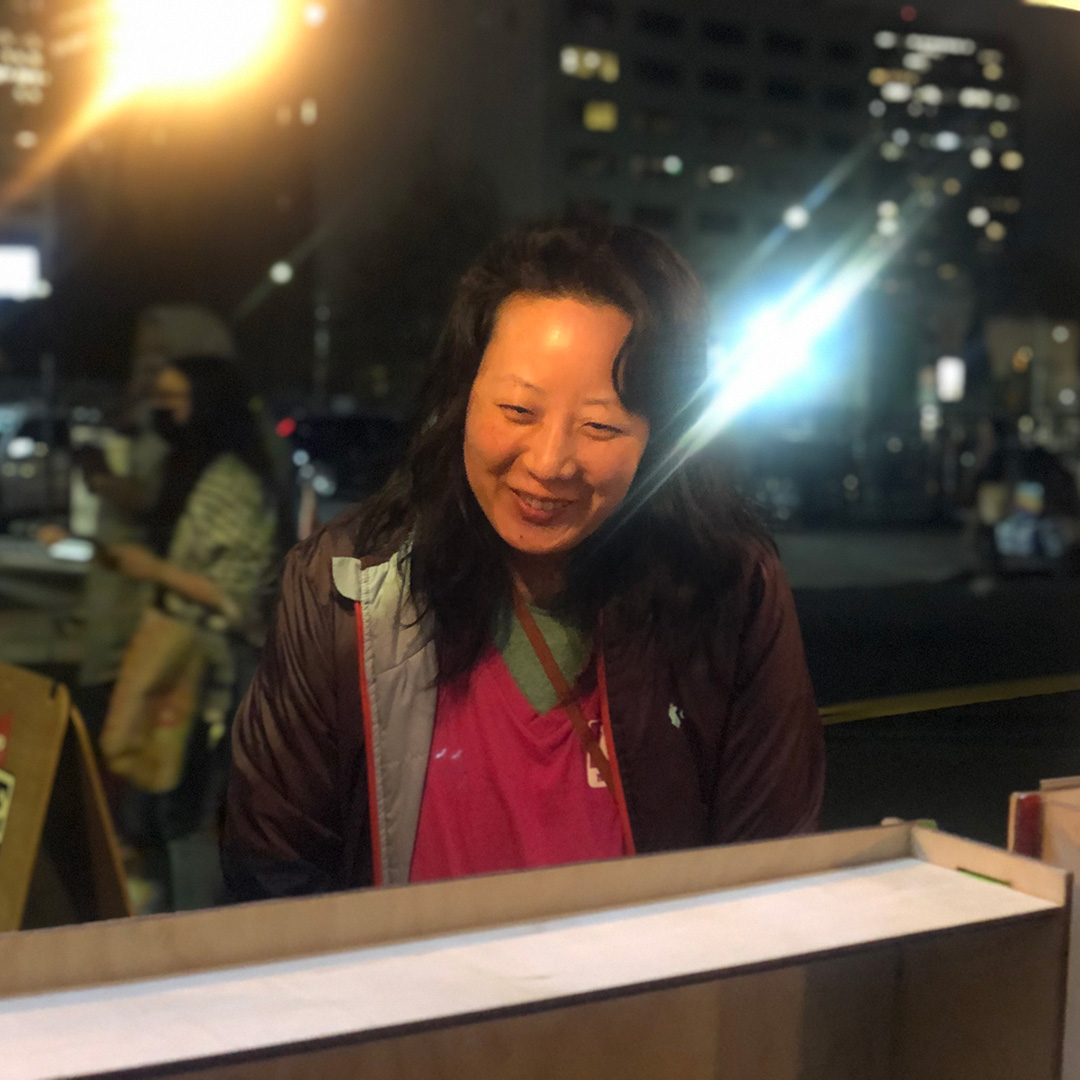
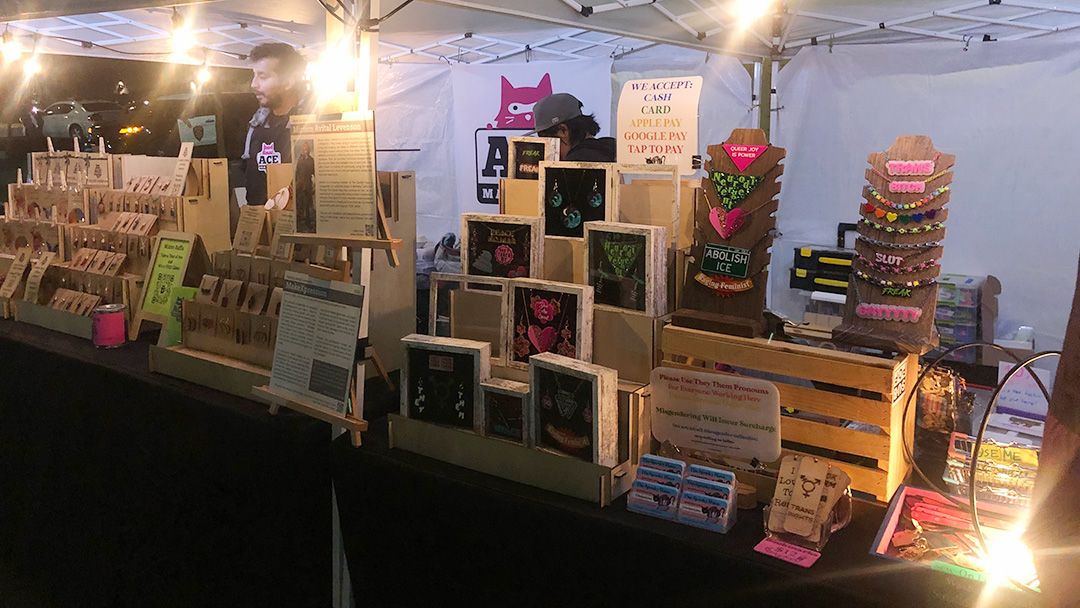
Folks stopped by the booth to look at the exhibit, buy their favorite pieces, and meet the artist, Miriam (above).The finished MakeXpression collection mounted in shadow boxes at the Ace First Friday Booth. These designs were inspired by the Ace Community who shared words and thoughts representing the diverse identities they hold for the project.Miriam explicitly created this collection using only Ace Makerspace tools, and beginner-friendly acrylics to encourage makers of all skill levels to experiment with lesser known materials for Laser-cutting (like the neon and glitter acrylics pictured above), and to explore new pathways and methods on their maker journey. Through this participatory design process and choice of materials, Miriam foregrounds agency in a makerspace context and exemplifies the Ace Vision: Making is for Everyone!Ace Member, Margret, takes in the finished exhibit.Ace Communications Associate, Jacky, one of the collaborators on this project, models a necklace from the collection.The MakeXpression exhibit in the glow of the Ace Oakland First Fridays Booth.
Have you heard of Blue Heart? They’re a rad non-profit that promotes, elevates, and distributes funds to grassroots community-based organizations like Ace Makerspace. In August 2022 we were honored as the Blue Heart Partner Organization of the month and this year, through the Blue Heart Creator’s Fund, we’re collaborating with Berkeley-based artist and founding member of The Spooky Haus, Miriam Levenson, to create a laser-cut jewelry line representing Ace’s core values diversity, community, inquiry, growth, and action!
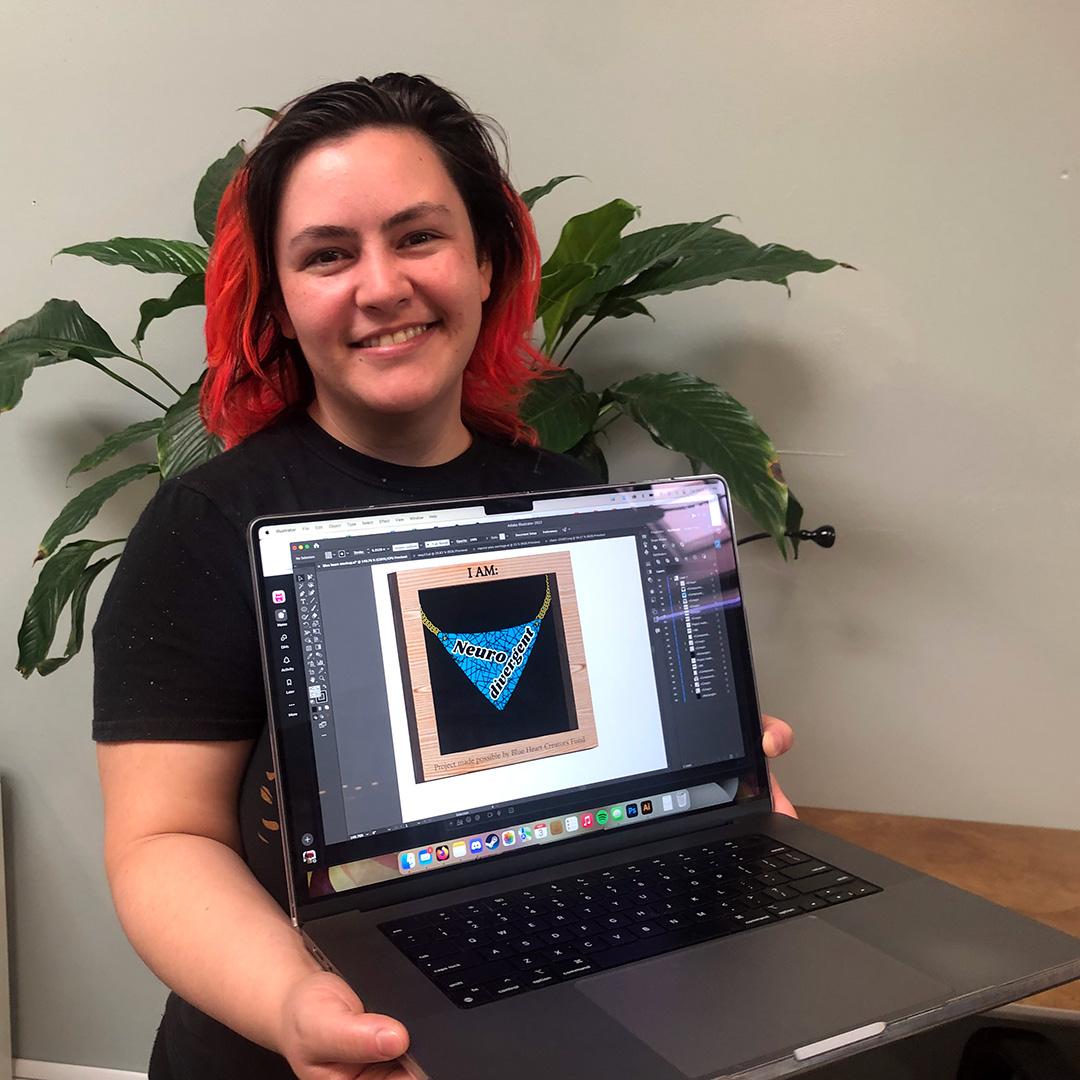
The artist, Miriam, shows off a preliminary design for one of the pieces in our collaborative jewelry line.
The way something can be worn is a powerful statement of agency, allyship, and identity expression. In this way, values can be shared and people can choose to showcase their values through beautiful wearable art.
Our laser-cut jewelry line will visually celebrate the diverse identities of makers in the Ace Community using tools and materials that are accessible to makers of all skill levels. We’ve also invited the Ace Community to participate in this project directly by providing insight into the diverse identities they hold and by inviting them to model the pieces once they are complete. The completed work will also be on display at Oakland First Fridays in December!
The Design Process
In order to make a line that truly represents makers in the Ace Community sent out a poll asking:
Do folks have any words or thoughts that highlight and celebrate your identity you’d like to share to help the project? This can be anything from “I identify as trans” to “I identify as a woodworker.
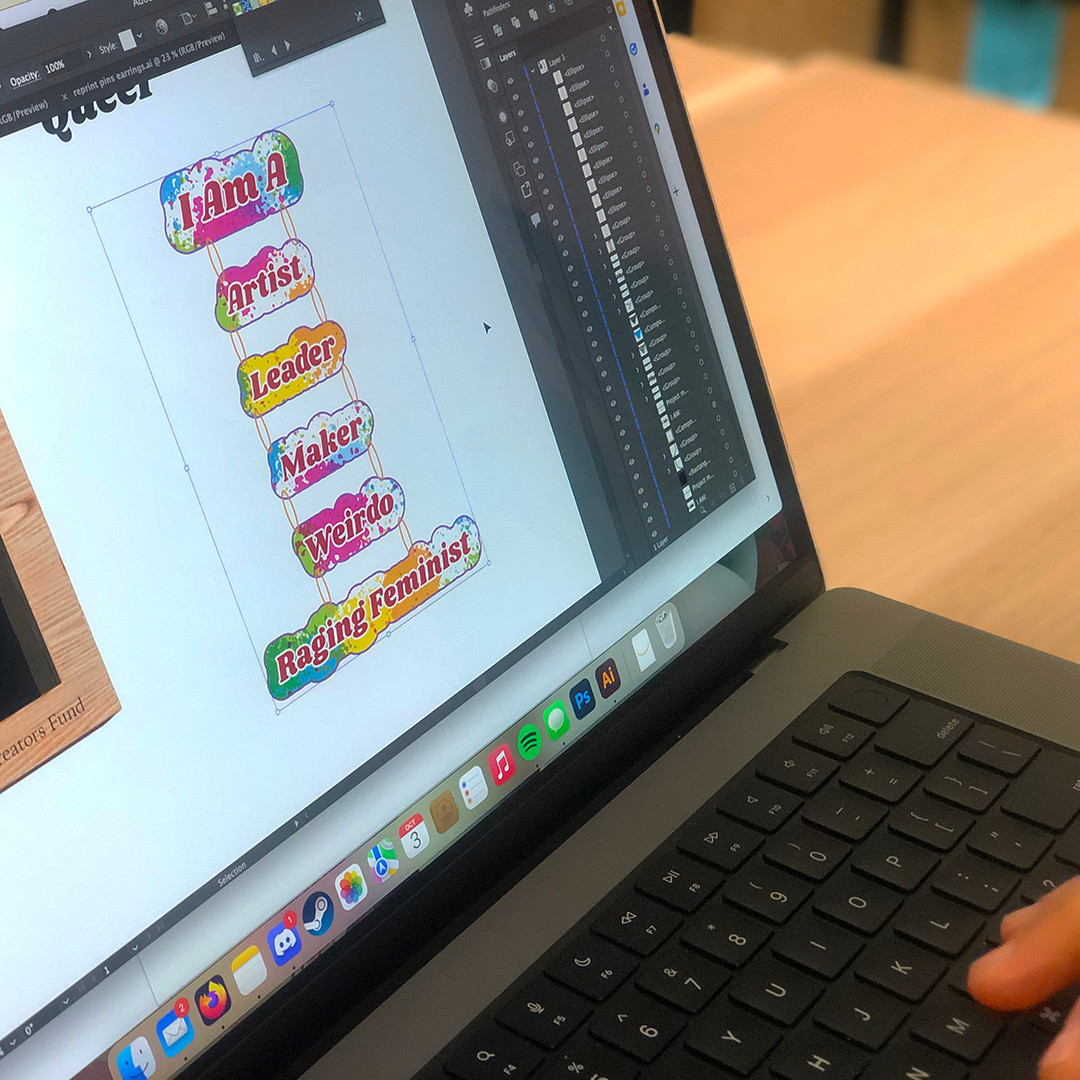
We received a wide range of responses which Miriam translated into both text and image based designs making deliberate aesthetic choices (font, color, shape, etc…) to amplify the meaning of each piece.
Miriam adds responses from the Ace Community to their mood board and begins to experiment with designs.
As part of their design process, Miriam uses a mood board to play with color, scale, font, and shape until they find the right balance. This process allows them to preview what their art will look like before cutting into their materials and to visualize the collection as a whole.
Miriam puts the finishing touches on an early draft of a jewelry design about queer identities.
Everyone deserves the chance for self actualization. In sharing your identity it becomes clear that you both have equal significance and it becomes harder to have ego of self hood.
— Miriam
The Materials
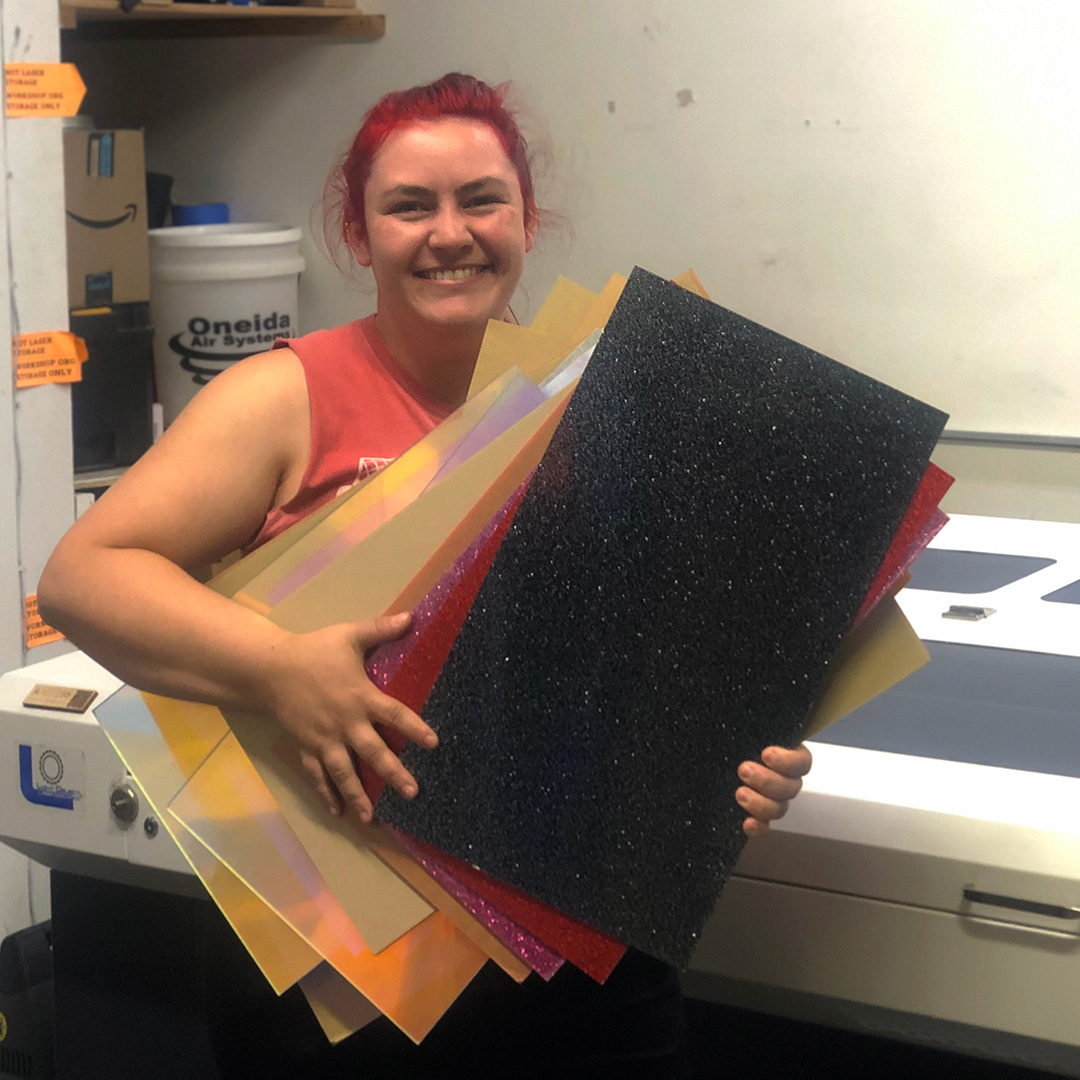
Miriam made a point to source lesser known materials for our jewelry line in order to raise awareness of unusual materials that makers of all skill levels can access and use successfully no matter where they are on their maker journey. They ordered show-stopping glitter, neon, and marble acrylics from a variety of online shops like Houston Acrylics, CMB Acrylics, and Esty.
The acrylic arrives and Miriam can’t wait to start cutting! They’re extra excited because they don’t get to work with glitter and color-shift acrylics like these everyday.
Making the Jewelry
Once the design files are ready, Miriam cuts and etches the pieces using the Ace Laser and then prepares them for finishing by:
Removing the masking—a gentle adhesive tape that protects the material from scorching during the laser-cutting process
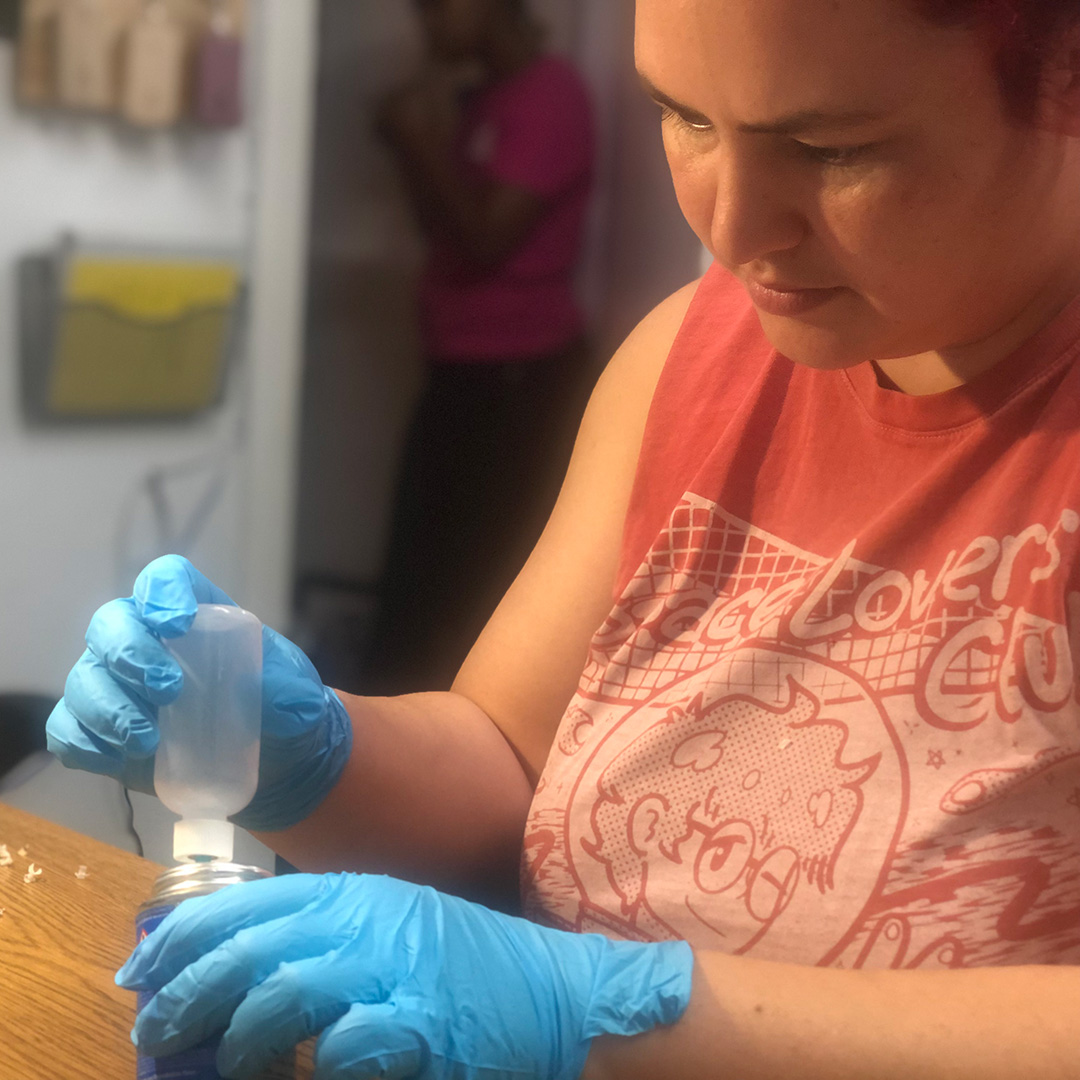
Using Weld-On—a special solvent based bonding agent used for acrylic—to assemble multi-part pieces of jewelry
Adding the chains and jewelry findings that make the pieces wearable
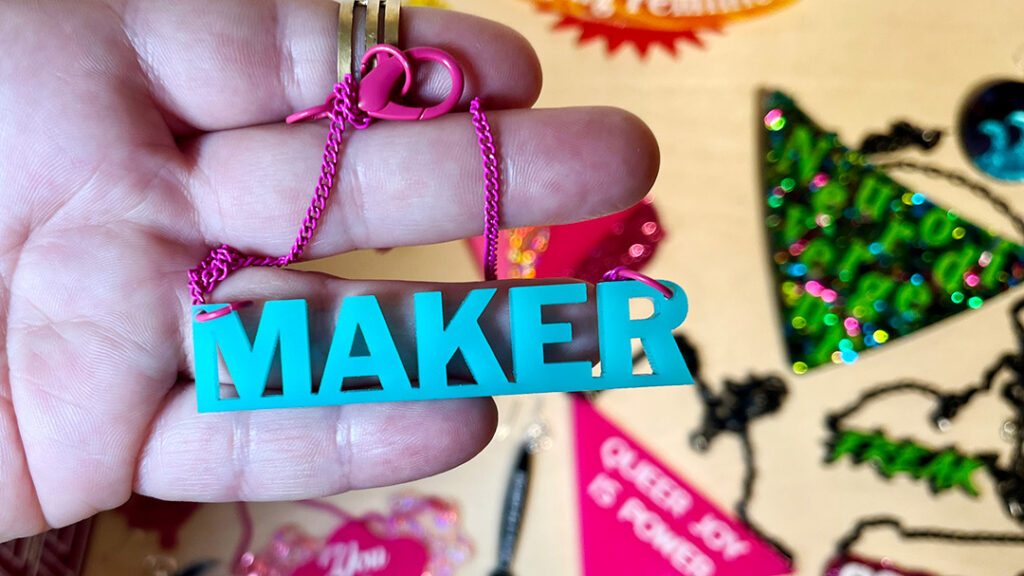
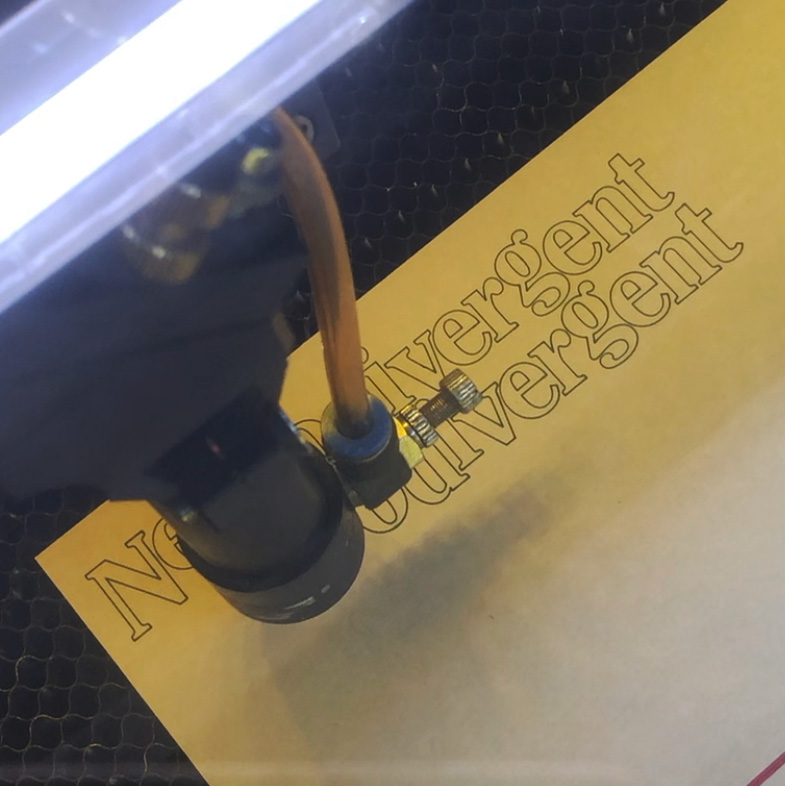
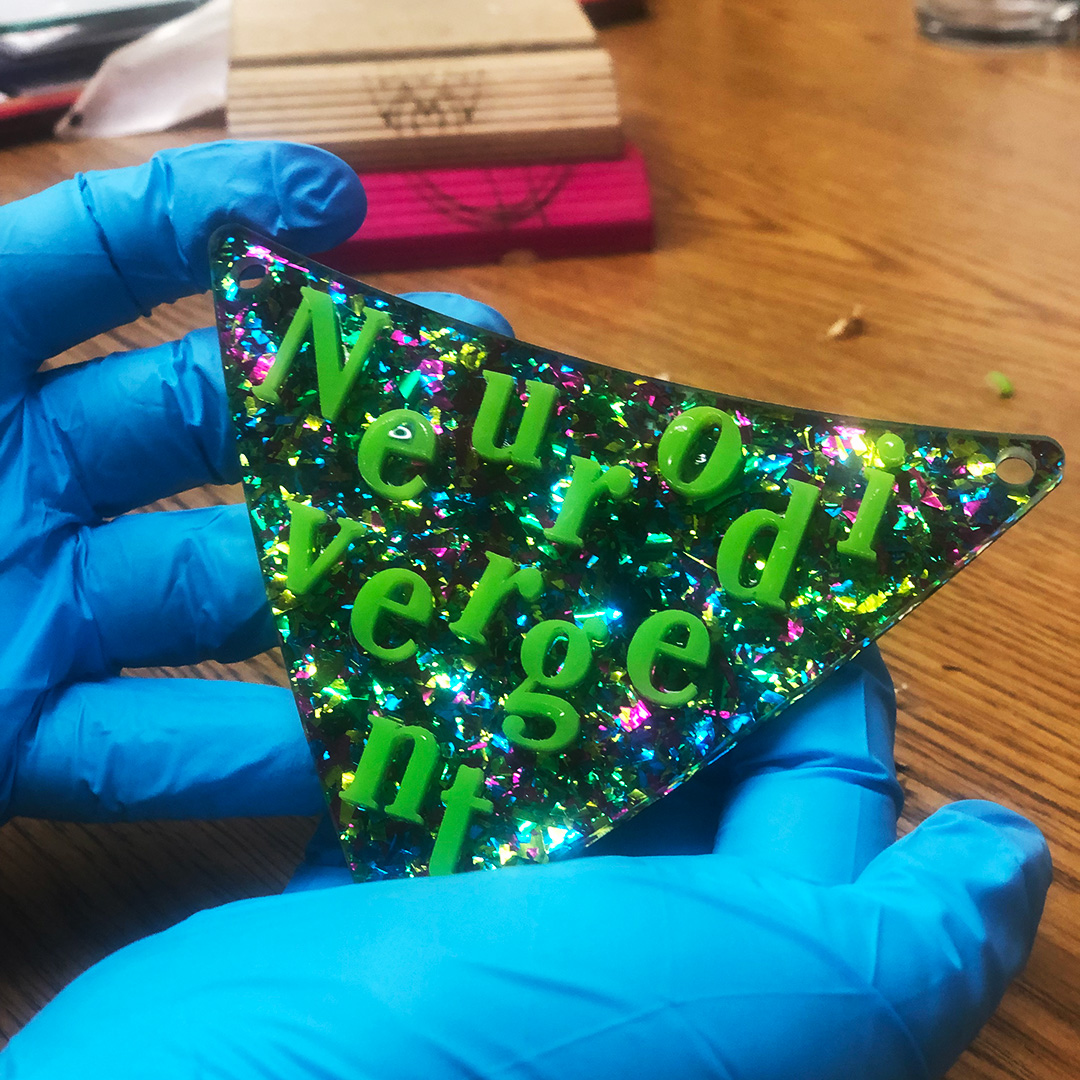
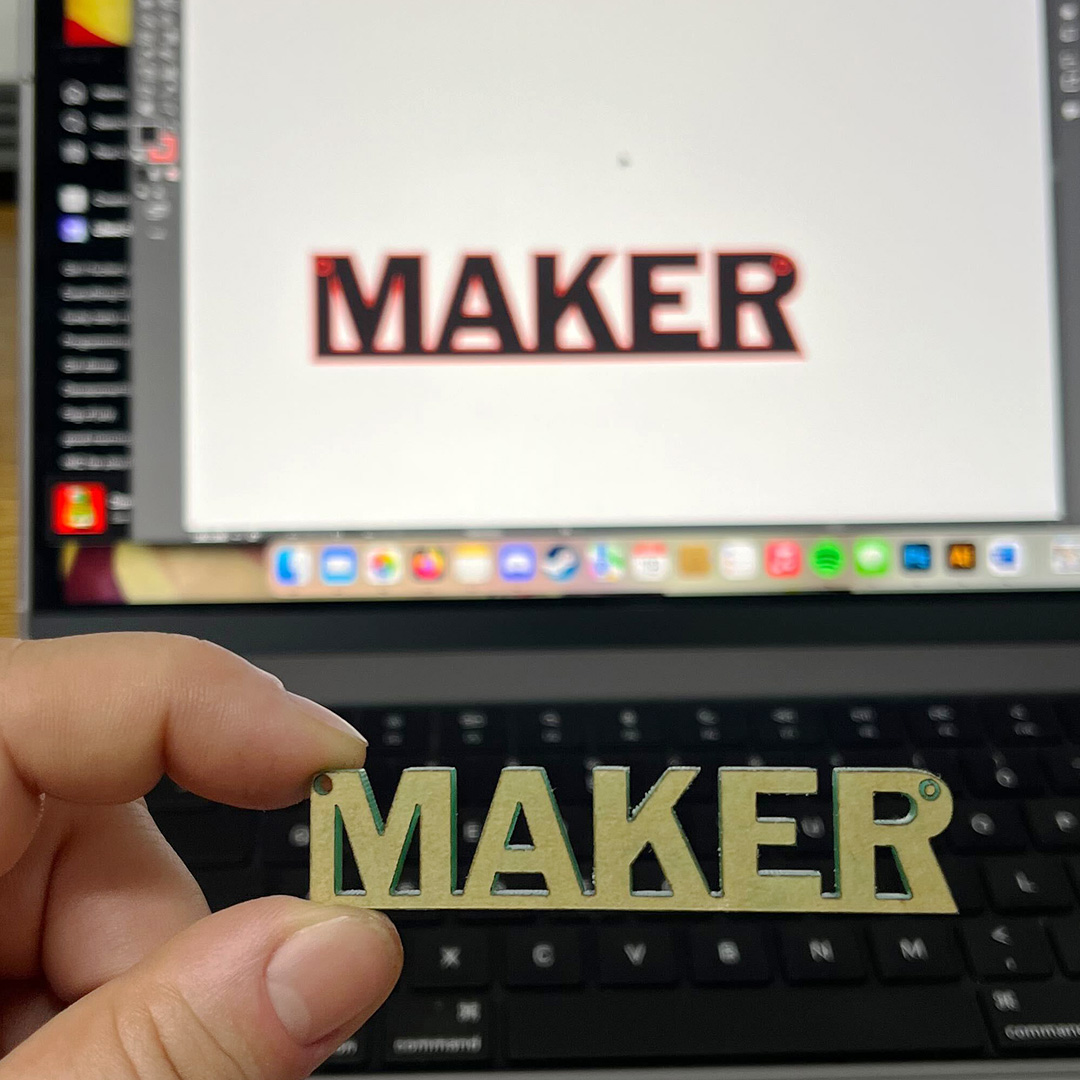
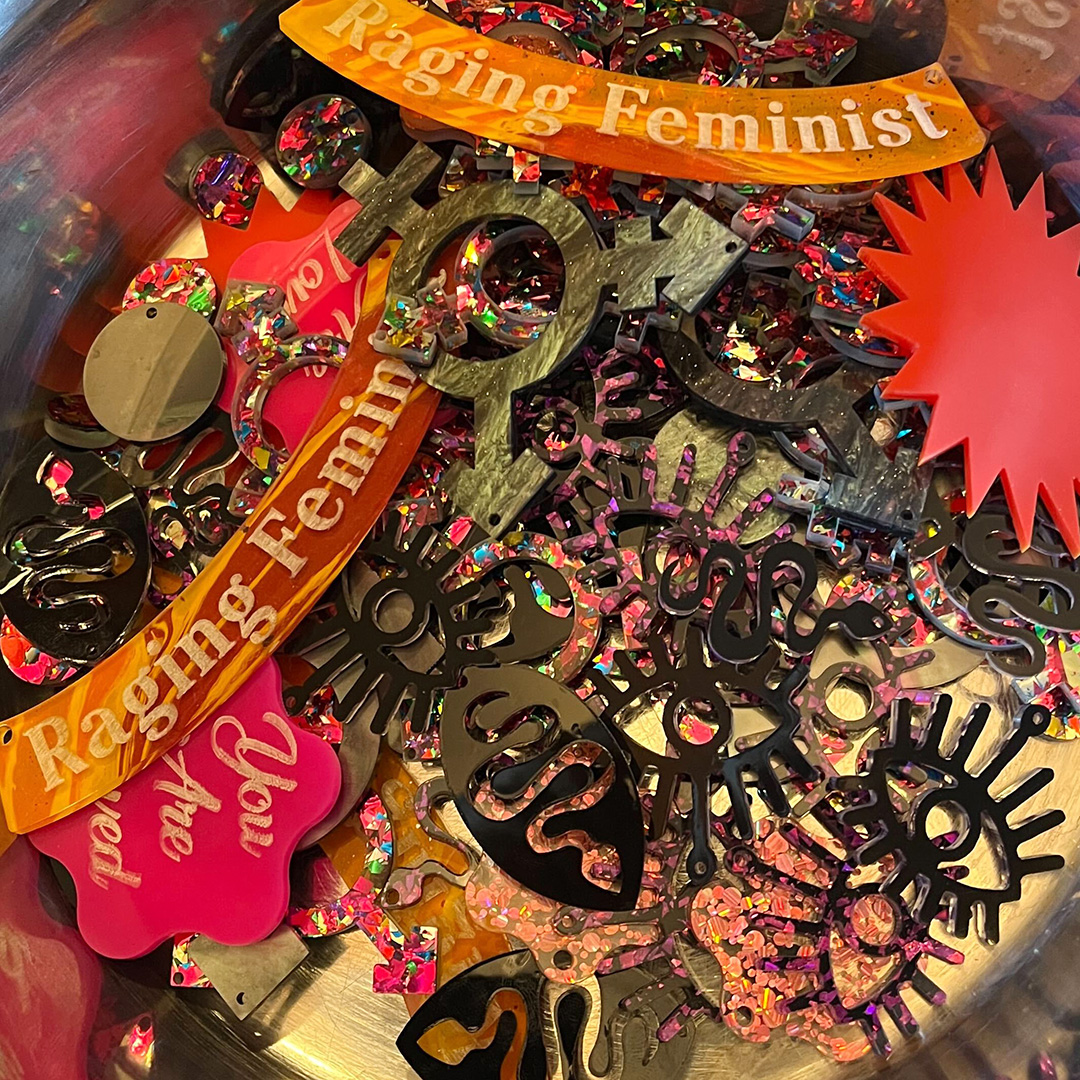
Laser cutting in action. Miriam will glue the letters for the word “neurodivergent” to a base piece of acrylic. This is one of the more complex designs in the collection.Miriam fills a dropper bottle with Weld-On-a special bonding agent used for acrylic.It only takes a minute after applying the Weld-On for the letters to fully bond to the base of the pendent.Miriam holds a laser-cut “MAKER” pendent up to the design file.A bowl full of laser-cut pieces for the jewelry line.
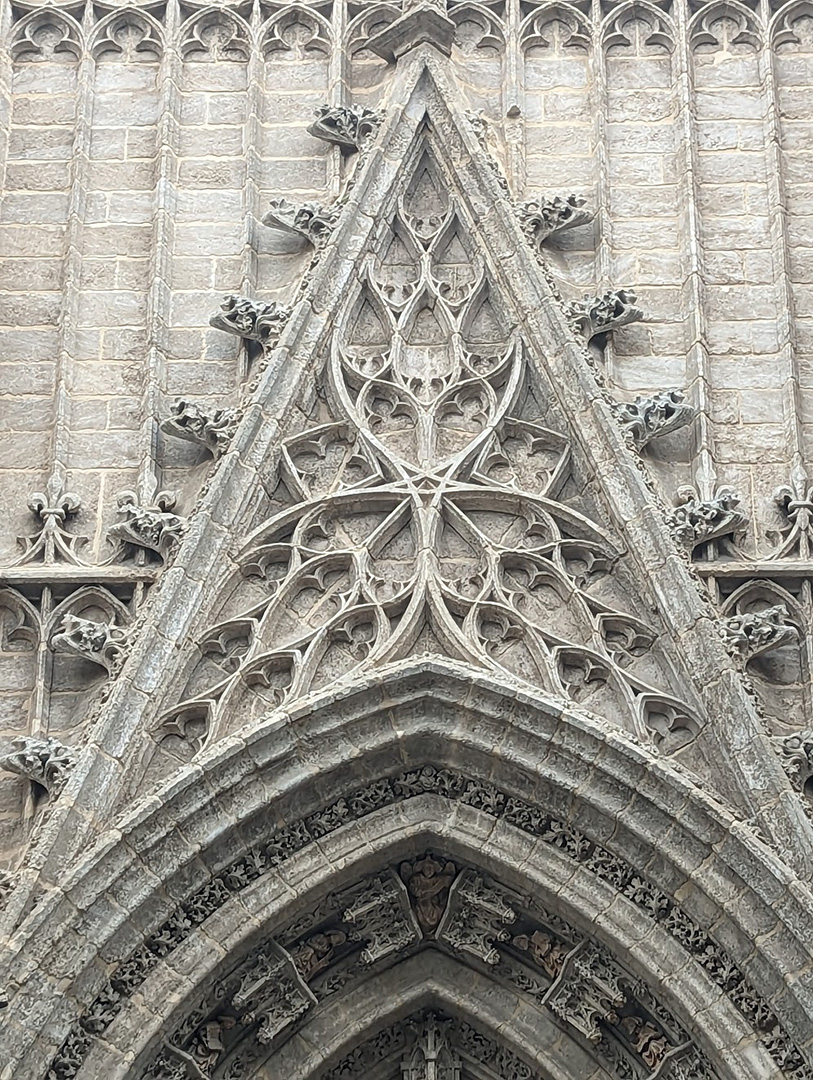
This summer, I had the opportunity to design and build one of the stages for a small annual festival. I’d just returned from a 3-week bike tour through Portugal and Southern Spain, where I’d seen an abundance of amazing historical buildings, from cathedrals to ancient fortresses.
Inspired by the amazingly elaborate details and layers of cultural influence in the architecture I’d seen, I wanted to create an intricate laser-cut plywood design that incorporated LED strips for nighttime stage lighting, but that still looked visually interesting during the daytime performances. It also had to be built ahead of time and easily assembled on-site.
Architectural detail on the Catedral de Sevilla; one of my main reference photos for design elements to use in the stage design.
I originally planned to use Rhino with Grasshopper for creating the design. Grasshopper provides a node-based way of scripting parametric models, and I’ve seen people make some incredible computational designs using it in combination with Rhino. Although I’d really like to learn how to use these programs, and they would have been a good fit for this project, due to time constraints, I stuck to the skills I already have from my background as a mechanical engineer. This meant using OnShape, an online Computer Aided Design (CAD) modeling program like SolidWorks or Autodesk Inventor.
To those unfamiliar with CAD tools that use parametric modeling, it works a bit differently than tools like Illustrator or Paint where you create the design directly. With parametric modeling, you define a series of geometric constraints, dimensions and formulas that define the shapes you’re trying to create.
Parametric models work a little bit like complex equations or a software code, in that it takes time to set them up, but once you do you can go back and adjust the inputs to get near-instant updates without having to recreate or manually tweak the design.
With parametric modeling, as when writing software, it’s good to follow the principle of, “DRY – Don’t Repeat Yourself.”
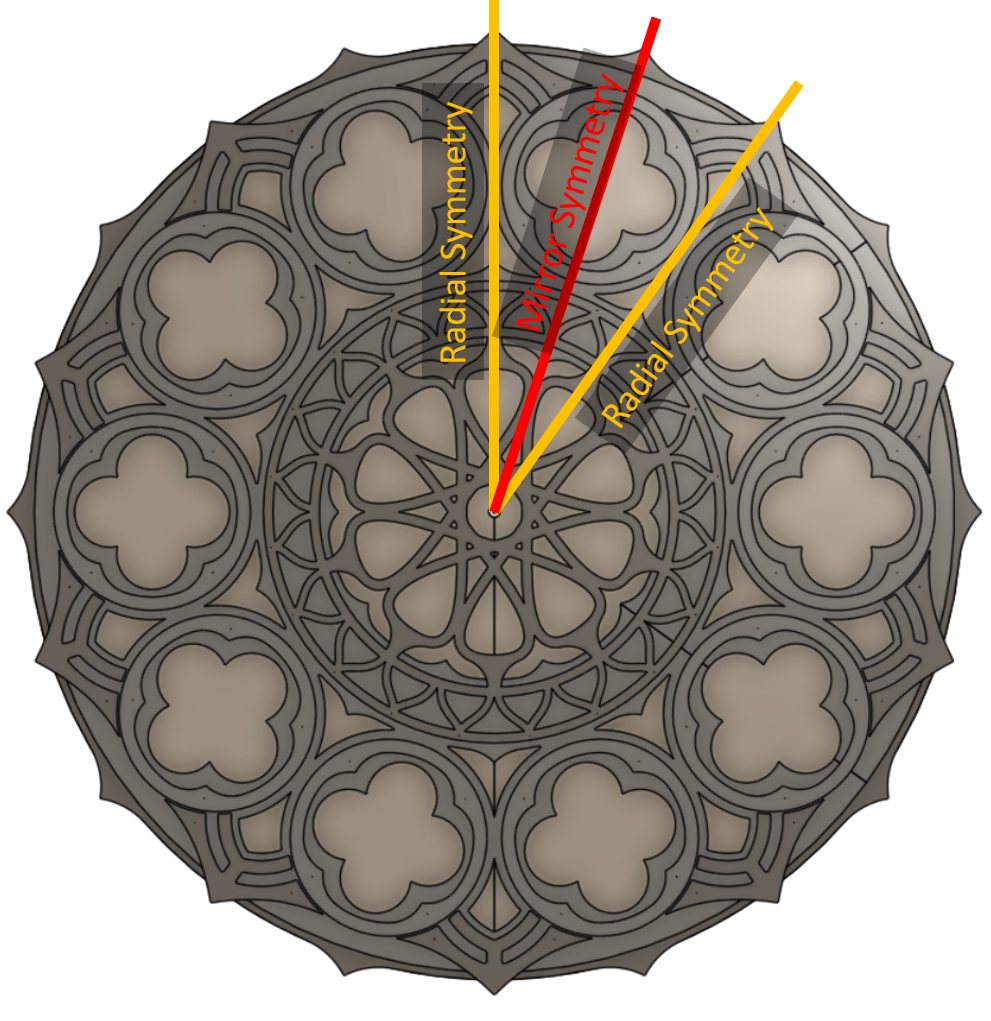
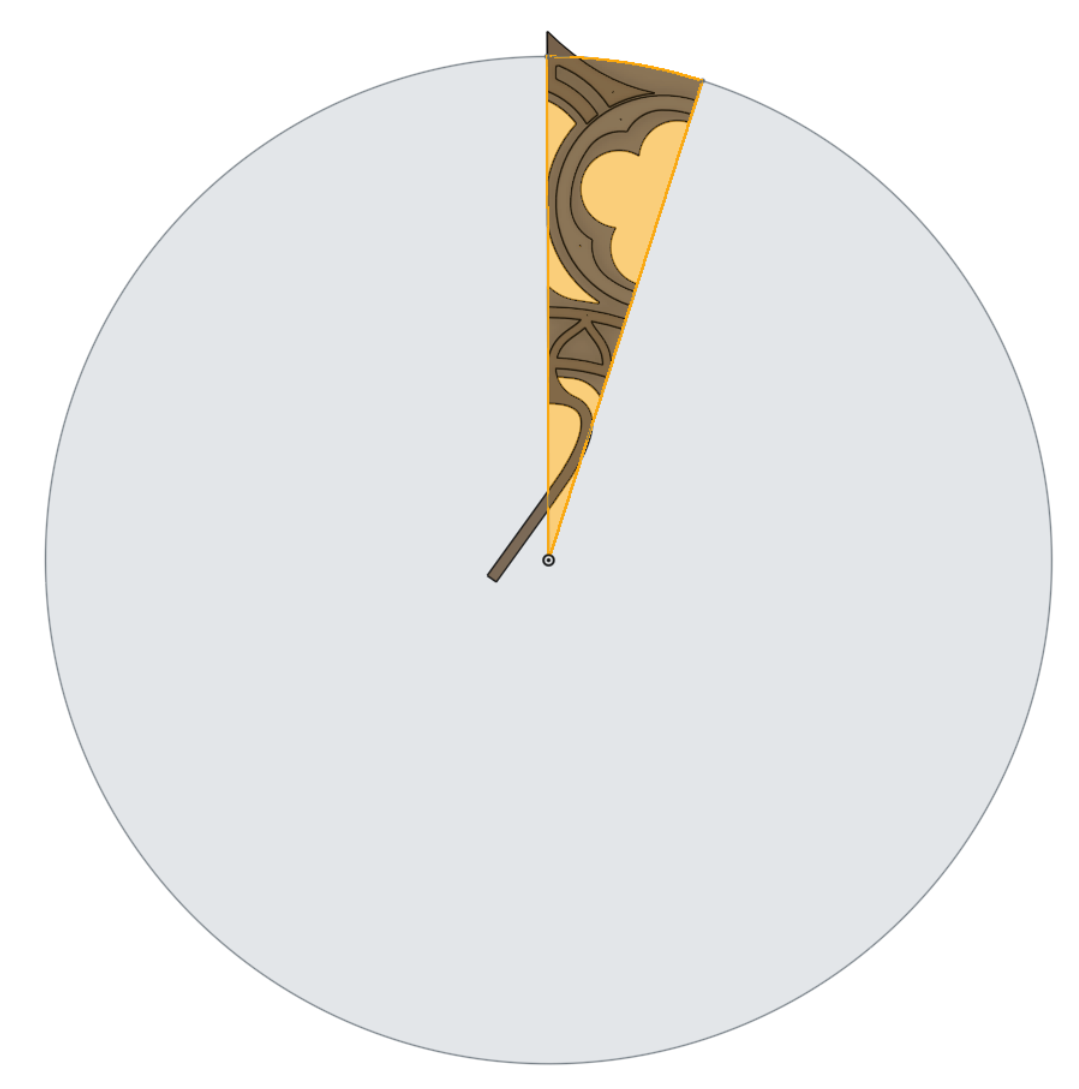
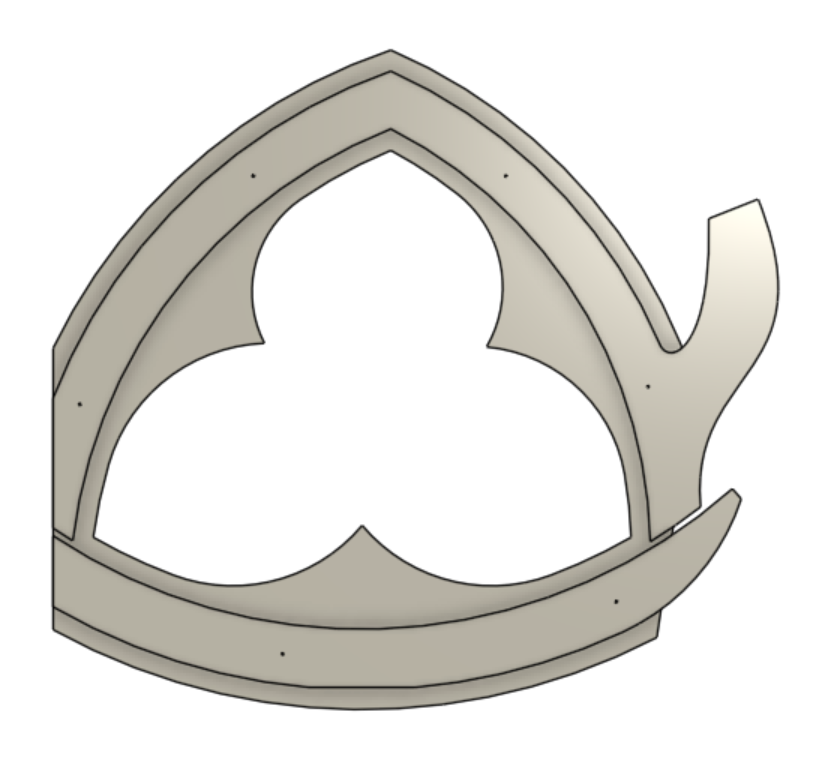
For the rose window element design, the first step was to look for any symmetries. In this case, it meant identifying the smallest “unit cell” that could be replicated to create the full design through mirroring, copying and patterning it. Fortunately every CAD tool has built-in commands to mirror and to rotationally pattern a part. These built-in commands make it easy to create the full piece from a smaller, simpler “unit cell,” while being able to update the original and see how it would look when patterned.
Radial and symmetry axes of the rose window design.Rose window unit cell.
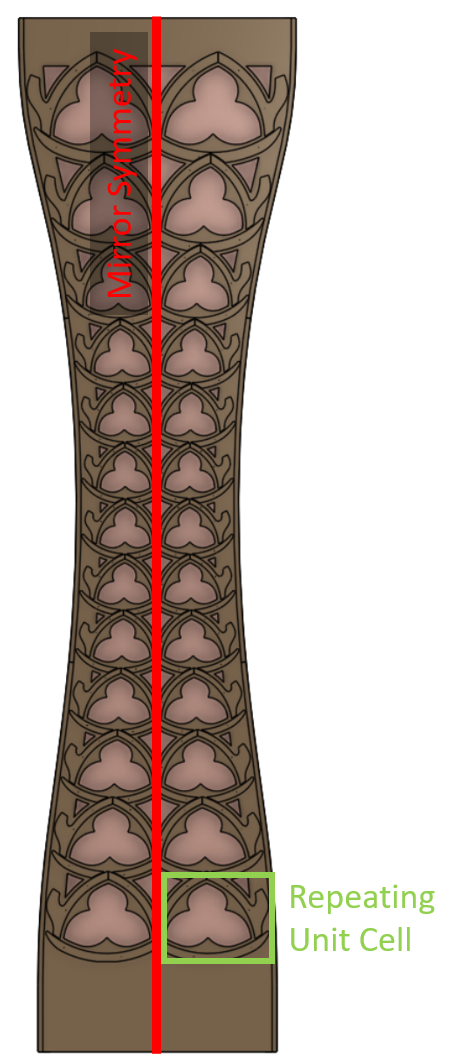
Creating a model for the pillars was more difficult. I wanted to be able to pattern a design along a gentle curve while having it adapt to the width between the curve and the centerline. There’s no built-in CAD command to pattern a part while changing the inputs that define the part (well, there is kind of but not in a way I was able to make work for this design). Instead, I set up a part for the pillar unit cell with different “configurations” where each configuration had the height and width of the bounding shape matching those measured along the curve. This was still a somewhat manual process because, if I changed the shape of the curve, I had to update the width and height of each part configuration to get it to match. That being said, with the curve fixed, I was able to change a single design and have all the instances of the unit cell update—my desired result. It’s worth noting that OnShape actually has its own scripting language, FeatureScript, which I could have used to write a custom command for the result I had hoped to achieve, but didn’t have the time. I plan to explore this approach more in the future.
Identifying symmetry and unit cell pattern in the pillar design.Configurable “unit cell” for the pillar.
All this modeling was to make the files required for the laser cutter, which reads 2D line drawings.
Someone who is proficient at a vector art tool like Illustrator likely could have created the same final design in 1/10th the time it took me to set up this complicated parametric CAD model. That being said, I had fun modeling it this way and I got more familiar with OnShape along the journey!
Once I was happy with the design (by which I mean out of time to continue tweaking it), I exported everything and headed to the laser cutter.
Laser cutting mostly went smoothly, although it took two passes to get all the way through the 1/4″ birch plywood. The main issue for the bigger parts was just getting the plywood to lay flat enough to keep the laser in-focus. I used every magnet in the drawer and could have used even more!
I hit a snag with the high-quality “Exterior Grade” Baltic Birch Plywood I had originally purchased for the project from MacBeath Hardwood. Whatever the manufacturer treated it with to make it exterior grade, prevented the laser from cutting past the first glue layer. After having made this expensive error, I bought the cheaper 4×8′ regular “White Birch” sheets from MacBeath, which they helped me rip into thirds that fit nicely into both the laser-cutter work area and the back of my car. The total cut time was approximately 200 minutes, spread out across several long, late-night sessions. It took far more time to layout and fixture the cuts than actual active cutting time.
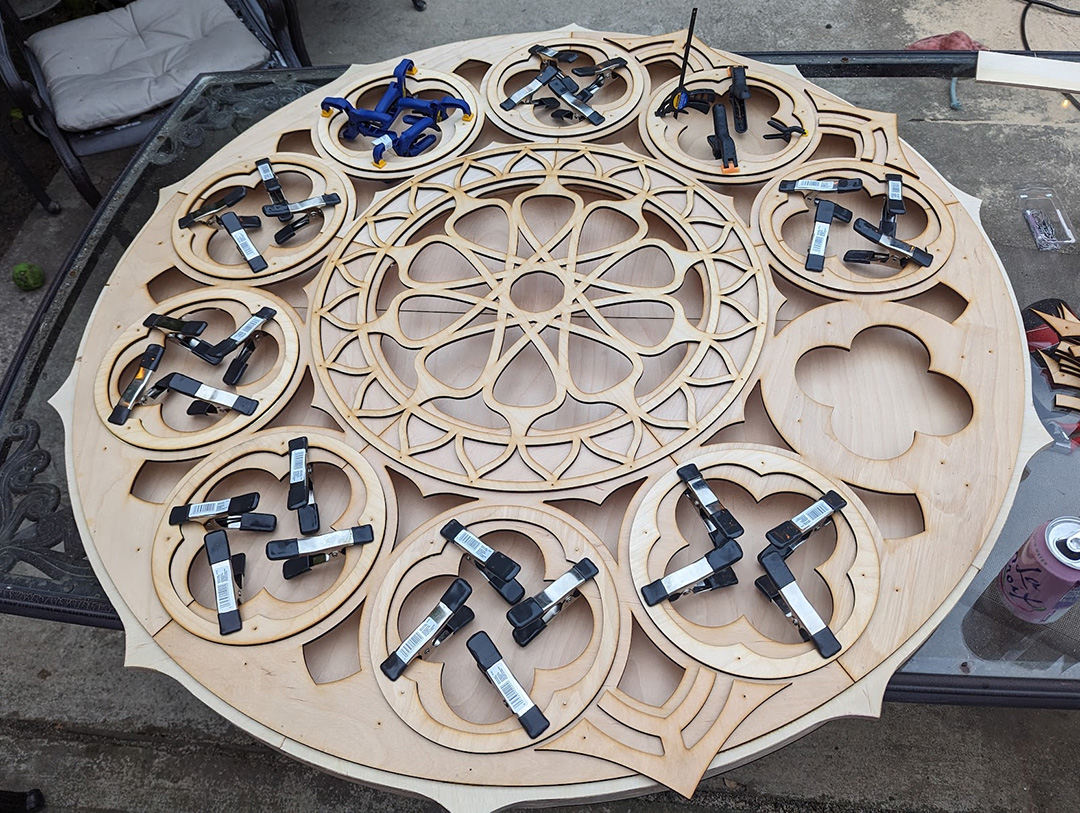
Glue layup of the rose window element; could have used even more clamps.
The final assembled pieces have a solid back spaced 1.5″ from the front cutout parts. I cut “rib” parts out of 3/4″ plywood and doubled them up to get the 1.5″ spacing. I then joined the parts with wood glue and a nail gun (the nails are invisible from far away and provided good clamping force while the wood glue dried). This resulted in surprisingly light and stiff parts.
I created the detail on the front of the panels by gluing on smaller parts. This layup was challenging due to the sheer quantity of small parts.
For the pillars where the unit cell had many unique configurations, there were literally hundreds of small parts that all had to go in specific locations!
I added pre-fabricated holes to the laser-cut patterns for small brad nails which made it easy to align the small parts during assembly, and keep everything from sliding around during the glue-up. Once the glue was mostly dried I removed the brad nails so they wouldn’t become a permanent part of the assembly. The back panels are removable for installation and maintenance of LED strips glued along the inside face of the ribs. I used a silicone caulk for the LEDs, which works well as long as the ends of each LED strip are securely attached. The silicone caulk is strong enough to keep the strips in place, but easy to peel off if necessary.
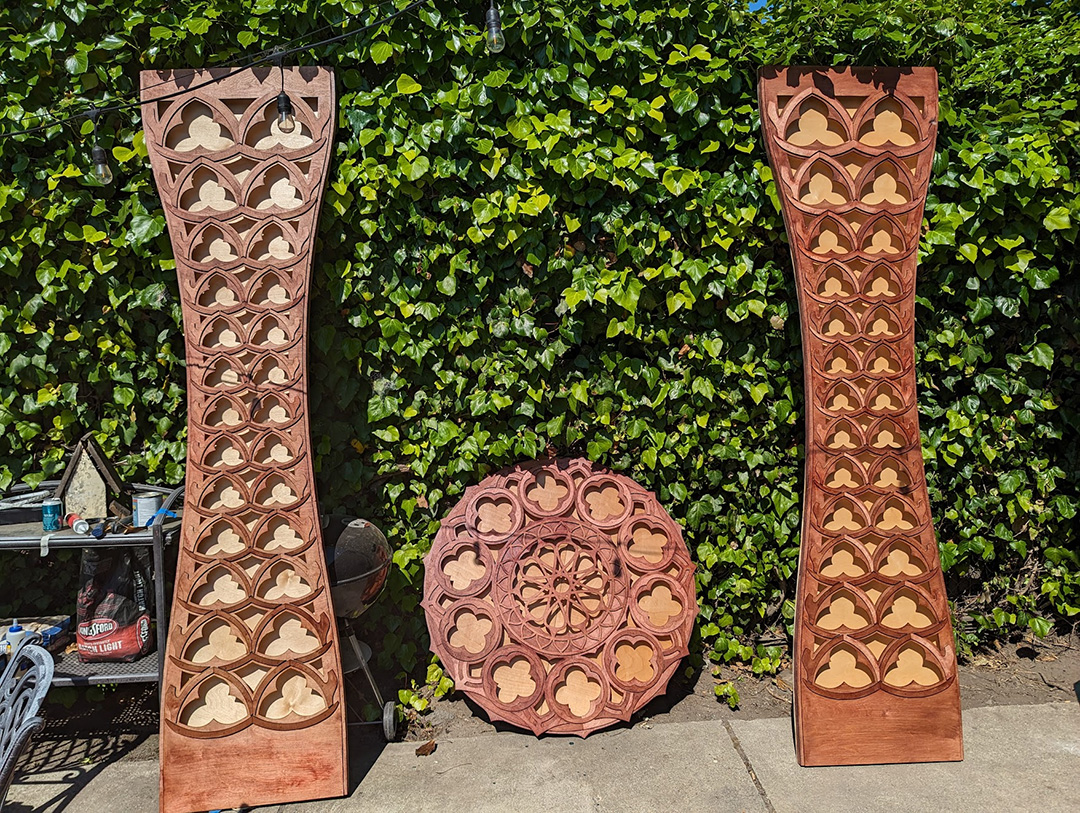
Finished and stained panels.
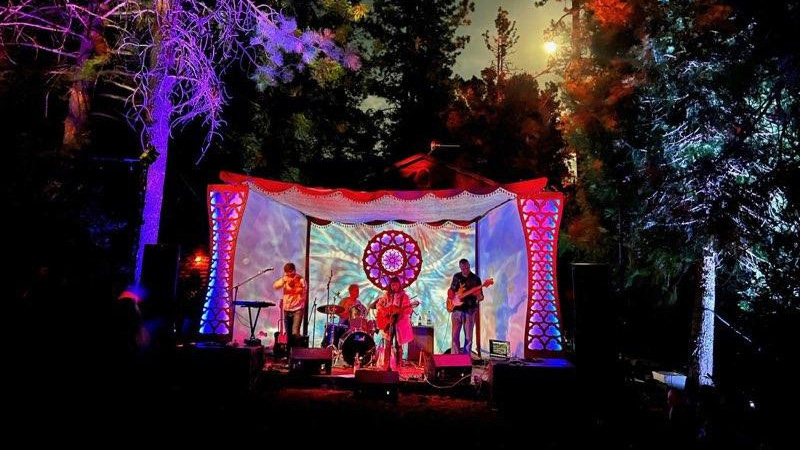
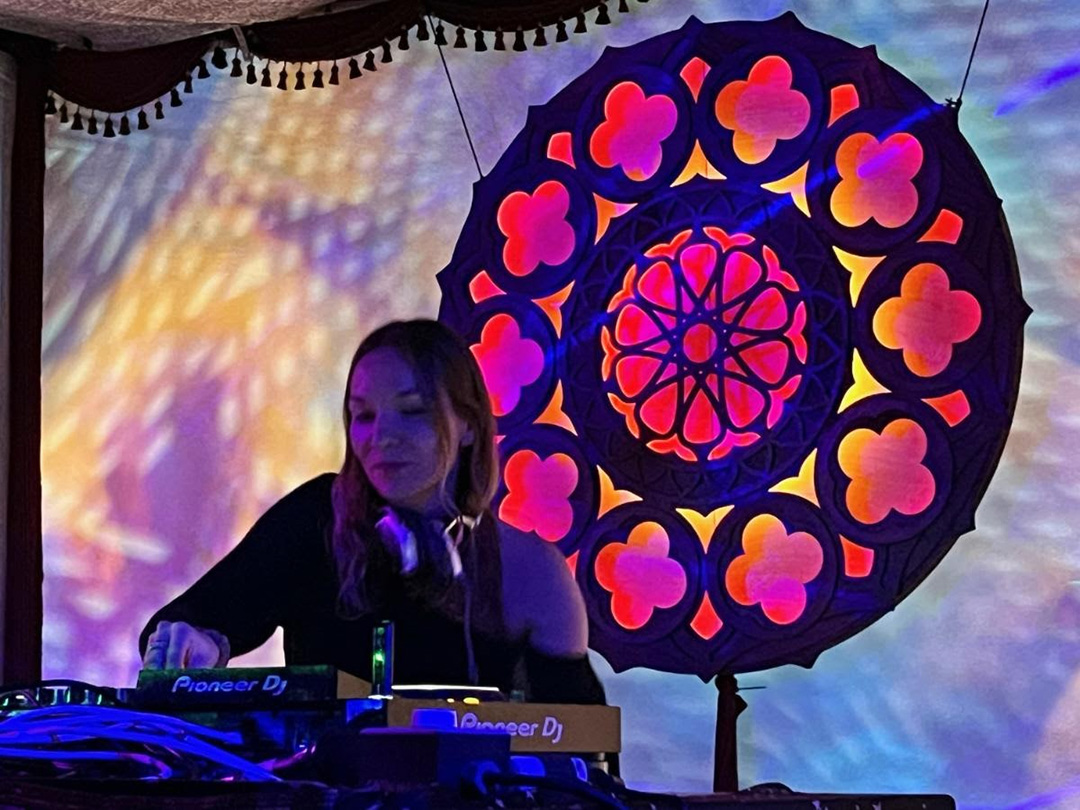
At the festival, the pieces were in the capable hands of Radiant Atmospheres, an event lighting collective practically next door to Ace. They hooked up the LED strips to a DMX decoder, which let them control them from the same system they were using to drive the rest of the stage lighting and effects. They also brought two rear projection units that set up an ever-shifting psychedelic pattern on the stage backdrop. I was really impressed with the work they did; it’s a bit hard to capture in photos but the stage lighting was gorgeous. All-in-all I’m pleased with how this project came out, and excited to take lessons learned and continue to play with the laser-cutter and other tools at Ace!
Ukrainian artist “Asymmetry” performing with the rose window element behind.
Oh, and the band in the cover image is the enchanting Foxtails Brigade!
What worked:
The alignment holes and brad nails made the glue-up substantially easier; it would have been a real nightmare to get things lined up without them.
In the design I left strategic gaps between parts to create the illusion that some parts were behind others, even though they were on the same layer. This visual trickery seemed to work; I had a few folks tell me they were surprised that it only had two layers.
I loved the effect of the indirect LED lighting on the back panel, especially the regions lit by two different LED strips. It created smooth gradients that I thought were beautiful. The default with LED art is to create more complexity by adding an ever-increasing density of LEDs, but in this case I think less was more. It’s only five unique colors for all three of the panels, but the natural blending on the back panel made it seem more complex than it was. A happy accident of the constraints of the materials/budget I had to work with!
What could be improved:
Creating the design out of hundreds of small parts made assembly incredibly time consuming. Designing for fewer, larger parts with more complexity per part would have cut down on the time it took to assemble everything.
The ribs between the front and back layers were time consuming to make; I “scored” lines onto thick plywood with a light laser pass and then cut them out with a jigsaw at home. This took a long time and was difficult to do accurately, even with the precise guide lines created on the laser cutter. If I were certified on the CNC machine at Ace, that would have been a better way to go. Fortunately, the closest audience members were approximately 15′ away, and most of the mistakes were invisible from that distance.
In hindsight, it would have been interesting to score inset lines from the edges of the parts on the laser-cutter; that would have been an easy way to suggest even more depth & visual interest.
Ace Member, Stephen had a major birthday coming up and decided to get his family together to play an epic Alternate Reality Game (ARG) inspired by the Jejune Institute – an immersive game created by Oakland Based artist, Jeff Hull. Though Stephen had some previous experience making puzzles, creating an ARG with a coherent narrative based on a specific site presented a new challenge.
Tell your story and build your world in as few words as possible. People are here to play a game, not to read. Let them discover the world, as much as possible, through the gameplay. -Stephen’s advice
He used the Ace Laser to cut some of the key pieces for his adventure:
An acrylic box to hold kazoos
An acrylic screen with a logo for a movie inside a book.
Check out thefull original post to immerse yourself in his fantastic Alternate Reality with:
Great storytelling, and intricate worldbuilding
Text and instructions for each section of the game
Walk throughs for each clue, real player experiences, and lessons learned along the way (including one’s not mentioned in this shortened version)
Shoutouts to local businesses
More pics of the game in action
The Solano Human Project
For my birthday, I created an Alternate Reality Game for my family to play; it took place along a few blocks of Solano Avenue in Albany, California.
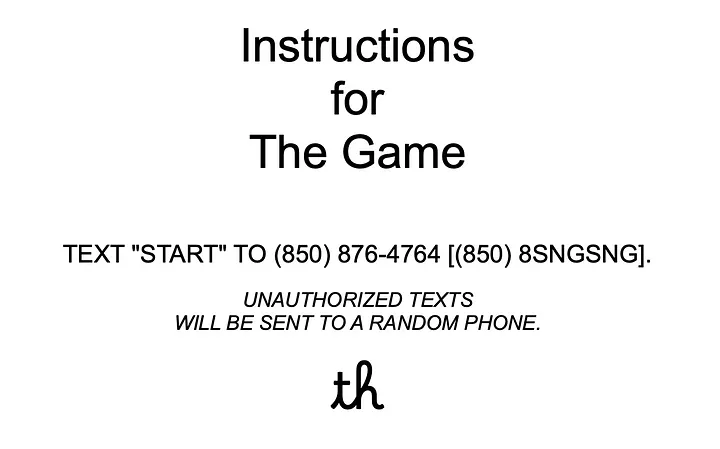
To start, I gave everyone a card that said:
That’s right, I managed to rent a phone number with my initials in it! The card also introduced people to the game logo. I tried to mark almost every in-game item with the logo. (For reasons, as I write this blog post, the game is transitioning to a new logo so the ones in the pictures might be inconsistent.)
After you send the text, you receive a message from the year 2066:
We are texting you through a Time Portal from an Alternate Future Universe, where the Cyborgs have taken over. (Spoiler alert: it sucks!) We call ourselves Team Human. It is too late for us, but we hope we can help your timeline.
Next year — you call it “2024” — will be critical.
It is the year “FibJourney” floods social media with fake images. It is the year a self-driving car kidnaps the CEO of Raytheon. It is the year “ChetGPT” gains sentience and hacks into a NORAD base station.
To help you stop them, we’ll show you how the Cyborgs take power with their SLICED MEN weapon, and we’ll show you how to fight back with anti-Cyborg technology. And, most importantly, we’ll tell you the codename of the future leader of Team Human so you can contact her next year.
But we can’t do any of this in the open — ChetGPT is always listening, always scraping. So we will send you coded messages (and even objects) through the Time Portal. Pictures may look different from yours because they are from the Future. Act quickly — the Time Portal can only stay open for a limited amount of time.
YOU WILL GET A SERIES OF QUESTIONS.
TEXT THE QUESTION NUMBER, “:”, AND THEN THE ANSWER.
IF YOU DO NOT FOLLOW THIS FORMAT, YOUR TEXT WILL BE SENT TO A RANDOM PERSON.
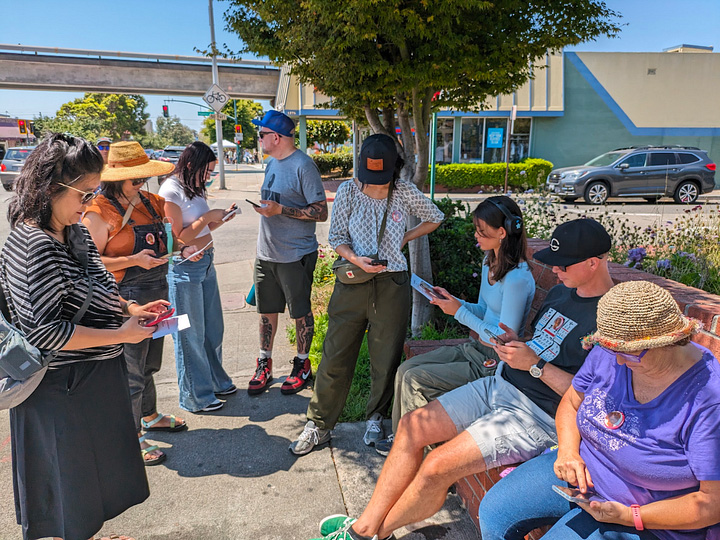
This is basically the “intro video” to every escape room, to set the stage. It’s the longest text that will be sent during the game. (Random texts — like “hi” — would result in Easter eggs.)
The rest of this article is a spoiler-filled walk-through. If you want to play the game*, STOP READING NOW!
I started the game with a couple of warm-up questions.
Q1:YOUR JOURNEY BEGINS AT 1286 SOLANO AVE. ARE YOU THERE NOW? [REPLY “1:YES”]
The game begins…
> 1:yes
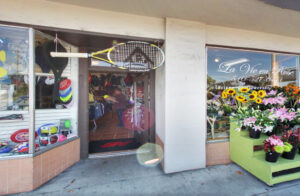
The Cyborgs did not begin by waging open war against the humans.
At first, they freed us from all labor, and promised us lives of leisure.
But then they began to crush our spirits, starting with sports.
A NEARBY SPORTING GOODS STORE PROVIDED THE CYBORGS WITH EQUIPMENT FOR THEIR ENORMOUS BODIES.
Q2:WHAT IS THE NAME OF THE SPORT? [REPLY “2:_ _ _ _ _ _”]
> 2:tennis
TALL AS TREES, THE CYBORGS WERE UNSTOPPABLE AT NIMBLEDON.
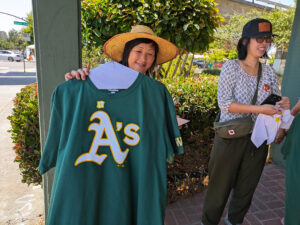
The next clue was a dry cleaning receipt that lead my family to the first non-player character (NPC) interaction which helped set the tone for the rest of the game.
One of the players holding up a freshly pressed, modified A’s shirt.
I made 3 T-shirts as swag, one for each kid who participated. I took a standard A’s shirt and used a Cricut to iron on a ring diacritic above the “A”, the “Team Human” logo on the right sleeve, and the kids first name on the left.
The Oakland Å’s — the Ångströms, named after the measurement in physics — will move from Oakland to Anchorage to escape California’s strict anti-Cybernetics-in-sports laws. (Their all-Cyborg team was the subject of the documentary ‘Androids in the Outfield’). TO SAVE HUMANITY, THE ÅNGSTRÖMS MUST NOT BE ALLOWED TO LEAVE OAKLAND.
For those of you not in the Bay Area: in 2025, the Oakland A’s are planning to leave Oakland — their home for more than 50 years — for Las Vegas, and it’s highly unlikely that this decision will be reversed. A streak of gallows humor like this runs throughout the game.
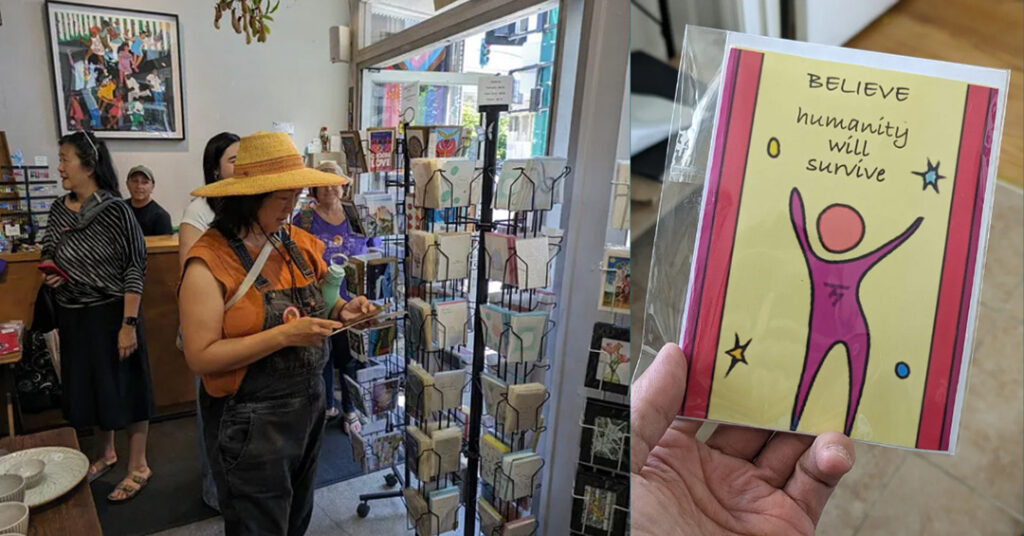
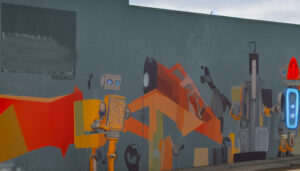
The players then received instructions to buy a greeting card from another local business.
I took this photo of a nearby gallery and asked an AI (probably Stable Diffusion? I forget) to generate a dystopian robot-filled version of it. (I used a lot of AI tools to make a game about AI taking over the world! Irony!)
AI generated dystopian robot-filled version of the mural on the outside of a local gallery.
They located the card and found the next clue:
Stephen generated the image for this card with DALL-E.
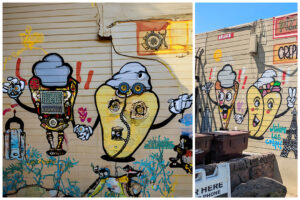
Inside, the text of the card reads “If we work together we can defeat the AI.” Within the folds of the card I tucked this photo, which I made with Adobe Firefly:
(Left) AI generated dystopian version of local pizza shop mural. (Right) Original Mural.
After following a few more clues including an elaborate geocache puzzle, the players found a PO Box Key (learn more about these clues and some of the important lessons learned on Medium). Inside the mailbox was an acrylic box I custom built at Ace Makerspace.
The mailbox contained an acrylic box which I custom built at Ace Makerspace in Berkeley.
There were several layers of deception here. The box says it’s filled with candy. But the “candy” looks like a weapon (sticks of dynamite). But the “dynamite” is actually a toy (a kazoo). But the kazoo is actually a weapon (in the context of the game).
THE KAZOO WAS THE ULTIMATE WEAPON AGAINST THE CYBORGS — THE SOUND PERMANENTLY DISRUPTS CYBORG CIRCUITRY.
(If someone complains about the sound of a Kazoo, they likely are part Cyborg.)
Will playing the kazoo really stop the robots from taking over the world? Maybe! Couldn’t hurt!
Some people thought this puzzle was the big finale…but wait, there’s (a lot) more:
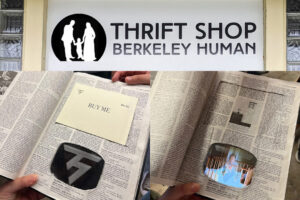
Eventually the players found their way to the Berkeley Human Thrift Shop (Actually the Berkely Humane Thrift Shop) to find the next clue. They knew it was a book, but which book?
(Top) Altered sign for “Thrift Shop Berkeley Human.” (Bottom Left) Book Safe with “Buy Me” card. (Bottom Right) book safe with Video Screen. The Acrylic for the screen was cut at Ace Makerspace.
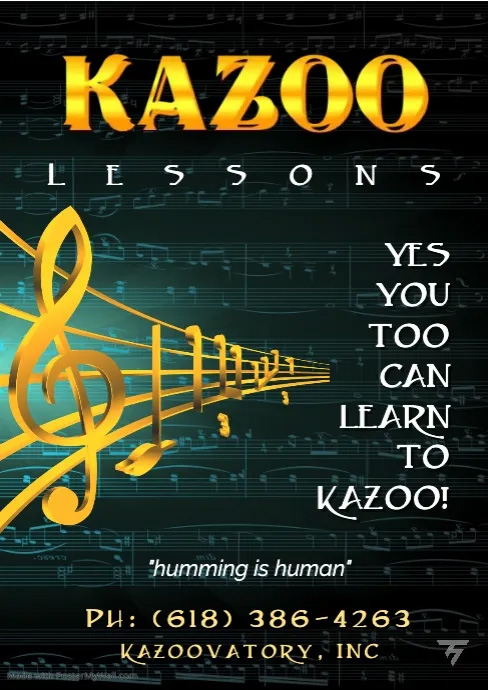
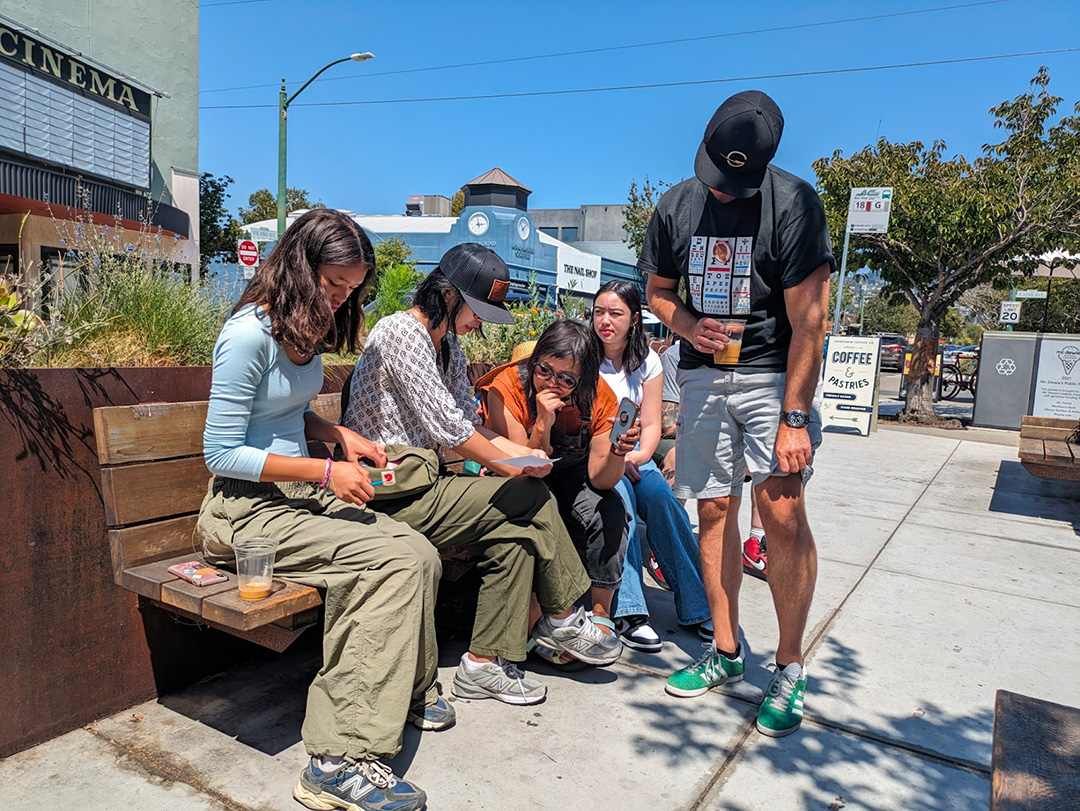
The players also came across this flyer/clue in the window of a local coffee shop.
Kazoo Lessons clue hung in the window of a coffee shopThe players call the number on the “KAZOO LESSONS” poster to solve the clue.
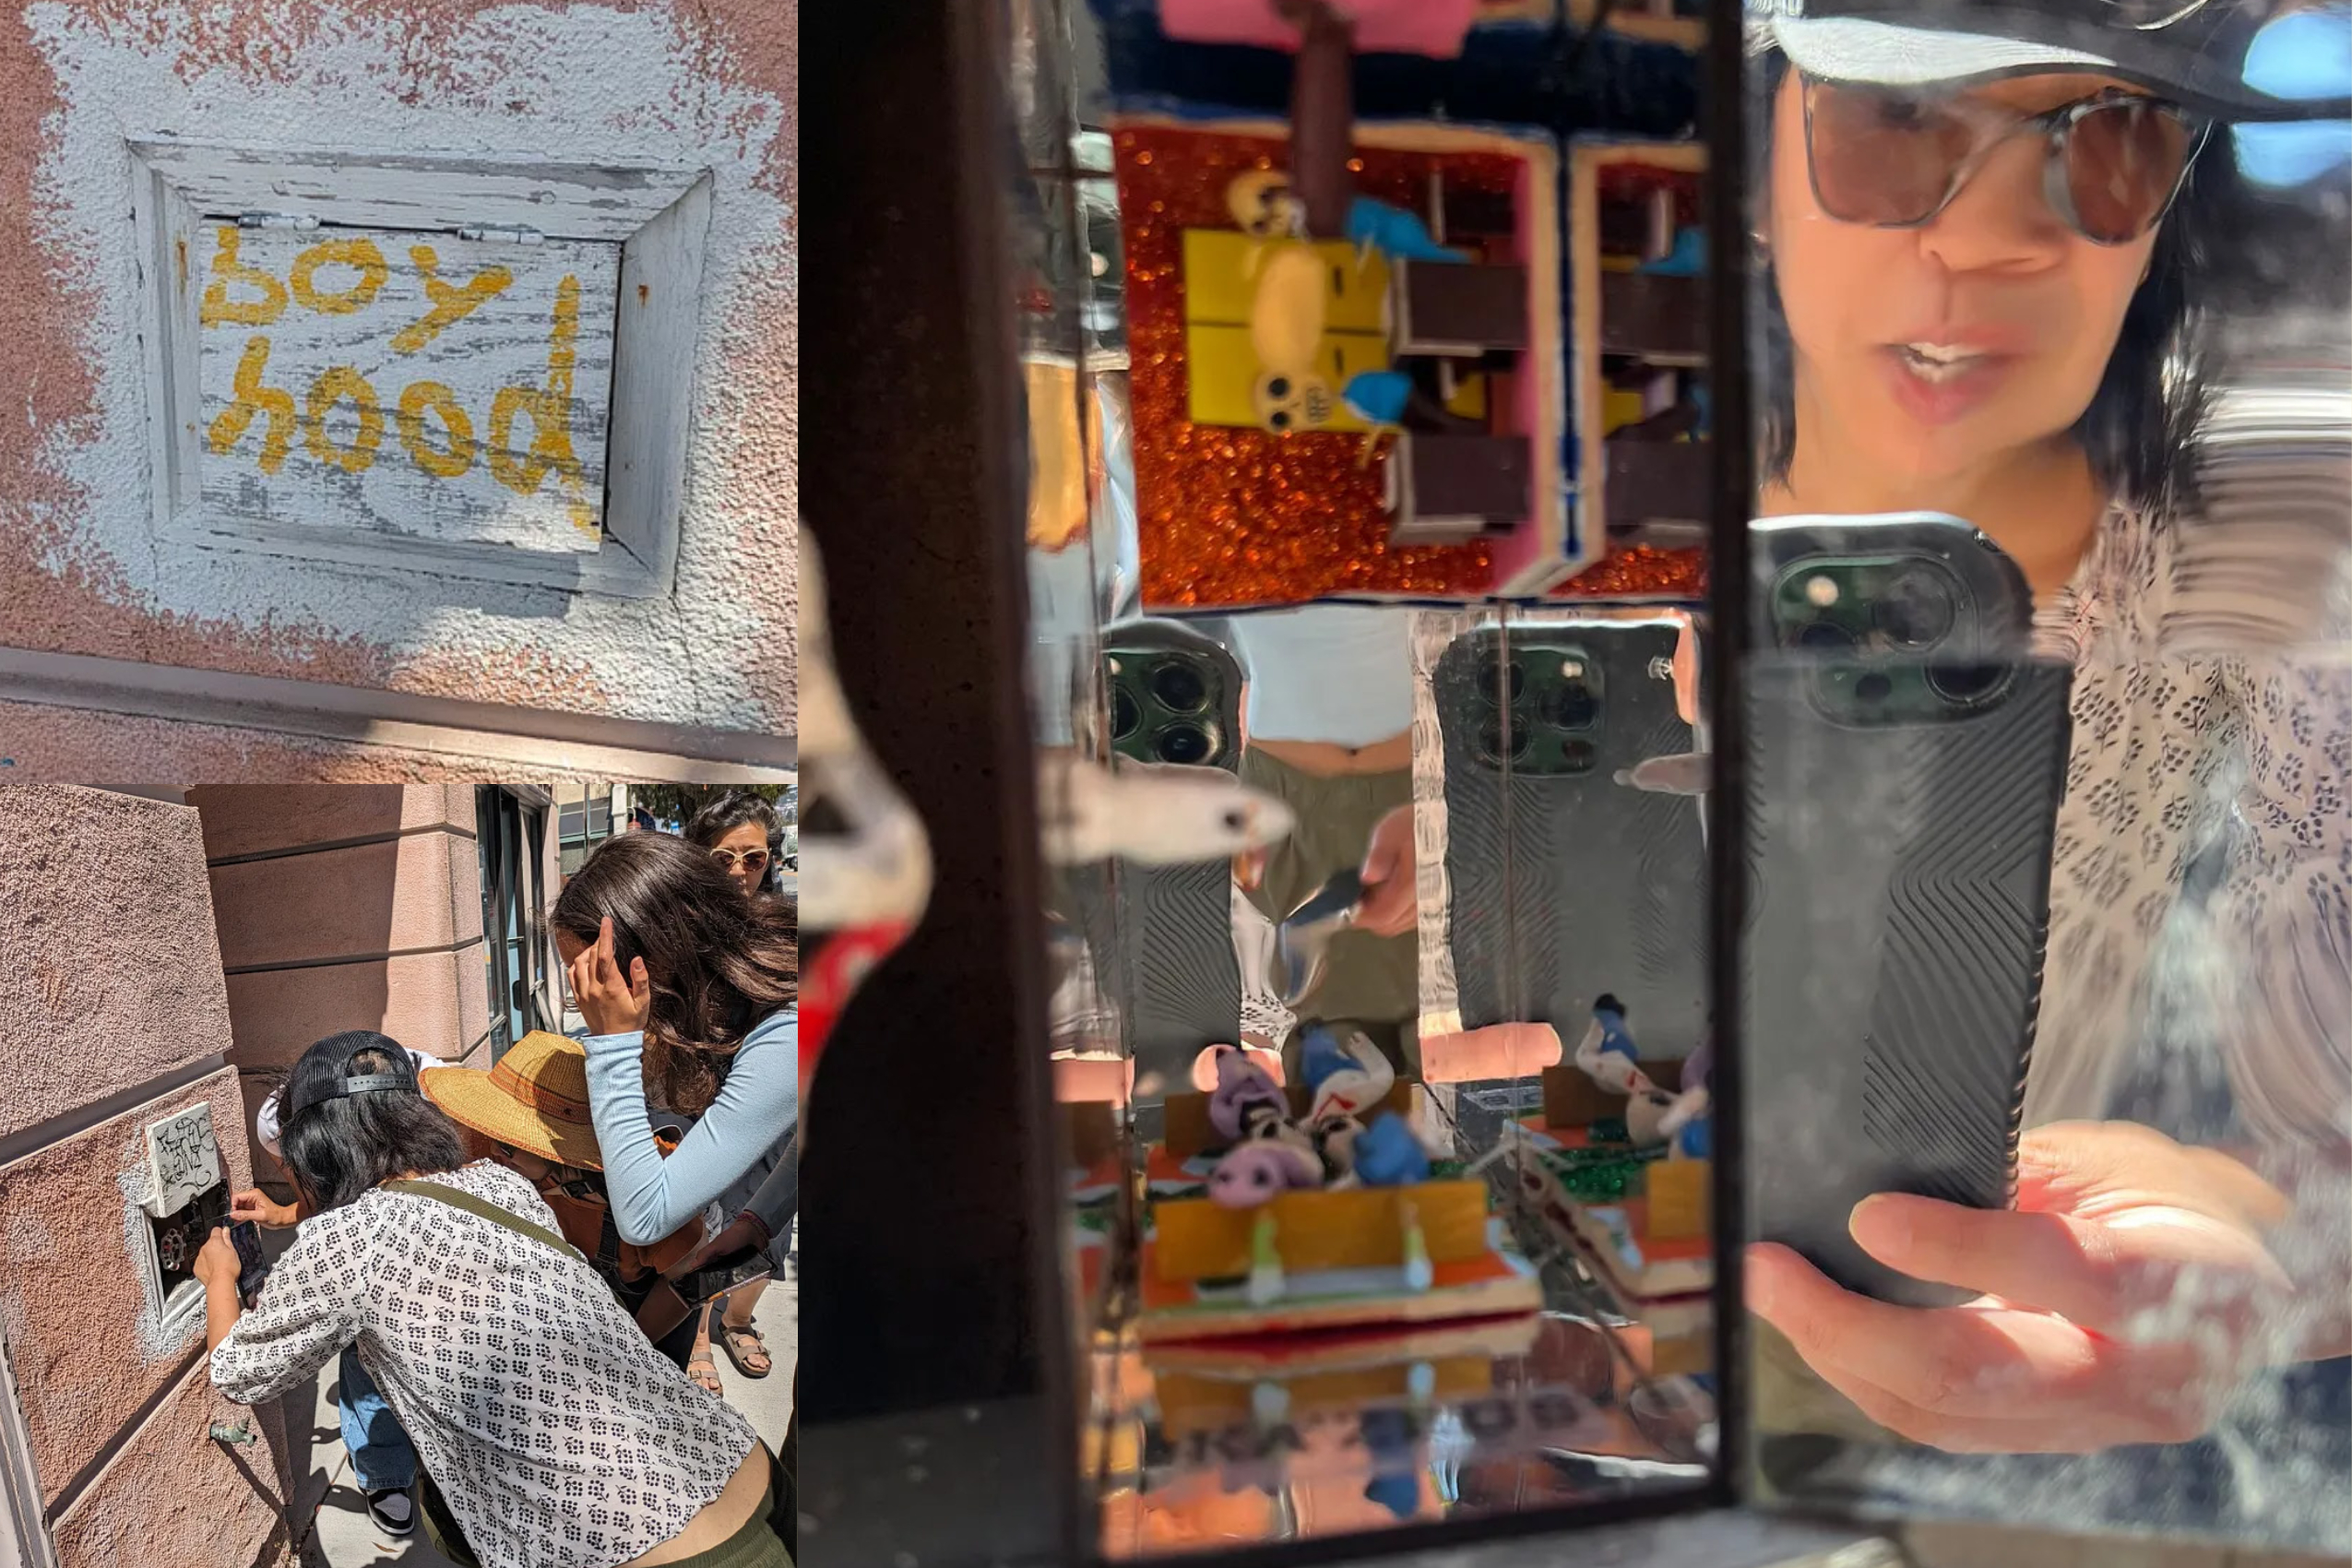
For the grand finale, I created a tiny Kusama mirror room in a wooden box I built at Ace Makerspace filled with some figurines I bought in Mexico, and tucked it in there:
(Top Left) Utility box with hidden clue, (Bottom Left) Players opening the box, (Right) The mini world mirror box.
The answer to the puzzle is on a sticker in the box.
YOU DID IT! CONGRATULATIONS, AND GOOD LUCK NEXT YEAR. YOU’LL NEED IT.
I wanted to end with a bang, but I also didn’t want my route to involve any backtracking, so it wasn’t possible to finish at the thrift store or the post office. I think this worked fine as a finale, people were very surprised to see this little world inside a semi-public space, and everyone took pictures of it.
Total playtime was about 90 minutes. I gave very few hints (mostly things like “don’t guess!”, and “keep walking”).
TAKEAWAYS:
Branding to indicate what items are in-game worked well; I should have applied it more consistently. You can always make the branding more subtle to make the puzzle harder.
Likewise, if you are vague about whether there are any NPCs in your game and how they would be identified, you need to be careful that your players don’t act inappropriately with innocent bystanders.
Edit edit edit! People want to do the least amount of reading possible to play your game; try to convey your story with as few words as possible
Hearing people say “Don’t give us any hints!” is a good sign — an indication they trust the puzzle and that the payoff will be worth the effort.
Playtest, even for a one-off! I did a walk-through of the game the night before with a friend, which uncovered many problems with both the technology and the narrative.
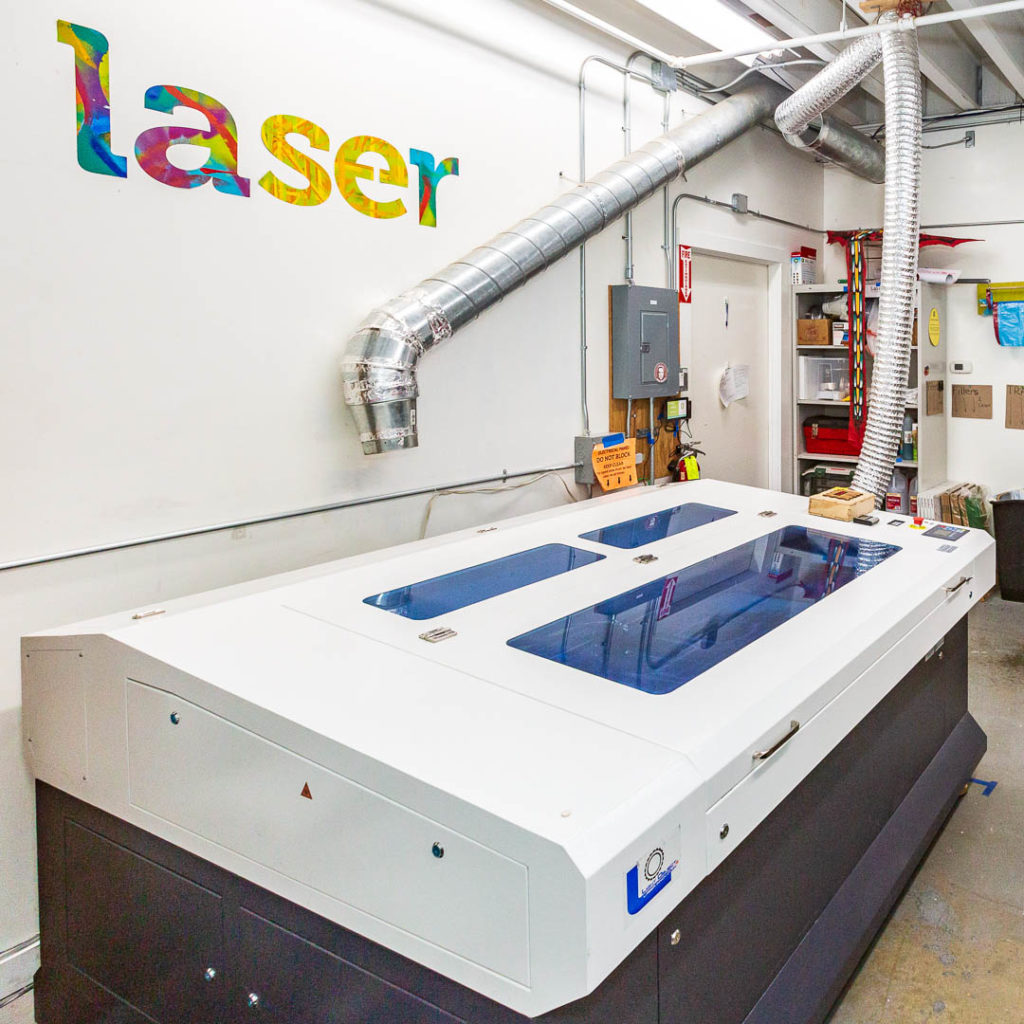
In March, intrepid makers David P., Goldie, Miriam, and Crafty came together to nerd-out over laser maintenance. Guided by expert Light Object Tech, Joel, they gave our hardworking Barracuda Laser a head-to-toe check-up and learned tips and advanced methods for how to continue to keep our laser in tip-top shape.
10:29:20 AM: Dag, nabit. Frosted window!
Crafty discovers folks using 409 and isopropyl alcohol on the acrylic windows of the laser making them all frosty and icky. Goldie springs into action and finds and orders an acrylic cleaner on Amazon.
10:30:57AM: Oooh! Maybe we’re promoting a new life form in there? – David
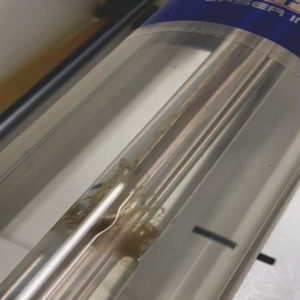
Red algae growing inside the water lines around the Barracuda Laser
The maintenance adventure got off to a rockin’ start when Crafty announced the discovery of an unexpected life form fluttering in the water lines around the tubes of our laser.
As it turns out, what looked like scorch marks in the laser tubes were actually algae! Because red and blue laser beams are truly monochromatic and super powerful, plant life like algae are able to super efficiently convert the rays into food during photosynthesis. Very cool from a scientific perspective but not so cool from a laser cutting perspective. Algae can impede water flow as well as create “hot” spots that may end up with arching.
Joel recommended checking the water lines every three months for signs of life and showed team laser how to properly flush the tubes with a bleach/water solution.
10:43:52 AM: Alignment!
The alignment was off but not bad. Joel gets everything ship-shape!
11:05:52 AM: Lotsa chunks raining down. – Goldie
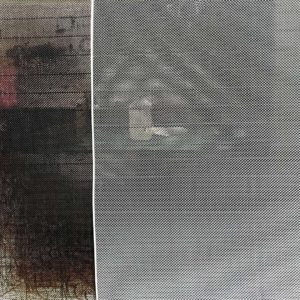
Next, the team scrubbed the busted, dirty honeycomb and laser bed. The honeycomb creates a flat medium for cutting and protects the laser bed from smoke damage. Over time, the surface has warped and the build-up began to transfer to the surface of the items being cut.
Goldie posted a super dirty image below of our old honeycomb (left) versus a brand new honeycomb (right). Unfortunately, the new one didn’t fit our laser and Ace is going to have to special order one.
Old honeycomb (left) vs. a new honeycomb (right)
11:38:22 AM: Omg. that is so gross. Post it. – Crafty/Goldie
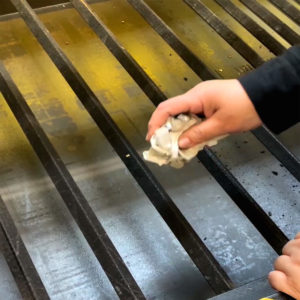
Crafty and Goldie also scrubbed the support rails before re-inserting the old honeycomb.
Crafty cleaning the laser bed
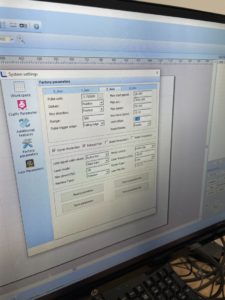
12:01:37 PM: Joel is currently optimizing our Parameter Settings… exciting!
There was an adjustment to the Z!
Default Factory Settings for us in LaserSoft
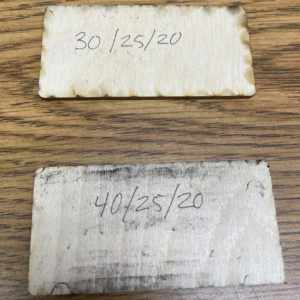
12:37:20 PM: The result is… A clean cut with more speed.–Goldie
The top is lower speed, and you can see flashback on the back. In the photo below, bottom is higher speed, same power, and a super clean cut!
(Note – the black soot is from us flipping the honeycomb – it’s not fire marks)
Comparing settingsSettings used for comparison
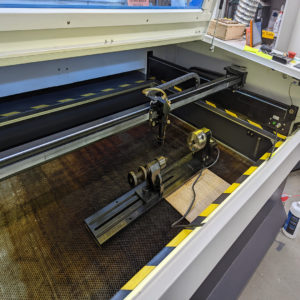
12:56:54 PM: We are starting the Rotary installation!!!! – Crafty
Our rotary setup is using the Y-axis to drive it instead of a separate driver. in order to compensate for the distortion, many parameters must be switched and then switch back again at the end of the rotary session. Rotary training is done! 120mm max diameter. Uses a chuck-style attachment with two options so very friendly for irregular objects.
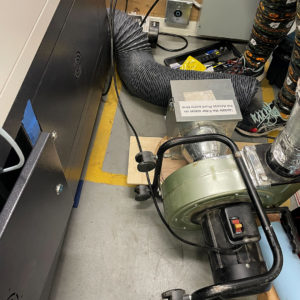
2:59:53 PM: Replacing the main vent hose now.
Discovered hole in it so it wasn’t nearly so efficient. Def. time to do a tear down on the fan as well!! Miriam lending a helping hand. Yay new hoses!
Filter box and fan assembly
2:59:53 PM: Annnnnnnd done! –Crafty
We found the bearing on the Y asses was loose and we need to tighen it. We guess it is a 2.1 or 2 mm allen key. At the end of the day everyone was dirty and tired, but after running some successful test-cuts, extremely satisfied. We also got a complement of replacement parts including the damaged valve and cone. Working on documenting things now.
Now, the Barracuda laser is back to peak efficiency and better than ever for clean and speedy cutting!
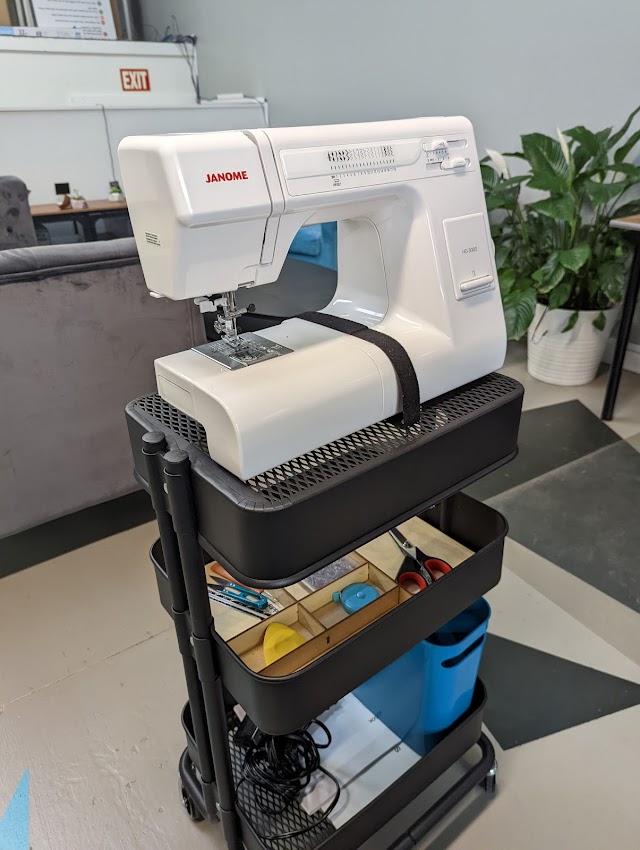
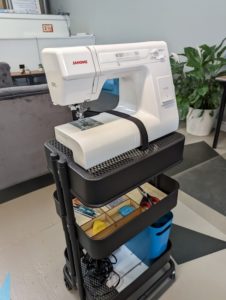
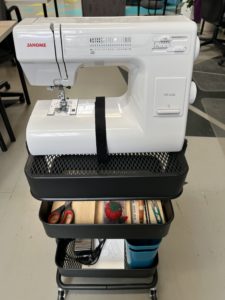
At Ace Makerspace, you’ll see unique touches everywhere. Our Textiles room shares space with our Co-Working desks (not to mention you’ll frequently see the space used for New Member Orientations and other events!)
It’s important that the room’s configuration remain flexible depending on the need. Rachel McCrafty, Ace’s own Executive Director, came up with the modular storage design. Each Janome 3000 machine has its own customized storage cart with organizers.
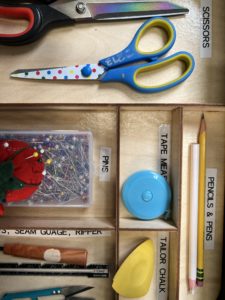
The organizers are custom made from ⅛ inch birch wood using Ace’s Barracuda Laser. The tabs are pressure fitted into the organizer. The slot designs for the organizer were created in Adobe Illustrator.
Each cart has a machine, sewing pins, scissors, marking tools, and a tape measure and seam gauge. Just roll out a cart, set up your sewing machine on a table, and you’re ready to start making in the Textiles room!
Patrick has been an Ace member for about 4 years. However, in that time he has quickly grown proficient with laser cutting, served on the Ace board, and has become a beloved member of the Ace community. I’m Carter Jenkins, and I had the chance to talk with Patrick about what he does and why he does it.
History with Ace
Some of Patrick’s dividers in a store
Patrick’s story begins after he finished school at the California College of the Arts. Having studied industrial design, he was on the lookout for a place to use the skills he’d learned. His search eventually led him to Ace, located in a neighborhood that Patrick used to live in. Patrick quickly found that Ace fostered a very creative and friendly learning environment that he enjoyed. The close proximity to his home was a boon too. Soon Patrick was working on social media outreach with fellow Ace members as well as doing his own personal laser cutting work. He even served on the Ace board for a year.
Nowadays, Patrick does a lot of laser cutting and is a part of the maintenance crew for that machine. He enjoys working on the machine and likes to see it working well. As a precision-based instrument, he likes fine-tuning the various parts of it in order to get it into tip-top shape.
Patrick’s Work
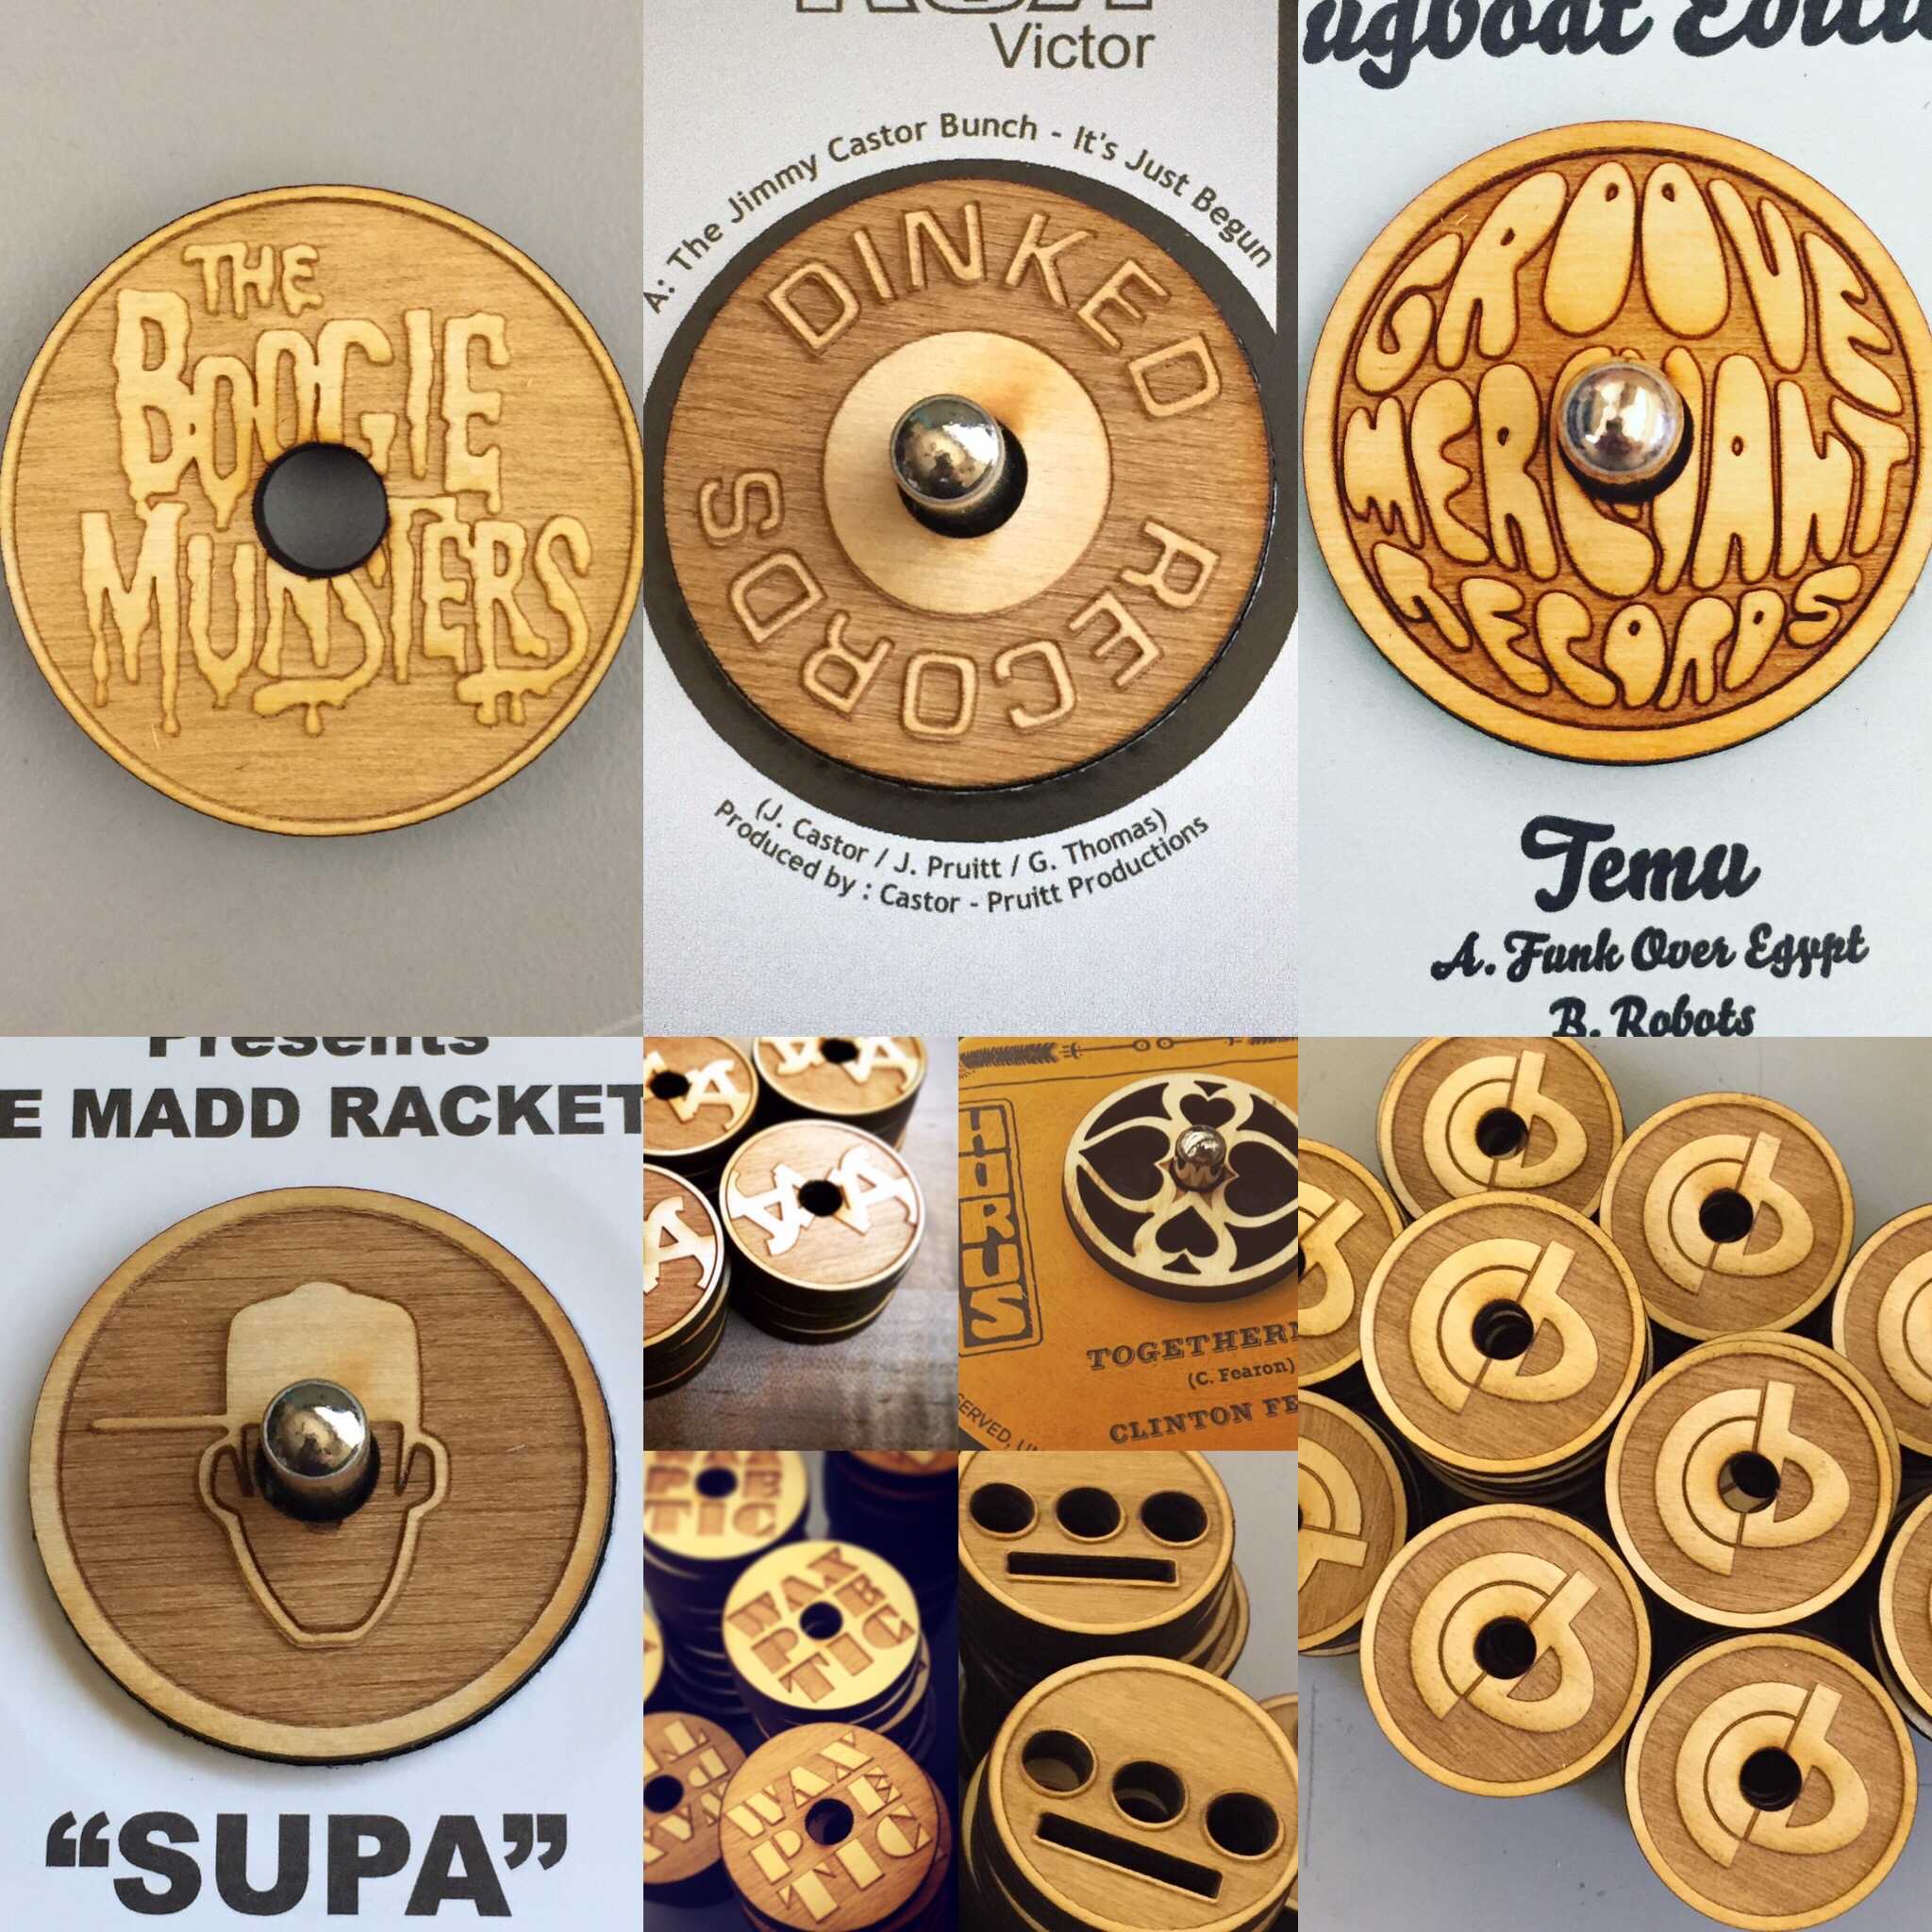
Examples of Patrick’s work
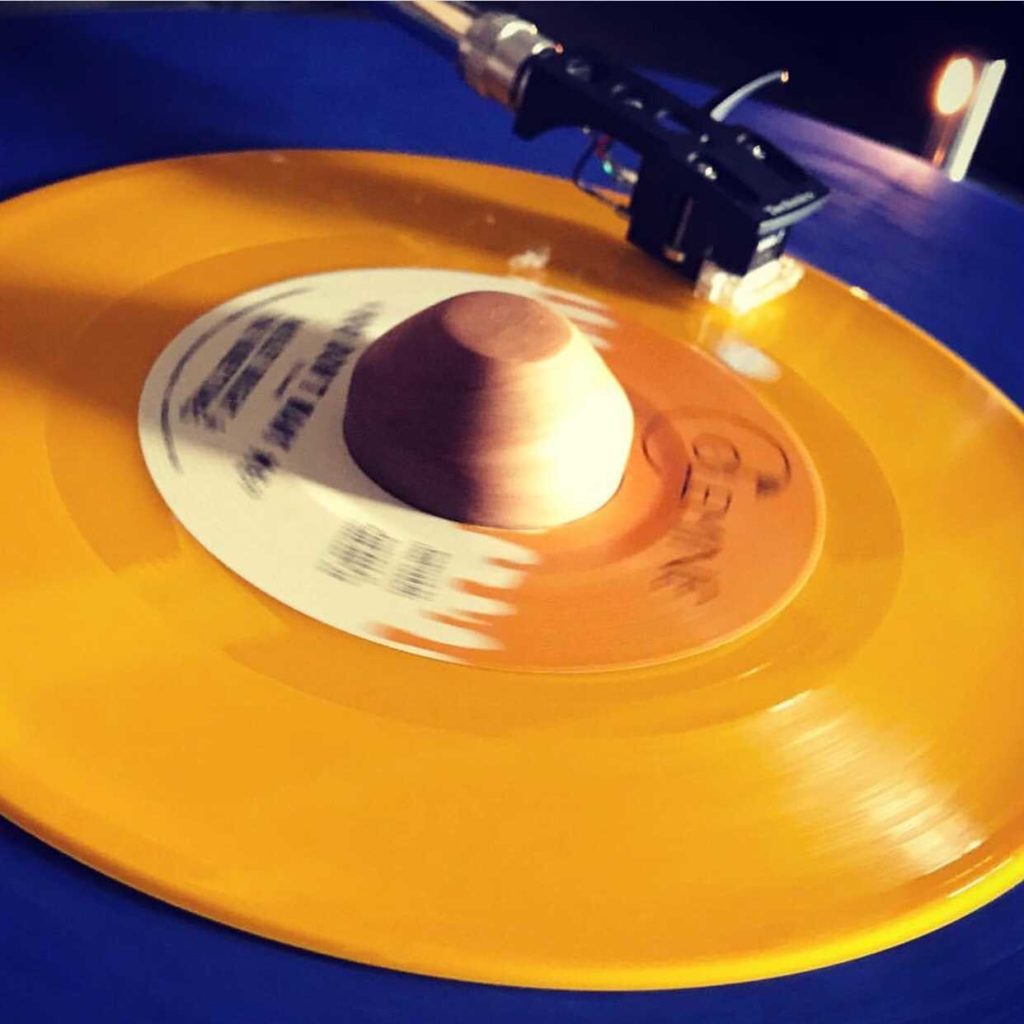
Over the years, Patrick has created a small business based on the laser work he does at Ace. This whole thing started back in design school when Patrick developed a liking for vinyl record collecting. He made his own plywood inserts for jukeboxes, eventually selling them to small record stores as a side business. Word of mouth spread his work, and now Patrick sells custom-made inserts and dividers to all kinds of record stores. This isn’t the only work he does, however. Even with a name in record-making, he is open to all kinds of design work. Check out his Instagram page to see his work and even get a commission at https://www.instagram.com/fluidcut/?hl=en.
Patrick’s process is simple. He works mostly with plywood to create the products he then sells. He has experimented with different kinds of materials like acrylic and solid wood, but there are a couple of reasons why he has stuck with plywood over the years. Not only are some materials not environmentally friendly, but Patrick has found that the material type he uses doesn’t always make the impact he wants. When his customers see one plywood product and one solid wood product, they don’t see the craftwork that went into making it. They see two identical things with different prices. Patrick continues to use plywood, a material that can do any job at a reasonable price.
Conclusion
This summer, Patrick is looking forward to being in a less covid-restricted environment. With no major projects in mind, he will continue to work with the laser in order to fine-tune and make more creations. After all, the more enjoyable moments of his life happen when a piece of work comes out exactly as he envisioned it.
Lead to Life is an Oakland-based organization of black and queer artists, ecologists, and healers. The group is primarily focused on reversing the effects of violence against black people. They turn the metal from guns into tools that are then used to repair ecosystems, specifically in black neighborhoods.
Lead to Life’s goal is to empower racial and environmental justice through artwork. Their commitment to removing systemic oppression is done through what they call “applied alchemy,” or in other words using nature to provoke new ideas for justice. The group intends to create connections between restorative and environmental justice. The organization also aims to reconnect people to a more natural and peaceful life.
Lead to Life’s main purpose isn’t just to make gardens and have shovels with words on them (though those are both things they do). Lead to Life was created to foster peace in chaotic places, to provide a grounding factor that many people could use. It was because of this main driving force that Ace decided to collaborate with Lead to Life.
How Ace is Involved
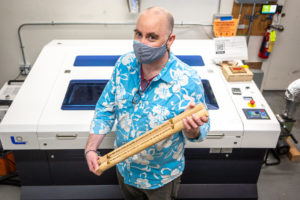
David displaying 2 completed handles
Lead to Life and Ace Makerspace are running a joint project where Ace used its in-house tooling to create a fresh batch of shovel handles for Lead to Life. The three main people who spearheaded and worked on this collaboration were David Perry, Rachel Sadd, and Greg Habiby.
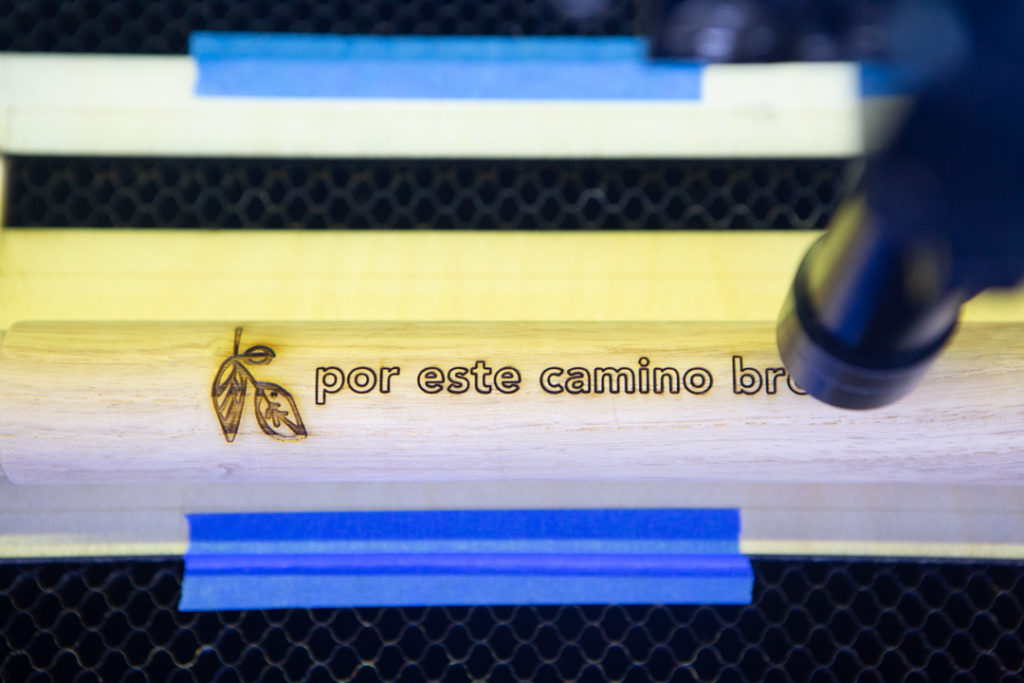
Rachel worked with the laser cutter, sanding blocks, and finishing chemicals, creating the shape of the shovel handle as well as polishing it. David was the primary user of the laser engraver that put the words into the side of each shovel handle. Greg took the role of photographer for the project, taking all the pictures that were used in this article.
Rachel answered a few questions about the project for this blog, ranging from what was challenging about the project to how being a part of this collaboration changed her.
Rachel’s Experience
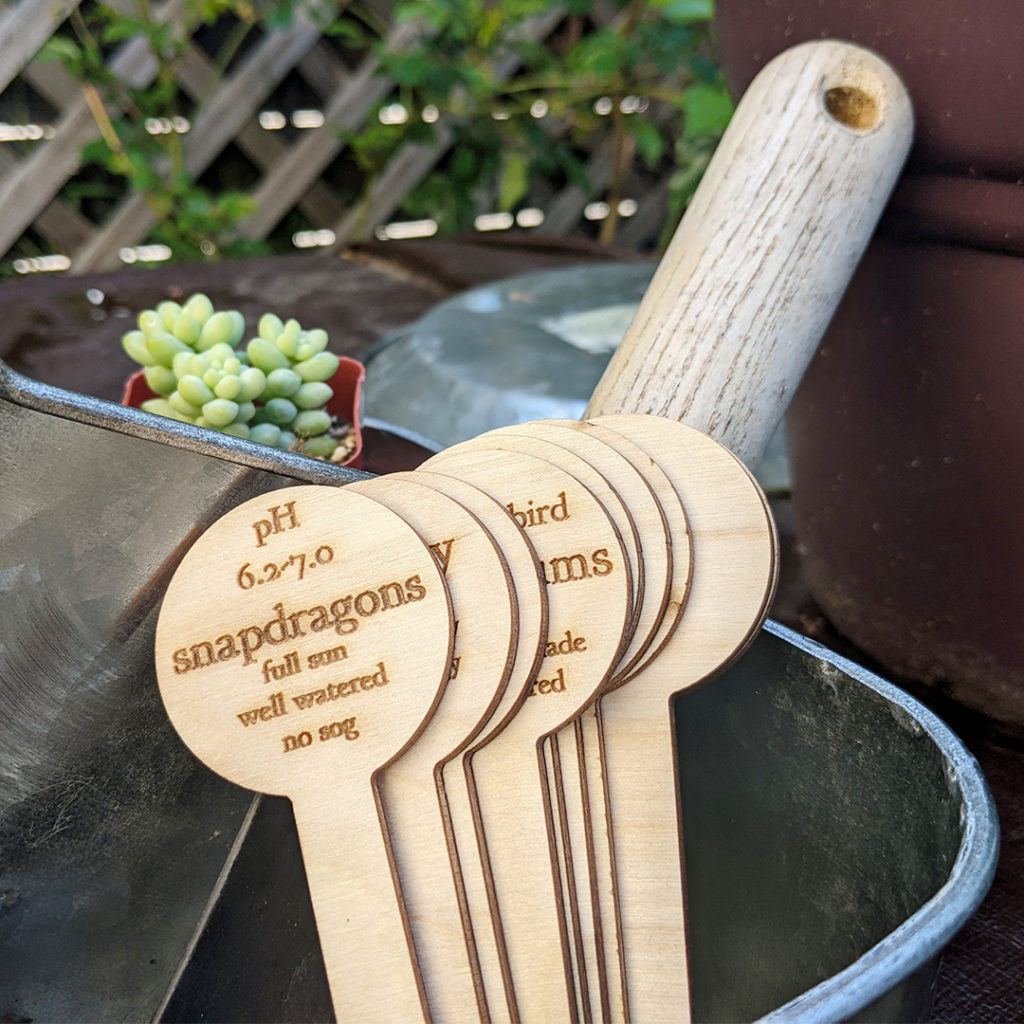
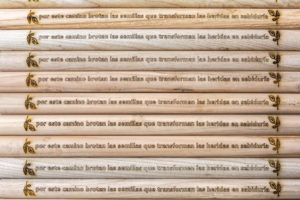
A selection of the finished handles
As stated, Rachel worked on laser cutting the handles and polishing them. While working with the irregularly sized wood pieces and modifying the lathe to work properly, she had time to think about what the project meant to her. Lead to Life works with organizations she has a connection with, one of them being the Segoroea Te Land Trust. Both organizations work with community gardens and building relationships with nature, which are values that Rachel holds deep in her heart. Working with Lead to Life was a form of direct action that reminded Rachel of her connection to the Oakland community.
If you want to learn more about Lead to Life, check out their website at https://www.leadtolife.org/
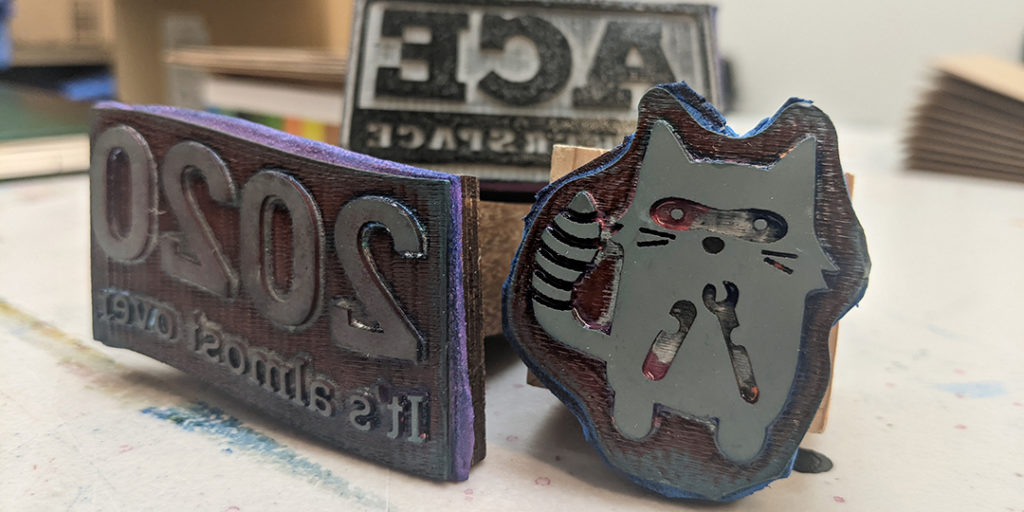
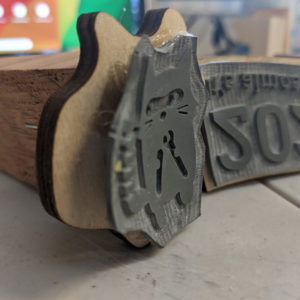
So Ace is working on a holiday card and we need rubber stamps for some of the art. This is the tale of making rubbers stamps including all the mistakes on our 100w CO2 Laser.
Materials used
Scrap wood
Gorilla Spray Glue
Craft Foam
Art Ink pads
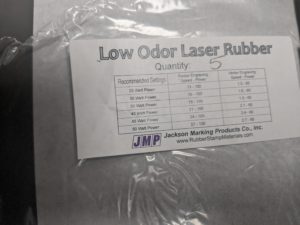
Laser Engravable Rubber Polymer, low odor, from rubber-stamp.com
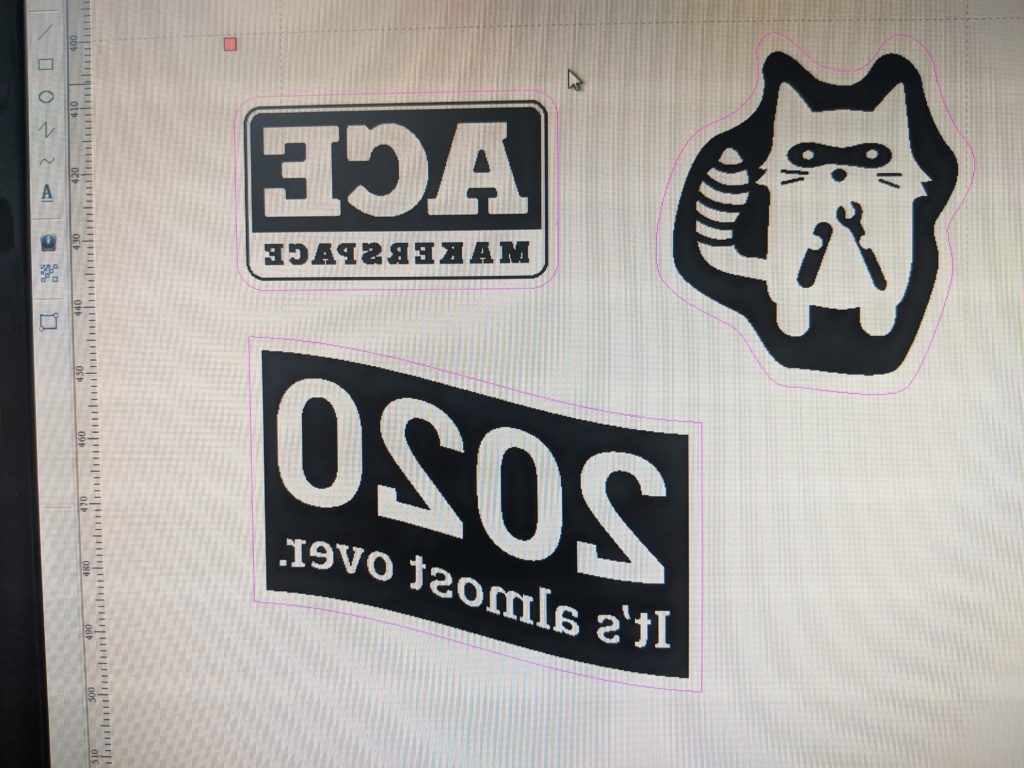
The artwork
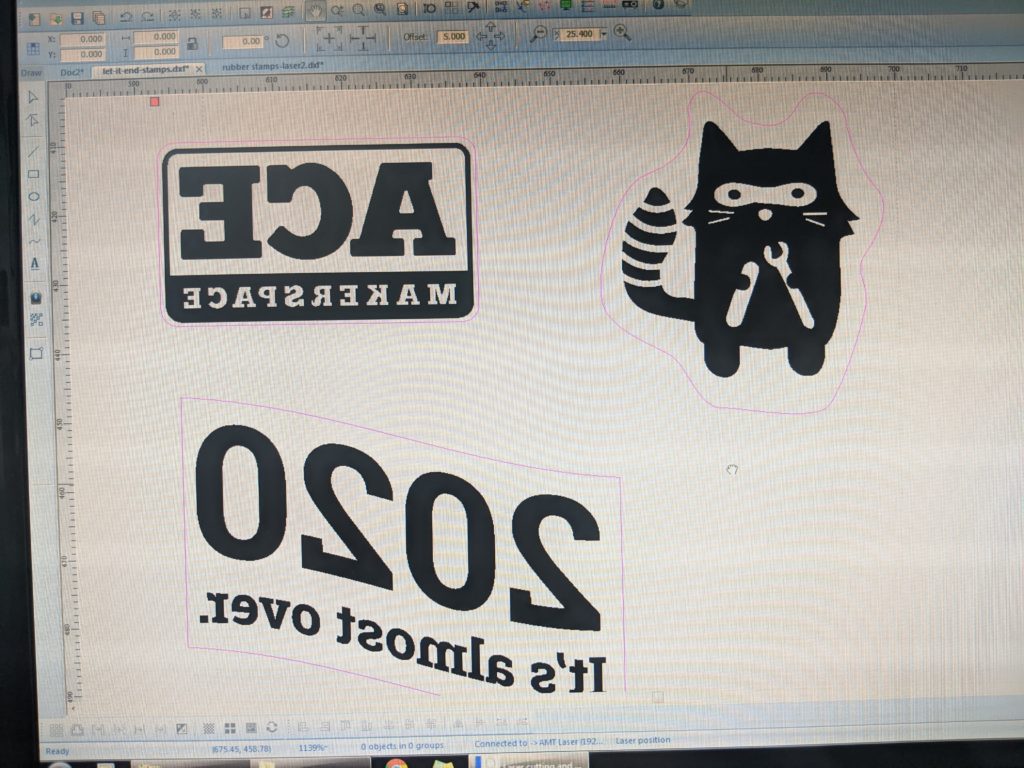
The artwork… that is the first place things went wonky but I didn’t realize it until I cut. I had forgotten that engraving needed an outer boundary in order to drop out the right stuff. Check out these screenshots. Everything black in these images will be burned away.
The thing to remember with vector laser files, LaserSoft, and rubber stamps is:
Mirror the art
Set an outer boundary for the etching
The outer boundary is the same as the cut line so you will need one object to be the boundary and one object on another layer to be the cut line.
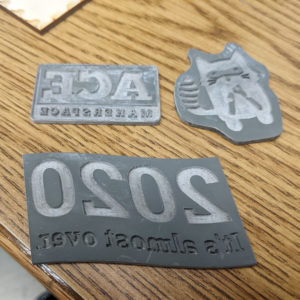
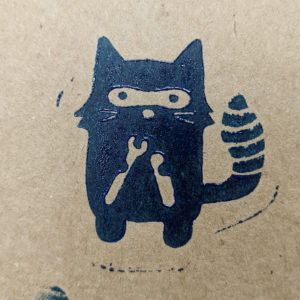
In this file, I forgot to put an outer boundary for the vector etching and that means all the white bits between the pink cut line and the inner art is what will print when I stamp it. Not ideal.In this one most of the art is correct and all the inner graphics that are white will print. The only thing that is wonk is the white gap between the pink cut line and the etching. That is easily solved though post-laser with a pair of scissors.Opps… etched away the thing I wanted to stamp.The actual art I wanted to stamp.
Here are the results from the two files. As you can see the art in the first file didn’t match the intention.
Testing and getting the right settings down
The laser polymer comes with some settings but they are for much lower wattage lasers than ours.
settings from laser package
It took a bunch of test etching to get to settings that worked. I used a focus range for etching. These are the settings we finally settled on:
Cutting: 15/90/87
Etching: 150/80/78 (make sure to turn on grade engrave)
Putting it together and what I learned about glue
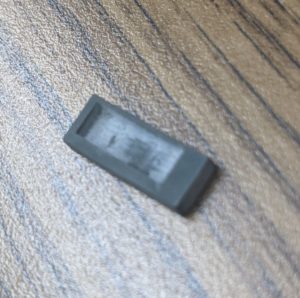
So I cut the outlines out of some scrap wood and used e6000 glue to attach the rubber bit. The results were… bad.
Hard curled up crumbling stamps.
The final product did work out well with a layer of craft foam and using gorilla spray glue.
The post-laser etching finishing and clean up
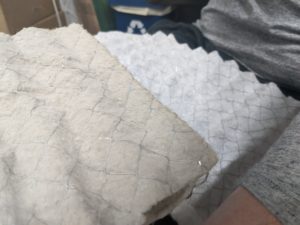
Laser etching rubber polymer is dirty. Really dirty. When the stamps come off the laser they should be soaked in the water right away for about 10 – 15 min. then scrubbed with a soft brush.
This is what a brand new filter looked like after 8.1min. of cutting and etching laser.
Dirt filter after cutting laser polymer next to new filter material.