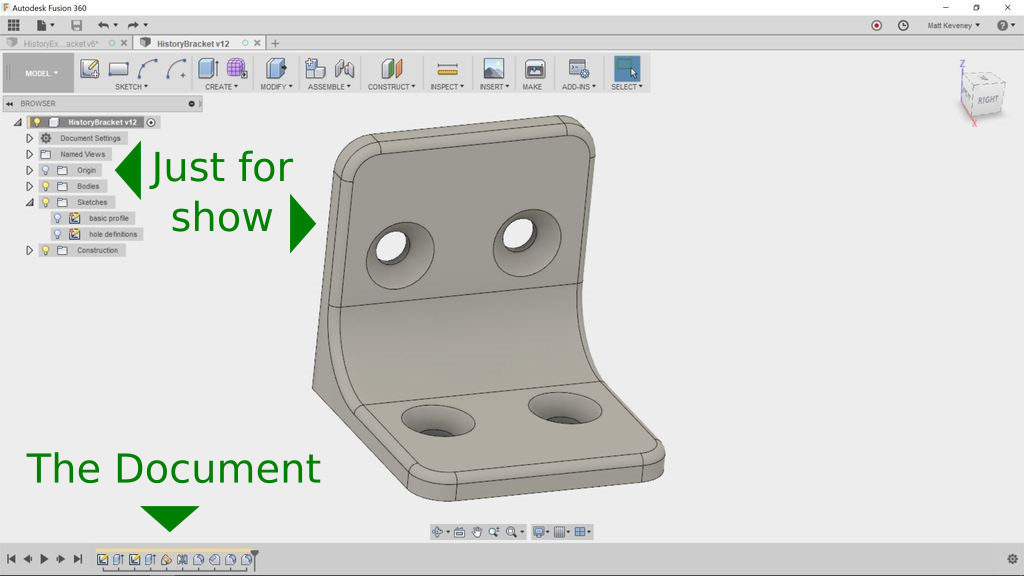
The 3D View is “Just for Show”
With most editing tools, the document you’re editing is comprised of the things displayed right in front of you. With a word processor, it’s the words; a spreadsheet, it’s the numbers and formulae; an image editor, it’s the pixels. This is also true of mesh-centric 3D modelers like Blender or SketchUp. When you move edges or faces, bore holes, or perform any other operation, you’re modifying the Mesh: a collection of points, edges and faces in Cartesian 3D space. The mesh itself is the document.
But with Fusion 360, the document is composed of the sequence of things in the history timeline (shown at the bottom of the screen). The 3D view in the center of the screen is the result of executing that sequence of operations. The things in the Browser (the hierarchical object list on the left), are also a product of the history timeline sequence. Think of the timeline as the program code that produces your design. As far as editing is concerned, the Browser and 3D view are just for show!
I’ve always thought that ‘history timeline’ was a misleading name. ‘Operation Sequence’ might be better. In real life we can’t yet travel back in time, so the term ‘history’ suggests that it’s merely an informational record of what already happened. Not so! Items in Fusion 360’s history timeline can be rearranged and edited. Learning how to do so is key to getting the most out of the tool.
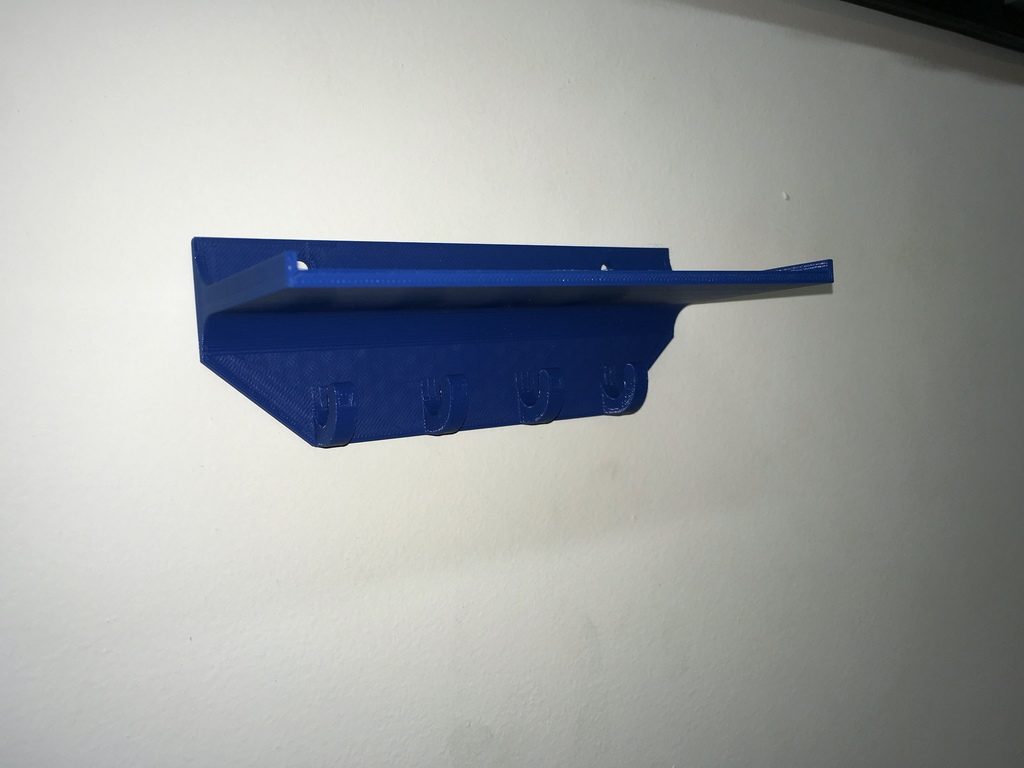
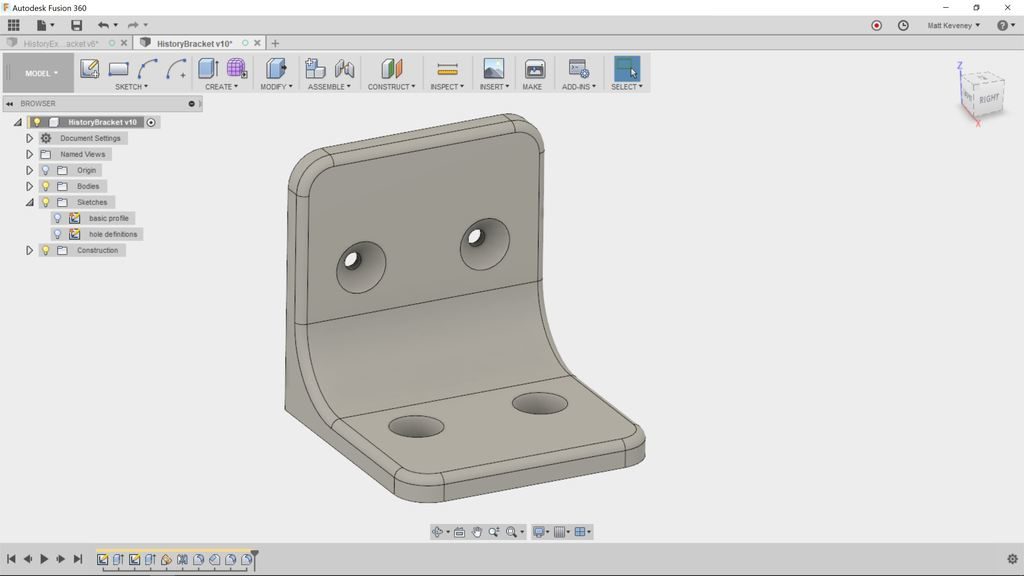
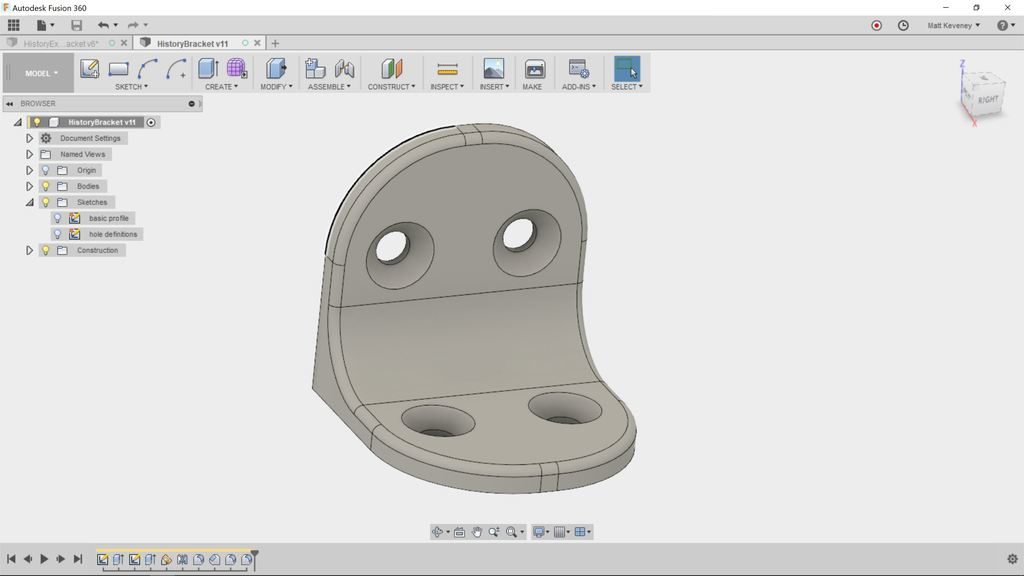
To get some practice with the timeline, let’s walk though a (somewhat contrived) example: The corner bracket pictured above.
First create a sketch describing the basic cross section profile.
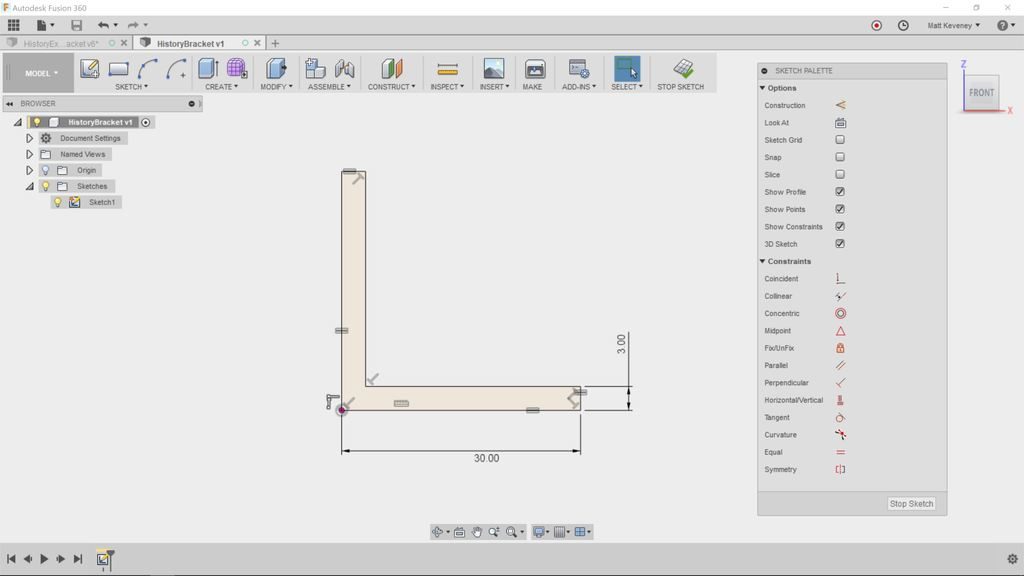
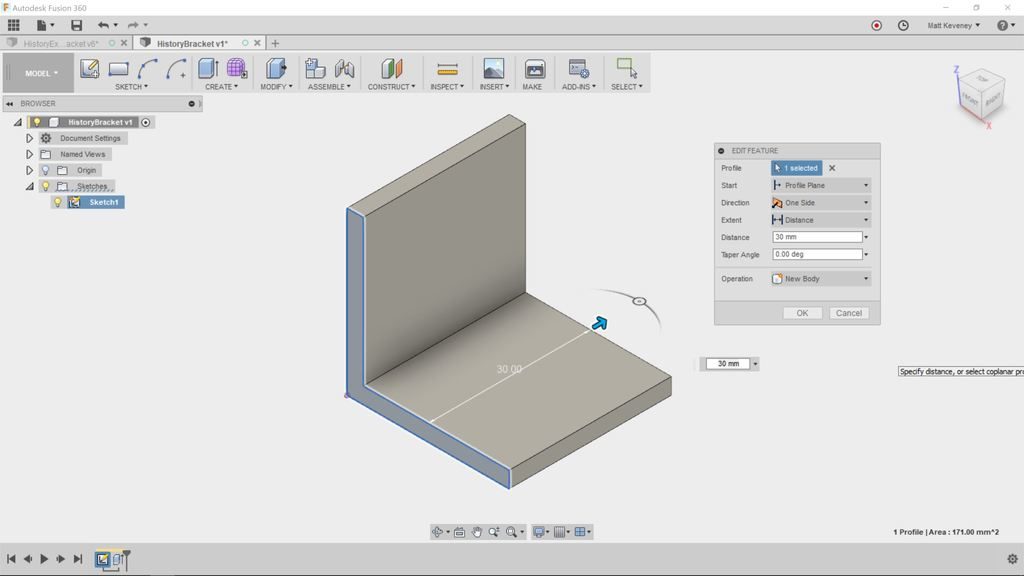
Then extrude with the push-pull tool to create a solid body.
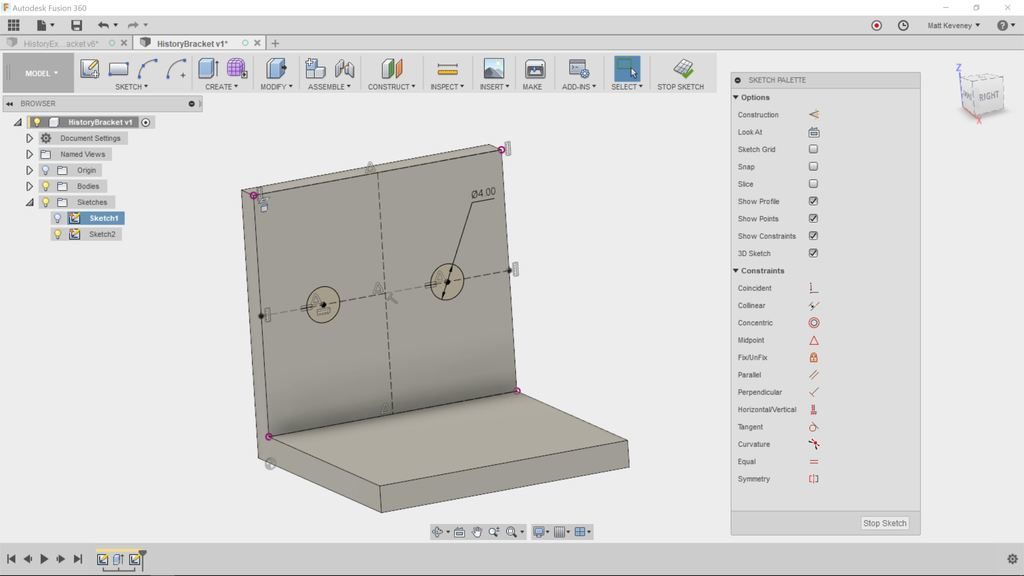
Now create a sketch on one of the sides to describe mounting hole profiles.
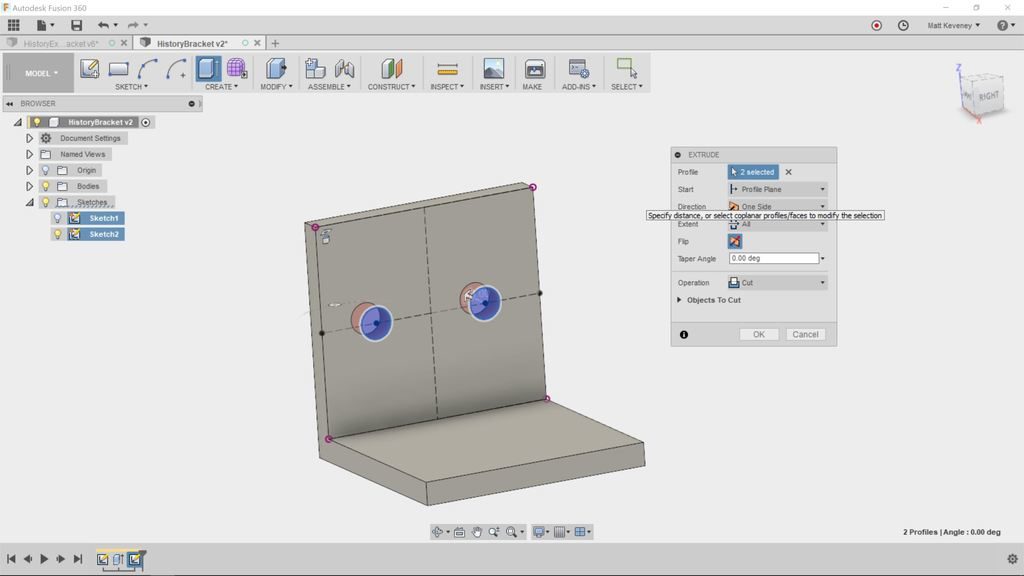
And extrude to bore the holes.
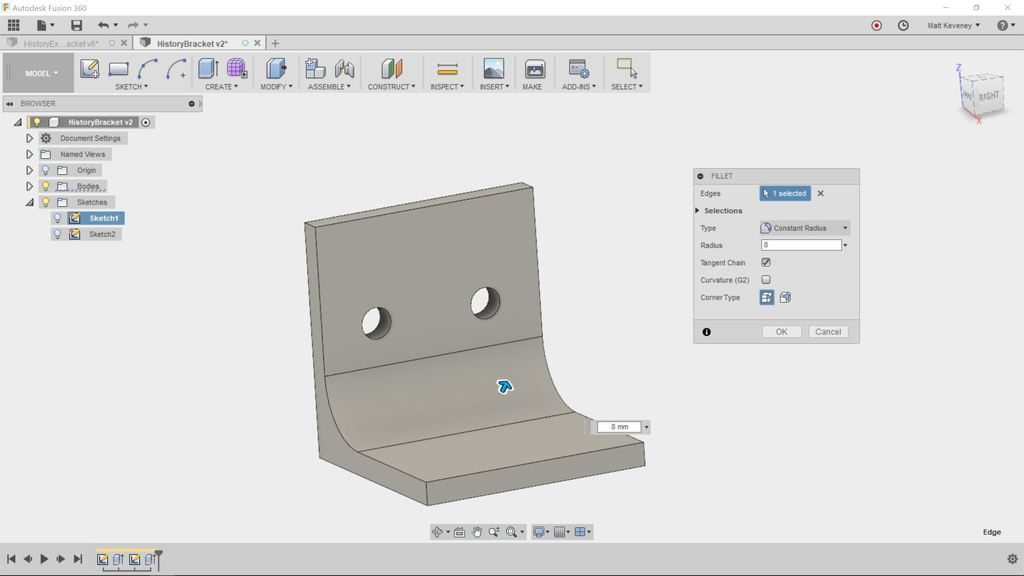
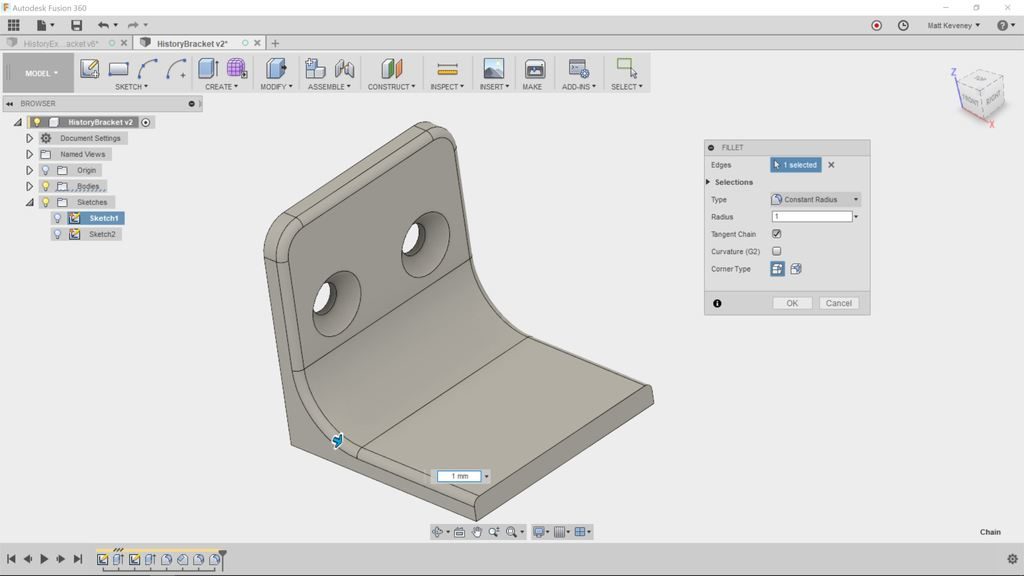
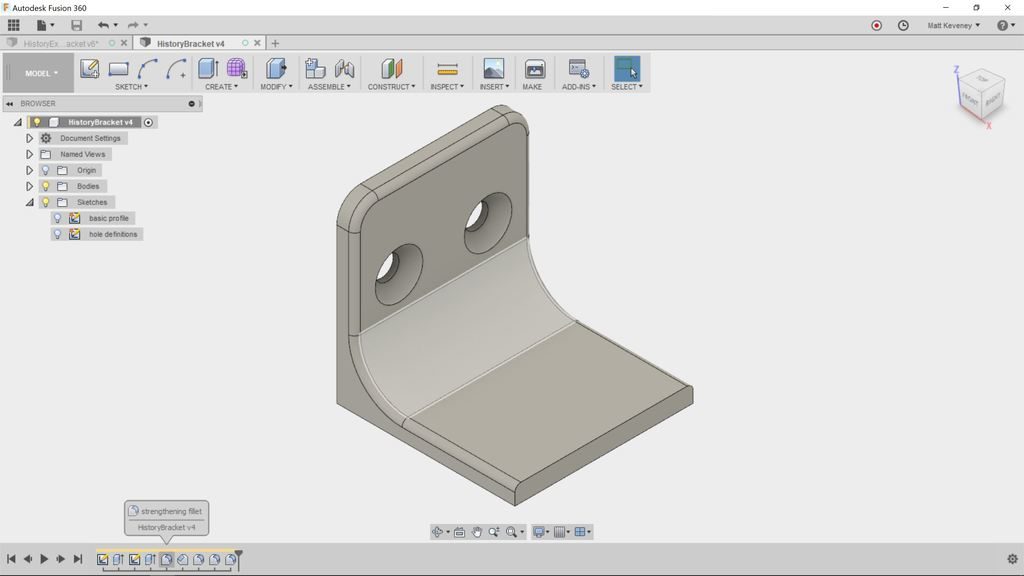
Now, we’ll use some of the modify tools. First, add a large fillet to strengthen the bracket.
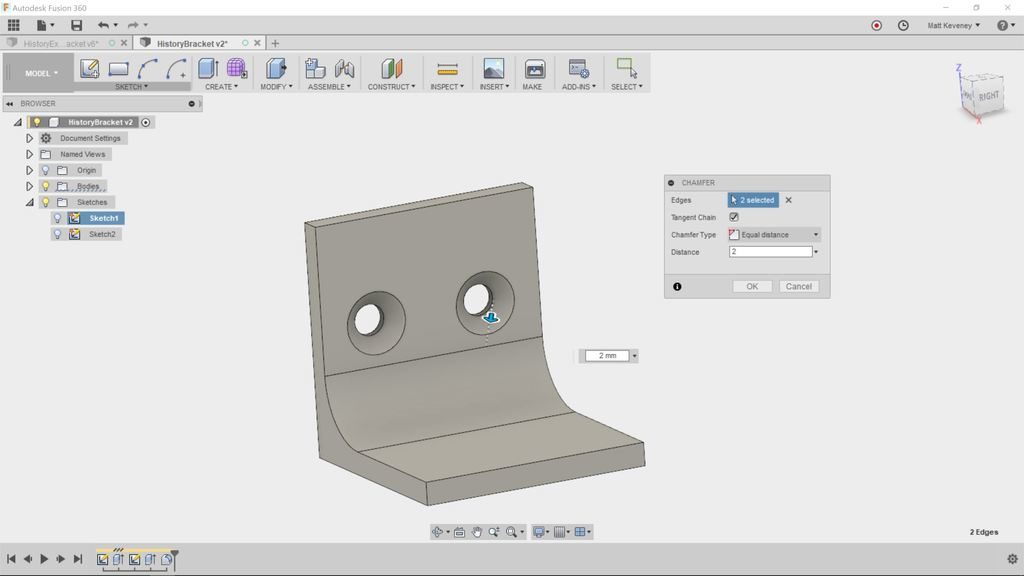
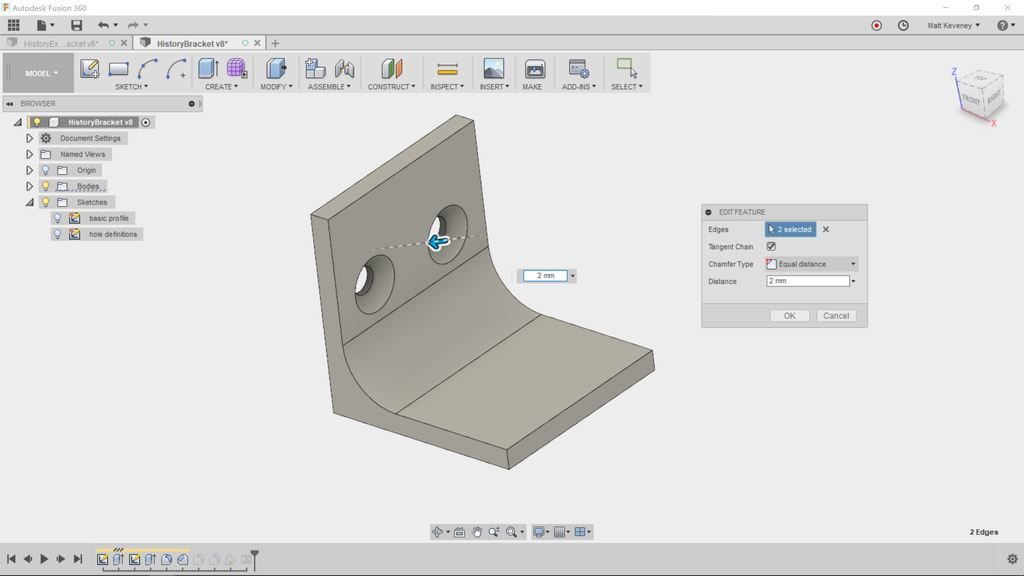
Add a chamfer to counter-sink the holes.
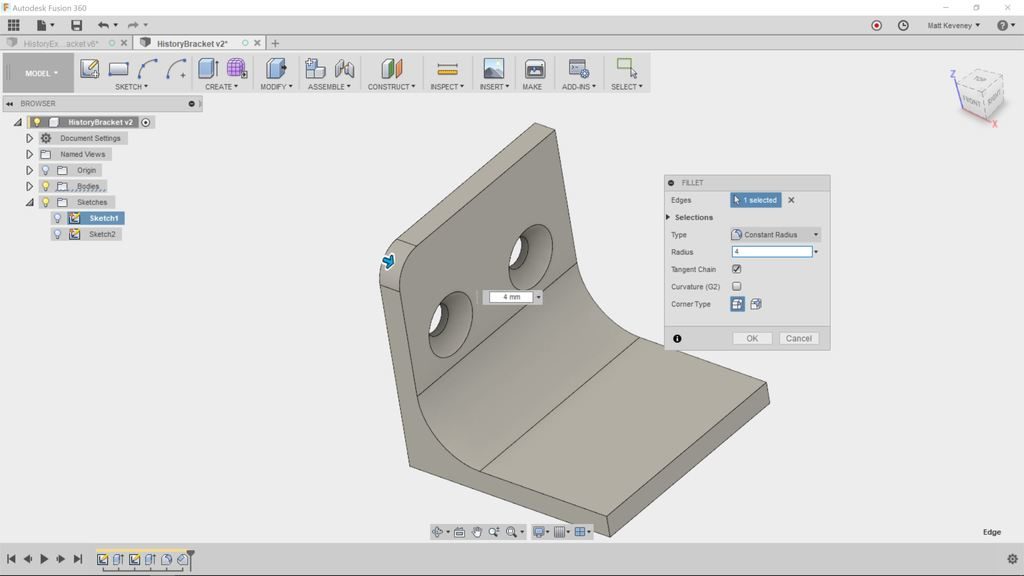
A fillet to round over the top corner.
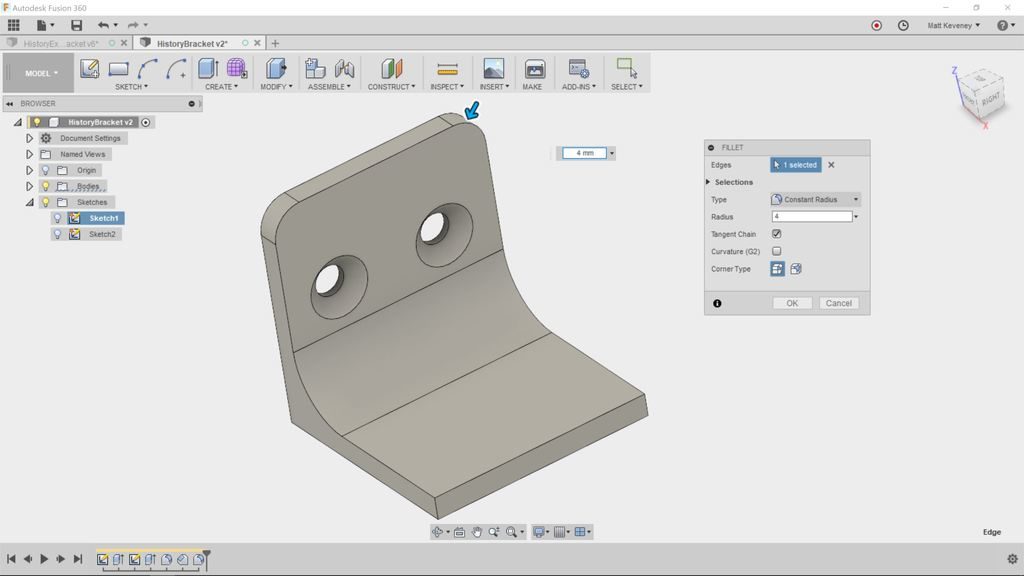
Add another for the other top corner.
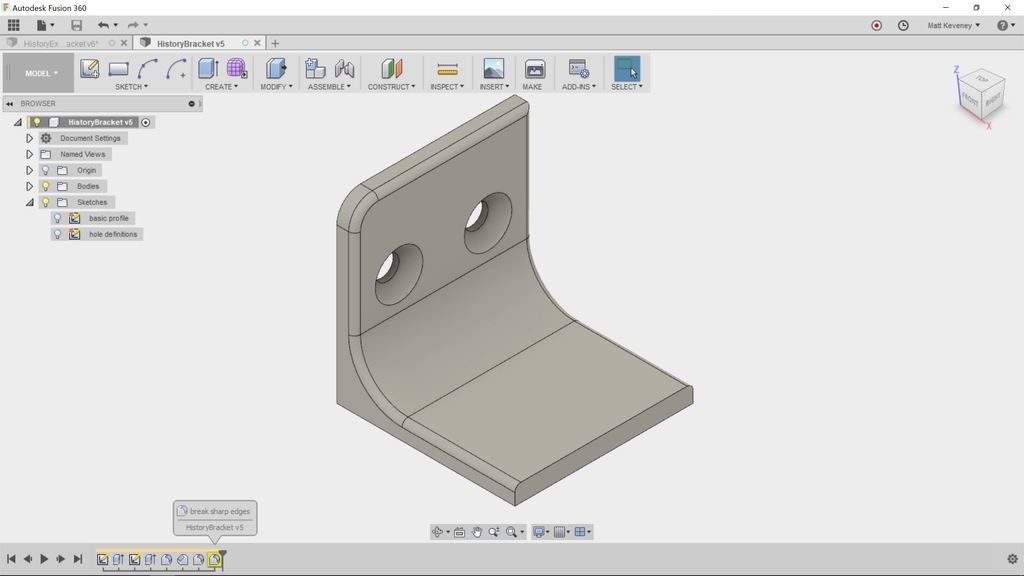
Add one more small fillet to break the sharp edges.
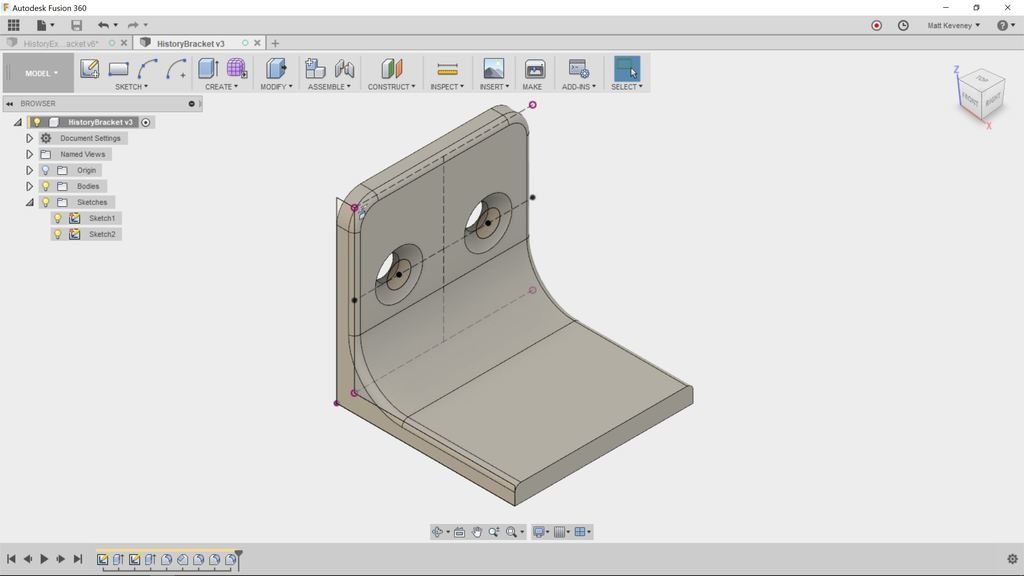
Well, it clearly needs some work, but let’s review the timeline to see what we’ve done so far. First, make the sketches visible for clarity’s sake (find the sketches in The browser and click the light bulbs). Then click the home and fit buttons to get this view:
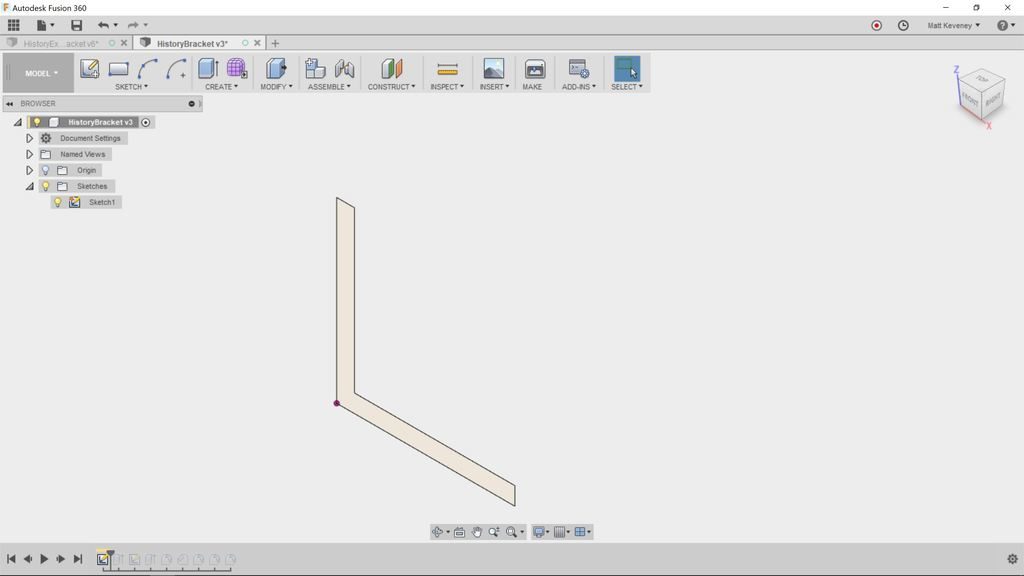
Right click the first item in the history (a sketch) and select Roll history marker here. The body will vanish from the 3D view, and the Browser will display just one object; the sketch. Don’t panic; you haven’t deleted anything! Note that the items in the history are still there; they’re just grayed-out.
You’ve moved the history marker to display the model as it was defined at this point. Remember: the history timeline is your document; the 3D view and Browser are just for show.
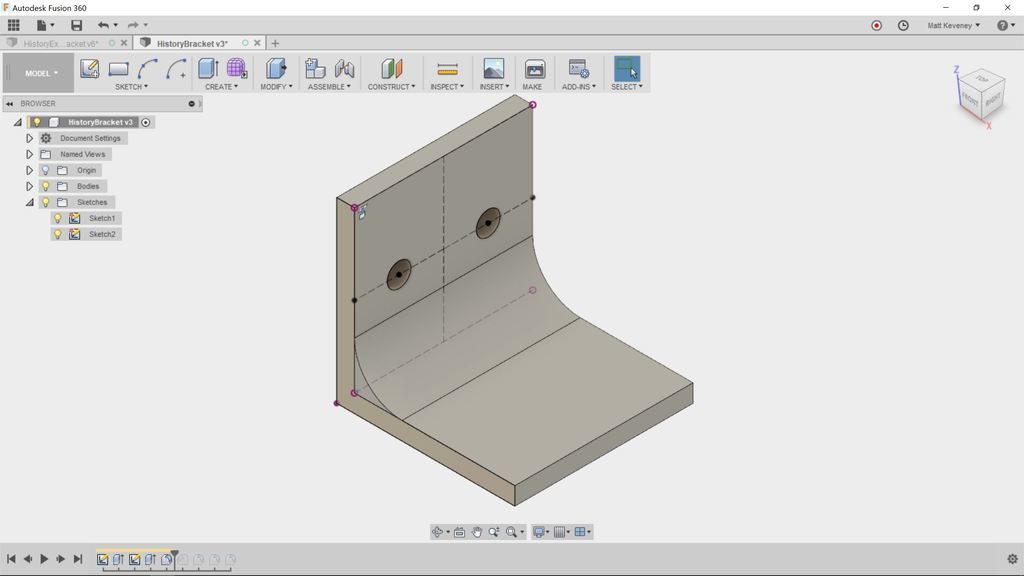
Click the next step icon to advance the history marker. With each click, the display will update to reflect another operation. When you reach the end the 3D view will reflect the model as defined so far.
We can give the sketches and features more meaningful names. This is a good practice in any case, but is especially useful when getting familar with the history timeline.
Right click each item in the timeline; click rename and enter the following names:
basic profile
basic body
hole definitions
holes
strengthening fillet
countersinks
corner roundover
corner roundover 2
break sharp edges
To see the names you’ve just entered, hover the mouse over each item in the timeline. The names for sketches also appear in the Browser.
While labeling our history items (sketches and features), I remembered that we rounded the outer corners with two seperate features. It makes more sense to use a single feature, since both of these fillets should always be the same size. That way, if we ever want to change the size we need only edit one feature.
Right click the corner roundover 2 feature and delete it. Fusion will warn that the feature is referenced by other features in the timeline. Click Delete anyway!
Now the break sharp edges round-over feature has a yellow background, indicating that something is amiss. Ignore this for now, we’ll come back to it.
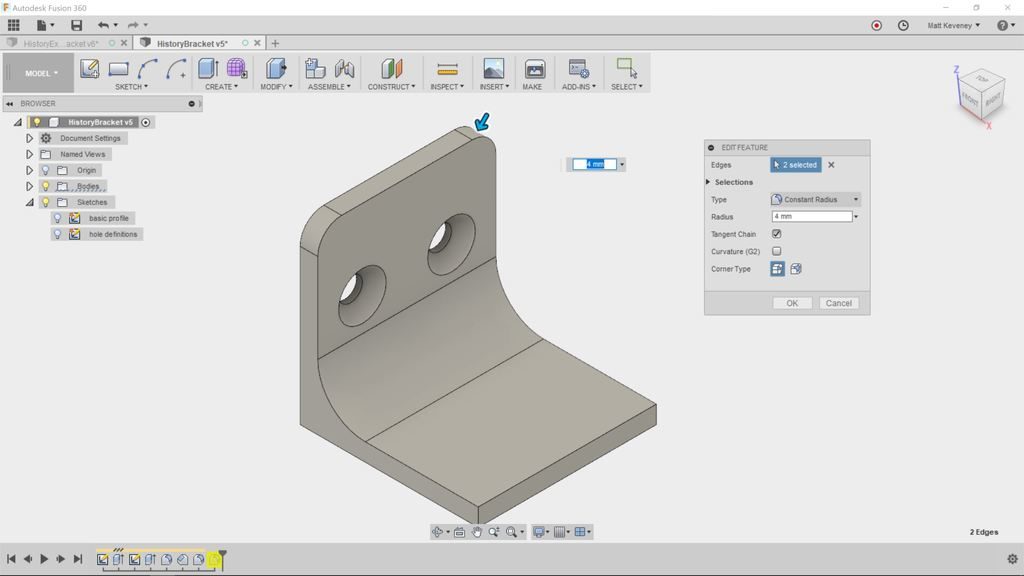
Right click the corner roundover fillet and select edit feature (or just doubleclick the feature’s icon). The fillet dialog will be shown, and the 3D view/browser will reflect the model as it was defined at that point in the history.
The fillet dialog indicates that a single edge has been selected. Hold shift and select the other upper edge. Then release shift and click OK.
Notice that the break sharp edges round-over hasn’t been applied to this new fillet. This is due to the same issue that arose when we deleted the corner roundover 2 feature.
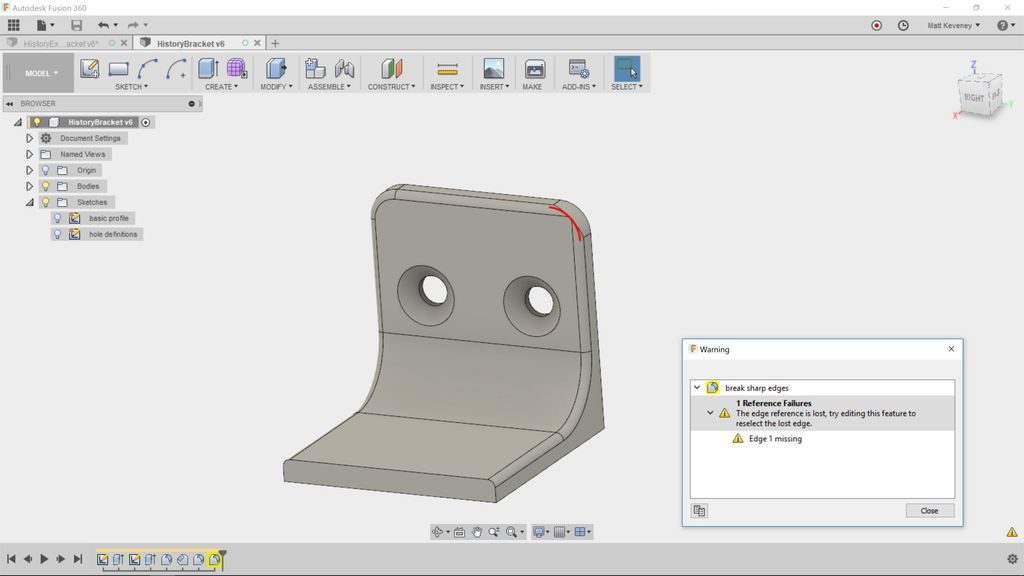
So, let’s have a look. First, right click and choose review warning. This displays more detail about what went wrong. In this case it says: “The edge reference is lost, try editing this feature to reselect the lost edge.”
So, let’s try editing as suggested. Double-click the feature to edit.
Even though the model has the same shape as before, the underlying edges that define the body have changed due to our upstream edit. Notice that it now says two edges were selected (originally there was just one chain of edges). If you press shift these edges will be highlighted. You can clearly see a gap where the redefined fillet is.

Click the ‘X’ next to edges in the dialog box to deselect the edges; then reselect the edge. It will select the entire edge chain again. Once saved, the yellow warning background will disappear. Be sure to address all warning issues in your timeline! If ignored, they’ll just cause trouble later.

When editing something in the history, we often have to review and adjust downstream features like this. This can be very frustrating if you aren’t familiar with the timeline. With a little practice it becomes second nature, and is a worthwhile skill to attain sooner rather than later.
So, let’s finish our bracket. We need holes and round-overs on the other tab, and our break edges fillet needs to go around the entire perimeter.
We’d like the hole pattern to be identical on both tabs of the bracket. We could duplicate the sketch and extrude operations that we used on the first tab, but if we ever changed the pattern (maybe to use more holes), we’d have to edit two sketches instead of one, and we’d have to be careful to keep them identical. By using a mirror operation instead, we can use a single hole definition, making for simpler adjustments later.
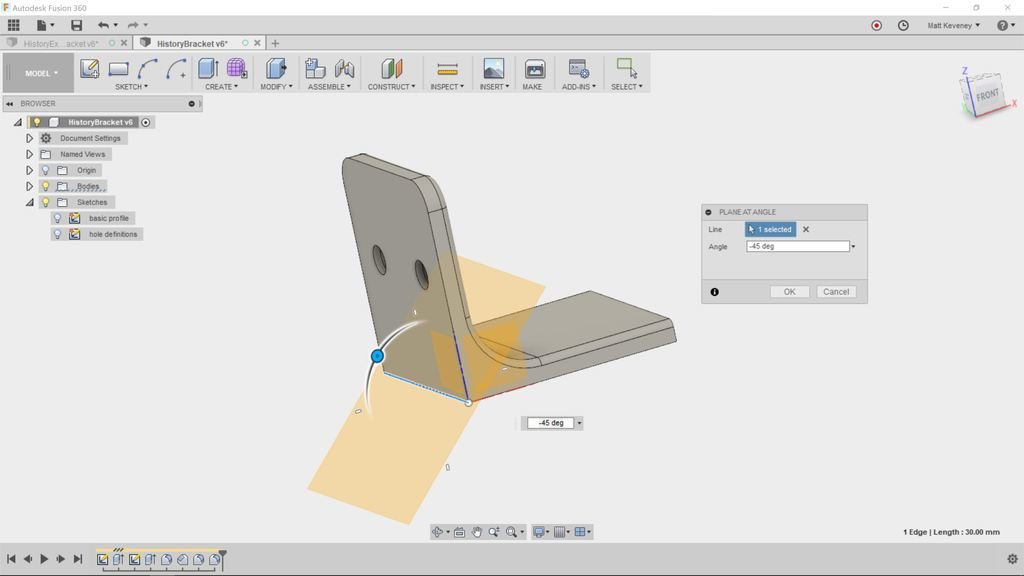
First we need a reflecting plane. Choose Construct/Plane at angle and select the bottom edge at the apex of the bracket. Enter an angle of -45. Then right-click the feature in the timeline and rename it reflecting plane.
Now, click Create/Mirror. Set the pattern type to Features, then select our holes extrude feature (in the timeline) and click OK.
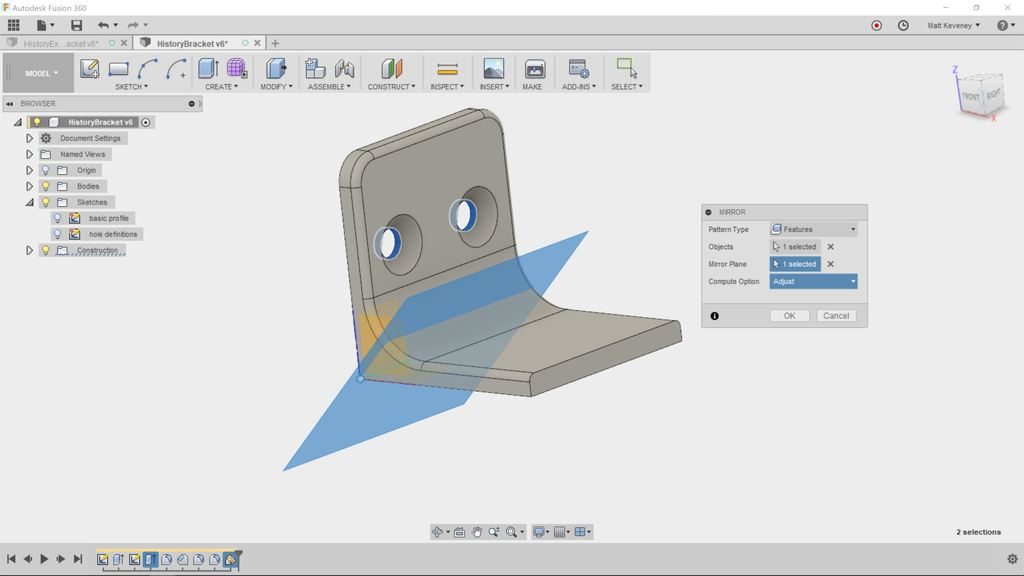
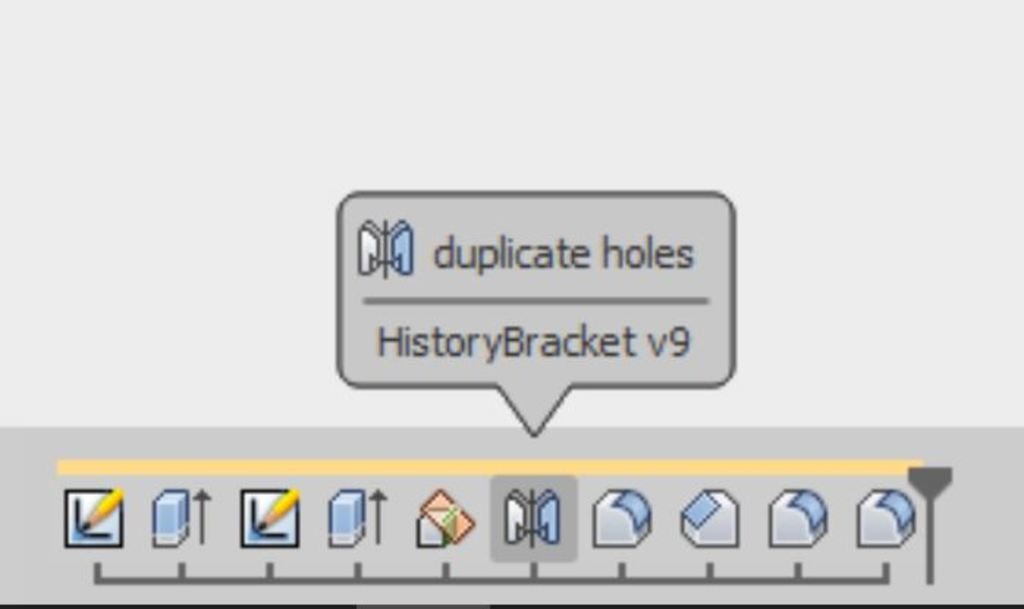
Right click the mirror feature and rename it duplicate holes.
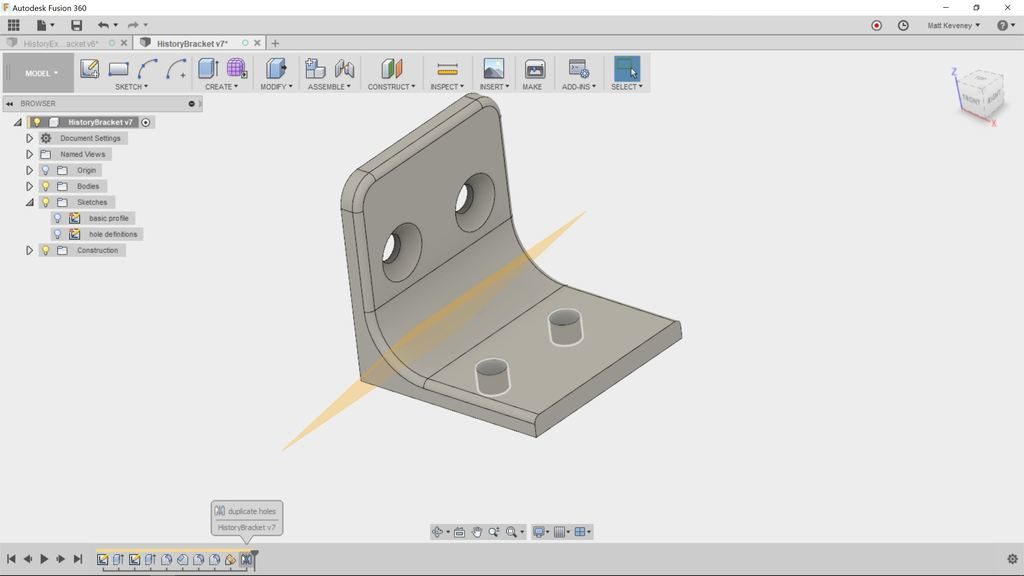
Turn the construction plane display off now, just for clarity.
We’d like to countersink these new holes too, but if you double-click to edit the countersinks feature, the new holes do not appear for selection!
That’s because the new holes did not exist at the time we created the countersink object. Note that the countersink feature appears before the mirror feature in the timeline. You might be tempted to simply add another countersink feature, but there’s a better way!

To fix, let’s move the reflecting plane and mirror objects to an earlier point in the timeline. Press shift and select both features. Then drag the features to the left. You’ll find you can’t go further left than our holes feature. Release the mouse button to complete the move.
This illustrates an important concept: Any feature that references another must appear after the dependent feature in the timeline. In this case, the duplicate holes mirror feature refers to the holes extrusion feature, so duplicate holes must appear later. This also applies to sketches that contain projected geometry: The edges being projected must be defined before the sketch.
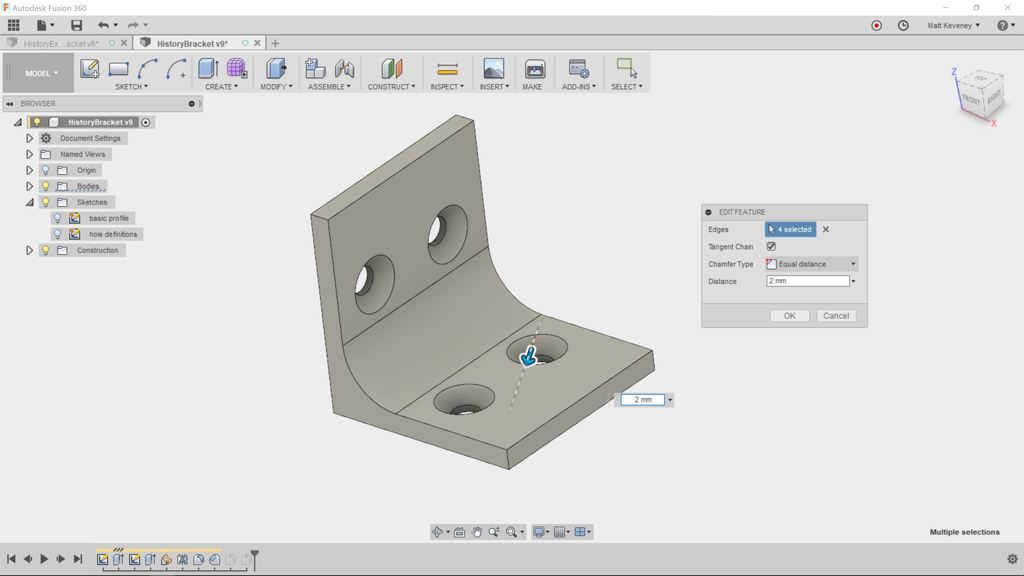
Now double-click the countersinks chamfer feature to edit it. Since it now happens after the mirror feature, we can add the new holes to the set of ‘edges’ this feature affects. Shift-select the additional holes and click OK.
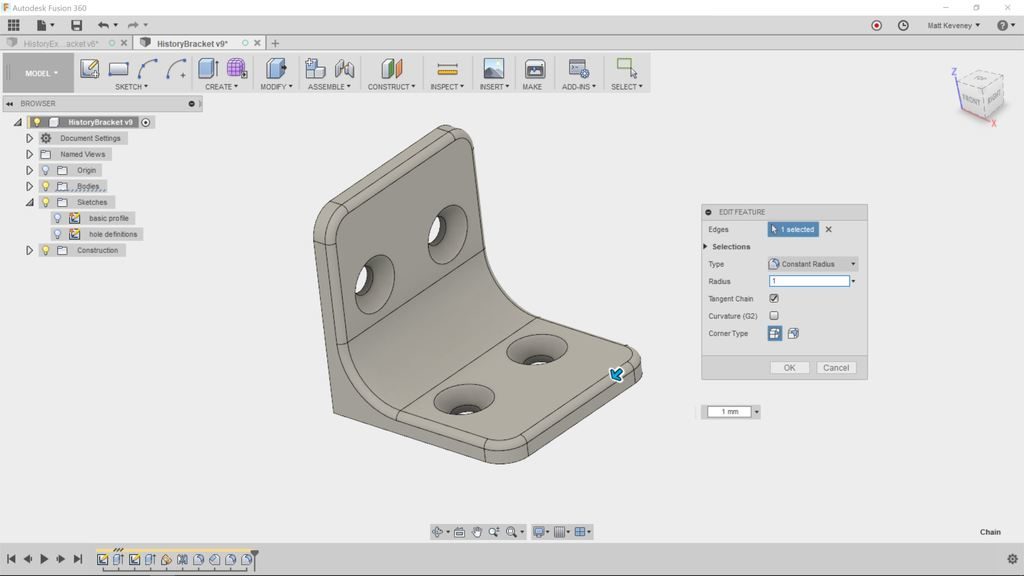
Let’s fix the corner round-over the same way. Double-click to edit, then shift-select to add the other two edges.

Finally let’s fix the break sharp edges feature again. Double-click to edit it. Click the ‘X’ next to the edges button do deselect all. Then reselect the edge. This time it should select the entire perimeter as originally intended.
Notice that we did all that cleanup without adding much to our history timeline. We removed one feature, then added two and adjusted a few.
The more natural thing might have been to add a new sketch and another extrusion for the extra holes; then apply the fillet and chamfer tools again. Resist this temptation! The model might look the same, but the document will be larger than necessary, will be more difficult to edit later, and will slow Fusion down.
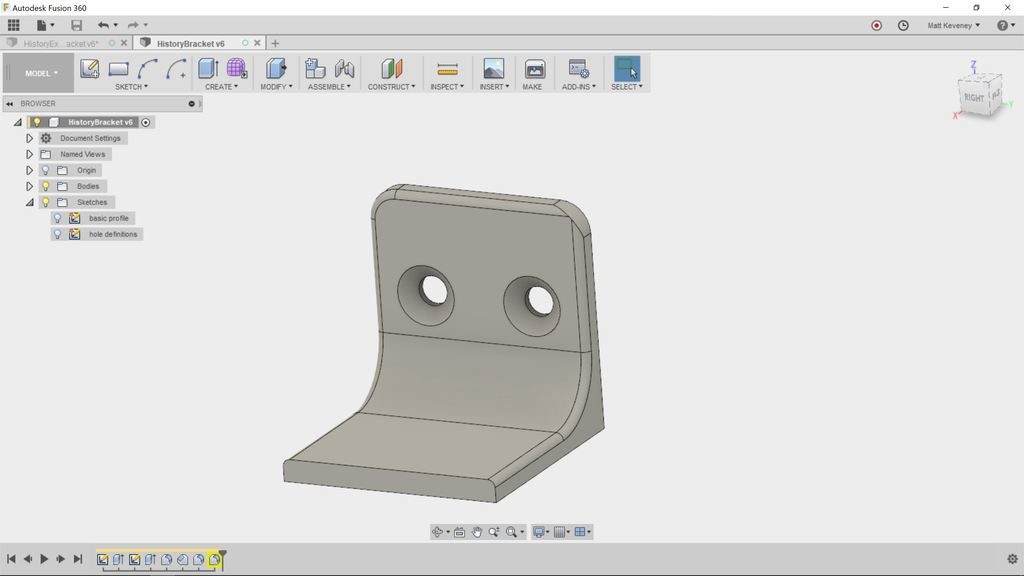
With our concise model, edits are a breeze. Here’s the original plus 3 variants. Each variant was made by editing a single value in a single sketch or feature.
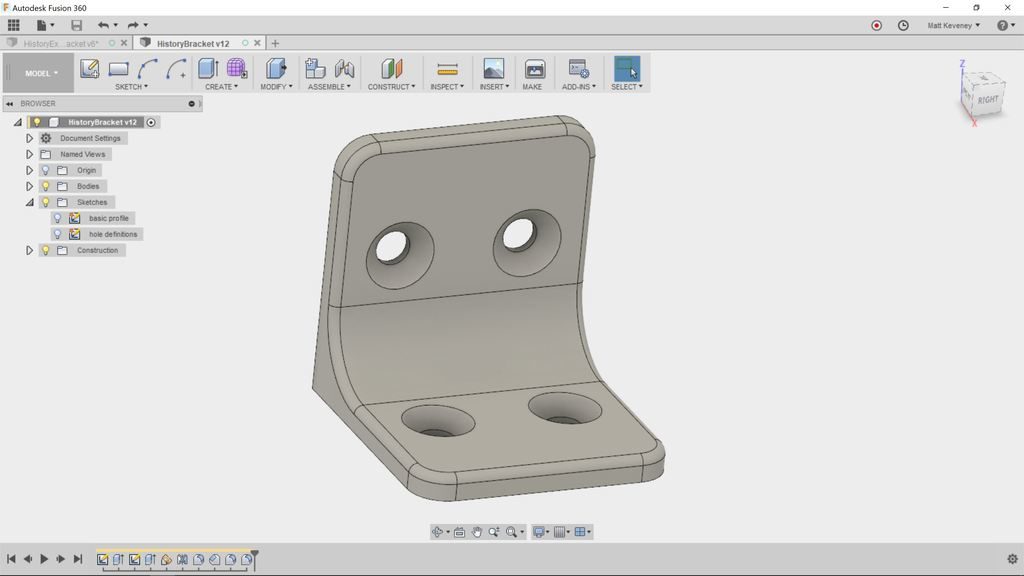

Remember: The history timeline is your document. The rest is just for show!
P.S. The document comparison I made here is oversimplified. Some bitmap editors like Microsoft Paint modify pixels directly, but Photoshop and Gimp documents contain layers and other high-level objects. A Blender document is actually a mixture of a mesh and high-level ‘modifier’ objects, among many other things. In Fusion 360, the ‘sculpt’ workspace offers freeform mesh-based editing much like Blender. Also, Fusion does store faces and bodies in the document that don’t appear as distinct items in the history. I simplified in order to illustrate my paradigm. I lied only to more clearly illuminate the truth.