Category: Workshop

Everything in the woodshop

Wood Glue Laminates

How long do I need to keep my glue up in clamps?

30 minutes if it’s done with a woodworking glue like Titebond. Yes it’s often thought you have to leave it clamped up over night but in reality 30 minutes is enough. Though it is advised to wait 24 hours before stressing the joint.

After gluing up wood for guitars more than 30 years I have never had a glue joint fail. With a well prepped joint surface the glue line will always be stronger than the surrounding wood.

While it may take hours for big blobs of squeezed out glue to dry, the super thin layer in the glue joint dries much faster. If you can feel a skin on top of the big globs or see that a thin smear of glue has dried the glue in the joint is probably dried.


Here’s what Titebond has to say about it:

http://www.titebond.com/resources/use/all/faqs

What is the clamping and drying time of Titebond Wood Glues?

“For most of our wood glues, we recommend clamping an unstressed joint for thirty minutes to an hour. Stressed joints need to be clamped for 24 hours. We recommend not stressing the new joint for at least 24 hours. For Titebond Polyurethane Glue, we recommend clamping for at least forty-five minutes. The glue is completely cured within 6 hours.”


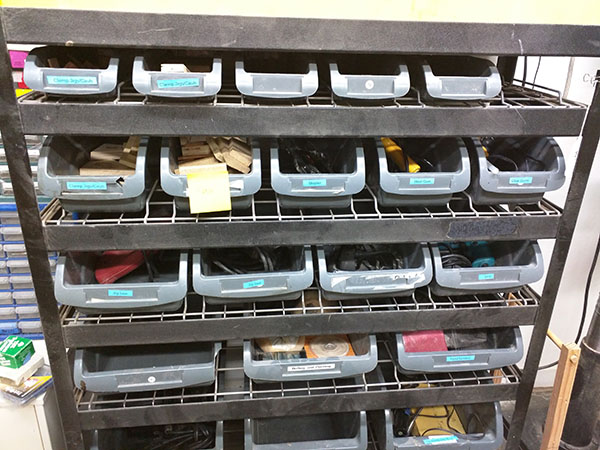
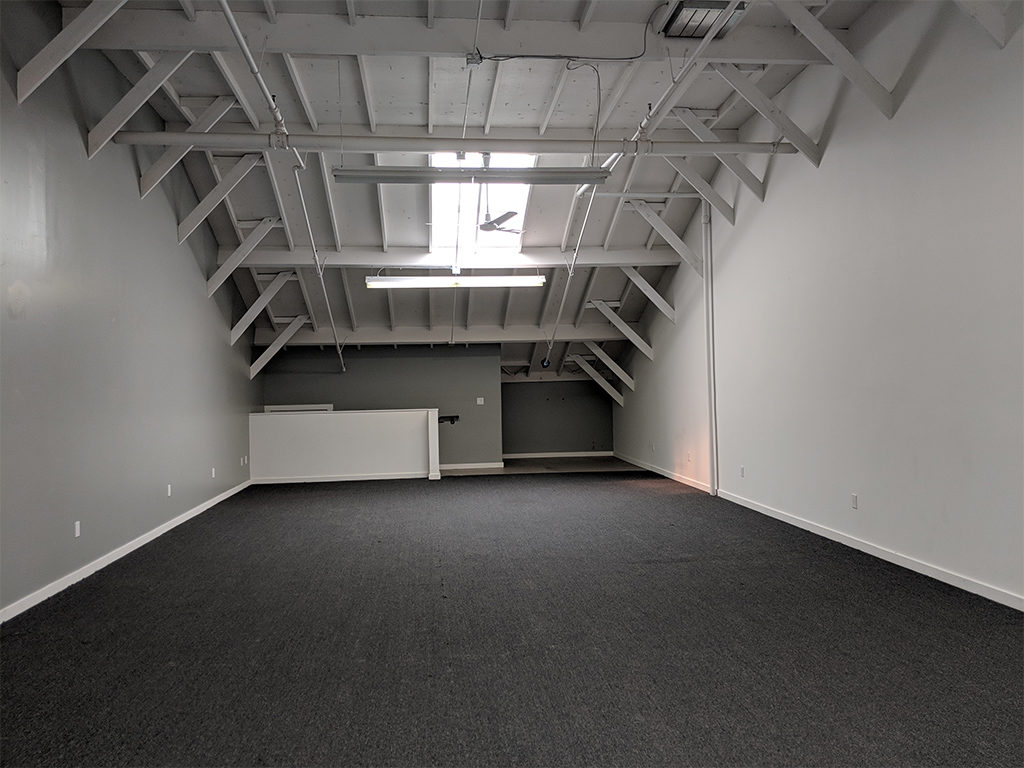
It is common to leave glue ups over night. This isn’t necessary and it can sometimes make the space cluttered for others and take the clamps out of use from the community.

What I try to do is once I get my last clamp on I check the time, and then do all my clean up and packing and loading of my car. Or you take this opportunity to do your monthly “little thing”. It’s easy to fill a 1/2 hour and then I can remove the clamps and put them back for someone else to use before I leave. It also makes anything I have to leave at Ace smaller and easier to store out of the way.

That said if you are going to do any milling or sanding over a glue joint using Titebond or other water based glues it’s good to leave a few days or even weeks to let all the water to fully evaporate from the glue joint. The joint is swollen from the water and if you level it before absolutely dry it can sink a bit when it fully dries leaving a low groove along the glue joint.

Made at AMT-June 2019

NOMCOM Fob All The Things dashboard | AMT Software • Bodie/Crafty
Hand Built Speaker | Workshop • David
Recycling Game | Workshop/Laser • Bernard M.
Solid wood credenza | Workshop | Raj J.
Tiny electronic brass jewelry | Electronics | Ray A.
RFID Mint Dispensing Box | Laser+Electronics | Crafty
Wood Signage | CNC Router | James L.
Fabric Kraken stuffed with 720 LEDs | Textiles + Electronics | Crafty

Stanley Black and Decker and DeWalt Donation of Awesomeness

The morning of January 17th was jam-packed with activity at AMT. Coworking was fun and I had appointments back to back for AMT Office Hours. Around the end of the morning, I got this mysterious call from a lost truck driver trying to find us. I thought to myself “We haven’t ordered anything… what could it be”.

After a few missteps with online maps, the driver found us and I got a call to come down to the loading dock… I was all prepared to send a miss-order back… but low and behold when I got on the truck to check it out I couldn’t believe my eyes. It was this amazing donation from Stanley Black & Decker of top of the line DeWalt tools. Two pallets of them.

two pallets of donated tools and a mind blow org ED
Crafty Rachel and Aron freaking out with joy over two pallets of tools.

I freaked out. Like full-on, won a game show freaked out. I almost hugged the driver.

This was out of the blue. A total surprise. When I announce it to the AMT community on our Slack #workshop channel my reaction spread.

And just when I thought it couldn’t get any better it did. I came in on Friday morning to find another pallet’s worth of amazing Stanley planes, Black and Decker Tools, and DeWalt was waiting for us at the shop door.

AMT was built on amazing donations and this one couldn’t have come at a better time. Much of our existing equipment was near its end-of-life. This community had really racked up the duty cycles.

Awesome donation dr. shiney
Dr. Shiney and Aron getting their minds blown
The anticipation is Planer with these two!
Tracksaw dreams do come true!

So a big thank you to Stanely Black & Decker/ DeWalt from me, the AMT community and greater set of folks in North Oakland, CA.

Track saw air Guitar
We will rock this. Oh, yes we will.
Serina with Tools
And the magic continued! More tools on Friday morning.

Custom built Sanding Station for the AMT Shop

Exciting news as a slightly late X-Mas present to the shop I have built us a dedicated sanding station with dust extraction!

This project did not cost a single dime and built entirely from things found in the space. The dust collection is thanks to @TechCurious who hooked us up with a donated Shopvac and mini cyclone not too long ago.

It’s on locking casters so can roll around but be stable when you need it to be. The new station has a large power strip on the back for both the shop vac and the various sanders! There are hooks to hold cables and hoses and the main hose comes straight out through the table top. There are dedicated shelves for the sanders on one side and I have made an adaptor for one of the sanders to attach easily to the hose (I will be working on the other sanders soon). Simply insert the hose and tighten down the screw to hold it in place.

Other than the adaptors I would like to get some storage for sandpaper on this cart and hopefully, it will be a nice little addition to the shop.

Just one thing to be aware of I have give the table top a good coat of wax to minimize glue adhesion but please try not to get glue paint etc on the surface, having a flat area to sand on makes things a lot easier so let’s try and keep it that way!

Also, it is built to be level with the bench and the table saw so can be used as additional support, Infeed table etc.

See you around the shop soon!

Colm M.
AMT Workshop Steward


Dollars Against Dust

Exciting news in the AMT Workshop! We are embarking on a plan to improve the air quality in the AMT workshops. We estimate that we should see a 35% improvement in air quality in the shop. That is a lot of good considering that the AMT workshops serve over 400 people a year.

The plan is not very difficult but it is rather costly, coming in at $1100 almost precisely ($1105.72 is the boring real number). Unsurprisingly, this is where you all come in, we at the shop need to raise $750 to make this plan a reality the other $350 will be matched by AMT.

What is this plan we hear you ask, well, the plan is to:

  • Installing two 400 CFM air cleaners in each of the shop spaces meaning we would cycle and scrub the air in each space approximately every 4 minutes (slightly longer in the front room and slightly shorter in the rear room).
  • The new air cleaners will be remote controlled (meaning no climbing on tables to get to them).
  • These air cleaners will have timers to run for an hour after you leave the shop, meaning the air should be nice and clear for the next person coming in.
  • On top of this we want to revive the once active air quality monitor in the shop, so we can really see what the shop air quality is! (an air quality readout is what the big blank TV in the corner used to display).

“HOW CAN I HELP” we hear you clamor, well, in one of three ways we say!

Donate to the Cause

Making a cash donation directly to AMT means that 97% of your donation goes to the project and it is tax deductible.

Donate

Buy a Raffle Ticket

Donate via raffle tickets for a chance to win cool prizes like redwood burls and original art. $5 per ticket, drawing at the general meeting on December 13th.

 Tickets

Buy a ticket to the “Ask an Expert” fundraiser

Get expert advice on your projects including those important gifts you are making this season at our “Ask an Expert” fundraiser December, 6th from 6pm – 9pm.

$10 for members
$25 for non-members

 $10 for Members

 $25 for Non-members


Big empty room

AMT Expansion 2018

This month AMT turns 8 years old and we are growing! We have rented an additional 1200sqft suite in the building. We have a Work Party Weekend planned June 1-3 to upgrade and reconfigure all of AMT. All the key areas at AMT are getting an upgrade :

CoWorking and Classroom are moving in to the new suite. Rad wifi, chill space away from the big machines, and core office amenities are planned for CoWorking. The new Classroom will be reconfigurable and have double the capacity.

Textiles is moving upstairs into the light. The room will now be a clean fabrication hub with Electronics and 3D Printing both expanding into the space made available. Photo printing may or may not stay upstairs — plans are still forming up.

Metal working, bike parking, and new storage including the old lockers will be moving into the old classroom. But before they move in the room is getting a face lift by returning to the cement floors and the walls will get a new coat of paint.

The CNC room and workshop will then be reconfigured to take advantage of the space Metal vacated. We aren’t sure what that is going to look like beyond more workspace and possibly affordable storage for larger short term projects.

Town Hall Meeting May 17th • 7:30PM • Plan the New Space

What expansion means to membership

The other thing that happened in May is after 8 years our rent finally went up. It is still affordable enough that we get to expand. Expansion also means increasing membership volume to cover the new rents and to take advantage of all the upgrades. We are looking to add another 30 members by winter.  Our total capacity before we hit the cap will be 200 members. We feel that offering more classes and the best bargain in co-working will allow us to do this. Please help get the word out!

The New Suite in the Raw

Big empty room

Aquarium Stand

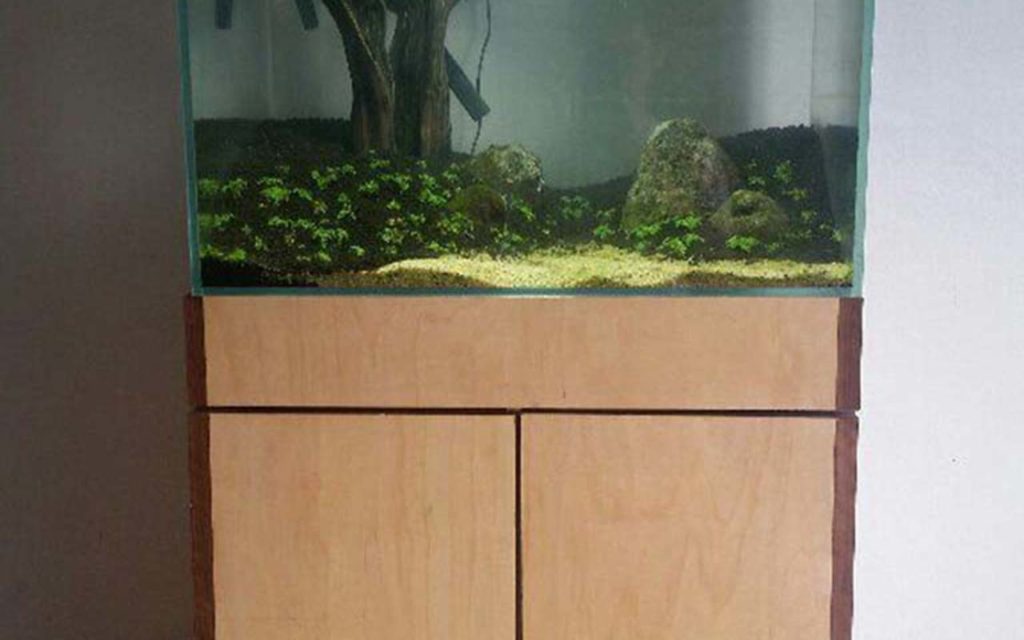
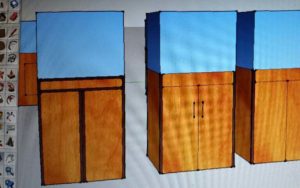
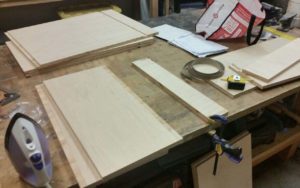
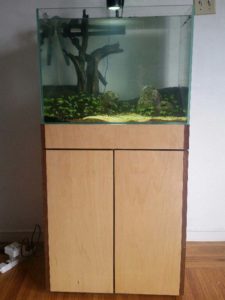
This is an aquarium stand that I built at Ace Monster Toys. It is made of maple 3/4 plywood and walnut edge banding. I used the old craftsman table saw and the ryobi router table to cut and shape the parts. If I had to do it over again I would use the CNC router. It would be far far safer, faster, and the results would be cleaner and more square. I would probably also use strips of 1/8″ walnut instead of the iron-on edge banding, because it would be much more durable and age better.  After designing the piece in sketchup, I made some test pieces to practice edge banding on. The idea is to use the edge banding to hide the screws and the ugly edges of the plywood.  It was a challenge to cut up the 4×8 sheet of plywood with a handheld power saw. A panel saw would have been better.  After getting the pieces small enough to fit in my car, I took them to AMT and cut them to size on the table saw. The problem was that, even with my own brand new blade, the saw would not cut perfectly square, and the measurements on the fence were not accurate. It was very frustrating and the results were not perfect.  I used the router table to cut dadoes and rabbets where the walnut strips would go. After assembling the box, I used an iron to iron on the walnut edge banding, which I trimmed with a razor.  At this point I took the stand home for finishing, and added some wheels. The stand contains my canister filter and CO2 tank. I am very happy with the result, but if I had to do it over, I would use the CNC.

Big Lathe Now Working!


The lathe in the woodshop is functional thanks to the new lathe stand built by Howard. The lathe is made of the motor from Rachel’s donated lathe and the frame from the old workshop lathe. Hugh, Ravi, and Jose Miguel worked together to build the “frankenlathe”.

Because the original lathe stand wasn’t heavy enough, it vibrated too much when throwing out-of-balance work. To solve this problem, Howard added a piece of a railroad rail, a giant motor, and a piece of oblong steel to the bottom of the stand. This has reduced the vibration. However, Ravi warns that users shouldn’t try to turn very big objects on there until it has been determined that the stand is sufficiently weighted down. Otherwise, the piece may be ruined or even become a projectile.

The lathe stand is made of 100% recycled or re-used wood. The lathe can be raised into a better position for taller users by unfastening the carriage bolts underneath the head and the tail of the lathe, inserting wood shims to raise it to the desired height, and then re-tightening the bolts that hold the lathe to the stand.

The lathe stand has a dust collector port under the lathe to capture falling dust and debris. This port should be connected to the cyclone dust collection system when the lathe is in use.

While the lathe table has wheels, it may now be too heavy for them so users should be careful when trying to move the lathe. Lathe tools and chuck key are stored on the bottom shelf of the lathe stand.

While use of the lathe is currently “at your own risk,” training is highly advised and the machine will soon require certification as soon as someone who is skilled with the lathe can provide a certification class.

Regarding safety, Ravi has the following tips:

Body Safety
1) get some training
2) wear impact-resistant face shield, not the dust-resistant one
3) properly align rest to reduce catches
4) Properly seat material
5) Select proper speed setting for material, size, and type of action taken
6) sharpen chisels before use
7*) don’t wear scarves, long hair or other things that can get sucked into the rotating shaft of death
*Should be higher on the list but I don’t want to remake the list

Equipment Safety
1) turn both knob and switch to off, if only knob is turned to off can burn out motor
2) be careful in handling and placing chisels so as to not damage the tips

AMT 360º How to use the New Cyclone

We have a new dust collection system!

Our previous system (which used to live in the closet) has been replaced and we now have a cyclone dust collector.
The cyclone lives in the metal shop and is hooked up to the ducts in the workshop.

To turn it on, currently you need to plug it into its extension cord. Look for the blue stickers on the right side of the cyclone:


We are interested in your feedback regarding this new system.
You can use our equipment feedback tracking with the asset tag AMT140 to report issues.
Ping us ( @fitzhugh or @pierre ) on slack in the #workshop channel if you have questions about this system!

Workshop Organization: The Story in Pictures

So we bit of organization in the workshop and put some things in storage. Everyone who showed up really did a great job. We still have some tweaks and more labeling to do… oh, and we want to make a nice map of the room.

reachable tools!
All the sleds, push sticks, and jig you could ask for.
Birds eye view.
The culling is coming.. oh, yes it is.
CLAMPS!
There really are more pipe camps… big ones in the closet.
Supply closets supplin’
All the things
Electronics sans dust… please keep stuff off the floor in hear.
The yellow zone
Drills, driver and miter boxes.
Measuring Tools
MOAR Power!!
It’s all numbers
More measuring
Next up… build a tool caddy for the lathe stand
The new home of First Aide and Protective gear
Temporary hardware
Power Tool Bins
Power tool bins with labels
Bandsaw and Jointer stored all cozy like
The jointer in its relaxed position
Space available in project storage.
Sheet goods with a little bit of effort
Scrappy keeps on scrappin’
The finest in mobile dust collection thanks to Pierre
All the under work bench tools
Under work bench tools
More under work bench tools