Author: Rob Curl

Former graduate student and research assistant at the UCB Center for Japanese Studies.

Reclaimed Wood Use in the AMT Woodshop

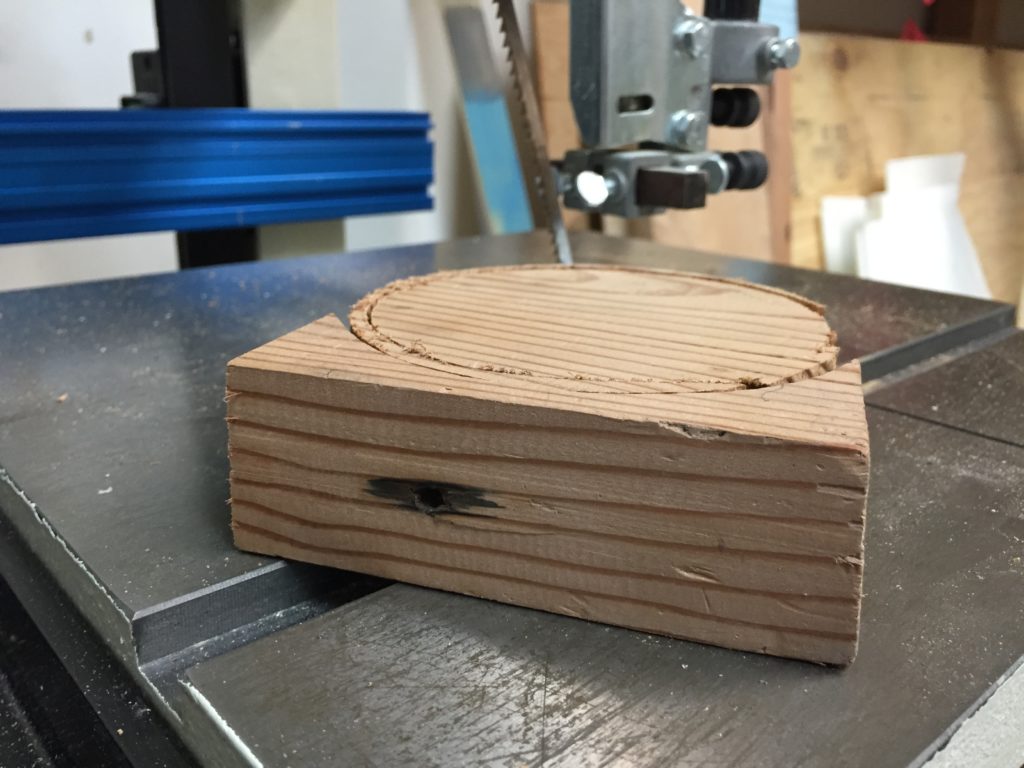
After emptying the dust bag last night, Yukari and I spent some time using the bandsaw. She cut some nice, easy plywood completely without incident. Afterwards, I picked a random piece of scrap off the pile and traced a pattern on to it to make a circle for a dust collection shroud for the new belt sander I’m leaving on loan to AMT.

The cut without incident until I got to the last little bit. In a half second that scared the living shit out of the me, the blade snapped in half and whipped near my face.

2016-07-10 19.41.39

Now, because I’m not an idiot, I was following proper safety protocol by wearing glasses, hearing protection, with no long sleeves, while also keeping my body and face as far as possible from the cut by not leaning in to see what I was doing scroll saw style. Additionally, the bandsaw functioned properly by stopping when something like this occurs (from its perspective, the blade slid off the wheel). The blade almost immediately caught in the gap and was prevented from snaking all over. This means no one was hurt and the only damage to me was an extremely elevated heart rate.

Why did this occur?

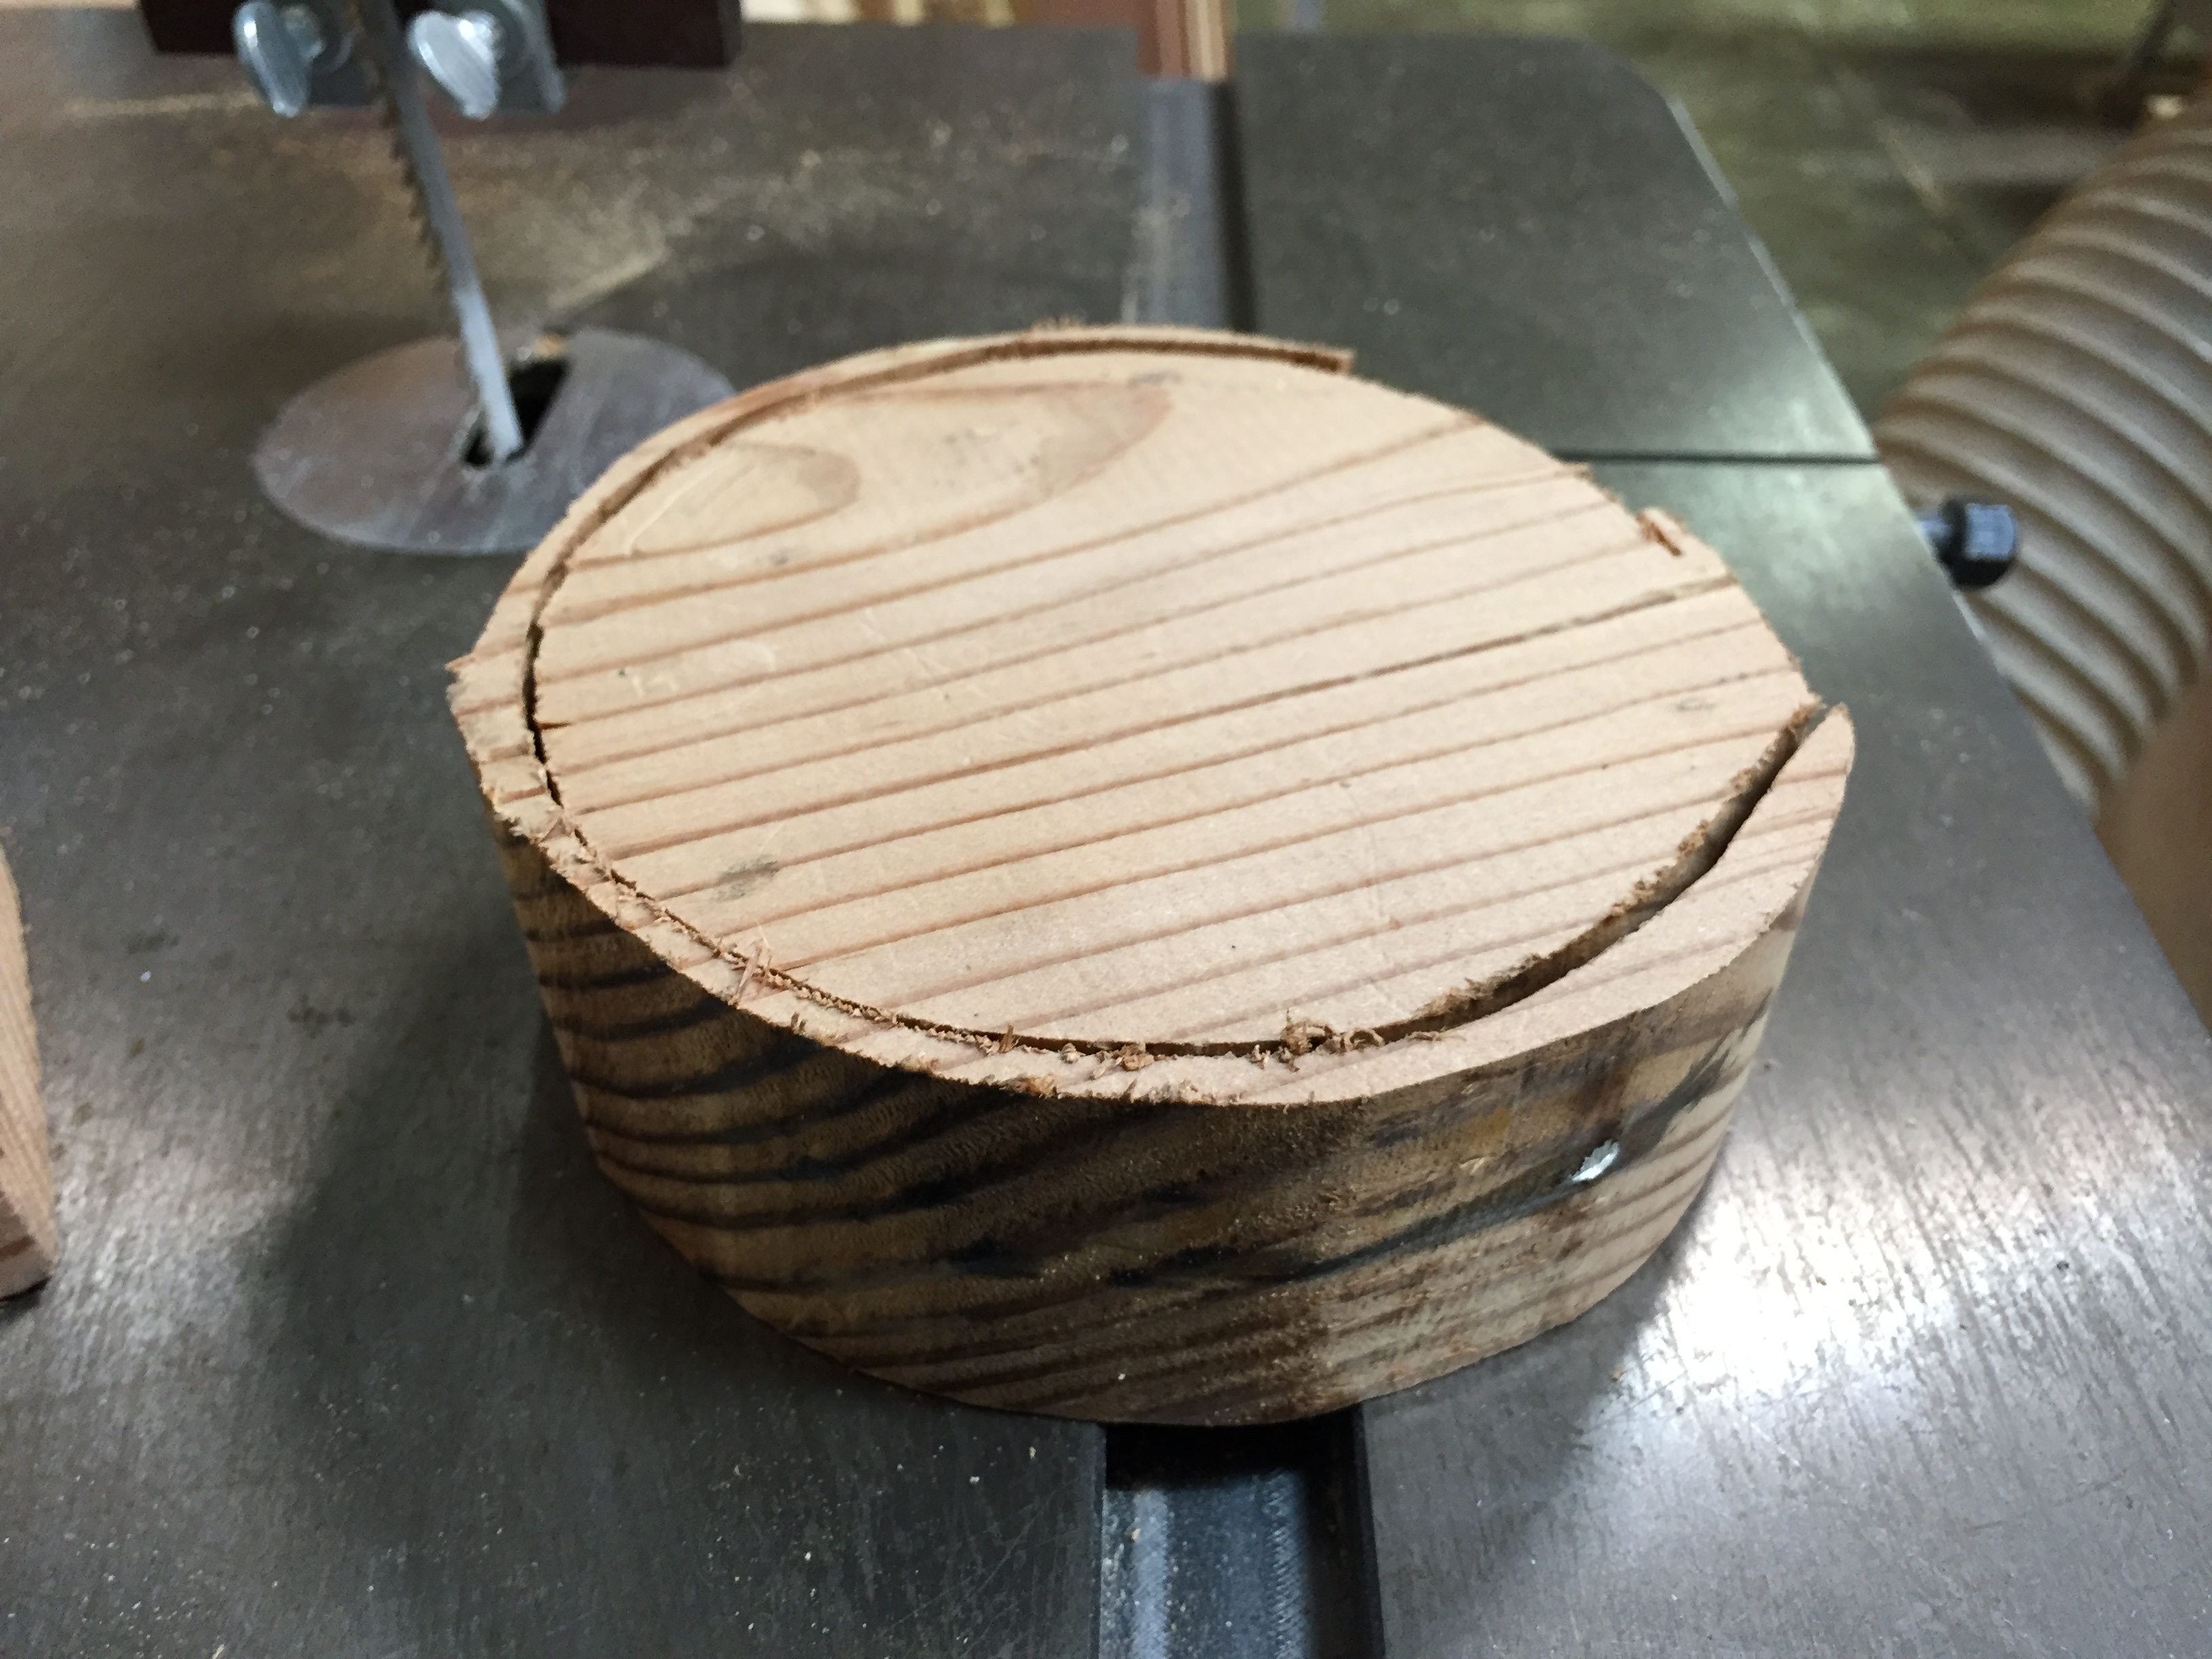
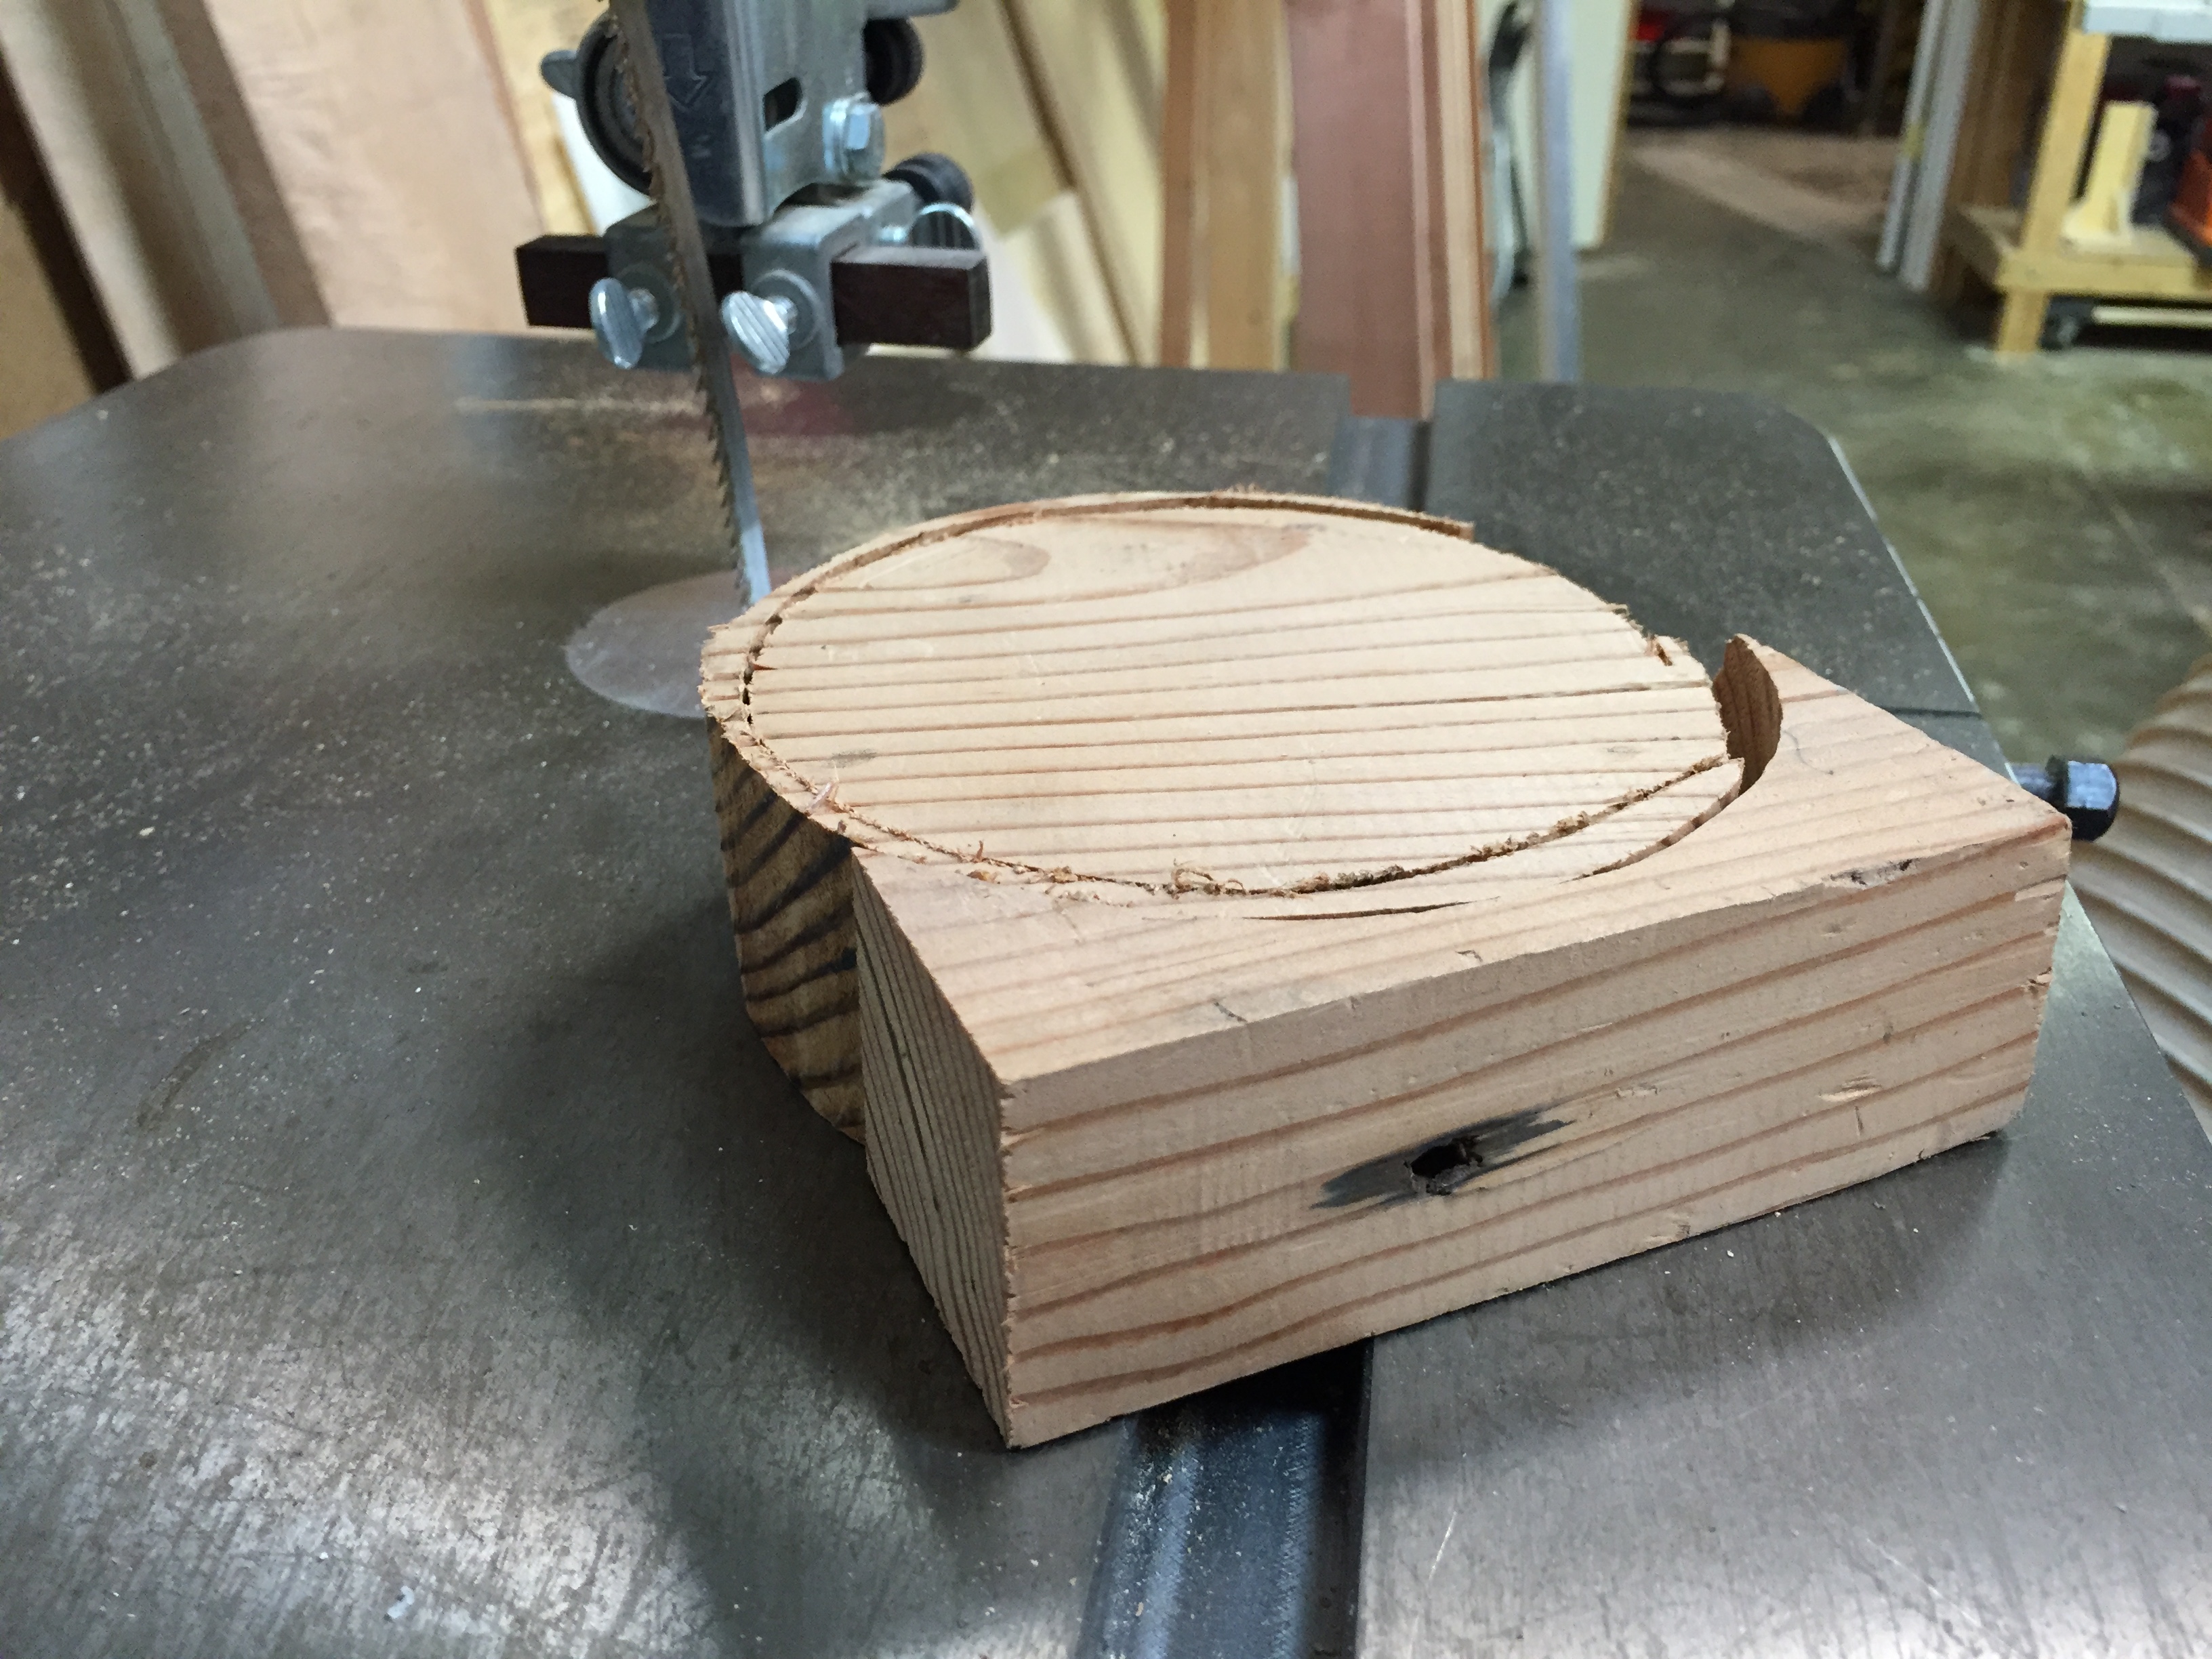
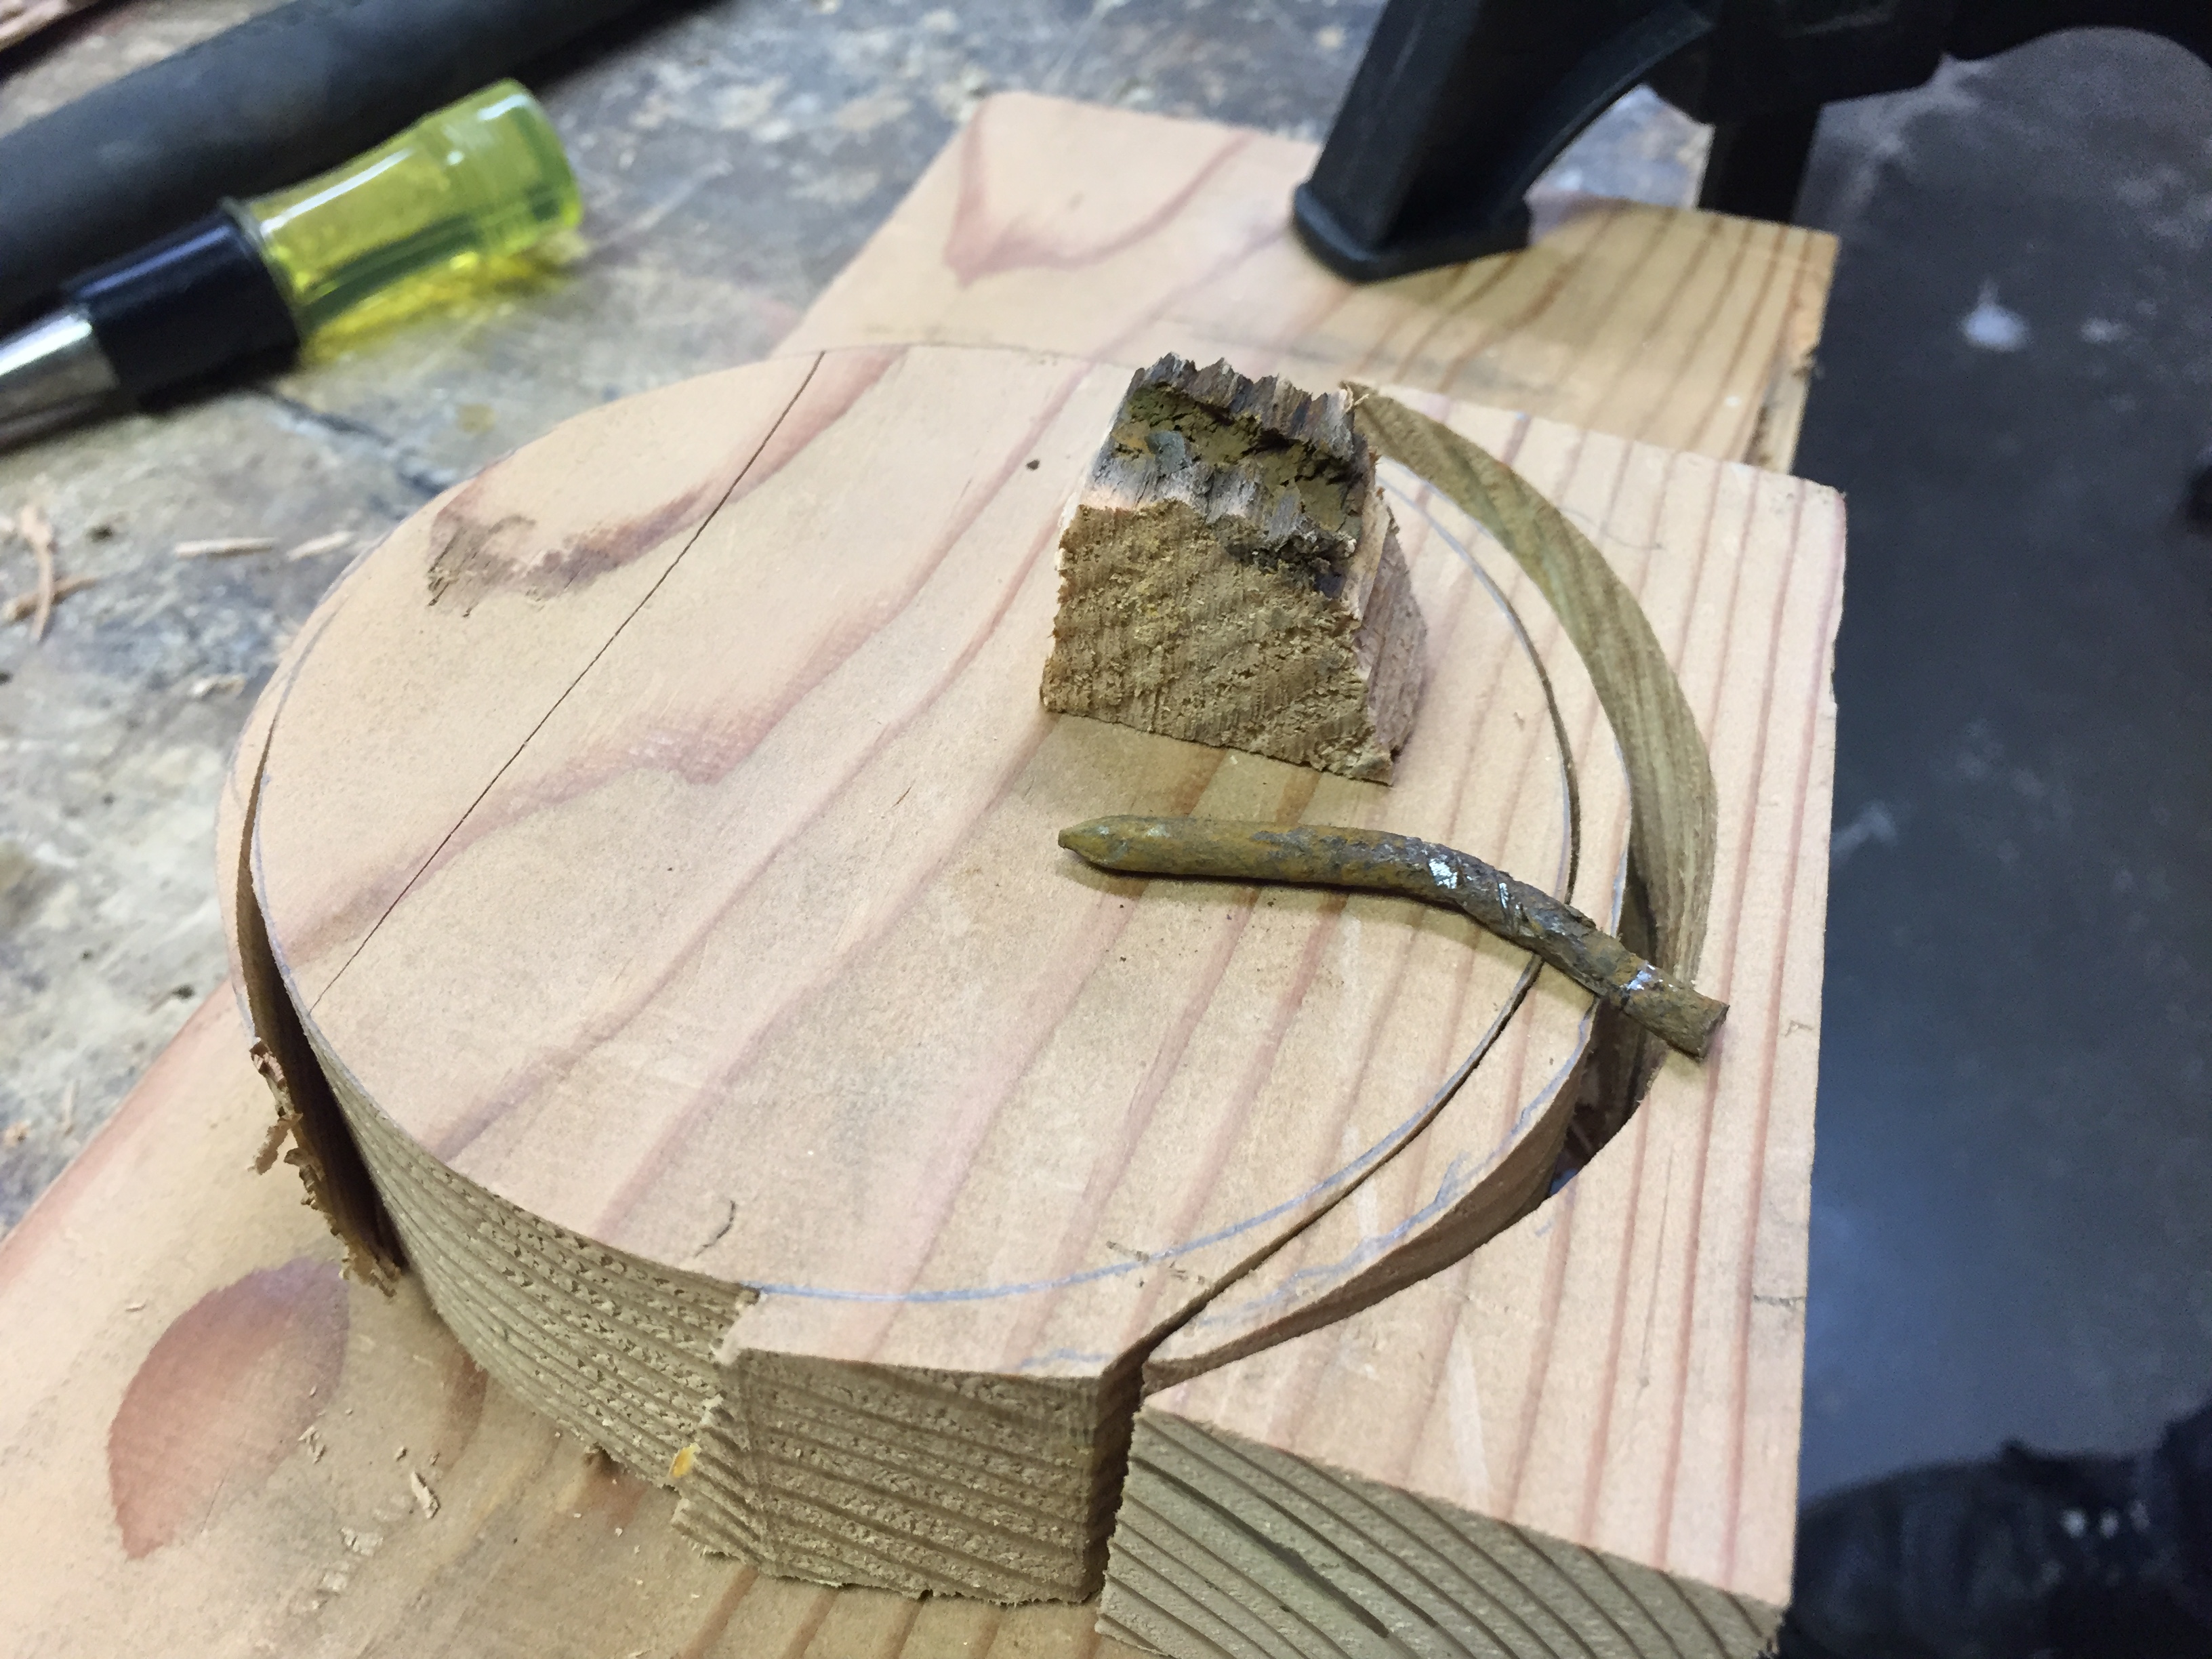
This happened because the piece of wood I was cutting had a very large nail buried inside it. The stock I pulled off the scrap pile was reclaimed wood, not obvious at first glance.

2016-07-10 19.50.32

While cutting the circle pattern, I was continually rotating the waste material off the workpiece in order to get a nice curve. Thanks to the way I was cutting, I didn’t see that I actually cut through the nail TWICE while making my circle with a blade designed for wood. Needless to say, that is not proper use of a bandsaw blade.

After this happened, I immediately contacted Hugh and explained the situation. Chris happened to wander in to the shop at the same time, and together with Hugh on the phone we talked through what happened while Chris and I investigated the bad stock.

We determined pretty quickly that there is no possible way that I could have seen the nail before beginning the cut, as it was buried ¾ of an inch deep within the wood. Chris and I actually had to chisel out an entire section to expose one of the nails and finally pull it out. The only way I would have known that there was a nail deep inside the workpiece before starting would be if I had a metal detector wand (which I’ll get to in a moment).


2016-07-10 19.50.522016-07-10 19.51.022016-07-10 19.51.102016-07-10 20.00.53

It’s my understanding that this is not the first time reclaimed wood in the shop has caused an issue with our tools and equipment. I am now strongly of the opinion that reclaimed wood pieces need special rules in the shop. I propose the following changes to woodshop policy.

  1. Reclaimed wood can be used by those who bring it in.
  2. As much as possible, folks working on a reclaimed wood project should use their own blades and equipment, even if it’s mounted on AMT hardware. In other words, they are assuming the risk with their consumables, not the community’s.
  3. If a project does not use all of the wood that was brought, the reclaimed wood SHOULD NOT be placed on the scrap pile. While it’s possible for a piece of reclaimed lumber to have very obvious and easy to remove screws or nails, as what happened to me demonstrates this is not always the case. This would also have the benefit of reducing waste material hanging around the shop (This to me is the most important and most salient point).
  4. When possible, the woodshop community should purchase a metal detecting wand for woodshops. Examples: http://www.woodcraft.com/product/153262/lumber-wizard-40-metal-detector-with-laser-light.aspx or http://www.woodcraft.com/product/142012/little-wizard-ii-metal-detector.aspx
  5. Those using reclaimed wood should be encouraged (or even required) to use this metal detector on their wood. We could potentially even figure out a system for possibly loaning the tool out if folks are going to go on a big run to a recycle shop and want to prescreen their stock.

AMT’s Brand New Bit Box! – Initial Build and Glue Up

Working with the CNC routers and the woodshop hand routers/drills frequently, it’s become apparent that AMT needs a new place to store our community bits rather than “randomly in plastic tubs” or “wherever we want”

Enter the brand new AMT Bit Box!

Based on a design found in Woodworking Magazine, the bit box is being made out of dried poplar, some half inch plywood, and a whole lot of quarter inch dowel rods.

The example above isn’t quite the final form. AMT needs less a retail style “display” case and more a functional set of modular shelves that can be changed as its needs change. Additionally, we need a badass logo on the front.

Let’s take a look at the build as it happens!


1. Size Cuts and Dado Cuts

2016-06-29 15.33.10
Click to enlarge!

I didn’t take any pictures of the first few cuts on the table saw, but it’s pretty standard except for one thing: dado cuts. What is a dado cut you ask? Simply put, dado cuts use a special stacked blade system attached to the table saw to cut specifically dimensioned holes, grooves, and end sections. The cool perfectly lined sections you see on the side piece in this first picture are the result of dado cuts!

One problem: AMT doesn’t have a throat plate of the appropriate size for dado cuts! OH NO WE CAN’T USE THE TABLE SAW WITHOUT A THROAT PLATE BECAUSE DANGER WHAT CAN WE DO.


2. New Throat Plate for Table Saw!

2016-06-29 15.32.52
Click to enlarge!

Oh wait naw it’s cool guys. I made one really fast, gave it a linseed oil coat and some wax. Now it lives in the shop steward drawer with the other appropriate throat plate sections


2. Checking the Squareness and Design Changes

2016-06-29 16.34.20
Click to enlarge!

Here’s the pieces of the box being squared and checked for consistency and straightness. Making a GOOD, LEVEL, SQUARE box is actually one of the most difficult things a woodworker can do, which is why it’s such good practice for joinery techniques and other basics. You’ll also notice that by this point I had already drilled the mounting holes for the dowel rods. As I mentioned, I modified the original design to give us a more modular set of shelves to work with. There will still be a standard set of drawers just like in the original picture to hold random objects, but the lower and upper shelves will be removable while the bit holders themselves will rest on the dowel shots like the sleeves of your Ikea bookshelf. Want to make a new bit holder for the latest set of bits you’ve purchased? Need to store a specialized set of objects? Just cut a piece of scrap to size, mount the things you want to put in the box, and drop it on the dowels!


3. Use of Forstner Bits

2016-06-29 16.52.22
Click to enlarge!

The dowel holes were cut with the Forstner bit set that AMT has in it’s drill section. In the very near future, these might live in the box they were used to make!

For those interested in different types of bits, forstner bits (like any drill bit) makes a hole in wood. BUT WAIT! While a standard drill bit cuts using a spiraled tip, a forstner bit first centers itself using a small needle-like plunge tip and then cuts a very smooth, flat based hole.

To steal from a woodworking site that knows way more than I do: “Because they’re designed to produce a minimum amount of tear-out when exiting the material, Forstner bits are the best bit for drilling through holes. Forstner bits drill a flat-bottomed hole, making them a necessary tool for many hardware installations where a precise depth of mortise is required.”


4. Sandingsandingsandingsaning

2016-06-29 16.34.32
Click to enlarge!

All those big, flat pieces of poplar required about an hour and  half of sanding with three different grits using my finishing sander and its new wonderful connection to the central dust collection system. That hose connector was about $20 at Rockler Wood Supply, while the connector bridging the hose and the central dust intake was about $5. Both were well worth the investment in saving my lungs, the shop air quality, and cleanup in general.

Shopping Link: http://www.rockler.com/dust-right-universal-small-port-hose-kit

Alternatively, you can roll your own using some PVC pipe, our friendly 3D printer, and some standard shopvac hose.


5. Glue Up Finished!

2016-06-29 19.13.50
Click to enlarge!

The glue up is finished! Looking at the level, you can see it’s pretty dead close to being straight and square even with the ridiculous clamp job we got going on. Now to come back  and cut/dado the doors, drawers, and bit holders. Look for this to be finished by the end of the week, and to be up on the wall by the end of next week.