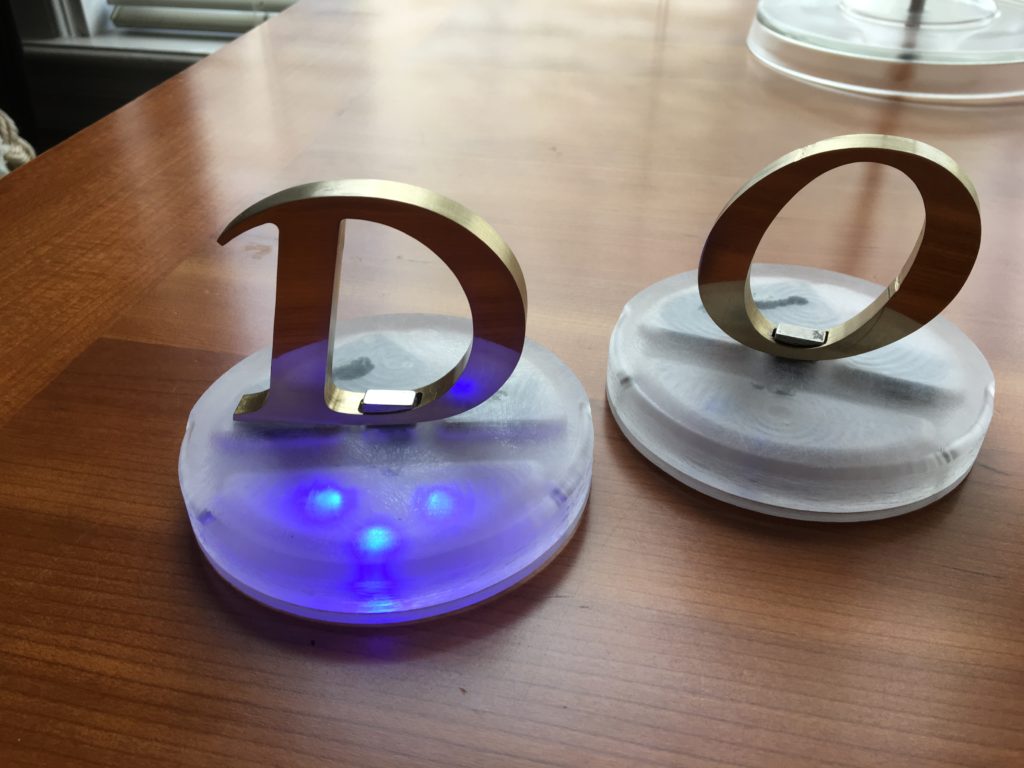
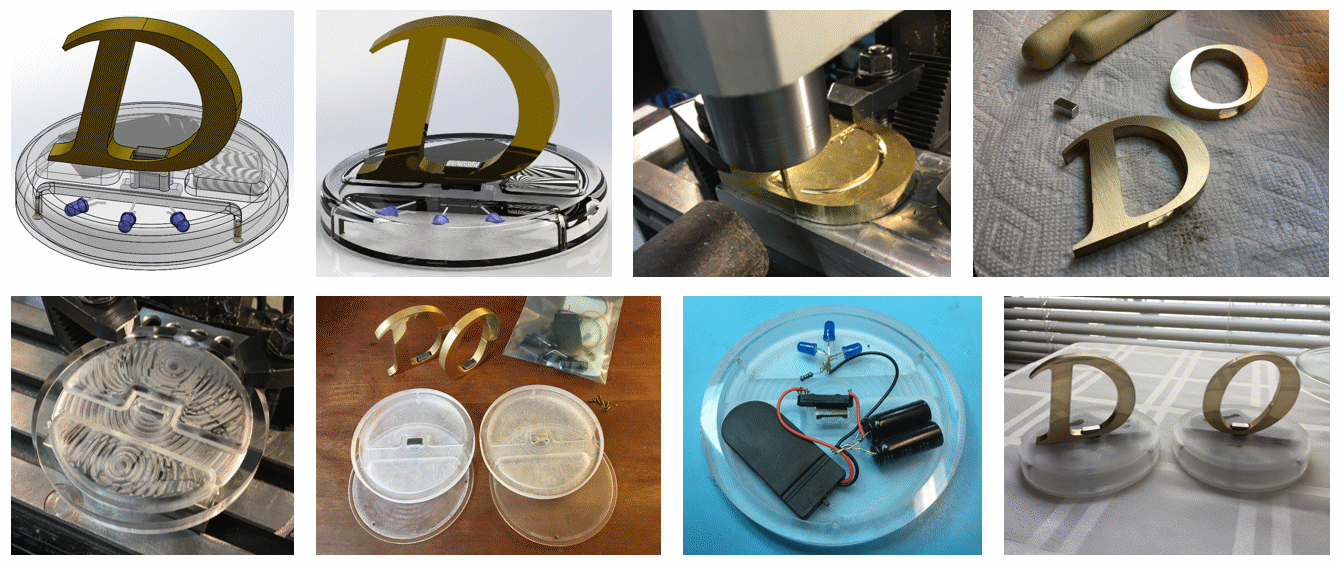
This project, brass initials for my buddy’s kids, was executed entirely at Ace Monster Toys. The brass initials hold a little magnet that triggers a reed switch to light a few LEDs. The brass was machined using AMT’s CNC milling machine with CAM G code generated by SolidWorks (and I’m getting up to speed on the free alternative Fusion360). I broke a few 1/8″ end mills before converging on the right settings: 0.1″ depth of cut, 2500 rpm, and a 3 IPM feed. Dry machining with forced air worked well and was compatible with the way I mounted the brass sheet, which was superglued to an aluminum block. I polished the brass with needle files, sandpaper, and a polishing compound as guided by the fantastic Clickspring videos on Youtube, then dipped the pieces in thinned lacquer.
The base is an acrylic disc that I roughed up with large-grit sandpaper to more evenly diffuse the LED light. Next to the reed switch is a little steel block that gives the magnet something to snap on to. The reed switch switches from a couple CR2032 coin batteries charging two 1.8 mF capacitors to dumping their energy into the LEDs through a 100-ohm resistor. The component are messily hot-glued into place (the step I’m least satisfied with), and there’s a thin back piece that screws on with 1-72 brass screws, which let me practice countersinking.
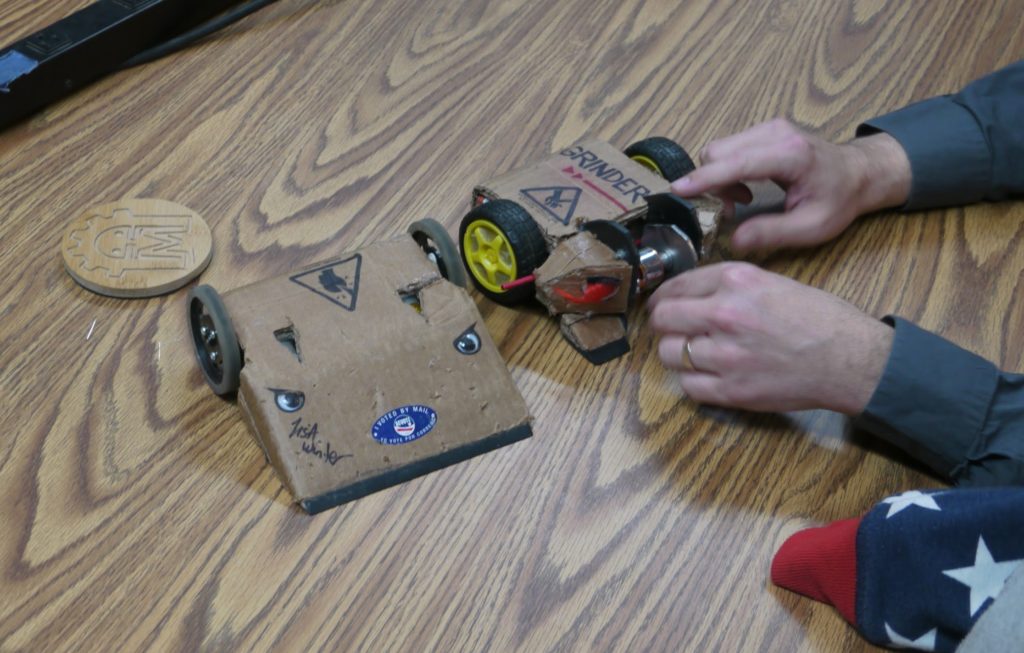
I only put these in the mail yesterday, so the reaction of the recipients is, as yet, unknown.
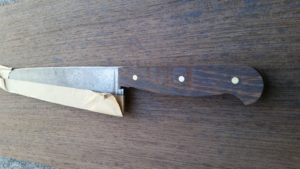
This is an almost-complete project that I made at AMT using the band saw, drill press, and drum sander. It is my first attempt at a knife handle. I started with a rusty old blade, which I soaked in vinegar overnight, then cleaned up with solvent. I then filed the metal flat where the wood would go and drilled three holes the same size as the brass rod that I bought. I found a nice piece of wenge wood in the dumpster of a high end furniture manufacturer here in the East Bay. After re-sawing on the band saw, I traced the outline of the handle shape and holes on the wood. I trimmed the pieces on the band saw and drilled the holes for the brass rod. I epoxied it all together and clamped it for several hours before filing the sides and sanding the wood just up to the
metal. All that’s left is the final shaping to round and smooth out the handle, then finishing and polishing the wood with cyanoacrylate, and sharpening the blade.
Hi! I’m Devon. Some of you have probably seen me cutting many, many box joints into big plywood sheets in the woodshop, or basking in flux fumes kludging my way through a never ending procession of circuit boards in the electronics section. You may even have found yourself wondering what I was building!
I’ve mentioned to anyone willing to listen that I’m building a synthesizer, but what I’m building might not be exactly what you picture a synthesizer to be.
If you make it to the end I’ll share another little sound bite.
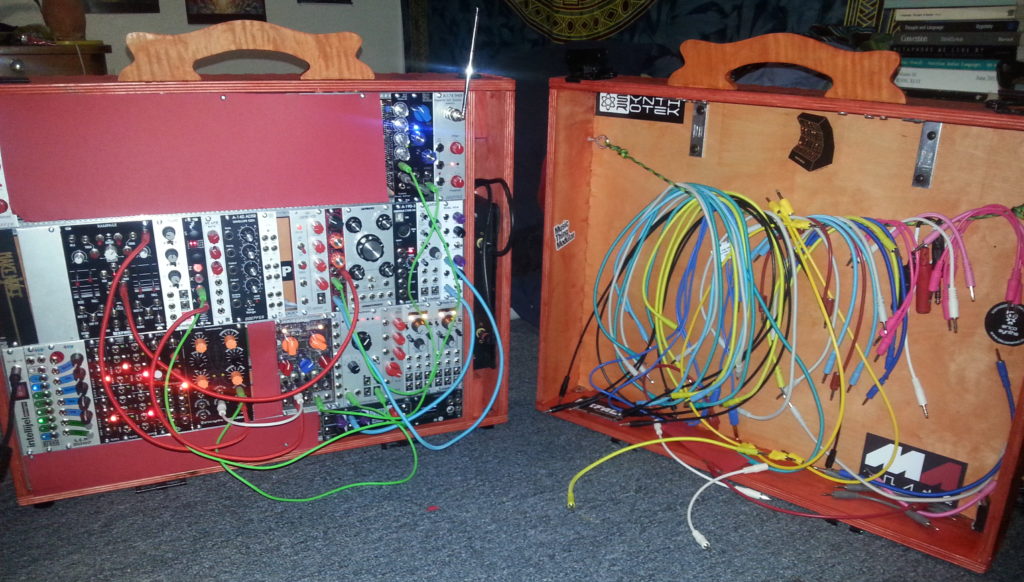
And here’s a picture of it:
That red stuff is construction paper. The other things are modules, because this is a modular synthesizer. Within the realm of synthesis and auditory exploration, there are a particularly geeky few who are really into analog gear. Even more myopic and esoteric than them is us: the modular synth crowd.
It’s pretty arcane stuff, so I’ll spare you the details, but in essence a modular synthesizer is one which, in contrast to a conventional fixed architecture synth, has no fixed architecture. That’s what those colorful patch cables are for: the signal chain on a modular is created (patched) in-the-moment by the user according the ancient and venerable dictum of “outputs to inputs”. This provides a kind of sonic flexibility that is difficult to achieve through the more regular method: pretty much any output can go into pretty much any input. It’s nuts; trust me.
Modular synths have been around a long time. The first synthesizers were modular. This instrument, if you want to call it that, adheres to a particular format called Eurorack, which is the new kid on the block.
The Box
Anyways, all those fancy modules need to go in something. As I live in a tiny apartment, I need to put this thing away when I’m not using it. So I decided to build a case with a lid, which provides the added benefit of the thing being somewhat portable.
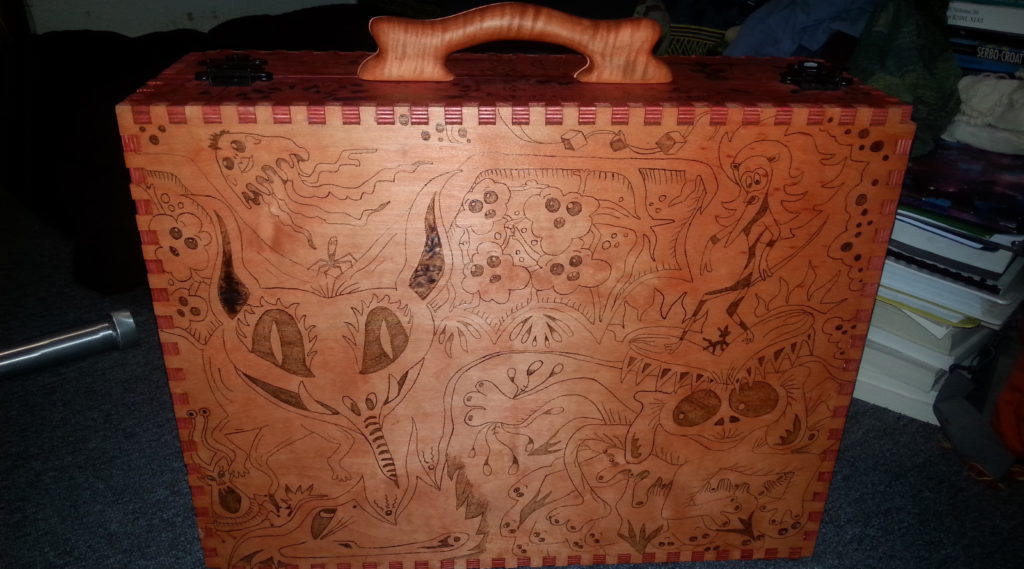
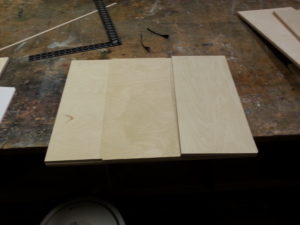
There’s a picture of it! It is constructed from 1/2″ Baltic Birch ply. The handle on the top there is made from curly maple, but more on that later.
Building the box was my first step into Synth DIY (SDIY). And, like everything in life, it took a lot longer than I thought it would.
First step was cutting the sheets down to size.You can’t tell from that image there, but by this phase I had already made my first crucial mistake. This mistake would turn out to be a stroke of genius, though (more on that in a minute). The panel saw in the workshop is a thing of beauty — thanks Davey!
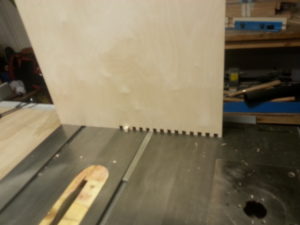
I would like to take a moment to apologize to all the hard-working folk in the coworking space who got to listen to hours and hours of “zhne, zhne, zhne, zhne” as I cut out all those little box joints with the dado blade.
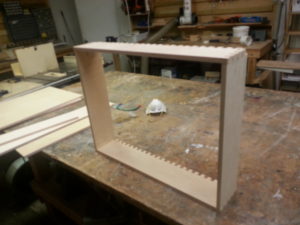
Eventually I got all the teeth cut in, and mostly aligned. I would have to take a file to them to give them enough clearance for the glue, though, since I didn’t really take that into account during the set up. In the background there you can see my trusty box joint jig. It looks sort of like a castle!
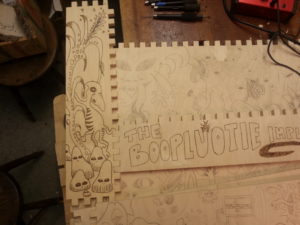
Once all the pieces were cut out, the real work could begin. Most of those drawings were done by my lovely partner and companion Katie, who is a better drawer than me. I contributed though! I arted what would become the top panel here in the time it took her to do the rest of the thing. The design was drawn in with pencil, and then I spent an unbelievable amount of time wood-burning them in with a pyrography pen. I could have got a certificate in the time it took me to do this.
But it was all totally worth it, because it looks pretty sweet. Heres a nice little side-by-side.
Once the wood burning was done, and my burned-to-shit thumb was all bandaged up, it was time to apply the dye. I used alcohol-soluble dyes, which due to the higher rate of evaporation do not cause the the grain to raise like water-based dyes. They’re a bit trickier to use for that same reason, though. I think I did a decent job.
Then it was time to glue it up! This stage was pretty scary, what with there being now dozens of hours invested in the project. Thankfully, I barely screwed it up at all.
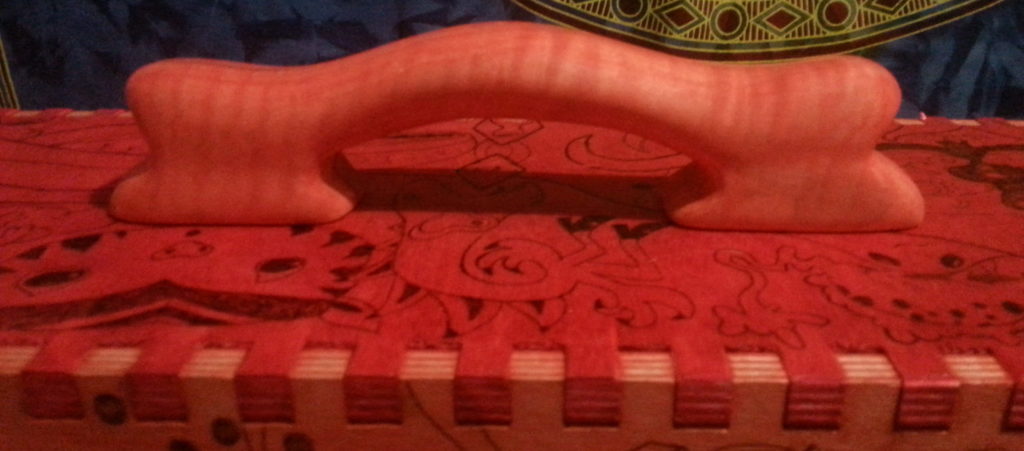
Once the glue had dried, it was time to kick it up a notch. I had purchased an assortment of hardware from Reliable Hardware, including a really bogus cheap little suitcase handle. What a shame it would have been to have topped off all my hard work with a flimsy stupid little thing. Obviously, I had to make a handle.
My woodcarving teacher Sheri helped a lot at this point. We designed the shape, and then glued two pieces of curly maple together, with a sheet of thick paper in between them. Once that had dried, we did a rough cut on the bandsaw, and then I spent close to 10 hours rasping, riffling, and sanding the thing down to the proper shape and luster (and, of course, splitting it back into its constituent halves). During this time I listened to a really interesting book about the history of the Mp3. Then came a coat of that dye, and a nice shiny layer of beeswax and oil finish. If anyone wants a cheap plastic suitcase handle, let me know.
Remember how I said that I made a big mistake early on that ended up being a blessing? Well, somehow I managed to dimension the whole thing to be two inches too long, and about two inches too tall. Isn’t that hilarious? Now the frame for my rack wasn’t going to fit.
But guess what! That two inches on the side is just enough space to fit in a compartment for a spring reverb tank! Yeah, just like your guitar amp has! Except this reverb tank is mounted vertically. And I managed to find exactly one reverb tank on the whole internet designed for vertical mounting, and that sucker just fits. You can see it on the right hand side of the synth in the picture below.
As for that extra bit of height? I turned that into lemonade too by adding a little mini-row at the very bottom. Currently it’s mostly cardboard, but I will fill it with little handy utility type things.
My next step was to throw a little rope across the lid side of the case from which to hang my many colorful cables. The lid was designed so as to be able to fit over the synth while the thing is fully patched. There is a certain sand-painting quality to modular synthesis, in that there are no saved presets in this town. When you pull the plug, the plug pretty much stays pulled.
The Electronics
I’m not an electrical engineer and I am only learning how to read circuits. The first soldering iron I touched was upstairs at AMT. So I’m no expert. I did not build all the modules you see in that case, but I did build half of them. And with the help of resident synth legend Matt (@mhz), I’ve been learning a ton. The plan is to fill the rest of the case with stuff I’ve built myself, which is going well. I wish I had picked up the soldering iron sooner.
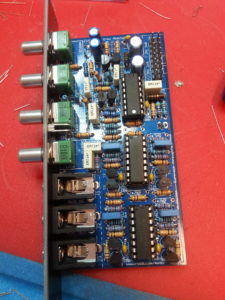
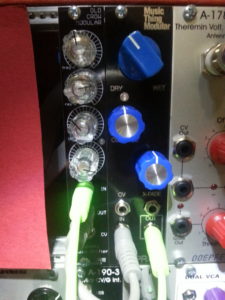
One of my favorite parts is picking the knobs! Here’s a picture of my most recently stuffed board, and a picture of it nicely mounted in the case (next to it is the reverb module that interfaces with the afore-mentioned spring tank). It’s a phase shifter! A clone, in fact, of the popular Small Stone guitar pedal from the 70s.
Behold my impeccable taste for knobs!
A really cool thing about the SDIY scene is that a lot of designers release their circuits to the community open-source style. Which is an awesome learning resource, and makes everything very hackable.
The Future
Going forward, I’m going to continue assembling modules. Over the past few months I went from buying assembled units, to buying kits, to buying PCBs and panels and sourcing my own components. Soon I will get certified for the incredible Laser Cutter (!), and then I will foray into doing my own acrylic panels, which will give me the opportunity to delve deeper into the DIYness.
I spend more time building the synth than I do playing it. SDIY is as much of a hobby as the music/sound design itself. I have decided not to fight this, and am learning how to read schematics, so that I can hack them, and maybe someday come up with my own designs that I can re-release back into the open-source SDIY ecosystem.
So there it is. Thanks for reading. If you want to geek out in greater depth about the nature of modular synthesis or synthesis in general, I’m pretty approachable, and you can slack me @devogenes.
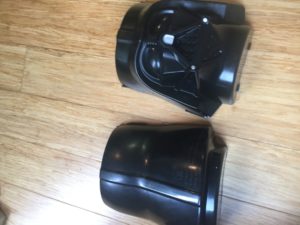
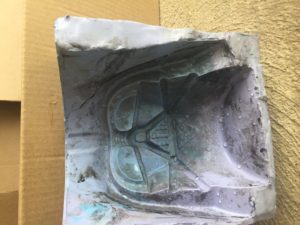
This project began when I found a halloween basket of Darth Vader on sale after Halloween – $2.50. I’ve been looking for project to learn/practice/experiment with silicone molds, so I chopped up the mask to make a two part mold.
original mask
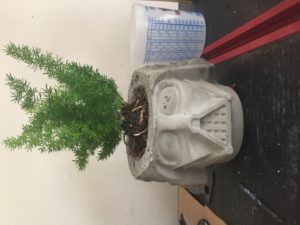
I wanted the cavity to remain hollow so it could serve as a planter, so I built a box out of foam core and hot glue and placed the mask face up. I placed one edge of the foam core right up against the top of the mask to block out the cavity – lots of hot glue on the underside to keep the silicone out.
Despite having watched a variety of videos on youtube, i tried a different process to make the two piece mold in two separate boxes. Big mistake!
darth vader mask mold – smooth on Oomoo 30
The mold had great detail, but the two pieces didnt match up. I tried to patch and fill, and it probably can be done, but i was in a rush to get on a plane and try to cast one of these for x-mas. The result was some unevenness in the bottom, and spalling out of the sides which could be cleaned up better.
darth vader concrete planter
I also didn’t pour it up high enough to the top, in part because my solution for the cavity was a failure due to lack of proper materials and time. The details came out pretty well despite taking it out too soon.
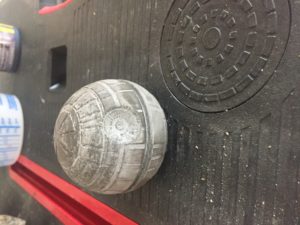
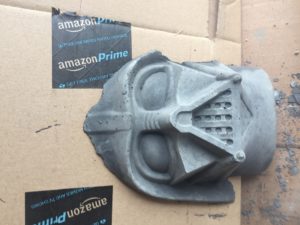
I also experimented with some concrete coloring agent and made this death star paper weight. I prepared too much material so I poured a bit of Darth’s mask to see how the color would be.
death star paper weightdarth vader concrete with color
Its hard to see the color in the death star due to the lighting, but the mask shows the much darker charcoal color than the planter. I think with some added colorant, it would be a nice deep black.
The mold required ALOT of material. The stock we had at AMT was expired and hard when I opened the bottle, and it ended up taking 3.5 bottles, so essentially $100.
It was like taking a class for $100, which I’d have paid anyway, and I’ve got a half decent mold that can be used. Im not sure how I would try making it again so that the molds could better align due to the cavity I want to keep. If it were a solid head, you could build the box and just pour the material over the entire bust, and maybe that will still work if I figure out a way to cover the cavity.
Sorry for the sideways pics, I couldn’t rotate them for some reason.
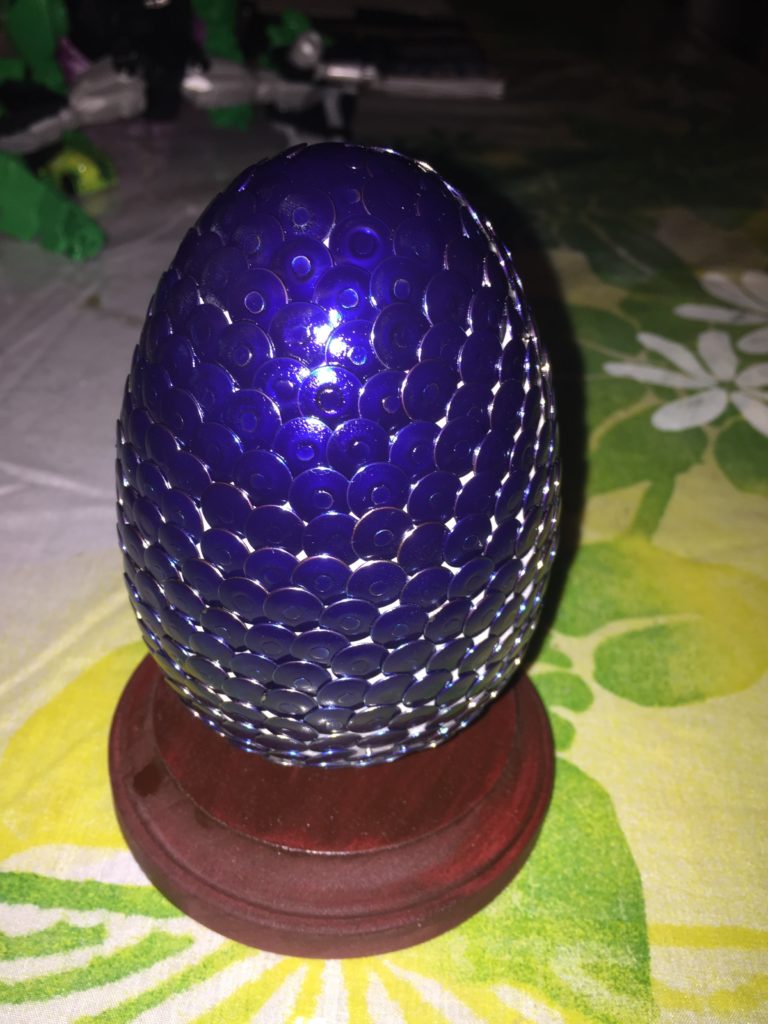
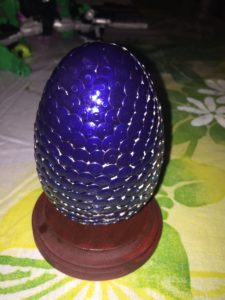
lots of thumbtacksfinished dragon scale egg made of thumbtacks and a styrofoam egg
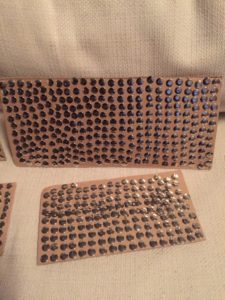
The most tedious part of this project is sticking approx.. 550 thumbtacks onto a piece of cardboard. This step, however, makes the painting of the thumbtacks much easier, especially if you plan to use spraypaint.
Painting the thumbtacks
Paint each thumbtack – two coats may be needed if you want to eliminate any marks on the top side of the thumbtack. A much quicker method is to use spraypaint. You will want to use spray paint that is suitable for automobiles. If you want some of the shininess of the thumbtacks to come through the paint, you can start by spraying a clear adhesion promotor first. This can be found at any car parts store, along with a wide selection of spray paint suitable for metal.
Once the thumbtacks are dry, take one and place it in the top center of the styrafoam egg. Put the next thumbtack beneath the first, with it barely overlapping. Now follow a pattern like a swirl, around the egg, with each thumbtack barely overlapping the one above it and the one right next to it. By overlapping the thumbtacks, you lock them in place without the need for any glue.
When you get to the last tack at the bottom of the egg, place some glue on the bottom of the head before sticking it in. The glue is needed because there are no more tacks to lock it into place.
Now spray the egg with several coats of clear coat, which will give the egg a glossy sheen as well as help bind the thumbtacks to each other. I have also heard that some folks use mod podge as a final clear coat, which would also cause the tacks to better adhere to each other.
We are beefing up our Textiles program in 2016. January’s Sewing 101 is a crash course on a Saturday. February’s Sewing 101 will be a 3 class series in the evenings. This monthly series will continue in this alternating format as long as we have interest from the community.
As part of the sewing 101 class folks will be making two projects. One of those projects will be a square of fabric with stitch techniques that will be added to a 2016 AMT Quilt to be displayed in the textiles room.
We have also had a make over in the textiles room. Check out this sneak peak.


 Eventually I got all the teeth cut in, and mostly aligned. I would have to take a file to them to give them enough clearance for the glue, though, since I didn’t really take that into account during the set up. In the background there you can see my trusty box joint jig. It looks sort of like a castle!
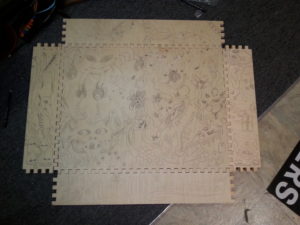
 But it was all totally worth it, because it looks pretty sweet. Heres a nice little side-by-side.
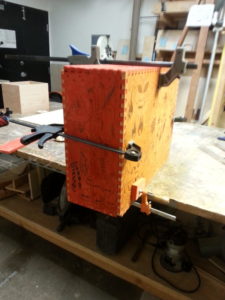
 Behold my impeccable taste for knobs!

