Author: Ray Alderman

New linear actuators and stepper drivers in Electronics

Added some small linear actuators and StepStick A4988 stepper driver modules to the Electronics area.  These are like the ones you pull out of CD-ROM drives but have an extra 25mm of length to them for a total around 60mm slide length.  Use to make small CNC laser engravers and other like minded projects.  Four wire stepper motors that work well with the standard A4988 modules.  Have your microcontroller of choice move things with 0.01mm accuracy!  In the drawer marked “linear actuators” in Electronics.

HC-SR04 Ultrasonic sensor modules

Ultrasonic HC-SR04 modules now in Electronics

Just added some HC-SR04 ultrasonic distance measuring modules to our stock in the Electronics Area.

This little guy uses ultrasonic sonar to give you a distance reading from one inch to over ten feet.   It’s one of the more common sensor modules out there, tons of existing code and examples and tutorials for whatever controller you are using to talk to it.  Check out the well supported arduino library at http://playground.arduino.cc/Code/NewPing or just search for “HC-SR04” and you will see tons of data on it.

In the drawer marked “Sonar”, grab one today to play with it and see how far stuff is.

Skull

Mr. Skull

I have been wanting to put *something* in the eyes of a cheap plastic skull for a few years now. As makers we see the potential in everything and every year at Halloween I see these plastic skulls that scream out for hacking. This last Halloween I noticed that Target was selling extra large skulls and thought, hmmm, probably can fit a 32mm square LED matrix in that eye socket. A quick trip over to the office supplies area, grab a ruler, come back and with a few measurements decide to give it a shot.

Skull
Captions are nice

This was also for the AMT booth at East Bay Mini Maker Faire to have something interactive that people could play with via their phones. For that I needed a wifi server and for that it was time to try my hand at programming a ESP8266 board. I had picked up a NodeMCU module that is a good breakout for the ESP8266 and started to figure out how to use it. Right about then I found you could program it via the Arudino IDE and someone had posted some example web server code where people enter text and you can process it and do stuff.

Armed with this and a few MAX7219 LED matrix modules I jumped in. There was much flailing about programming wise. As a programmer I’m a good salesman. Finally after getting the code to sorta work I needed to cut open square windows for the LED matrixes. Matrixi?

I was lucky enough to find a tinted piece of 1/4″ acrylic in the scrap bin at AMT that would work. I figured out the spacing of where each matrix should go and laser cut out the holes to hold the LEDs in place. After that it was time for open up Mr. Skull. I cut an opening in the back of his head that would allow me to just put a hand inside. Putting in the acrylic with the LED modules attached, I then took a hot glue gun and without being able to see inside, started to squirt hot glue everywhere inside the head of Mr Skull in the hope that some of the glue would hold the acrylic with the LEDs in place. It just did.

Finding a music stand to put up Mr Skull was a nice surprise. Ever since then he’s been guarding the upstairs and waiting to see what people put in the text box of his website.

I hope to put say a Twitter feed and/or word clock into him at some point. Always upgrades to be done in projects.

Edgy-Cam

project-hdr-960-cam

In 2015 AMT was hosting a Holiday party and cool things that involved the guests where needed, thus Edgy-Cam was born.

600-feature-gallery-cam2
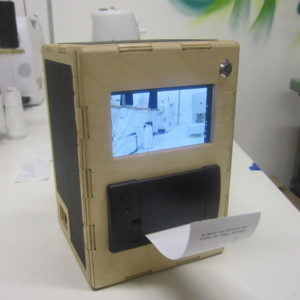
Edgy-Cam is a Raspberry Pi with a camera module and connected to a thermal receipt printer. Using the Canny Edge Detection algorithm, photos are taken with the camera, processed and turned into hand drawnish monochrome image that is printed out on the thermal printer. Like other instant cameras, but with some serious image processing going on. Every processed image is a monochrome 512×384 and given a unique filename and saved on the Raspberry Pi. Images can be retrieved later if people are interested.

600-feature-gallery-cam1
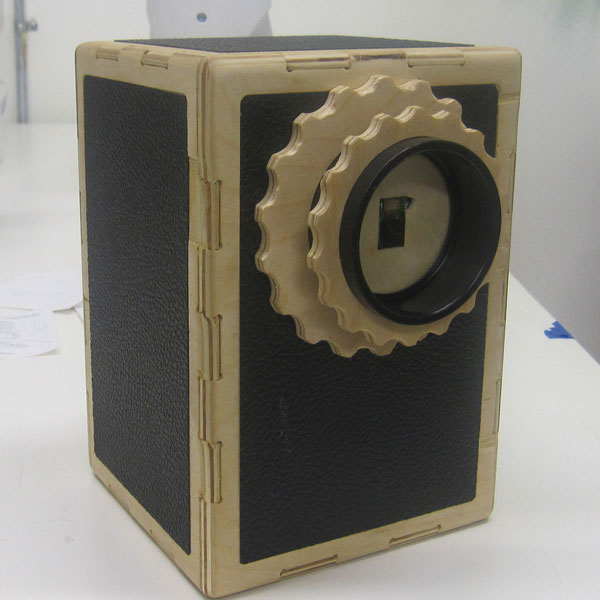
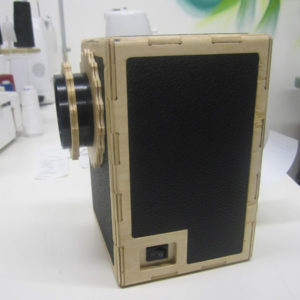
The case is made out of 1/4″ baltic birch plywood and was CNC cut at AMT. The black inlay is tolex, a vinyl like material and this is the same pattern as found on Marshall guitar amplifiers. After cutting and assembly, the case had the edges rounded over on the AMT router table. All case assembly, sanding and gluing was done in the AMT woodshop.

The display is a standard 4.3″ composite LCD monitor, mostly used for watching the rear view camera in a car.

The thermal printer is a standard 58mm thermal receipt printer with 5V TTL UART interface. It communicates with the raspberry pi (3.3V) via a serial connection that is run though a level shifter to make the 5V to 3.3V and back play well with each other.

All this is powered by a 8000mAh 11.1V lithium ion battery. The battery has enough juice to run for hours and take and print over a hundred photos.

Fun fact: The Canny Edge Detection Algorithm is named after John F Canny who is a UC Berkeley computer science professor.

The Edgy-Cam software is a python script that is run on bootup, and uses the SimpleCV library to supply the Canny Edge algorithm.